Poison Barrage Ranged Totem Trickster build - Odealo's Crafty Guide
This Trickster build takes Poison DPS to a whole new level. As a Totem build it also makes it much easier to survive Boss encountersTornado Shot/Barrage
Poison Totem Trickster
Patch 3.3 Build
The Best Crafty Guides by Odealo
Estimated budget: high

| Guide notes |
| June 1, 2018 -Build created -Updated Skill Trees to Patch 3.3 June 2, 2018 -Added gameplay video |
This Trickster build is one of the most potent (DPS-wise) Totem builds in Path of Exile. As most of the Totem builds, it also makes it quite easy to stay alive in Boss encounters, and it is perfect for clearing end-game content by dealing insane Damage with your Poison. It is based on Valkuur's Guidance gloves, which make Lightning Damage apply Poison, Quill Rain unique bow for its'crazy Attack Speed bonuses, and Abyss jewels for added Lightning Damage to your Attacks (with Abyss jewels are what makes this build rather expensive).
You can also find our other PoE Builds right over here: Odealo's Crafty Guides - Full List
1. Gameplay
This build does not differ much from standard Totem builds. You summon your Totems and run around kiting and avoiding attacks. While two Barrage Ranged Attack Totems shoot around 65 Arrows per second each, with 100% to apply Poison, making them lethal weapons. While Totems do the job, you are free to worry about your well-being. You are free to use the Frenzy Attack skill as well, to generate Frenzy Charges, apply Poison, cull enemies and grant the Innervation buff. Also for smooth map farming, you can replace Barrage with Tornado Shot. Barrage may feel clunky when dealing with several bigger packs on open maps. It still shines in single-target battles. Also for better clear speed, it's worth to consider taking Piercing Shots Passive.
|
0:06 Tier 11 Spider Forest |
|
|

2. Build's PROS & CONS
| PROS |
|
| CONS |
|
3. Leveling
If you want to follow the final Skill Tree during leveling, your life won't be easy. It is recommended to level up this Trickster character as an elemental conversion bow build, and respec later on. Otherwise, the process may be very problematic and take way longer than it should. Simply go for Ice Shot/Tornado Shot and take the Ranger's Bow nodes to get you going. Focus Physical DPS gear, and upgrade your weapons every now and then, and you should be totally fine.
Suggested leveling Gem setups:
| Ice Shot setup | |
 |
Ice Shot - very good bow skill, which deals moderate AoE damage in a cone behind your main target |
 |
Added Cold Damage Support - increased Cold Damage of supported skills |
 |
Lesser Multiple Projectiles Support - increases the number of Ice Shot projectiles, but slightly reducing its' damage |
 |
Physical Projectile Attack Damage Support - increases the damage of your projectiles, and the damage they deal with Poison |
| Blink Arrow setup | |
 |
Blink Arrow - the only bow movement skill |
 |
Faster Attacks Support |
| Utility Gems | |
 |
Frostbite - recommended Curse for the leveling phase |
 |
Clarity - helps a lot during leveling to sustain your Mana Pool |
 |
Hatred - the best DPS elemental conversion Aura |
 |
Stone Golem - grants increased Life Regeneration per second |
Bandits:
Kill all bandits for the two additional Passives Points
Leveling Skill Trees:
31 Points Skill Tree
Priorities: 1) Blood Siphon 2) Fangs of the Viper 3) Deadly Draw 4) Heavy Draw
64 Points Skill Tree
Priorities: 1) Lethality 2) Primeval Force 3) Thick Skin 4) King of the Hill 5) Small Leech nodes
Recommended leveling items:
 Blackheart - one of the best Phys. DPS leveling rings. You can get two of those if you can afford it and use them for the first 30 levels Blackheart - one of the best Phys. DPS leveling rings. You can get two of those if you can afford it and use them for the first 30 levels |
|
| Adds 1 to 4 Physical Damage to Attacks 5% increased Physical Damage Adds 1 to 3 Chaos Damage to Attacks +(20-30) to maximum Life (2-4) Life Regenerated per second 10% chance to Cause Monsters to Flee |
|
 Meginord's Girdle - great Phys. DPS belt. It also grants amazing maximum Life bonus, and after you buy it, you can wear it until you switch to your Poison Totem gear Meginord's Girdle - great Phys. DPS belt. It also grants amazing maximum Life bonus, and after you buy it, you can wear it until you switch to your Poison Totem gear |
|
| +(25-35) to Strength Adds 5 to 15 Physical Damage to Attacks +25 to Strength 10% increased maximum Life +(10-20)% to Cold Resistance 25% increased Flask Life Recovery rate |
|
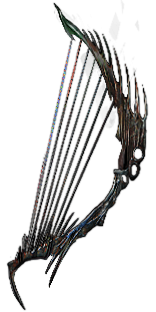
 Silverbranch - the first unique bow that you can find in Path of Exile Silverbranch - the first unique bow that you can find in Path of Exile |
|
| +1 to Level of Socketed Bow Gems (80-100)% increased Physical Damage 10% increased Attack Speed +30 to Accuracy Rating +10 Mana gained on Kill |
|
|
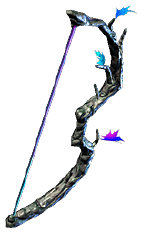
Death's Harp |
|
| (30-50)% increased Critical Strike Chance (100-125)% increased Physical Damage 10% increased Attack Speed +100% to Global Critical Strike Multiplier Bow Attacks fire an additional Arrow |
|

|
|
|
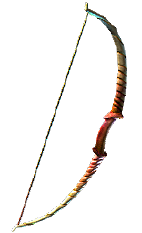
| (30-50)% increased Critical Strike Chance (100-125)% increased Physical Damage Adds (10-20) to (30-35) Physical Damage 10% increased Attack Speed +100% to Global Critical Strike Multiplier Two additional Arrows |
|
 Death's Opus - much more powerful version of Death's Harp bow. However, it is powerful enough to be the most expensive leveling item listed in this guide
|
|
|
| +(20-30) to Dexterity +(20-30) to Strength +100 to Accuracy Rating 30% increased Projectile Speed 10% increased Movement Speed 30% increased Projectile Damage |
|
4. Final Skill Tree, Ascendancy Points, and Pantheon
Final Skill Tree:
116 Points Final Skill Tree
116 Points Path of Building link
Ascendancy points:
Preferably in that order:
- Harness the Void
- Patient Reaper
- Prolonged Pain (requires to refund the Evasion/Energy Shield small node)
- Weave the Arcane
Pantheon:
Major God: Soul of Lunaris - 1% additional Physical Damage Reduction for each nearby Enemy, up to 8%; 1% increased Movement Speed for each nearby Enemy, up to 8%
Minor God: Soul of Gruthkul - 1% additional Physical Damage Reduction for each Hit you've taken Recently up to a maximum of 5%
5. Final Gems links
| [DPS] Barrage/Tornado Shot (in Dendrobate) |
|
 |
Barrage - your core DPS skill which will be used by your Ranged Attack Totems. Those should fire approximately 80 arrows each, applying nearly 400 Poison stacks on a single enemy. If you have not taken Pierce, it's best to swap it with Tornado Shot for map clearing/farming. |
 |
Tornado Shot - the alternative attack skill that is much better for clearing open-space maps and bigger packs. It works well versus Bosses on lower tiers as well |
 |
Greater Multiple Projectiles Support - increases the number of supported skills' projectiles. The damage from your Hits is much less important than the number of Hits |
 |
Ranged Attack Totem Support - allows you to summon a Totem that will use the supported bow attack skill |
 |
Unbound Ailments Support - increases the duration and damage of your Poison |
 |
Deadly Ailments Support - dramatically increases your Poison Damage. This Support Gem was also buffed in Patch 3.3 which made it even more powerful |
 |
Elemental Damage with Attacks Support - since your damage type is Lightning, and it's the Lightning Damage that applies your Poison, it's another very important Support Gem in this setup |
 |
Lesser Poison Support - increases the chance to Poison on Hit, and adds Chaos Damage to supported attacks. It is granted by the Dendrobate unique armour |
| [UTILITY] Frenzy (in Quill Rain) |
|
 |
Frenzy - Frenzy is used to |
|
Greater Multiple Projectiles Support |
 |
Curse on Hit Support - makes Frenzy apply the supported curse |
|
Despair - the recommended curse for this build. It can also be used as an Aura with the Impresence amulet, however, staying in melee range for it to work pushes your character's defenses to the limit |
 |
Culling Strike Support - instantly kills enemies below 10% Life. Also allows dealing killing blows with Frenzy, which grants the Innerave buff |
 |
Innervate Support - grants the Innervation buff to your other skills (Barrage Totem) on kills with supported skills |
| [UTILITY 1] no links required | |
 |
Arctic Armour - provides Physical and Fire Damage mitigation |
 |
Wrath - adds extra Lightning Damage |
|
Blink Arrow - used for mobility and Spell/Attack avoidance |
 |
Lightning Golem - increases your Attack Speed |
| [UTILITY 2] Wither | |
 |
Wither - increases Chaos Damage taken by affected enemies |
 |
Faster Casting Support - increases Cast speed of the With spell |
| [UTILITY] Immortal Call setup | |
 |
Shock Nova - an auto-cast spell that has a chance to Poison (if that mattered) and Knockback enemies. Do not upgrade it above level 4 |
 |
Knockback Support - grants supported skills a chance to knockback enemies |
 |
Cast when Damage Taken Support - will auto-cast supported spells after a certain amount of damage is taken by your character. Keep this gem at level 1 |
 |
Immortal Call - grants brief Physical Immunity. Will be auto-cast if you keep it at maximum level 3 |
|
|
5. Gear Setup
This Quill Rain Poison Ranged Attack Totem build is extremely powerful and when making this build we have realized we might have previously overused this adjective. Sadly, such power comes at a high cost. In general, this is a very expensive build to complete, with at least twelve expensive Abyss Jewels required.
If you would still like to try this build out, we would like to invite you to visit our Path of Exile marketplace where you can buy PoE Currency with real cash from other PoE players.
Our recommended items will:
- Cap your resistances
- Give you enough DPS/Life to start mapping successfully
- Save you at least a couple of hours, since it's already planned out for you!
|
Stat priorities on items:
|
 (Helmet) Lightpoacher - our recommended pick for the helmet slot. It allows you to use two additional Abyss Jewels for extra damage (Helmet) Lightpoacher - our recommended pick for the helmet slot. It allows you to use two additional Abyss Jewels for extra damage |
|
| Has 2 Abyssal Sockets Trigger Level 20 Spirit Burst when you Use a Skill while you have a Spirit Charge +(10-15)% to all Elemental Resistances Recover (4-5)% of Life when a Spirit Charge expires or is consumed (15-20)% chance to gain a Spirit Charge on Kill +1 to Maximum Spirit Charges per Abyss Jewel affecting you |
|
 (Helmet) Starkonja's Head - another good pick for this build. Provides amazing defensive bonuses and increased Attack Speed (Helmet) Starkonja's Head - another good pick for this build. Provides amazing defensive bonuses and increased Attack Speed |
|
| 50% reduced Damage when on Low Life +(50-70) to Dexterity 10% increased Attack Speed 25% increased Global Critical Strike Chance (100-130)% increased Evasion Rating +(80-100) to maximum Life 150% increased Global Evasion Rating when on Low Life |
|
| Helmet Enchantments: Barrage fires an additional Projectile Tornado Shot fires 2 additional secondary Projectiles |
|
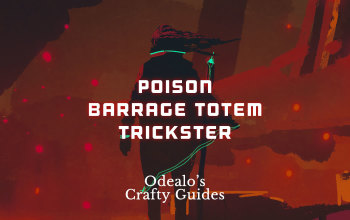
 (Weapon) Quill Rain - the core weapon for this build. Quill Rain provides the highest global Attack Speed in the entire game (Weapon) Quill Rain - the core weapon for this build. Quill Rain provides the highest global Attack Speed in the entire game |
|
| 100% increased Physical Damage +(10-20) to Dexterity 100% increased Attack Speed +(25-50) to Accuracy Rating +2 Mana gained for each Enemy hit by Attacks (50-100)% increased Projectile Speed 40% less Weapon Damage |
|
 (Quiver) Skirmish - mandatory Quiver for this build. Allows you to summon the second Ranged Attack Totem. Also getting corrupted one that increases the number of arrows fired should be very easy. It should not cost more than 10 Chaos Orbs because of the items' low popularity (Quiver) Skirmish - mandatory Quiver for this build. Allows you to summon the second Ranged Attack Totem. Also getting corrupted one that increases the number of arrows fired should be very easy. It should not cost more than 10 Chaos Orbs because of the items' low popularity |
|
| (20-30)% increased Accuracy Rating +(15-25) to Intelligence +(30-50) to maximum Mana (20-30)% increased Mana Regeneration Rate 0.2% of Physical Attack Damage Leeched as Mana Attack skills can have 1 additional Totem Summoned at a time |
|
 (Body Armour) Dendrobate - mandatory item for this build. It provides the additional link and greatly increases your Poison Damage and duration (Body Armour) Dendrobate - mandatory item for this build. It provides the additional link and greatly increases your Poison Damage and duration |
|
| 3% reduced Movement Speed (Hidden) Socketed Gems are Supported by Level 10 Lesser Poison (130-150)% increased Evasion and Energy Shield +40 to maximum Energy Shield +(15-25)% to all Elemental Resistances (75-100)% increased Damage with Poison if you have at least 300 Dexterity (15-25)% increased Poison Duration if you have at least 150 Intelligence |
|
 (Boots) Rare Life/Res. boots - you will need to wear Rare Boots or it may be extremely hard to cap your Elemental Resistances (Boots) Rare Life/Res. boots - you will need to wear Rare Boots or it may be extremely hard to cap your Elemental Resistances |
|
| Min. requirements: 60 maximum Life 25% increased Movement Speed 30% Fire Resistance 30% Lightning Resistance 30% Cold Resistance |
|
| Boots Enchantments: 16% increased Attack and Cast Speed if you've Killed Recently 10% Chance to Dodge if you've taken a Critical Strike Recently |
|
 (Belt) Rare Life/Res. belt - simply aim for the highest defensive stats you can afford (Belt) Rare Life/Res. belt - simply aim for the highest defensive stats you can afford |
|
| Min. requirements: 90 maximum Life 30% Fire Resistance 30% Lightning Resistance 30% Cold Resistance 30% increased Elemental Damage with Attack Skills |
|
 (Belt) Rare Stygian Vise - with similar stats to the regular belt. Will be more expensive and provide the additional Abyssal socket (Belt) Rare Stygian Vise - with similar stats to the regular belt. Will be more expensive and provide the additional Abyssal socket |
|
| Min. requirements: 90 maximum Life 30% Fire Resistance 30% Lightning Resistance 30% Cold Resistance 30% increased Elemental Damage with Attack Skills |
|
 (Amulet) Impresence (Chaos) - is a good choice for increased Chaos and Damage over Time (Amulet) Impresence (Chaos) - is a good choice for increased Chaos and Damage over Time |
|
| +(10-16) to all Attributes (30-40)% increased Damage over Time Adds (17-19) to (23-29) Chaos Damage +(50-70) to maximum Life +(17-23)% to Chaos Resistance 100% reduced Despair Mana Reservation Gain Maddening Presence for 10 seconds when you Kill a Rare or Unique Enemy |
|
 (Amulet) Karui Charge - this amulet provides very high DPS boost but lacks defensive stats. If you are still farming currency for your Abyss jewels on lower tier maps, this might be the best choice for you (Amulet) Karui Charge - this amulet provides very high DPS boost but lacks defensive stats. If you are still farming currency for your Abyss jewels on lower tier maps, this might be the best choice for you |
|
| +(20-30) to Dexterity +(20-30) to Strength (5-10)% increased Attack Speed +100 to Accuracy Rating 30% increased Projectile Speed 10% increased Movement Speed 30% increased Projectile Damage |
|
 (Amulet) Rare Amulet - can be a very solid and inexpensive pick (Amulet) Rare Amulet - can be a very solid and inexpensive pick |
|
| Min. requirements: 70 maximum Life added Lightning Damage to Attacks missing Elemental Resistances Optional affixes: increased Lightning Damage Attributes |
|
 (Ring) Rare rings - with Essence of Delirium crafted Opal Rings being the best in slot (Ring) Rare rings - with Essence of Delirium crafted Opal Rings being the best in slot |
|
| Min. requirements: 50 maximum Life added Lightning Damage to Attacks missing Elemental Resistances Optional affixes: increased Damage with Poison (from Essence of Delirium) increased Attack Speed Attributes |
|
 (Ring) Valako's Sign - if getting enough Essences (or a proper Opal Ring) is problematic for you, you can use Valako's Sign instead. This ring provides very good Lightning Damage bonuses, and increases the Damage you deal with Hits against Shocked enemies (Ring) Valako's Sign - if getting enough Essences (or a proper Opal Ring) is problematic for you, you can use Valako's Sign instead. This ring provides very good Lightning Damage bonuses, and increases the Damage you deal with Hits against Shocked enemies |
|
| +(20-30)% to Lightning Resistance 40% increased Damage with Hits against Shocked Enemies 20% increased Lightning Damage +(20-40) to maximum Mana 0.2% of Damage Leeched as Life against Shocked Enemies 10% chance to Shock |
|
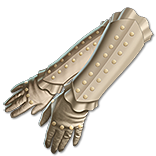 (Gloves) Volkuur's Guidance - the Lightning version obviously is the mandatory pair of gloves for this build. Volkuur's Guidance make your Lightning Damage Poison, which is the core mechanic of this build (Gloves) Volkuur's Guidance - the Lightning version obviously is the mandatory pair of gloves for this build. Volkuur's Guidance make your Lightning Damage Poison, which is the core mechanic of this build |
|
| Min. requirements: 70 maximum Life 20% Fire Resistance 20% Cold Resistance 20% Lightning Resistance Optional affixes: increased Attack Speed |
|
| Gloves Enchantment: Decree of Spite |
|
 (Jewels) Abyss Jewels - with as many Lightning Damage affixes you can find and afford (Jewels) Abyss Jewels - with as many Lightning Damage affixes you can find and afford |
|
| Recommended affixes: maximum Life added Lightning Damage to Attacks added Lightning Damage to Bow Attacks Optional affixes: chance to gain Onslaught for 4 seconds on Kill increased Attack Speed if you have Crit. recently |
|
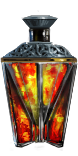 (Flask) Dying Sun - the best Bow/Projectile Flask in Path of Exile (Flask) Dying Sun - the best Bow/Projectile Flask in Path of Exile |
|
| +50% to Fire Resistance +6% to maximum Fire Resistance (-10-10)% increased Charges used (15-25)% increased Area of Effect during Flask Effect Skills fire 2 additional Projectiles during Flask Effect |
|
 (Flask) Coralito's Signature - grants insane DPS buff during Flask effect (Flask) Coralito's Signature - grants insane DPS buff during Flask effect |
|
| Your Critical Strike Chance is Lucky Take 30 Chaos Damage per Second during Flask effect 25% chance to Poison on Hit during Flask effect Your Critical Strikes do not deal extra Damage during Flask effect (50-75)% increased Duration of Poisons you inflict during Flask effect Grants Perfect Agony during Flask effect |
|
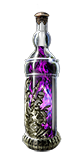 (Flask) Witchfire's Brew - provides very high DoT bonus during the Flask's effect. Also creates the Smoke Cloud, which Blinds enemies (Flask) Witchfire's Brew - provides very high DoT bonus during the Flask's effect. Also creates the Smoke Cloud, which Blinds enemies |
|
| 100% increased Evasion Rating Creates a Smoke Cloud on Use 50% increased Charges used (25-40)% increased Damage Over Time during Flask Effect Grants Level 21 Despair Curse Aura during Flask Effect |
|
Other suggested Flasks:
|
|
 |
|
|
If you have any other build requests, please leave that in the comments below.
Pictures used in this article are the intellectual property of Grinding Gear Games.
