Perforate Bladestorm Champion Duelist build
Interesting Melee build based on the newly added in Patch 3.7 Perforate and Bladestorm skillsPerforate/Bladestorm
Champion Duelist build
Updated for Patch 3.7
The Best Crafty Guides by Odealo
Estimated budget: medium

| Guide notes |
| August 2, 2019 -Build created |
Bladestorm and Perforate are two new attacks introduced in Patch 3.7, and both of them have extra effects based on your Active Stance. We have decided to combine them both into a very interesting build which uses Bladestorm as a supporting Attack which periodically deals damage through Tornadoes while you spam Perforate to deal insane single-target damage. This build isn't far from the current Melee meta, as it offers a very interesting playstyle and well-balanced stats - very solid singlet-target DPS, AoE attacks to clear out trash, and very solid defenses based on high Life and Physical Damage mitigation.
You can also check our other PoE build right here Odealo's Crafty Guides - Full List
1. Gameplay
This build revolves around two base skills which have to be used in succession. First of all, you want to create three spinning Bladestorm Tornadoes with Multistrike Support which will quickly apply stacks for Impale and deal a moderate amount of damage. Then you follow up with Perforate which will one-shot most of your victims. You can also switch between stances, with Sand stance increasing your AoE, mobility, and defenses, while Blood Stance grants higher DPS against Bosses.
At the same time, this build offers very high Physical Damage mitigation with around 85% Damage Reduction with Flasks active. It is further amplified by Champion's Ascendancy Passives which reduce your damage taken and grant Stun Immunity.
|
|
|
|
2. Build's PROS & CONS
| PROS |
|
| CONS |
|
3. Leveling tips
Leveling is very similar to other Melee classes. You focus on high Life, Physical DPS, and Movement Speed bonuses. It's initially very slow, but when you get Bladestorm at level 28 you can use it in Sand Stance which will make them travel, killing enemies in a wider area. It's very important to take the Master of Metal Ascendacy first, which grants very high flat added Physical Damage based on the number of Impale stacks on the enemy. After level 31, this Passive alone will more than double your DPS.
Suggested leveling Gem setups:
| Perforate setup | |
 |
Perforate - primary attack used in this build. Make sure to level us using Sand stance for increased AoE and clear speed |
 |
Melee Physical Damage Support - increases the Physical Melee Damage of supported skills |
 |
Maim Support - this Gem increases your Physical DPS and Maim enemies, slowing them down |
 |
Impale Support - can be used after you reach level 31. If you get Master of Metal, this will grant the highest DPS bonus at lower levels |
| Bladestorm setup | |
 |
Bladestorm - secondary attack used in this build which is used to summon three spinning Tornadoes that periodically damage enemies |
 |
Melee Physical Damage Support |
 |
Impale Support - grants very high bonus DPS at a cost of reduced Attack Speed |
 |
Multistrike Support - allows you to create the maximum number of Bladestorm Tornadoes with each attack |
| Utility Gems | |
 |
Ancestral Warchief - summons a Totem which increases your Melee Damage |
 |
Punishment - the recommended Curse for this build which increases your Melee Damage and Attack Speed |
 |
Blood and Sand - allows switching between Blood and Sand stances. You should use Sand for leveling/farming, and switch to Blood Stance when facing Bosses or tougher Rare monsters |
 |
Whirling Blades - the recommended Movement Skill used in this build |
 |
Summon Lightning Golem - increases your Attack Speed |
Bandits:
It's recommended to kill all the Bandits for two extra Passive Points, however, you can also switch to Alira for the extra Crit. Multiplier if you reach level 90 or higher
Leveling Skill Trees:
34 Points Skill Tree
Priorities: 1) Art of the Gladiator 2) Master of the Arena 3) Dervish 4) Blade Master
60 Points Skill Tree
Priorities: 1) Forceful Skewering 2) Swift Skewering 3) Herbalism 4) Fatal Blade
Recommended leveling items:
 Blackheart - one of the best leveling Rings in the game. You should be able to efficiently use them between levels 1 to 45 Blackheart - one of the best leveling Rings in the game. You should be able to efficiently use them between levels 1 to 45 |
|
| Adds 1 to 4 Physical Damage to Attacks 5% increased Physical Damage Adds 1 to 3 Chaos Damage to Attacks +(20-30) to maximum Life (2-4) Life Regenerated per second 10% chance to Cause Monsters to Flee |
|
 Meginord's Girdle - very solid Belt which can be used until early Maps Meginord's Girdle - very solid Belt which can be used until early Maps |
|
| +(25-35) to Strength Adds 5 to 15 Physical Damage to Attacks +25 to Strength 10% increased maximum Life +(10-20)% to Cold Resistance 25% increased Flask Life Recovery rate |
|
|
|
|
| 40% increased Global Accuracy Rating 100% increased Damage when on Low Life 50% increased Physical Damage Adds 2 to 6 Physical Damage 10% increased Attack Speed +(20-30) to maximum Life +2 Life gained for each Enemy hit by Attacks |
|
|
|
|
| Physical Damage: (45 to 56)–(77.4 to 94) Critical Strike Chance: 5.00% Attacks per Second: (1.65 to 1.72) +190 to Accuracy Rating (60-80)% increased Physical Damage Adds (5-8) to (10-14) Physical Damage (10-15)% increased Attack Speed (40-30)% reduced Stun and Block Recovery 20% chance to Avoid being Stunned Socketed Gems are supported by Level 1 Multistrike |
|
|
|
|
| 50% increased Movement Speed Level Requirement reduced by 100 (Hidden) |
|
4. Final Skill tree, Ascendancy Points, and Pantheon
Final Skill Tree:
115 Points Final Skill Tree
115 Points Path of Building(PoB) link
Ascendancy points:
Preferably in that order:
- Master of Metal
- Conqueror
- Worthy Foe
- Unstoppable Hero
Pantheon:
Major God: there are two choices depending on if you are grinding Maps or want to challenge end-game Bosses.
Maps: Soul of Lunaris 1% additional Physical Damage Reduction for each nearby Enemy, up to 8%; 1% increased Movement Speed for each nearby Enemy, up to 8%
Bosses: Soul of Solaris 6% Physical Damage Reduction if there is only one nearby Enemy; 20% chance to take 50% less Area Damage from Hits
Minor God: Soul of Gruthkul - 1% additional Physical Damage Reduction for each Hit you've taken Recently up to a maximum of 5%
5. Final Gems links
| [DPS] Perforate setup | |
 |
Perforate - your primary DPS skill which deals insane single-target DPS in Blood Stance and gets more area coverage while in Sand Stance |
 |
Melee Physical Damage Support - one of the core Support Gems for all Melee/Physical skills |
 |
Brutality Support - grants the highest Physical Damage bonus, but makes supported skill unable to deal non-physical damage |
 |
Impale Support - grants increased chance to Impale and its effectiveness |
 |
Fortify Support - grants very high bonus damage and a very solid defensive buff |
 |
Maim Support - increases your Physical DPS and Maim enemies on Hit |
| [DPS] Bladestorm setup | |
 |
Bladestorm - secondary attack used in this build which is used to create three Tornadoes for extra damage which is applied over 3-second duration |
 |
Brutality Support |
 |
Impale Support |
 |
Multistrike Support - allows you to three create all three Tornadoes with a single-attack. Make sure not to break the animation before it ends |
| [UTILITY] Auras | |
 |
Pride - greatly increases Physical Damage taken by enemies in the radius |
 |
Dread Banner - grants increased Chance to Impale and Physical Damage taken by nearby enemies |
 |
Blood and Sand - allows you to use the new Blood and Sand stances. Blood Stance grants increased Damage, and Sand Stance increased AoE |
| [UTILITY] Ancestral Warchief and Blood Rage | |
 |
Ancestral Warchief - will increase your Melee Damage when active |
 |
Blood Rage - increases your Attack Speed, Life Leech, and generated Frenzy Charges |
 |
Enhance Support - increases the quality of supported Gems; it's mainly used for extra Attack Speed granted by Blood Rage |
| [MOBILITY] Whirling Blades | |
 |
Whirling Blades - one of the fastest Movements Skill in PoE which is recommended for use with this build |
 |
Faster Attacks Support |
| [UTILITY] Steelskin and Vaal Haste | |
 |
Cast when Damage Taken Support - will auto-cast Steelskin when you take a certain amount of damage |
 |
Steelskin - grants a protective shield which absorbs up to 2200 damage |
 |
Vaal Haste - Vaal Aura which grants greatly increased Attack and Movement Speed for a short duration |
 |
Increased Duration Support - increases the maximum duration of Vaal Haste and Steelskin |
| [UTILITY] Golem | |
 |
Cast when Damage Taken Support - will resummon your Golem automatically |
 |
Summon Lightning Golem - increases your Attack Speed while active |
|
|
5. Gear Setup
Below you will find the recommended gear for this Perforate/Bladestorm Champion build. We do not go into meta-crafted/Mirror level gear or extremely expensive Elder/Shaper items. Excessive spendings with this build are not recommended unless you really want to push your character to its maximum potential.
Using this opportunity we would like you to visit our PoE Marketplace (link is available on top of the page) where you can buy cheap items and currency items from other players with the use of real money.
Our recommended items will:
- Cap your resistances
- Give you enough DPS/Life to start mapping successfully
|
Stat priorities on items:
|
 (Helmet) Rare Helmet - a Rare Helmet can provide very high defensive stats and shouldn't be expensive to get (Helmet) Rare Helmet - a Rare Helmet can provide very high defensive stats and shouldn't be expensive to get |
|
| Min. requirements: 70 maximum Life 90% All Elemental Resistances Optional affixes: Nearby enemies take #% Physical Damage |
|
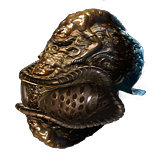
 (Helmet) Abyssus - grants insane bonus damage but increases Physical Damage you take. If you strictly follow this build, this may be the option to go as it shouldn't affect your defenses that much (Helmet) Abyssus - grants insane bonus damage but increases Physical Damage you take. If you strictly follow this build, this may be the option to go as it shouldn't affect your defenses that much |
|
| Adds 40 to 60 Physical Damage to Attacks +(20-25) to all Attributes +(100-125)% to Melee Critical Strike Multiplier (100-120)% increased Armour (40-50)% increased Physical Damage taken |
|
 (Helmet) Starkonja's Head - grants good defensive utility, high Life bonus, and extra DPS. It also gives you Dexterity needed for Blood Rage Gem requirements (Helmet) Starkonja's Head - grants good defensive utility, high Life bonus, and extra DPS. It also gives you Dexterity needed for Blood Rage Gem requirements |
|
| 50% reduced Damage when on Low Life +(50-70) to Dexterity 10% increased Attack Speed 25% increased Global Critical Strike Chance (100-130)% increased Evasion Rating +(80-100) to maximum Life 150% increased Global Evasion Rating when on Low Life |
|
| Helmet enchantment: Blood Rage grants additional 12% increased Attack Speed |
|
 (Weapon) Rare Jewelled Foil - offer high Weapon Range and high DPS thanks to the extra Implicit modifier (Weapon) Rare Jewelled Foil - offer high Weapon Range and high DPS thanks to the extra Implicit modifier |
|
| Min. requirements: 370 Physical DPS 1.75 Attack Speed Optional affixes: Increased Critical Strike Multiplier Increased Critical Strike Chance |
|
 (Weapon) Grelwood Shank - greatly increases your defenses thanks to the Iron Reflexes Passive and extra Armour, however, has much lower DPS when compared to Rare Foils (Weapon) Grelwood Shank - greatly increases your defenses thanks to the Iron Reflexes Passive and extra Armour, however, has much lower DPS when compared to Rare Foils |
|
| +475 to Accuracy Rating (185-215)% increased Physical Damage (15-20)% increased Attack Speed 80% increased Armour while stationary Skills fire 2 additional Projectiles if you've been Hit Recently Point Blank Iron Reflexes while stationary |
|
 (Body Armour) Rare Body Armour - preferably with high Armour Rating (Body Armour) Rare Body Armour - preferably with high Armour Rating |
|
| Min. requirements: 100 maximum Life 1600 Armour Rating Optional affixes: Elemental Resistances %maximum Life Attacks have +# to Critical Strike Chance |
|
 (Boots) Rare Boots - get pair with the highest maximum Life bonus you can afford (Boots) Rare Boots - get pair with the highest maximum Life bonus you can afford |
|
| Min. requirements: 80 maximum Life 25% increased Movement Speed 30% Fire Resistance 30% Lightning Resistance 30% Cold Resistance Optional affixes: High Armour Rating |
|
| Boot enchantment: 16% increased Attack and Cast Speed if you've Killed Recently |
|
 (Belt) Stygian Vise - again, aim for high defensive stats (Belt) Stygian Vise - again, aim for high defensive stats |
|
| Min. requirements: 80 maximum Life 300 Armour Rating 30% Fire Resistance 30% Lightning Resistance 30% Cold Resistance Optional affixes: increased Damage or Physical Damage |
|
 (Amulet) Rare Amulet (Amulet) Rare Amulet |
|
| Min. requirements: 65 maximum Life 35 Intelligence 15% All Elemental Resistances Adds min. 12 Physical Damage to Attacks 30% increased Global Critical Strike Multiplier Optional affixes: Dexterity |
|
 (Ring) Rare Rings - aim for a Shaper Ring with Assassin's Mark Curse (Ring) Rare Rings - aim for a Shaper Ring with Assassin's Mark Curse |
|
| Min. requirements: 60 maximum Life Curse enemies with level # Assassin's Mark on Hit 30 Intelligence Optional affixes: Added Physical Damage to Attacks Elemental Resistances Dexterity |
|
| Adds (3-4) to (10-14) Physical Damage to Attacks 20% chance to Trigger Level 20 Tentacle Whip on Kill Adds (26-32) to (42-48) Cold Damage to Attacks (6-10)% increased maximum Energy Shield (6-10)% increased maximum Life (60-80)% increased Attack Damage if your other Ring is a Shaper Item Cannot be Stunned by Attacks if your other Ring is an Elder Item |
|
 (Gloves) Rare Gloves (Gloves) Rare Gloves |
|
| Min. requirements: 70 maximum Life 35% Lightning resistance 35% Cold resistance Optional affixes: added Physical Damage to Attacks Attack Speed |
|
 (Jewels) Tempered Flesh - when socketed between Barbarism and Juggernaut nodes, this Jewel grants over 70% extra Crit. Multiplier (Jewels) Tempered Flesh - when socketed between Barbarism and Juggernaut nodes, this Jewel grants over 70% extra Crit. Multiplier |
|
| -1 Strength per 1 Strength on Allocated Passives in Radius +5% to Critical Strike Multiplier per 10 Strength on Unallocated Passives in Radius |
|
 (Jewels) Rare Jewels - this should provide extra Life and damage bonuses (Jewels) Rare Jewels - this should provide extra Life and damage bonuses |
|
| Recommended affixes: increased maximum Life increased Physical/Melee/Area Damage increased Global Critical Strike Multiplier Optional affixes: increased Attack Speed |
|
 (Jewels) Murderous Eye Jewel (Jewels) Murderous Eye Jewel |
|
| Recommended affixes: maximum Life added Physical Damage to Attacks/Sword Attacks increased Global Critical Strike Multiplier |
|
 (Flask) Lion's Roar - grants very high bonus Melee Damage and Armour Rating (Flask) Lion's Roar - grants very high bonus Melee Damage and Armour Rating |
|
| +3000 to Armour (14-20)% Chance to Block during Flask effect (6-10)% Chance to Block Spells during Flask effect |
|
Other suggested Flasks:
|
|
     |
|
|
If you have any other build requests please leave that in the comments below.
Pictures used in this article are the intellectual property of Grinding Gear Games.


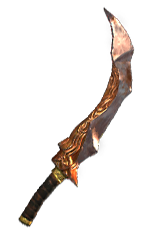
 Redbeak - has high DPS and can be used from level 1
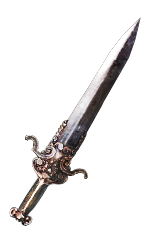
 Lakishu’s Blade - great option to socket your Bladestorm in it for the free Multistrike
 Seven League Step - this pair of Boots grant the highest possible Movement Speed bonus making it one of the most popular leveling items in the game