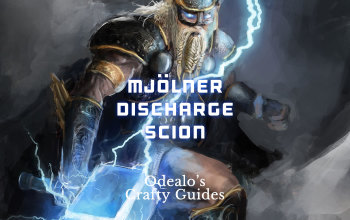
Mjölner Discharge Ascendant Scion Build - Odealo's Crafty Guide
Extremely powerful and interesting melee build. Discharge is triggered on melee hits with increased power thanks to the Mjölner unique GavelMjölner Discharge
Ascendant/Scion
Build updated to Patch 3.2
The Best Crafty Guides by Odealo
Estimated budget: moderately low (3-5 Exalted Orbs)

| Guide notes |
| March 9, 2018 -Updated Skill Trees to Patch 3.2 |
Mjölner is considered a legendary item in Path of Exile. It has been introduced in Patch 1.1.2 and ever since it has been exclusive and extremely valuable unique Gavel. It is a core item for a lot of trigger-on-hit builds, including this extremely powerful Discharge build. Very high DPS and toughness, have always been the main characteristic of Mjölner builds, and same applies to his one.
Check the full list of our other Path of Exile Crafty Guides here: Odealo's Crafty Guides - Full List
1. Gameplay
Mjölner Discharge, like all the other Discharge builds rely on extreme charges (Frenzy, Power, and Endurance) generation. In this type of builds, triggering Discharge causes all the charges to be consumed for increased damage. This is why most of the listed unique items in this build are required to reach top tier DPS. In general, this is a melee build, that relies on a high number of hits caused by Cyclone and Blade Vortex skills. This combination can trigger Discharge up to 5 times per second. This is why all of the uniques listed are really important, because they synergize extremely well, and allow charge generation that can cope with your Discharge frequency.
|
|
2. Build's PROS & CONS
| PROS |
|
| CONS |
|
3. Leveling tips
It is recommended to use Sunder and Ancestral Warchief Totem skills to level up, supported by several high flat physical damage unique items. This build does not get any significant DPS nodes on passive skill tree during early levels, that's why it is important to increase it with items. High life early on will allow you to stack pure DPS items and cope pretty well with any leveling phase content.
Suggested leveling Gem setups:
| Ancestral Warchief setup | |
 |
Ancestral Warchief - spawns a Totem that uses melee attacks to kill enemies. It deals extremely high damage |
 |
Added Fire Damage Support -greatly buffs the AW DPS by adding Fire Damage based on your physical damage |
 |
Faster Attacks Support |
 |
Melee Physical Damage Support |
| Sunder setup | |
 |
Sunder - one of the best leveling melee skills in PoE. Provides good AoE |
 |
Maim Support - will cause your Sunder to slow enemies and increase Physical Damage they take |
 |
Increased Area of Effect Support – increases the range of your Sunder skill |
| Utility Gems | |
 |
Punishment - increases physical damage taken by cursed enemies |
 |
Leap Slam - your main mobility skill assuming you choose to use a two-handed weapon. May be swapped to Shield Charge for one-handed/shield variation |
 |
Herald of Ash - will increase your DPS and cause slain monsters to explode dealing AoE damage |
Bandits:
We recommend killing all bandits for the additional 2 passive points
Leveling Skill Trees:
32 Points Skill Tree
Priorities: 1) Constitution 2) Master of the Arena 3) Art of the Gladiator 4) Born to Fight
64 Points Skill Tree
Priorities: 1) Retribution 2) Amplify 3) Elementalist 4) Devotion 5) Discipline and Training
Recommended leveling items:
 Blackheart - one of the best Physical DPS leveling rings, available as soon as you start your new character at level 1 Blackheart - one of the best Physical DPS leveling rings, available as soon as you start your new character at level 1 |
|
| Adds 1 to 4 Physical Damage to Attacks 5% increased Physical Damage Adds 1 to 3 Chaos Damage to Attacks +(20-30) to maximum Life (2-4) Life Regenerated per second 10% chance to Cause Monsters to Flee |
|
 Meginord's Girdle - amazing DPS and max. life bonuses granted by this belt make it one of the best choices for leveling Meginord's Girdle - amazing DPS and max. life bonuses granted by this belt make it one of the best choices for leveling |
|
| +(25-35) to Strength Adds 5 to 15 Physical Damage to Attacks +25 to Strength 10% increased maximum Life +(10-20)% to Cold Resistance |
|
 Deidbell - grants extreme DPS buffs at level 33 Deidbell - grants extreme DPS buffs at level 33 |
|
| Adds 10 to 20 Physical Damage to Attacks +(20-30) to Strength +(20-30) to Dexterity +(200-300) to Armour 20% increased Melee Damage Cannot Leech when on Low Life |
|
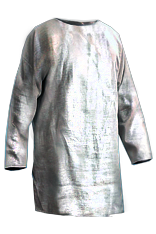 Tabula Rasa - one of the best leveling items in Path of Exile. Provides cheap 6 links for your Sunder/Totem setup Tabula Rasa - one of the best leveling items in Path of Exile. Provides cheap 6 links for your Sunder/Totem setup |
|
| 3% reduced Movement Speed (Hidden) Item has no level requirement and Energy Shield (Hidden) Item has 6 White Sockets and is fully linked (Hidden) |
|
|
|
|
| Socketed Gems are Supported by Level 20 Increased Area of Effect (120-160)% increased Physical Damage +10 to Strength +(50-80) to Accuracy Rating +10 Mana gained on Kill +2 to Weapon range |
|
|
|
|
| +1 to Level of Socketed Strength Gems (80-100)% increased Physical Damage Adds 5 to 10 Physical Damage Adds (30-40) to (70-80) Physical Damage +(15-30) to Strength Gain 70% of Physical Damage as Extra Fire Damage Culling Strike |
|
4. Final Skill tree, Ascendancy Points, and Pantheon
Final Skill Tree:
121 Points Final Skill Tree - remember to put Intuitive Leap unique jewel on the left of the tree to save up a couple of skill points
121 Points Path of Building link
Ascendancy points:
Preferably in that order:
- Witch Ascendancy - Elementalist
- Shadow Ascendancy - Assassin
- Path of the Shadow
Pantheon:
Major God: Soul of Lunaris - 1% additional Physical Damage Reduction for each nearby Enemy, up to 8%; 1% increased Movement Speed for each nearby Enemy, up to 8%
Minor God: Soul of Gruthkul - 1% additional Physical Damage Reduction for each Hit you've taken Recently up to a maximum of 5%
5. Final Gems links
| [DPS] Mjölner's Discharge setup | |
 |
Discharge - your main DPS ability. It consumes all your charges when triggered, dealing elemental spell damage for each charge. It is automatically triggered on hits with your Cyclone/Blade Vortex skills |
 |
Controlled Destruction Support - buffs Discharge's spell damage |
 |
Elemental Focus Support - grants increased elemental damage |
| [DPS/TRIGGER] Cyclone Setup | |
 |
Cyclone - your main ability. You use it to spin around, hitting multiple enemies and triggering Gems socketed in Mjölner. It is important to have at least 4 attacks per second with Cyclone |
 |
Faster Attacks Support - providing the extremely important increased attack speed (allowing more hits per second) |
 |
Blood Magic Support - with nearly all Mana reserved on your auras, this is mandatory Support Gem |
 |
Additional Accuracy Support - makes fewer hits miss (hits need to land to proc Mjölner Gems) |
| [MOBILITY] Leap Slam setup | |
 |
Leap Slam - your main mobility skill. Will also grant the Fortify buff. Used over Shield Charge to allow jumping over cliffs and obstacles |
 |
Faster Attacks Support - it will make your whirling blades cast faster |
 |
Fortify Support - increases physical damage and grants the Fortify effect. Fortify reduces your damage taken by 20% |
| [CURSE/UTILITY] Blade Vortex CoH setup | |
 |
Blade Vortex - this skill spawns ethereal knives around the caster for additional hits per second. It will be auto-cast with CwDT Support Gem, and at the same time, it will be used to apply your curse. Have it at level 5-8 |
 |
Cast when Damage Taken Support – will cast your Blade Vortex. Keep it at level 1 |
 |
Increased Area of Effect Support - Blade Vortex has lower radius than Discharge, so in order to have all enemies cursed this Gem is recommended |
 |
Curse on Hit Support - will make Blade Vortex apply supported curses |
 |
Elemental Weakness - the recommended curse for this build. Will lower enemies resistances to all elemental damage types |
 |
Increased Duration Support - optional Gem if you can afford the 6th link. Will make the ethereal knives from BV to stay up a bit longer (they have a moderately low base duration) |
| [GOLEM] Ice Golem | |
 |
Ice Golem - this is the recommended golem for this build. Increases attack speed and accuracy rating, allowing more hits to land per second. If you do not use the 6th link for the Inc. Duration Support Gem in your body armour, that is the place to socket it into |
| [AURAS] Purity auras setup | |
 |
Purity of Fire - increases your resistance to Fire damage |
 |
Purity of Ice - increases your resistance to Cold damage |
 |
Purity of Lightning - increases your resistance to Lightning damage |
 |
Enlighten Support - preferable at level 3. Will allow all 3 auras to be active which is mandatory for this build defenses |
| [DPS] Righteous Fire setup | |
 |
Righteous Fire - this spell causes additional burning damage, as well as deals degeneration damage to the caster (you). If you have all the items listed, the healing from Kingsguard should allow you to sustain the RF damage in general, but you may need to turn it off during boss fights. On top of its' regular damage, this skill also grants increased global spell damage bonus (up to 39%) |
 |
Burning Damage Support - increases the RF damage |
 |
Concentrated Effect Support - increases damage and reduces Righteous Fire radius. Since this is a melee build, most damage is done in close range anyway |
 |
Elemental Focus Support - increases RF DPS |
|
|
5. Gear Setup
Mjölner Discharge Ascendant is a budget-friendly build, as it does not require anything above 4 links (5 is a luxury which does not exactly affect dps greatly, while 6 is completely redundant). This build however requires a lot of specific uniques equipped to be fully viable, hence it is not advised to play it as a League starter build. Most of this items will be extremely hard to find, making them also very expensive.
If you want to try out this build but luck PoE currency, we would love to invite you to our PoE Currency market, where your can easily restock the missing Orbs to complete your desired build.
Our recommended items will:
- Cap your resistances
- Give you enough DPS/Life to start mapping successfully
- Save you at least a couple of hours, as it's already all planned out for you!
|
Stat priorities on items:
|
 (Helmet) Devoto's Devotion - the best pick for this build. Greatly increases your attack speed and movement speed, which helps you increase clearspeed (Helmet) Devoto's Devotion - the best pick for this build. Greatly increases your attack speed and movement speed, which helps you increase clearspeed |
|
| 15% increased Attack Speed (60-75)% increased Global Critical Strike Chance 150% increased Evasion Rating (20-25)% increased Rarity of Items found 10% increased Movement Speed 10% reduced Character Size |
|
 (Helmet) Starkonja's Head - another decent option. Provides increased Attack Speed and great Life and Evasion bonuses (Helmet) Starkonja's Head - another decent option. Provides increased Attack Speed and great Life and Evasion bonuses |
|
| 50% reduced Damage when on Low Life +(50-70) to Dexterity 10% increased Attack Speed 25% increased Global Critical Strike Chance (100-130)% increased Evasion Rating +(80-100) to maximum Life 150% increased Global Evasion Rating when on Low Life |
|
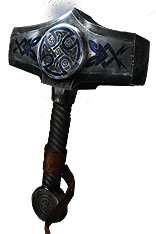 (Weapon) Mjölner - this build is all about this weapon, and can't work without it. It is very cheap and at the same time powerful (Weapon) Mjölner - this build is all about this weapon, and can't work without it. It is very cheap and at the same time powerful |
|
| 15% reduced Enemy Stun Threshold (80-120)% increased Physical Damage Skills Chain +1 times (30-40)% increased Lightning Damage with Attack Skills +200 Strength Requirement +300 Intelligence Requirement Trigger a Socketed Lightning Spell on Hit Socketed Lightning Spells deal 100% increased Spell Damage if Triggered |
|
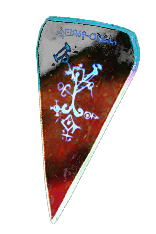 (Shield) Saffell's Frame - amazing for its' increased elemental resistances, which will help you sustain your Life while RF is active (Shield) Saffell's Frame - amazing for its' increased elemental resistances, which will help you sustain your Life while RF is active |
|
| 3% reduced Movement Speed (Hidden) +4% to all Elemental Resistances (70-80)% of Block Chance applied to Spells (20-30)% increased Spell Damage +10% to all Elemental Resistances +4% to all maximum Resistances Cannot Block Attacks |
|
 (Shield) Rise of the Phoenix - this shield also provides the important increased Fire resistance. Will also grant higher defensive bonuses the Saffell's Frame, at the cost of no spell damage bonuses (Shield) Rise of the Phoenix - this shield also provides the important increased Fire resistance. Will also grant higher defensive bonuses the Saffell's Frame, at the cost of no spell damage bonuses |
|
| 3% reduced Movement Speed (Hidden) +8% to all Elemental Resistances (80-100)% increased Armour and Energy Shield +(40-60) to maximum Life (15-20) Life Regenerated per second +5% to maximum Fire Resistance +(20-25)% to Fire Resistance +25% to Fire Resistance while on Low Life 10% increased Movement Speed when on Low Life Cannot be Ignited while on Low Life |
|
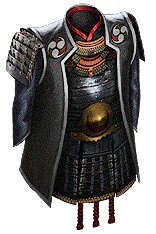 (Body Armour) Kingsguard - the healing provided by this armour is irreplaceable in this build (Body Armour) Kingsguard - the healing provided by this armour is irreplaceable in this build |
|
| 5% reduced Movement Speed (Hidden) (150-170)% increased Armour and Energy Shield +(60-90) to maximum Life +(50-70) to maximum Mana 30% increased Endurance Charge Duration Gain 100 Life when an Endurance Charge expires or is consumed (Hidden) |
|
 (Boots) Inya's Epiphany - greatly increases the amount of Power Charges generated by Romira's Banquet and the damage of your Discharge. Best in slot (Boots) Inya's Epiphany - greatly increases the amount of Power Charges generated by Romira's Banquet and the damage of your Discharge. Best in slot |
|
| +(50-70) to maximum Life 25% increased Movement Speed (5-8)% increased Intelligence 5% increased Damage per Power Charge 25% chance that if you would gain Power Charges, you instead gain up to your maximum number of Power Charges |
|
 (Boots) The Blood Dance - another decent pair of boots for this build. They do not grant as high Power Charge generation as Inya's pair, but provide extra Frenzy Charges (Boots) The Blood Dance - another decent pair of boots for this build. They do not grant as high Power Charge generation as Inya's pair, but provide extra Frenzy Charges |
|
| +(30-40) to Dexterity 20% increased Movement Speed 2% increased Movement Speed per Frenzy Charge 3% reduced Attack and Cast Speed per Frenzy Charge 0.5% of Life Regenerated per second per Frenzy Charge (20-30)% chance to gain a Frenzy Charge on Kill 6% increased Damage per Frenzy Charge with Hits against Enemies on Low Life Gore Footprints |
|
 (Belt) Rare Life/res belt - high elemental resistances should be your priority. You can try getting corrupted belt that increases the maximum number of charges (Belt) Rare Life/res belt - high elemental resistances should be your priority. You can try getting corrupted belt that increases the maximum number of charges |
|
| Min. requirements: 65 maximum Life 30 Strength 22% Fire Resistance 30% Cold Resistance 42% Lightning Resistance |
|
 (Belt) The Flow Unthethered - the best in slot belt for this build. This item was exclusive to the Harbinger League and may be extremely hard to obtain. If you choose this over the rare belt, you need to pick up all the resistances on your rare ring. This belt has the unique Cooldwon Recovery Speed affix, which lowers the internal cooldown of your Discharge spell , allowing more casts to be triggered (Belt) The Flow Unthethered - the best in slot belt for this build. This item was exclusive to the Harbinger League and may be extremely hard to obtain. If you choose this over the rare belt, you need to pick up all the resistances on your rare ring. This belt has the unique Cooldwon Recovery Speed affix, which lowers the internal cooldown of your Discharge spell , allowing more casts to be triggered |
|
| (15-25)% increased Stun and Block Recovery Grants Summon Harbinger of Time Skill (10-15)% increased Attack and Cast Speed (15-20)% increased Energy Shield Recovery rate (15-20)% increased Life Recovery rate (15-20)% increased Cooldown Recovery Speed Debuffs on you expire (15-20)% faster |
|
 (Amulet) Voll's Devotion - best in slot amulet. Grants insane Endurance Charge generation. Try to find uncorrupted one or with unchanged implicit modifiers (Strength and Intelligence bonuses) (Amulet) Voll's Devotion - best in slot amulet. Grants insane Endurance Charge generation. Try to find uncorrupted one or with unchanged implicit modifiers (Strength and Intelligence bonuses) |
|
| +(16-24) to Strength and Intelligence +(30-40) to maximum Life +(20-30) to maximum Energy Shield +(15-20)% to all Elemental Resistances 30% reduced Endurance Charge Duration 30% reduced Power Charge Duration Gain an Endurance Charge when a Power Charge expires or is consumed |
|
 (Ring) Romira's Banquet - provides Power Charge generation from non-critical hits. Mandatory item for this build (Ring) Romira's Banquet - provides Power Charge generation from non-critical hits. Mandatory item for this build |
|
| (20-30)% increased Global Critical Strike Chance +333 to Accuracy Rating +(15-25)% to Global Critical Strike Multiplier +(40-60) to maximum Mana 0.4% of Physical Attack Damage Leeched as Mana Gain a Power Charge on non-Critical Strike Lose all Power Charges on Critical Strike |
|
 (Ring) Rare Life/res/attributes ring - you may stack a lot of Life and attribute on this piece as long as you go for the rare belt previously listed. Otherwise you will have to get the missing resistances here (at the cost of Intelligence and Accuracy bonuses) (Ring) Rare Life/res/attributes ring - you may stack a lot of Life and attribute on this piece as long as you go for the rare belt previously listed. Otherwise you will have to get the missing resistances here (at the cost of Intelligence and Accuracy bonuses) |
|
| Min. requirements: 70 maximum Life 35 Strength 35 Intelligence 200 Accuracy Rating Optional affixes: Elemental Resistances |
|
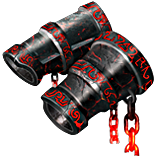 (Gloves) Repentance - mandatory item for this build. Provides the Iron Will passive, which greatly increases your spell damage (based on your Strength attribute, which is obviously high in Mjölner build) (Gloves) Repentance - mandatory item for this build. Provides the Iron Will passive, which greatly increases your spell damage (based on your Strength attribute, which is obviously high in Mjölner build) |
|
| (30-0)% reduced Spell Damage (120-180)% increased Armour and Energy Shield +(8-16) to maximum Energy Shield 500% increased Attribute Requirements Iron Will |
|
 (Jewels) Rare jewels - this should provide extra Life and damage bonuses (Jewels) Rare jewels - this should provide extra Life and damage bonuses |
|
| Recommended affixes: % increased maximum Life % increased Elemental/Spell Damage Optional affixes: % increased Attack Speed % increased Attack Speed while Holding a Shield |
|
 (Jewel) Intuitive Leap - mandatory jewel in the top/left end of the skill tree. It allows taking important nodes in radius without connecting them to your tree (Jewel) Intuitive Leap - mandatory jewel in the top/left end of the skill tree. It allows taking important nodes in radius without connecting them to your tree |
|
| Passives in Radius can be Allocated without being connected to your tree | |
 (Jewel) The Green Nightmare - this jewel socketed on the far left (near Diamon Skin passive) will grant you 35% chance to generate Frenzy Charges on kill. It also grants 11% chance to dodge attacks in this spot (Jewel) The Green Nightmare - this jewel socketed on the far left (near Diamon Skin passive) will grant you 35% chance to generate Frenzy Charges on kill. It also grants 11% chance to dodge attacks in this spot |
|
| Gain 5% of Cold Damage as Extra Chaos Damage Passives granting Cold Resistance or all Elemental Resistances in Radius also grant Chance to Dodge Attacks at 35% of its value Passives granting Cold Resistance or all Elemental Resistances in Radius also grant an equal chance to gain a Frenzy Charge on Kill |
|
 (Flask) Atziri's Promise - one of the best, and extremely well rounded Flask. Provides extra damage, Chaos Resistance and Life Leech (Flask) Atziri's Promise - one of the best, and extremely well rounded Flask. Provides extra damage, Chaos Resistance and Life Leech |
|
| +35% to Chaos Resistance 2% of Chaos Damage Leeched as Life during Flask effect Gain (15-20)% of Physical Damage as Extra Chaos Damage during effect Gain (10-15)% of Elemental Damage as Extra Chaos Damage during effect |
|
Other suggested Flasks:
|
|
     |
|
|
If you have any other build requests please leave that in the comments below.
Pictures used in this article are the intellectual property of Grinding Gear Games.


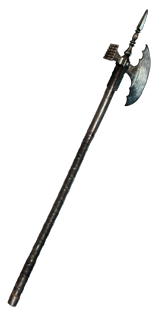 Wideswing - high DPS and increased Area of Effect granted by this weapon make it the best choice for your Sunder skill setup
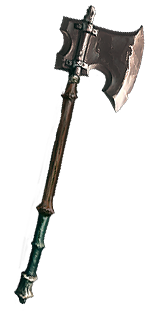 The Cauteriser - another great leveling axe option. It provides extreme DPS during early levels