Meteor/Firewall Sorceress Build for Diablo 4
One of the best Fire solo/leveling setups for the Sorceress Class in Diablo 4Meteor/Firewall
Sorcerer Build for Diablo 4
Last Update: June 1, 2023
| Build notes: |
| June 02, 2023 -Build created |
Build Overview
Meteor Sorcerer is a very powerful type of character that deals damage primarily with the Meteor as the title suggests - its hits are particularly important. After the initial impact, Meteor leaves patches of burning ground which will deal damage too. Meteor's damage can be further improved by the Aspect of the Shattered Stars and the Aspect of Three Curses. It will enhance the Skill with better AoE and Damage. A Firewall is another Pyromancy Skill that has a quite high chance to trigger automatically. For a movement Skill we've selected Teleport - it helps with dodging and overall mobility. Another very important part of the build is Frost Nova, Here it is used to apply Vulnerability for 6 seconds. Try to reduce its Cooldown so that the enemy you're up against is permanently Vulnerable. With Burning Instinct Node, Burning Damage is also increased alongside Critical Strike Chance, which is excellent for this build that makes use of both - Fire Damage and Burning Damage. In a Searing Heat board, you can additionally get the Legendary Node for a much more Critical Strike Chance with Meteor.
Please keep in mind, that the following Guide explains the basic variant of the build, without diving into all alternative variants that may utilize different utility skills for various benefits. This will be obviously updated as we have a chance to test out this build properly in the actual game.
You can also check our other Diablo 4 Builds
 Pros Pros |
 Cons Cons |
 Albe to kill a whole pack of enemies with one cast Albe to kill a whole pack of enemies with one cast |
 It has no Movement Speed enhancements It has no Movement Speed enhancements |
 It's easy to keep a safe distance from enemies with skills like Teleport and Flame Shield It's easy to keep a safe distance from enemies with skills like Teleport and Flame Shield |
|
 Uses Frost Nova and Critical Strikes for a massive damage boost Uses Frost Nova and Critical Strikes for a massive damage boost |
Skills
|
METEOR [5/5] |
|
Meteor is the primary damage source. It deals Fire Damage and creates Burning areas. It synergizes extremely well with Critical Strike and Burning modifiers from Paragon or Aspects. Increase its Rank for more damage and use its Enchantment. Modifiers:
|
|
FIREWALL [5/5] |
|
Each time an enemy takes Burning damage (which is very often) there's a 5% chance to spawn 2 Firewalls, each lasting 3 seconds underneath them. You shouldn't need to spawn them by yourself. This Skill has the highest Burning damage out of all on the list, only the Ultimate Skill surpasses it. Use its Enchantment. Modifiers:
|
|
FROST NOVA [4/5] |
|
Freezes all enemies around you for 3 seconds. It has a base Cooldown of almost 20 seconds, while the goal is to cast it every 6 to reap the benefits of the Mystical Frost Nova modifier. Frostblitz Aspect will get you an additional charge for it but increases its Cooldown too - it's a good deal despite that. Freezing itself is a good defensive addition. You can increase its Rank to lower the Cooldown. Modifiers:
|
|
TELEPORT [1/5] |
|
It's the utility Skill used only to move faster and dodge attacks. The damage it deals to the enemies around you as you finish dashing is negligible. It will benefit from Cooldown Recovery improvements to lower its 11-second Cooldown. Modifiers:
|
|
FIRE BOLT [2/5] |
| Basic Fire Skill that deals Burning Damage, it is not used here at all. |
|
FLAME SHIELD [1/5] |
|
Flame Shield grants you Immunity for 2 seconds and Burns enemies around you for the same duration. It has a 20-second Cooldown. Use it to apply an additional Burning and to avoid damage you cannot dodge because your Teleport is on Cooldown. With modifiers, it's a powerful Skill that also Heals you. Modifiers:
|
|
ICE ARMOR [1/5] |
|
A Barrier Skill with a 20-second Cooldown. For the next 6 seconds, it will absorb 30% of your Base Life in Damage. 5% of Damage dealt is added to the Barrier making it particularly great in glass canon Builds. Modifiers:
|
|
INFERNO [1/1] |
|
The ultimate ability that deals tons of Burning Damage. It has a very high Cooldown and is as good against multiple weak enemies as one big opponent due to the constricting area of effect. Use this Skill after you've run out of Mana. Modifiers:
|
Passive Skills
|
POTENT WARDING [1/3] |
| After casting any Skill that isn't Fire Bolt (Which isn't used here anyway), you gain 2% Resistance to all elements, and an additional 1% Resistance to Skill's Element for 3 seconds. The bonus will mostly apply to Fire, but there are Lightning and Cold Skills too. |
|
PRECISION MAGIC [3/3] |
| Lucky Hit Chance is increased by 15%. It's great as Lucky Hits are extremely important in this build. |
|
ALIGN THE ELEMENTS [1/3] |
| You gain a 1% Damage Reduction against Elites for each second you haven't taken damage from one. It stacks up to 40% after 40 seconds. |
|
ELEMENTAL ATTUNEMENT [1/3] |
| Critical Hits have a 5% chance to reset one of your Skill's Cooldowns, and it can happen only once every 10 seconds no matter the Rank so don't spend too many points here. |
|
PROTECTION [2/3] |
| Using Cooldown grants 20% of your Maximum Life as a Barrier for 2 seconds. The Cooldown Skill used here are Teleport, Forst Nova, and Flame Shield. As you should already aim to reduce Cooldown, it will only make this passive better. |
|
Devastation [3/3] |
| Increases your Maximum Mana by 9 so that you can cast more Skills. |
|
MANA SHIELD [2/3] |
| Each time you spend 100 Mana you will be granted 10% damage reduction for 5 seconds. |
|
INNER FLAMES [3/3] |
| Pyromancy Skills deal x9% increased Damage while you're Healthy. This applies to the Meteor, Inferno, Firewall, and Flame Shield Skills. |
|
DEVOURING BLAZE [3/3] |
| One of the most important passives. It increases your Critical Strike Damage by 30% against Burning enemies (so pretty much every enemy), and if they're also Immobilized (by Meteor), this bonus grows to 75%. |
|
FIERY SURGE [1/3] |
| Killing a Burnign enemy increases the Mana Regeneration rate by 10% for 3 seconds after doing so. It's important for the Mana Shield passive. |
|
ENDLESS PYRE [1/3] |
| For each second an enemy is Burning it will receive 1% increased Burning Damage, stacking up to 5% after 5 seconds. It's not very useful but needed to progress further and pick up Warmth. |
|
WARMTH [3/3] |
| Heals you for 0.9% of your Maximum Life for each nearby enemy every 1 second. The effect is doubled against bosses. It's great with Skills like Flame Shield or Teleport where you can intentionally run into a pack of enemies to heal. |
Specialization
|
ESU'S FEROCITY |
| It's very fitting. It increases the Critical Strike Damage against enemies that are above 50% of their Life. If they're below 50%, you have an additional +5% Critical Strike Chance. If you kill any enemy with a Critical Stike you'll gain both of these bonuses no matter the enemy's Life for the next 3 seconds. |
Items
|
Here's the stat priority list. This build benefits greatly from Critical Strike modifiers, CDR, Intelligence, Lucky Hit Chance, and of course Fire Damage. You're also constantly under the effect of a Barrier - Ice Armor or Protection Passive, so you might look for bonuses that apply to this conditional effect. The opponents should also be Burning and Vulnerable most of the time due to Firewall and Frost Nova. You should be looking for these on your gear:
In the Sockets use Sapphire Gem in a Weapon slot for Critical Strike Damage against enemies you've Immobilized or Frozen. Use Ruby Gem in your Armor simply to increase your Maximum Life. For the Jewelry, choose Skull for the extra Armor, it will be needed. |
|
|
RECOMMENDED UNIQUE ITEMS |
|
|
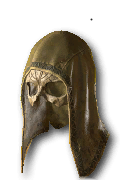
Harlequin Crest (Helm) - One of the most popular helmets in the entire Diablo series. Use it for extra Armor, Maximum Life, CDR, Resource Generation, +20 to All Stats, Damage Reduction, and +4 Ranks to all Skills. All of these qualities are extremely valuable.
|
+Maximum Life +Cooldown Reduction +Crafting Material Find +All Stats +Gain [10.0 - 20.0%] Damage Reduction. In addition, gain +4 Ranks to all Skills. |
|
Fists of Fate (Gloves) - As you've heavily invested in increasing the Lucky Hit Chance, these Gloves seem like a good option. Dazed enemies Enemies cannot attack or use skills, which is great against Immobilized targets that also cannot move. It's a good source of Healing and Mana.
|
+Lucky Hit: Chance to Heal +Lucky Hit: Chance to Restore primary resource +Lucky Hit: Immobilize Chance +Lucky Hit: Daze Chance +Your attacks randomly deal 1% to [200 - 300%] of their normal damage. |
|
Iceheart Brais (Pants) - If your Ice Nova has such a low Cooldown that you use it pretty much every 6 seconds to re-apply Vulnerability, you may want to use these Pants for extra damage to Frozen Enemies and Freeze Duration. It also grants Intelligence, Damage to Injured Enemies, and better Potions.
|
+Your Potion also restores X% Resource +Intelligence +Damage to Frozen Enemies +Damage to Injured Enemies +Freeze Duration +Enemies that die while Frozen have a [11 - 20%] chance to unleash a Frost Nova. |
|
CODEX OF POWER |
|
|
Mandatory/Heavily recommended Aspects
Optional Aspects
|
|
Paragon
|
1st Board - Starting Board Nodes - Pick up Intelligence around the Glyph Socket. Glyphs - Use Adept Glyph for extra damage and Area of Effect of Firewall and Meteor, the two Mastery Skills. |
|
2nd Board - Burning Instinct Board Nodes - Burning Instinct legendary node will be important - it increases Burning Damage based on Crit Damage and intelligence. Glyphs - Exploit Glyph makes you deal increased damage to Vulnerable targets. It also increases your damage against such enemies by up to 10%. |
|
3rd Board - Elemental Summoner Board Nodes - Mana magic nodes for extra Mana should be purchased here. Glyphs - Torch Glyph increases your Burning damage, and damage per nearby Burning enemy. |
|
4th Board - Enchantment Master Board Nodes - Non-physical magic nodes are the only ones worth purchasing here. Glyphs - Tactician Glyph increases the effect of nearby rare nodes, and makes you deal x10% increased damage for 4 seconds after casting Defensive Skill (Flame Shield, Ice Armor, Teleport, or Frost Nova). |
|
5th Board - Frigid Fate Board Nodes - Vulnerable Damage, Damage Reduction from Vulnerable Enemies, and Lucky Hit Chance nodes are excellent. Glyphs - Enchanter Glyph makes you deal an increased Non-physical Damage per Intelligence in radius, and a big bonus to Fire Resistance due to the two Fire Skills in the Enchantment Slots. |
|
END NOTE This is the beta version of our Meteor/Firewall Sorcerer Build for Diablo 4. The game has just launched so we expect all of the Guides will require constant updates when we get to test all the builds properly. Make sure to check out the Guides regularly to keep track of all the changes! If you have any Build requests, please post them in the Comments section below. We will be happy to cover your most requested builds in the future! Also, we hope that you have found this guide useful and informative. Also, we will be happy to receive constructive criticism that will help us improve our future work, so don't hesitate to give us your feedback. |
Pictures used in this article are the intellectual property of Blizzard Entertainment
