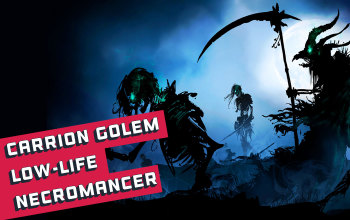
Low-Life Carrion Golem Auramancer/Necromancer
Low-Life/Aura stacking variation of our popular Carrion Golem Necromancer BuildCarrion Golem
Low-Life
Necromancer Auramancer build
Updated for Patch 3.14
The Best Crafty Guides by Odealo
Estimated budget: high

| Guide notes |
| May 17, 2020 -Build created |
This build is the Low-Life variation of your popular Carrion Golem Necromancer Build. If you are looking for a more budget and beginner-friendly approach to this build, you may want to check it out as well. As in most Minion builds, your main role is to progress through Maps and support your Minions with Auras, Curses, and other Utility Spells, and this build is heavily oriented around maximizing the effectiveness of your Auras. You are going to use a total of 11 Auras if you obtain all the necessary equipment, and reserving your Life for some of it. Their effect will be increased further by all the corresponding Passives that you are taking on the Tree, as well as, four Medium Cluster Jewels. Increasing the effectiveness of your Auras, on top of offering its directly implied effect, also boosts the effect of Necromancer's Commander of Darkness Passive, giving your Minions tons of extra Attack Speed.
Carrion Golems are the top Melee Golems that work best if paired if other Minion types. Not only Carrion Golems deal increased damage for each non-Golem Minion nearby (up to 50%) but also add extra Physical Damage for your other Minions. That's why you are going to use eight extra Zombies, and three Physical Spectres - preferably Syndicate Operative, which can be found in Research Safehouse. It may take some time to enter it, but they are currently a Top Tier Spectre for this build.
You can also check our other Path of Exile builds at Odealo's Crafty Guides - Full List
1. Gameplay
This is one of the fastest Minion builds out there. You have permanent Haste Aura with increased effect, Harbinger of Time, and tons of Cast Speed from Commander of Darkness. Your main role in the "team" is to support your Minions with powerful Auras to boost their damage. And as you are going to use 11 different Auras, you are not going to have too many empty Sockets for other Active/Utility skills. In the base form, this build only uses Flame Dash for mobility, Vaal Haste Aura for the extra burst of speed, and possibly Signal Prey which is granted by the corresponding Support Gem. If you manage to get some Auras as corrupted Implicit Modifiers on your Amulet/Rings/Boots or Shield, you will be able to self-cast Vulnerability Curse, and possibly Convocation or Flesh Offering too.
On the other hand, this build can be quite squishy. You should have somewhere between 5,000 and 6,000 maximum Energy Shield that is Regenerated at a decent rate thanks to Zealoth's Oath and Vitality Aura. You also should some extra Block, Physical Damage Reduction at nearly 50%, and Bone Armour Guard Skill. Overall, you should be able to smoothly farm most of Map Bosses.
|
|
|
|

2. Build's PROS & CONS
| PROS |
|
| CONS |
|
3. Leveling tips
It's impossible to level up as an Aura-stacking character. You will have to follow the standard Life path from this Guide: Carrion Golem Necromancer Life version while on the campaign, and possibly stay there for a while before you can get all the necessary and expensive equipment this Low-Life version requires. Just make sure to help all the Bandits while in Act 2 for the extra Passive Points, as it's the only viable choice there.
4. Final Skill Tree, Ascendancy Points, and Pantheon
Final Skill Tree:
115 Points Final Skill Tree (Cluster Jewels not included)
115 Points Path of Building(PoB) link
Ascendancy points:
Preferably in that order:
- Mindless Aggression
- Unnatural Strength
- Commander of Darkness
- Bone Barrier
Pantheon:
Major God: Soul of Solaris 6% additional Physical Damage Reduction while there is only one nearby Enemy 20% chance to take 50% less Area Damage from Hits
Minor God: Soul of Gruthkul 1% additional Physical Damage Reduction for each Hit you've taken Recently up to a maximum of 5%
5. Final Gems links
| [DPS] Summon Carrion Golem (Socketed in Elder Helmet) |
|
 |
Summon Carrion Golem - Carrion Golems are your main source of DPS. Not only they deal greatly increased damage for each non-Golem Minion but also grant additional Physical Damage to your Zombies and Spectres |
 |
Melee Splash Support - Carrion Golems' Melee Attacks will deal extra Splash damage, increasing your clear speed |
 |
Multistrike Support - increases the damage of your Golems by making their Attacks repeat two additional times with greatly increased Speed |
 |
Brutality Support - greatly increases Carrion Golem's Physical DPS but makes them unable to deal other types of damage |
| Gems granted by Elder Helmet: | |
 |
Minion Damage Support - greatly increases the damage of supported Minions |
 |
Minion Life Support - it's not really that important for this setup, but some extra Minion Life is always good to have |
| [UTILITY] Raise Zombie | |
 |
Raise Zombie - Zombies are a very important part of this build as their presence increases the damage of your Carrion Golems. They will also tank a ton of damage |
 |
Flesh and Stone - another Aura that increases the damage taken by nearby enemies. We link them to Zombies here, so that they both benefit from the Maim Support Gem |
 |
Maim Support - will increase the effectiveness of Flesh and Stone while in Blood Stance, but also grant your Zombies a chance to slow down enemies with Hits |
 |
Feeding Frenzy Support - your Zombies will have a chance to grant you the Feeding Frenzy buff, which increases the Action Speed of all your other Minions |
| [DPS] Raise Spectre | |
 |
Raise Spectre - Spectres are a very important aspect of this build that deal a ton of damage even if you are going to have only three summoned. You should get Syndicate Operatives from Research Safehouse for the best effect |
|
Minion Damage Support - pretty much the core Support Gem for all Minions that are supposed to deal damage |
 |
Brutality Support - just like Carrion Golems, your Spectres are supposed to deal purely Physical Damage |
 |
Predator Support - increases the damage of your Spectres, but also allows you to use Signal Prey on targets, and your Spectres will focus that target with increased DPS. You can replace it with Vicious Projectiles Support for better DPS, but getting the extra Green Socket may be tricky on Shavronne's Wrappings |
 |
Greater Multiple Projectiles Support - increases the number of your Spectre's Projectiles |
 |
Impale Support - boots the Chance to Impale and its effect from Syndicate Operative Attacks |
| [UTILITY] Auras 1 | |
 |
Precision - Aura that increases Accuracy Rating and Critical Strike Chance. It will only affect your Minions thanks to Generosity Support. Also, you may need to use it on a low level depending on your total Reduced Mana Reserved stat |
 |
Dread Banner - grants your Minions increased Chance to Impale enemies, which in the result, increases their Physical DPS |
 |
Generosity Support - increases the effectiveness of linked Aura Spells but makes them unable to affect you. It's irrelevant, as neither Precision or Dread Banner has any effect on your character |
| [UTILITY] Auras 2 (Socketed in Prism Guardian) |
|
 |
Haste - increases the Attack, Cast, and Movement Speed of all affected allies. Thanks to the increased effectiveness of your Auras, it makes everyone in your "party" extremely fast |
 |
Pride - since all your Minions will deal only Physical Damage, Pride is the core Aura for this build which boots Physical Damage taken by enemies the longer they stay in its radius |
 |
Discipline - a mandatory Aura which increases your maximum Energy Shield. You can also use the Vaal Skill, which for a short duration will allow you to Recover Energy Shield even when taking damage |
| [UTILITY] "Arrogance" Aura | |
 |
Purity of Fire - one of the Purity Auras will have to be linked to Arrogance Support otherwise you will not have enough Unreserved Mana to use it. Which one is it is irrelevant, in our case it was Fire, and we had two Red Sockets on Clayshaper, so it worked fine for us that way |
 |
Arrogance Support - linked Aura will Reserve Life instead of Mana, allowing you to use additional Aura in this setup |
|
[UTILITY] Auras 3 Notes:
|
|
 |
Purity of Ice - increases your Cold and Maximum Cold Resistance. Using all three Purity Auras basically allows you to skip nearly entirely all Resistances on your Rare equipment |
 |
Vitality - Vitality Aura increases your Life Regenerated per second which is transformed into Energy Shield Regeneration via Zealot's Oath Passive |
 |
Clarity - increases your Mana Regeneration Rate. Since you don't really need to cast any expensive Skills, it should be always at level 1 |
| [UTILITY] Purity of Lightning | |
 |
Purity of Lightning - a level 25 Aura has to be obtained from Doryani's Delusion Sorcerer Boots. It's important to get a pair with INT Base, because it has high base Energy Shield which will be very important for you |
| [UTILITY] Flame Dash | |
 |
Flame Dash - the recommended movement Spell for this build which allows you to progress faster and avoid taking heavy damage |
| [UTILITY] Vulnerability | |
 |
Vulnerability - the best Curse for this build. If you get any of the needed Auras as an Implicit Corrupted modifier on your gear, you should get 1 extra Socket which should be used for self-casting Vulnerability |
5. Gear Setup
Below you will find all the recommended gear for this build. This build doesn't offer much flexibility in terms of what equipment you need to use to make it work. You can only pick one of a few viable weapon options, and alter between Rare Unset Rings and Vivinsect, or use Rare Gloves/Belt, and Boots with higher Energy Shield base for better defensive utility at the cost of reduced Minion DPS and Speed.
|
Stat priorities on items:
|
 (Helmet) Rare Helmet - the best in the slot. Try getting Elder one which adds Minion Damage and +# to Skill of Socketed Minion Gems. You are going to socket your Carrion Golems here (Helmet) Rare Helmet - the best in the slot. Try getting Elder one which adds Minion Damage and +# to Skill of Socketed Minion Gems. You are going to socket your Carrion Golems here |
| Min. requirements: Socketed Gems are Supported by level # Minion Damage +2 to Level of Socketed Minion Gems Optional affixes: Socketed Gems are Supported by level # Minion Life Attributes Energy Shield |
| Helmet enchantment: 150% increased Effect of the Buff granted by your Carrion Golems |
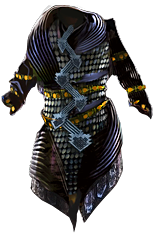 (Body Armour) Shavronne's Wrappings - a must-have Body Armour for the majority of Low-Life builds. Without it, you wouldn't be able to Reserve your Life for Auras (Body Armour) Shavronne's Wrappings - a must-have Body Armour for the majority of Low-Life builds. Without it, you wouldn't be able to Reserve your Life for Auras |
| (3-10)% increased Spell Damage (100-150)% increased Energy Shield 10% faster start of Energy Shield Recharge +(30-40)% to Lightning Resistance Reflects 1 to 250 Lightning Damage to Melee Attackers Chaos Damage does not bypass Energy Shield |
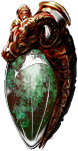
 (Weapon) Clayshaper - a great and inexpensive Weapon that allows you to summon an additional Golem and grants moderate bonus Physical Damage to all your Minions (Weapon) Clayshaper - a great and inexpensive Weapon that allows you to summon an additional Golem and grants moderate bonus Physical Damage to all your Minions |
| 15% reduced Enemy Stun Threshold Grants Level 12 Summon Stone Golem Skill Adds (24-30) to (34-40) Physical Damage (8-10)% increased Attack Speed Minions have (20-30)% increased maximum Life +1 to maximum number of Golems Minions deal (5-8) to (12-16) Added Attack Physical Damage |
 (Weapon) Cold Iron Point - another interesting Weapon option that increases the level of all your Physical Skill Gems which include your Zombies and Carrion Golems (Weapon) Cold Iron Point - another interesting Weapon option that increases the level of all your Physical Skill Gems which include your Zombies and Carrion Golems |
| 30% increased Global Critical Strike Chance +3 to Level of all Physical Spell Skill Gems Deal no Elemental Damage |
 (Weapon) Rare Wand - another viable option for the Weapon Slot. Just look to increase the level of all your MInion Skill Gems and grant extra Minion Damage (Weapon) Rare Wand - another viable option for the Weapon Slot. Just look to increase the level of all your MInion Skill Gems and grant extra Minion Damage |
| Min. requirements: +1 to level of All Minion Spell Skill Gems 50% Increased Minion Damage Optional affixes: Minion Movement Speed Minion Attack Speed Auras from your Skills grant 2% increased Damage to you and Allies |
| Min. requirements: 150 Energy Shield Optional affixes: Attributes Elemental Resistances Minions deal increased Damage (Redeemer prefix) |
 (Gloves) Breathstealer - this pair of Blight Unique Gloves allows you to get extra Anointment. You can pick Champion of the Cause here for extra Mana Reservation, which will allow you to use all the Auras even without Corrupted Jewels with Reduced Man Reserved implicit mod (Gloves) Breathstealer - this pair of Blight Unique Gloves allows you to get extra Anointment. You can pick Champion of the Cause here for extra Mana Reservation, which will allow you to use all the Auras even without Corrupted Jewels with Reduced Man Reserved implicit mod |
| (100-150)% increased Armour and Evasion +(30-50) to maximum Mana +(10-16)% to all Elemental Resistances (5-10)% increased Attack and Cast Speed Create a Blighted Spore when your Skills or Minions Kill a Rare Monster |
| Recommended Anointment: Champion of the Cause |
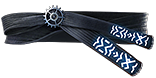
 (Belt) Rare Belt - again, aim for high defensive bonuses. You want the highest Energy Shield possibly and Stygian Vise base for extra Abyssal Jewel Socket (Belt) Rare Belt - again, aim for high defensive bonuses. You want the highest Energy Shield possibly and Stygian Vise base for extra Abyssal Jewel Socket |
| Min. requirements: 50 Maximum Energy Shield Optional affixes: Attributes % increased maximum Energy Shield |
 (Belt) The Torrent's Reclamation - the best all-around Belt for this build which grants the Greater Harbinger of Time Skill. It's an invincible Minion that periodically boosts the Action Speed of you and your Minions (Belt) The Torrent's Reclamation - the best all-around Belt for this build which grants the Greater Harbinger of Time Skill. It's an invincible Minion that periodically boosts the Action Speed of you and your Minions |
| (15-25)% increased Stun and Block Recovery Grants Summon Greater Harbinger of Time Skill (10-15)% increased Attack and Cast Speed (15-20)% increased Energy Shield Recovery rate (15-20)% increased Life Recovery rate (15-20)% increased Cooldown Recovery Rate Debuffs on you expire (15-20)% faster |
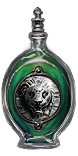
 (Amulet) Presence of Chayula - mandatory Amulet for this build. It grants a very high bonus Energy Shield based on your Life and Stun immunity which is an extremely valuable defensive bonus (Amulet) Presence of Chayula - mandatory Amulet for this build. It grants a very high bonus Energy Shield based on your Life and Stun immunity which is an extremely valuable defensive bonus |
| +(10-16) to all Attributes 30% increased Rarity of Items found +60% to Chaos Resistance Cannot be Stunned 20% of Maximum Life Converted to Energy Shield |
| Recommended Anointments: Charisma |
 (Ring) Rare Unset Ring - in this build you need to use two Unset Rings that will allow you to use extra Auras. Whether it's the standard Rare or Vivinsect is up to your personal preference (and most likely your exact stats) (Ring) Rare Unset Ring - in this build you need to use two Unset Rings that will allow you to use extra Auras. Whether it's the standard Rare or Vivinsect is up to your personal preference (and most likely your exact stats) |
| Min. requirements: 50 Dexterity 50 Strength 40 Maximum Energy Shield Optional affixes: +# to level of Socketed Gems Elemental Resistances |
 (Ring) Vivinsect - a solid Unique Unset Ring which grants a very high bonus to level of Socketed Gems. It can also provide additional Attributes and Shock while you Focus from its Veiled mod (Ring) Vivinsect - a solid Unique Unset Ring which grants a very high bonus to level of Socketed Gems. It can also provide additional Attributes and Shock while you Focus from its Veiled mod |
| Has 1 Socket +5 to Level of Socketed Aura Gems Socketed Gems have 10% increased Mana Reservation +(15-25) to all Attributes Regenerate 15 Life per second for each Uncorrupted Item Equipped -2 to Total Mana Cost of Skills for each Corrupted Item Equipped Veiled Suffix |
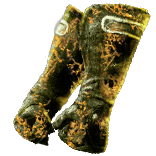
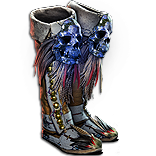 (Boots) Doryani's Delusion - grants a level 25 of a random Purity Aura. It's mandatory to pick the Intelligence base with decent Energy Shield. The type of Purity Aura you get is irrelevant, but you need to adjust your other Gems accordingly (Boots) Doryani's Delusion - grants a level 25 of a random Purity Aura. It's mandatory to pick the Intelligence base with decent Energy Shield. The type of Purity Aura you get is irrelevant, but you need to adjust your other Gems accordingly |
| (180-220)% increased Energy Shield +(60-70) to maximum Life 30% increased Movement Speed <One Purity of # mod of one element and One Added # damage mod of one element> |
| Boot enchantment: Regenerate 2% of Life per second if you were Hit Recently |
 (Jewel) The Anima Stone - mandatory Jewel used in this build. It allows you to summon two additional Golems in total (Jewel) The Anima Stone - mandatory Jewel used in this build. It allows you to summon two additional Golems in total |
| Can Summon up to 1 additional Golem at a time If you have 3 Primordial Jewels, can Summon up to 1 additional Golem at a time Corrupted Implicit mod: 1% Reduced Reservation of Skills |
 (Jewel) Primordial Might - making your Golems more aggressive greatly increases their AI and your overall clear speed (Jewel) Primordial Might - making your Golems more aggressive greatly increases their AI and your overall clear speed |
| (25-30)% increased Damage if you Summoned a Golem in the past 8 seconds Golems Summoned in the past 8 seconds deal (35-45)% increased Damage Golems have (18-22)% increased Maximum Life Your Golems are aggressive Primordial Corrupted Implicit mod: 1% Reduced Reservation of Skills |
 (Jewel) Primordial Harmony - these Jewels grant the highest DPS by reducing the cooldowns of your Golem's most powerful abilities (Jewel) Primordial Harmony - these Jewels grant the highest DPS by reducing the cooldowns of your Golem's most powerful abilities |
| Golem Skills have (20-30)% increased Cooldown Recovery Speed Golems have (10-15)% increased Cooldown Recovery Speed (16-20)% increased Golem Damage for each Type of Golem you have Summoned Golems regenerate 2% of their Maximum Life per second Primordial Corrupted Implicit mod: 1% Reduced Reservation of Skills |
 (Jewel) Primordial Eminence - a decent alternative to Primordial Harmony, should be cheaper than it and still grants decent bonuses (Jewel) Primordial Eminence - a decent alternative to Primordial Harmony, should be cheaper than it and still grants decent bonuses |
| Golems have (16-20)% increased Attack and Cast Speed 30% increased Effect of Buffs granted by your Golems Golems have +(800-1000) to Armour Primordial Corrupted Implicit mod: 1% Reduced Reservation of Skills |
 (Jewel) Rare Abyss Jewels - should provide extra Energy Shield and added Physical Damage to your Minions' Attacks. Use only if you have a Stygian Vise equipped (Jewel) Rare Abyss Jewels - should provide extra Energy Shield and added Physical Damage to your Minions' Attacks. Use only if you have a Stygian Vise equipped |
| Recommended affixes: Maximum Energy Shield Minions deal added # Physical Damage Minions have increased Attack and Cast Speed if you or your Minions have killed recently Corrupted Implicit mod: 1% Reduced Reservation of Skills |
 (Jewel) Fortress Covenant - grants high bonus Minion Damage and extra Block chance. It's great to pick it up and socket it inside one of your Cluster Sockets, as then the negative effect is ignored (Jewel) Fortress Covenant - grants high bonus Minion Damage and extra Block chance. It's great to pick it up and socket it inside one of your Cluster Sockets, as then the negative effect is ignored |
| Minions deal (35-45)% increased Damage Minions have +(10-12)% Chance to Block Attack Damage Minions have +(10-12)% Chance to Block Spell Damage Notable Passive Skills in Radius are Transformed to instead grant: Minions take 20% increased Damage Corrupted Implicit mod: 1% Reduced Reservation of Skills |
 (Jewel) Quickening Covenant - another Covenant Jewel that grants very high bonuses to your Minions and no negative effects if socketed in a Cluster Jewel (Jewel) Quickening Covenant - another Covenant Jewel that grants very high bonuses to your Minions and no negative effects if socketed in a Cluster Jewel |
| Minions have (12-16)% increased Attack Speed Minions have (12-16)% increased Cast Speed Minions have (10-12)% chance to Dodge Attack Hits Minions have (10-12)% chance to Dodge Spell Hits Notable Passive Skills in Radius are Transformed to instead grant: Minions have 25% reduced Movement Speed Corrupted Implicit mod: 1% Reduced Reservation of Skills |
 (Jewel) Large Cluster Jewel - you should get two of these and both should have the same Passives. The most important ones are Rotten Claws and Vicious Bite (Jewel) Large Cluster Jewel - you should get two of these and both should have the same Passives. The most important ones are Rotten Claws and Vicious Bite |
| Recommended affixes: 1 Added Passive Skill is Vicious Bite 1 Added Passive Skill is Rotten Claws 1 Added Passive Skill is Renewal 1 Added Passive Skill is Feasting Fiends Corrupted Implicit mod: 1% Reduced Reservation of Skills |
 (Jewel) Medium Cluster Jewel - you are going to use four Medium Cluster Jewel, out of which, all should increase the effect of your Auras. There are several useful Passives here so getting the right Jewels simply by using Chaos Orbs on a proper base does the trick (Jewel) Medium Cluster Jewel - you are going to use four Medium Cluster Jewel, out of which, all should increase the effect of your Auras. There are several useful Passives here so getting the right Jewels simply by using Chaos Orbs on a proper base does the trick |
| Recommended affixes: 1 Added Passive Skill is First Among Equals 1 Added Passive Skill is Precise Commander 1 Added Passive Skill is Replenishing Presence Corrupted Implicit mod: 1% Reduced Reservation of Skills |
 (Jewel) Energy from Within - socketed right below Melding will grant approximately 20% Increased Maximum Energy Shield making it a very good budget Jewel that boosts your defenses (Jewel) Energy from Within - socketed right below Melding will grant approximately 20% Increased Maximum Energy Shield making it a very good budget Jewel that boosts your defenses |
| (3-6)% increased maximum Energy Shield Increases and Reductions to Life in Radius are Transformed to apply to Energy Shield Corrupted Implicit mod: 1% Reduced Reservation of Skills |
 (Jewel) Unending Hunger - an amazing threshold Jewel for Raised Spectres. It grants them a chance to gain Soul Eater buff which increases Attack, Cast Speed, and size of your Spectres (Jewel) Unending Hunger - an amazing threshold Jewel for Raised Spectres. It grants them a chance to gain Soul Eater buff which increases Attack, Cast Speed, and size of your Spectres |
| Minions have (6-8)% increased Area of Effect With at least 40 Intelligence in Radius, Raised Spectres have a 50% chance to gain Soul Eater for 20 seconds on Kill Corrupted Implicit mod: 1% Reduced Reservation of Skills |
 (Flask) Rumi's Concoction - a great Utility Flask which boosts your defenses significantly. It's a must-have here because of your relatively low Energy Shield pool (Flask) Rumi's Concoction - a great Utility Flask which boosts your defenses significantly. It's a must-have here because of your relatively low Energy Shield pool |
| +3000 to Armour +(14-20)% Chance to Block Attack Damage during Flask effect +(6-10)% Chance to Block Spell Damage during Flask effect |
 (Flask) Taste of Hate - another amazing Utility Flasks which grants high Physical Damage mitigation by converting it to be taken as Cold Damage (Flask) Taste of Hate - another amazing Utility Flasks which grants high Physical Damage mitigation by converting it to be taken as Cold Damage |
| 20% of Physical Damage from Hits taken as Cold Damage during Flask effect Gain (15-20)% of Physical Damage as Extra Cold Damage during effect 30% chance to Avoid being Chilled during Flask effect 30% chance to Avoid being Frozen during Flask effect |
|
Other suggested Flasks:
|
   |
|
|
If you have tried our Carrion Golem Low-Life Auramancer build, make sure to let us know how it worked out for you. We will also appreciate your feedback that can be posted in the comments below. With your help, we will be able to improve our content.
Pictures used in this article are the intellectual property of Grinding Gear Games.
