Lightning Warp Assassin Build
Lightning Warp Assassin Build which deals damage by quickly teleporting and playing no Mana Cost for itLightning Warp
Assassin build
Updated for Patch 3.18
The Best Crafty Guides by Odealo
| Guide notes |
| June 19, 2022 - Build created |
| Build overview | |||
| Tags: [CASTER] [ELEMENTAL] [LIFE] | |||
|
Budget: Defenses: |
|
Boss DPS: AoE: |
|
Travel Skills are rarely considered a proper Skill to put in the main setup and to rely on it as the main Damage output, these are mostly utility tools. Lightning Warp, however, has some unique properties which allow it to be a great Damage Spell. Its base damage is quite low - slightly lower than Arc, with low effectiveness of added damage at 90%, but the trick lies in it dealing damage twice, at the starting and at the final location, doubling the apparent numbers. It has a duration in between these two instances, and the goal is to reduce it as low as the game allows for. It will result in nearly-instant relocation. From that point on, to travel faster, it will be needed to invest in Cast Speed - to cast the Lightning Warp faster. To reduce the Duration get the high Gem Level, allocate Passives on the Skill Tree, and get the Helmet Enchantment - it should add up to around a 100% reduction in Lightning Warp Duration. The Spell will cost around 80 or more Mana, which is very high. To combat it, it is essential to get two Forbidden Jewels for the Trickster's Keystone Weave the Arcane, it makes all Travel Skills cost nothing.
It's an Omniscience Build, making it already one of the most expensive ones. Not to mention the Forbidden Jewels, these are extremely expensive too. We can't recommend this build to anyone with under 100 ex budget. The defenses are actually high - it uses Determination, Grace, Defiance Banner, and Arctic Armour - while constantly casting Lightning Warp and not moving, the character counts as being stationary. It's capable of reaching around 4k of Maximum Life and relatively low Energy Shield on top of that, it will be resupplied with Ghost Dance very efficiently. It has very high Armour, Evasion, and mediocre Block and Spell Suppression Chance, a Mistwalker Keystone, and Elusive buffs to take no extra damage from Critical Strikes. It's a very fast build, something like Flicker Strike that you have full control over. It takes some time to get used to, for example, you are not allowed to teleport over walls or even small curbs, which can often lead to sudden stops which is frustrating. Assassin is one of the best classes for it due to the abundance of Critical Strike-enhancing nodes and synergies with Power Charges Mechanics, later expanded on by equipping Void Batteries. If you can't afford Forbidden Jewel, play as a Trickster - it's a temporary solution.
You can also check our other Path of Exile builds right over here Odealo's Crafty Guides - Full List
1. Gameplay
The secret of having a manageable clear speed is to use Inpulasa's Broken Heart combined with a Gloves' eldritch implicit enabling your Shock to spread. Before the Shocked enemies explode on death you will spread this Ailment among the whole group with just one cast, making the mob density the only limiting factor. The similarity to Flicker Strike is once more highlighted. When fighting bosses stand directly at point-blank range and Cast Lightning Warp with high frequency. Orb of Storms will provide the supplementary damage, it Hits enemies when you do, similarly to Focused Ballista. Use it during boss fights. For a Guard Spell use Molten Shell, and for Auras - Determination, Grace, Defiance Banner, Wrath, and if you have any Mana left, Arctic Armour. Zealotry should be hooked up to Divine Blessing Support and Lifetap. Activate it only when you need more damage. As your Curse pick the most obvious one - the Assassin's Mark.
|
Full gameplay video: |
|
|

2. Build's PROS & CONS
| PROS |
|
| CONS |
|
3. Leveling tips
Start as an Assassin Spell Caster - that's a very general lead but there's not much you can do before equipping the essentials. After completing the first labyrinth you can immediately start specializing in Power Charges scaling and Critical Strikes. You can use Storm Brand, Arc, or a similar Spell that can deal Physical, Cold, or Lightning Damage - it is possible to allocate one of these big Elemental Damage Clusters at the top of a Skill Tree, Static Blows, Fingers of Frost, or Snowforged, and respec it later. You will take Unstable Infusion first, the Deadly Infusion, and by this time you can start to specialize in Critical Strikes only, not any of the specific Elemental Damage. Switch to Lightning Warp after acquiring the Gloves with Shock Spread, gettering the two Forbidden Jewels, and Duration low enough for it to feel comfortable.
Suggested leveling Gem setups:
| Arc setup | |
 |
Arc - a basic Lightning Spell, it has low single target damage but it's enough to get to the mapping phase |
 |
Arcane Surge Support - grants more Spell Damage and Mana Regeneration Rate |
 |
Added Lightning Damage Support - adds Lightning Damage to the Spell |
 |
Elemental Focus Support - grants more Elemental Damage, but makes you unable to cause any Elemental Ailment with the Spell |
| Utility Gems | |
 |
Clarity - use this Aura for faster Mana Regeneration Rate |
 |
Wrath - your Spells deal more Lightning Damage |
 |
Flame Dash - your default movement Skill |
 |
Conductivity - lowers Lightning Resistance of Cursed enemies |
Bandits:
When dealing with the bandits, KIll all of Them, Alira might seem useful, but the two additional points are still a better option
Leveling Skill Trees:
29 Points Skill Tree
Allocate some LIghtning or Elemental Damage and Maximum Life
58 Points Skill Tree
Get more Maximum Life, and allocate all the Maximum Power Charge nodes with Disciple of the Forbidden
Recommended leveling items:
 Le Heup of All - good Ring for leveling, it grants Attributes and a lot of Elemental Resistances Le Heup of All - good Ring for leveling, it grants Attributes and a lot of Elemental Resistances |
|
| (10-30)% increased Damage +(10-30) to all Attributes (10-30)% increased Rarity of Items found +(10-30)% to all Elemental Resistances |
 Goldrim - it gives you a lot of Elemental Resistances Goldrim - it gives you a lot of Elemental Resistances |
|
| +(30-50) to Evasion Rating 10% increased Rarity of Items found +(30-40)% to all Elemental Resistances Reflects 4 Physical Damage to Melee Attackers Level Requirement reduced by 100 (Hidden) |
 Tabula Rasa - has six, linked, white sockets Tabula Rasa - has six, linked, white sockets |
|
| Item has no level requirement and Energy Shield (Hidden) Item has 6 White Sockets and is fully linked (Hidden) |
 Praxis - a good Mana-related item, use it to overcome the high Mana Cost of Skills Praxis - a good Mana-related item, use it to overcome the high Mana Cost of Skills |
|
| +(20-30) to maximum Mana +(30-60) to maximum Mana Regenerate (3-6) Mana per second -(8-4) to Total Mana Cost of Skills 8% of Damage taken Recouped as Mana |
|
 Storm Prison - It's a perfectly-suited Wand that grants you an extra Power Charge and Spell Damage Storm Prison - It's a perfectly-suited Wand that grants you an extra Power Charge and Spell Damage |
|
| (11-15)% increased Spell Damage (40-60)% increased Physical Damage Adds 1 to (35-45) Lightning Damage (15-25)% increased Mana Regeneration Rate +1 to Maximum Power Charges (25-35)% chance to gain a Power Charge on Kill |
4. Final Skill Tree, Ascendancy Points, and Pantheon
Final Skill Tree:
98 Points Final Skill Tree (doesn't include Unique nor Cluster Jewels)
117 Points Path of Building (PoB) link
Ascendancy points:
Preferably in that order:
- Unstable Infusion
- Deadly Infusion
- Mistwalker
- Opportunistic
Pantheon:
Major God: Soul of Solaris: 6% additional Physical Damage Reduction while there; is only one nearby Enemy; 20% chance to take 50% less Area Damage from Hits
Minor God: Soul of Shakari: You cannot be Poisoned while there are at least 3 Poisons on you; 50% less Duration of Poisons on You
5. Final Gems links
| [DPS] Lightning Warp setup | |
 |
Lightning Warp - It's the main damaging Skill, remember that it deals damage twice if you manage to hit an enemy with the initial and final Warp. It's important to get one at level 21 - the Gem level will decrease duration. |
 |
Empower Support - increases the Gem Level of Lightning Warp |
|
Added Lightning Damage Support - adds Lightning Damage to the Spell |
 |
Power Charge on Critical Support - grants Power Charges with Critical Strikes, and grants more Spell Damage per Charge |
 |
Increased Area of Effect Support - increases Area of Effect, it will be much easier to overlap the Warp's Damage against single targets and to Hit enemies sprinkled on the map with low mob density |
 |
Increased Critical Damage Support - increases Critical Strike Multiplier, which is good as your Critical Strike Chance should be 100% |
| [UTILITY] Orb of Storms setup | |
 |
Orb of Storms - Orb of Storms can deal a fair amount of damage on its own under the right circumstances, its strike frequency scales up with your Cast Speed, and in addition to that it also strikes each time you use a Lightning Skill near the Orb |
 |
Lifetap Support - Most of the skills in this build are linked with Lifetap to Spend Life on them but no Mana. You're expected to reserve all of your Mana, the main and most expensive setup costs nothing after all. |
|
Power Charge on Critical Support |
|
Elemental Focus Support - Skill deals much more Elemental Damage but can't cause Shock or any other Elemental Ailment |
| [UTILITY] Zealotry setup | |
 |
Zealotry - Zealorty grants more Spell Damage and increased Critical Strike Chance for Spells. During Boss fights it creates Consecrated Ground. |
|
Lifetap Support |
 |
Divine Blessing Support - Zealotry is the least important Aura, link it with Divine Blessing and activate only when you need a DPS boost |
 |
Increased Duration Support - increases the Zealotry Duration |
| [UTILITY] Auras setup | |
 |
Determination - increases and adds Armour which mitigates Physical Damage Taken |
|
Wrath - Wrath simply grants you more Spell Damage |
 |
Grace - increases and adds Evasion Rating for a chance to avoid damage |
 |
Enlighten Support - linked Spells have higher Mana Reservation Efficiency |
| [UTILITY] Other Mana-reserving Spells | |
 |
Defiance Banner - The Defiance banner increases Armour and Evasion, which you have a lot of |
 |
Arctic Armour - it's used for Freeze Immunity and less Physical and Cold Damage taken while Stationary - you count as Stationary while casting Lightning Warp |
| [UTILITY] Assassin's Mark | |
 |
Assassin's Mark - It's the best Curse you can use grants more Critical Strike Chance and extra Critical Strike Multiplier |
|
Lifetap Support |
| [UTILITY] Molten Shell | |
 |
Molten Shell - The Guard Spell to mitigate Hit Damage you take, it scales up with Armour, which up have a lot of |
|
Lifetap Support |
|
|
6. Gear Setup
It's an Omniscience Build which is already an indicator of how expensive it is. You will need Crystallised Omniscience, Inpulsa's Broken Heart for a bearable clear speed, and two Void Batteries, as it's just the best Wand when having multiple Power Charges. It also requires a very expensive pair of Forbidden Jewels. The Rare items won't be cheap as well - Prefixes will be usually reserved for Maximum Life and Suffixes for Attributes. In a regular build, Suffixes is where you get the Resistances from, but because Omniscience will get you the required Resistances, look only for the Attributes there. To cap the default Resistances with Attributes only you will need around 1300 Omniscience, it's very much doable, to even put on the Void Batteries you will need around 1000 of it. For defenses look for Life and Chance to Suppress Spell Damage - it's a Suffix so don't prioritize it over Attributes. Armour and Evasion are Prefixes so there's no conflict there.
Our recommended items will:
- Cap your resistances
- Give you enough DPS/Life to start mapping successfully
|
Stat priorities on items:
|
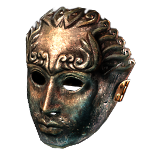 (Helmet) Rare Helmet - We recommend a mixed base Helmet - the purely Intelligence one can get you only up to 60 Intelligence, but a Dex-Int or Str-Int one has a chance for both, up to 55 Dexterity or Strength and 60 Intelligence, in the best-case scenario that is. Also, look for Life and Defences. One of Hunter's Suffixes can increase Intelligence but disables Eldritch Implicits. (Helmet) Rare Helmet - We recommend a mixed base Helmet - the purely Intelligence one can get you only up to 60 Intelligence, but a Dex-Int or Str-Int one has a chance for both, up to 55 Dexterity or Strength and 60 Intelligence, in the best-case scenario that is. Also, look for Life and Defences. One of Hunter's Suffixes can increase Intelligence but disables Eldritch Implicits. |
|
| Min. requirements: 50 Attributes +80 to Maximum Life Optional affixes: Armour Evasion Rating Spell Suppression Chance increased Intelligence Nearby Enemies have -#% to Lightning Resistance Socketed Gems are Supported by Level # Increased Area of Effect increased Area of Effect |
|
| Helmet enchantments: 30% reduced Lightning Warp Duration |
|
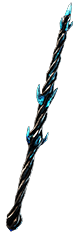
 (Weapon) Void Battery - The best-in-slot Wand for more Damage, it's perfect for a build valuing Cast Speed, Critical Strike Chance, and one which a lot of Power Charges. Use two of them. (Weapon) Void Battery - The best-in-slot Wand for more Damage, it's perfect for a build valuing Cast Speed, Critical Strike Chance, and one which a lot of Power Charges. Use two of them. |
|
| (36-40)% increased Spell Damage 80% reduced Spell Damage (10-20)% increased Cast Speed (50-65)% increased Global Critical Strike Chance +(40-50) to maximum Mana +1 to Maximum Power Charges 25% increased Spell Damage per Power Charge |
|
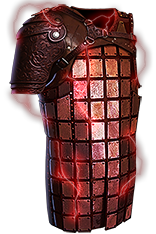 (Body Armour) Inpulsa's Broken Heart - It makes Shocked enemies Explode on kill, and it's an obligatory property as the Lightning Warp itself is not suited for dealing with multiple enemies. (Body Armour) Inpulsa's Broken Heart - It makes Shocked enemies Explode on kill, and it's an obligatory property as the Lightning Warp itself is not suited for dealing with multiple enemies. |
|
| +(60-80) to maximum Life (20-50)% increased Damage if you have Shocked an Enemy Recently (15-25)% increased Effect of Shock Shocked Enemies you Kill Explode, dealing 5% of their Life as Lightning Damage which cannot Shock Unaffected by Shock |
|
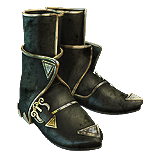 (Boots) Rare Boots - Boots of a base with Dexterity or mixed Dexterity have a chance to grant Spell Suppression Chance, but the mixed bases have of course chance for additional Attribute besides Dexterity. Get ones with a Movement Speed bonus and Maximum Life. One of Hunter's Suffixes can increase Strength if you have a lot of it. (Boots) Rare Boots - Boots of a base with Dexterity or mixed Dexterity have a chance to grant Spell Suppression Chance, but the mixed bases have of course chance for additional Attribute besides Dexterity. Get ones with a Movement Speed bonus and Maximum Life. One of Hunter's Suffixes can increase Strength if you have a lot of it. |
|
| Min. requirements: 25% Movement Speed +50 to Maximum Life 15% chance to Suppress Spell Damage 50 Attributes Optional affixes: you have Tailwind if you have dealt a Critical Strike Recently Chaos Resistance increased Strength |
|
| Min. requirements: +50 to Maximum Life 50 Attributes Shocks you inflict spread to other Enemies within a Radius of # Optional affixes: Chance to Suppress Spell Damage Armour Evasion Rating Chaos Resistance Attributes |
|
 (Belt) Rare Belt - A regular Belt is capable only of granting Strength, but a Synthesised one can increase your Attributes and it's much more beneficial than the numerical value, but also more expensive. Other than that seek Maximum Life. (Belt) Rare Belt - A regular Belt is capable only of granting Strength, but a Synthesised one can increase your Attributes and it's much more beneficial than the numerical value, but also more expensive. Other than that seek Maximum Life. |
|
| Min. requirements: +90 to Maximum Life 60 to Strength Optional affixes: increased Maximum Life increased Intelligence increased Attributes |
|
 (Belt) String of Servitude - String of Servitude has the possibility of increasing two of your Attributes by up to 18% each, needless to say, it's the best possible option. (Belt) String of Servitude - String of Servitude has the possibility of increasing two of your Attributes by up to 18% each, needless to say, it's the best possible option. |
|
| <(1-2) Random corrupted implicit modifiers> Implicit Modifier magnitudes are tripled Level Requirement reduced by 100 (Hidden) Corrupted |
|
 (Amulet) Crystallised Omniscience - It's the core element of the build that transforms all of your Attributes in Omniscience which grants Elemental Resistances and Elemental Resistances Penetration. (Amulet) Crystallised Omniscience - It's the core element of the build that transforms all of your Attributes in Omniscience which grants Elemental Resistances and Elemental Resistances Penetration. |
|
| +(10-16) to all Attributes Modifiers to Attributes instead apply to Omniscience +1% to all Elemental Resistances per 10 Omniscience Penetrate 1% Elemental Resistances per 10 Omniscience Attribute Requirements can be satisfied by (15-25)% of Omniscience |
|
| Recommended Anointments: Charisma Utmost Might Utmost Swiftness Window of Opportunity |
|
 (Ring) Rare Ring - Rings are where you can get Attributes of all kinds, and increased Attributes or extra Maximum Power Charges from Synthesised Implicit modifiers, which are expensive, but the whole build is expensive already so you might as well get them. Cogwork Rings might be interesting as these allow for an Extra Suffix but one less Prefix. Besides that look for Maximum Life. (Ring) Rare Ring - Rings are where you can get Attributes of all kinds, and increased Attributes or extra Maximum Power Charges from Synthesised Implicit modifiers, which are expensive, but the whole build is expensive already so you might as well get them. Cogwork Rings might be interesting as these allow for an Extra Suffix but one less Prefix. Besides that look for Maximum Life. |
|
| Min. requirements: +80 to Maximum Life 150 Attributes Optional affixes: increased Attributes increased Intelligence +1 to Maximum Power Charges Global Critical Strike Multiplier Critical Strike Chance Chaos Resistance |
|
 (Jewel) Rare Jewels - Attributes and Maximum Life are usually the enough, the two out of two possible suffixes should grat Attributes, Prefixes are for Life and Cas Speed or Lightning Damage (Jewel) Rare Jewels - Attributes and Maximum Life are usually the enough, the two out of two possible suffixes should grat Attributes, Prefixes are for Life and Cas Speed or Lightning Damage |
|
| Recommended affixes: Attributes Critical Strike Chance increased Cast Speed with Lightning Skills increased Maximum Life |
|
 (Jewel) Large Cluster Jewel - Large Cluster Jewels might get you some useful Notables, or you might get one that increases Cast Speed, grants Attributes, has 12 small nodes, and increased effectiveness of these nodes (Jewel) Large Cluster Jewel - Large Cluster Jewels might get you some useful Notables, or you might get one that increases Cast Speed, grants Attributes, has 12 small nodes, and increased effectiveness of these nodes |
|
| Recommended affixes: 1 Added Passive Skill is Doryani's Lesson 1 Added Passive Skill is Storm Drinker 1 Added Passive Skill is Widespread Destruction |
|
 (Jewel) Medium Cluster Jewel - Magnifier, Vast Power, and Towering Threat are the three best Notables to be found on Medium Cluster Jewels. Vast Power is especially good, it increases your Area of Effect per Power Charge. Towering Threat grants Maximum Life and increased Area Damage. (Jewel) Medium Cluster Jewel - Magnifier, Vast Power, and Towering Threat are the three best Notables to be found on Medium Cluster Jewels. Vast Power is especially good, it increases your Area of Effect per Power Charge. Towering Threat grants Maximum Life and increased Area Damage. |
|
| Recommended affixes: 1 Added Passive Skill is Magnifier 1 Added Passive Skill is Vast Power 1 Added Passive Skill is Towering Threat |
|
  (Jewel) Forbidden Flesh & Forbidden Flame - Allocate Wwave the Arcane from Trickster's Skill Tree, it's very important for it will make your Lightning Warp cost no Mana and increase your Cast Speed by 20%. It also has some insignificant Mana bonuses. (Jewel) Forbidden Flesh & Forbidden Flame - Allocate Wwave the Arcane from Trickster's Skill Tree, it's very important for it will make your Lightning Warp cost no Mana and increase your Cast Speed by 20%. It also has some insignificant Mana bonuses. |
|
| Allocates <<Random Ascendancy Notable>> if you have the matching modifiers on Forbidden Flesh Allocates <<Random Ascendancy Notable>> if you have the matching modifiers on Forbidden Flame |
|
 (Jewel) Militant Faith - Get the Dominus Variant. Transform your Agnostic Keystone into Inner Conviction. It will grant you more Damage per Power Charge, with 10 Power Charges it will be 30% more Damage. (Jewel) Militant Faith - Get the Dominus Variant. Transform your Agnostic Keystone into Inner Conviction. It will grant you more Damage per Power Charge, with 10 Power Charges it will be 30% more Damage. |
|
| Carved to glorify (2000-10000) new faithful converted by High Templar Dominus Passives in radius are Conquered by the Templars Historic <two random mods of devotion> |
|
 (Jewel) Split Personality - Your Skill Tree is not specifically suited to maximize the gain from Split Personalities, nonetheless, it will still grant around 100 extra Omnisicence when placed far enough, which is good. Look for the ones with Intelligence and other Attribute. (Jewel) Split Personality - Your Skill Tree is not specifically suited to maximize the gain from Split Personalities, nonetheless, it will still grant around 100 extra Omnisicence when placed far enough, which is good. Look for the ones with Intelligence and other Attribute. |
|
| This Jewel's Socket has 25% increased effect per Allocated Passive Skill between it and your Class' starting location <Two random modifiers> |
|
 (Jewel) Impossible Escape - Passives around Magebane are very beneficial, and very far from your main branch. If you have it, pick the reduced Duration nodes and Window of Opportunity, Reflexes, and Profane Chemistry (Jewel) Impossible Escape - Passives around Magebane are very beneficial, and very far from your main branch. If you have it, pick the reduced Duration nodes and Window of Opportunity, Reflexes, and Profane Chemistry |
|
| Passive in Radius of <<Keystone>> can be Allocated without being connected to your tree | |
 (Jewel) Watcher's Eye - You're using only Wrath, Determination, Grace, and occasionally Zealotry. We recommend the Wrath modifiers for increased Critical Strike Chance, as it grants a lot of it, Lightning Penetration, or other mods from Determination or Grace, as Zealotry is not permanent and unreliable when linked with Divine Blessing. (Jewel) Watcher's Eye - You're using only Wrath, Determination, Grace, and occasionally Zealotry. We recommend the Wrath modifiers for increased Critical Strike Chance, as it grants a lot of it, Lightning Penetration, or other mods from Determination or Grace, as Zealotry is not permanent and unreliable when linked with Divine Blessing. |
|
| (4-6)% increased maximum Energy Shield (4-6)% increased maximum Life (4-6)% increased maximum Mana <Two or Three random aura modifiers> |
|
|
Other suggested Flasks:
|
|
     |
|
|
If you have any other build requests please leave that in the comments below. We are always open to suggestions and constructive feedback.
Pictures used in this article are the intellectual property of Grinding Gear Games.
