
Lightning Arrow Hierophant
Lightning Arrow/Siege Ballista Build that utilizes Mana and Leech mechanics for its own unique playstyleOverleech Lightning Arrow
Hierophant Build
Updated for Patch 3.21
The Best Crafty Guides by Odealo
| Guide notes |
| May 1, 2023 -Build created |
| Build Overview | |||
| Tags: [ATTACK] [ELEMENTAL] [HYBRID] [RANGED] | |||
|
Budget: Defenses: |
|
Boss DPS: AoE: |
|
Hierophant is a rather unusual choice for a Bow Character, but it works out surprisingly well. By combining the Archer and Totem Archetype, you will have the best of the two worlds. Bows have a tendency to use Ballistas to supplement their Single-target anyway, and this Build is no exception. We push the Totems to the maximum, while still retaining the Bow gameplay style. You will use the Lightning Arrow to clear 99% of the content and deploy powerful Siege Ballistas to deal with tougher Enemies.
Thanks to the Hierophant Ascendency and Mind over Matter Keystone you will redirect 40% of Damage into your Mana first. Then, we use the Mind of the Council and Arcane Cloak to gain massive amounts of Damage from your Mana, making it very cost-effective to scale that resource. Usually, such Builds have a hard time getting enough Mana Regeneration to comfortably sustain using their Skills and taking Damage, but since you deal plenty of Damage with your Attacks, you can easily Leech it back.
Technically it is possible to fit in Critical Strikes, but it would be a huge opportunity cost. Instead, we utilize the Precise Technique Keystone and reworked Voice of the Storm Amulet, which grants us Lucky Damage with non-Critical Strikes. Precise Technique requires a bit of investment into Accuracy Rating, but it is not much more than the regular investments you would have to do to reach a 100% Hit Chance anyway. And of course, since it's a Projectile Based Build, we use the Vengeant Cascade Anointment which easily doubles our Damage output.
It is a very safe Build. You can easily reach over 4000 combined Life and Energy Shield pool, and almost half of the Damage you take is split into Mana. You will Leech Life, Mana, and Energy Shield all at once, which grants you amazing Recovery. On top of that, you will have the Arcane Cloak every few seconds that can absorb plenty of Damage. Spell Suppression is nearly capped just by your Passive Tree, and permanent Endurance Charges grant some missing Physical Damage Reduction.
The entry cost of this Build is rather low. The modifier combinations you would want on your Items are rather a niche, and the Mana Archetype is usually undervalued, so you can get very lucrative deals on your Gear pieces.
You can also check our other Path of Exile builds right over here Odealo's Crafty Guides - Full List
1. Gameplay
It is a very smooth and relaxing gameplay. You will use the Lightning Arrow to kill most enemies and help yourself with Siege Ballistas to deal with harder Enemies. Your Mark, Ensnaring Arrow, and Frenzy will be triggered automatically so you don't have to worry about buffs and debuffs. You can automate your Arcane Cloak but you can also use it manually to coordinate your Damage Burst or tank a particularly dangerous Attack.
|
|
|
|
2. Build's PROS & CONS
| PROS |
|
| CONS |
|
3. Leveling tips
Leveling is a bit tough since you will spend most of your early Points on Traveling nodes alone. It is suggested to have some leveling Gear prepared upfront to compensate for the lack of Damage. Thankfully, there are a lot of powerful Leveling Uniques for a Bow Character, so it only takes a bit of preparation to have a smooth leveling experience. You should also pick up nearby Damage Notables that will help you go through the Campaign, and remove them once you can scale your Damage via other means.
Suggested leveling Gem setups:
| Lightning Arrow setup | |
 |
Lightning Arrow - you can use your Bow Attack as soon as you get 12 level. You will need to buy this Gem from Lilly in your Hideout or from other Players. |
 |
Added Lightning Damage Support - grants additional Lightning Damage for your Attacks. |
 |
Added Cold Damage Support - grants Cold Damage for your Attack. |
 |
Lesser Multiple Projectiles Support - you will need this Support to have a decent Clear at first. |
 |
Elemental Damage with Attacks Support - improves the Elemental Damage you deal with Lightning Arrow. |
 |
Trinity Support - grants lots of Elemental Damage and Elemental Penetration if you deal similar amounts of Cold and Lightning Damage. |
| Siege Ballista setup | |
 |
Siege Ballista - you can start using your Secondary Setup around Act 3. Since you probably won't have access to the second 6-link, it is best to use it in 4-link or mix with Lightning Arrow for a double 5-link. |
 |
Added Lightning Damage Support - adds the Lightning Damage to Attacks of your Ballistas. |
 |
Added Cold Damage Support - grants Cold Damage for your Ballistas. |
 |
Elemental Damage with Attacks Support - improves the Elemental Damage you deal with Siege Ballista. |
| Aura setup | |
 |
Wrath - grants tons of Lightning Damage for your Attacks. You can get Level 21 Wrath Aura as a Corrupted implicit on a Rare Ring that requires 36 level to wear. |
 |
Herald of Thunder - grants a bit of Lightning Damage for your Attacks. |
 |
Precision - grants lots of Accuracy Rating which you will desperately need at lower levels. |
| Utility setup | |
 |
Frostblink - an instant Teleport that leaves Chilled Ground on both teleport locations. |
 |
Blink Arrow - teleports you to the Arrow location. It is quite slow to use at lower levels, but it can cover a great distance. |
 |
Sniper's Mark - increases the Damage of your Projectiles and makes them Split toward nearby Enemies. |
 |
Steelskin - absorbs a bit of Damage and stops Bleeding Effects. |
Bandits:
Kill all Bandits to get additional 2 Passive Tree Skill Points
Leveling Skill Trees:
You should pick up nearby Damage Notables to improve your leveling experience a bit. Those should be respected later.
30 Points Passive Tree
We recommend this order:
1) Holy Dominion 2) Divine Fervour 3) Precision 4) Ash, Frost, and Storm 5) Sentinel
72 Points Passive Tree
Allocate:
1) Precise Technique 2) Far Sight 3) Weathered Hunter 4) Thick Skin 5) Avatar of the Hunt 6) Entrench 7) Essence Sap 8) Watchtowers 9) Primeval Force 10) Herbalism
Notables to be removed once you reach Maps: Holy Dominion, Divine Fervour, Precision, Ash, Frost, and Storm; Avatar of the Hunt, Weathered Hunter
Recommended leveling items:
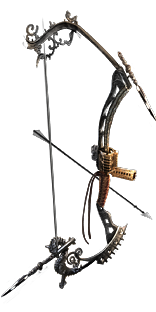 Storm Cloud - grants plenty of Damage and Attack Speed. Try to find one with a maximum Attack Speed roll, since they are cheap anyway. Storm Cloud - grants plenty of Damage and Attack Speed. Try to find one with a maximum Attack Speed roll, since they are cheap anyway. |
|
| No Physical Damage Adds 1 to 85 Lightning Damage (36-50)% increased Attack Speed |
|
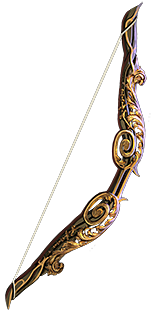 Roth's Reach - can be used at level 18, and will be good enough to carry you to the Maps. It grants additional Chains to improve your Clear as you don't have that many projectiles at first. Roth's Reach - can be used at level 18, and will be good enough to carry you to the Maps. It grants additional Chains to improve your Clear as you don't have that many projectiles at first. |
|
| (60-80)% increased Physical Damage Skills Chain +2 times 30% increased Projectile Speed (60-80)% increased Elemental Damage with Attack Skills |
|
 Blackheart - can be worn at level 1 and grants tons of Chaos Damage for your Attacks. Blackheart - can be worn at level 1 and grants tons of Chaos Damage for your Attacks. |
|
| Adds (10-15) to (20-25) Chaos Damage to Attacks Regenerate (10-15) Life per second 10% chance to Cause Monsters to Flee |
|
 Replica Tasalio's Sign - you can start using them at level 20. Those grant an insane amount of Cold Damage for your Attacks and make you Immune to Chill. Replica Tasalio's Sign - you can start using them at level 20. Those grant an insane amount of Cold Damage for your Attacks and make you Immune to Chill. |
|
| +(20-30)% to Cold Resistance Adds (15-20) to (25-35) Cold Damage to Spells and Attacks +(200-300) to Evasion Rating Your Cold Damage cannot Freeze Immune to Chill Adds 60 to 80 Cold Damage against Chilled Enemies |
|
 Corrupted Ring - on the market you can find a cheap Corrupted Ring that grants you level 21 Wrath. At that level, Wrath grants 17 to 267 Lightning Damage for your Attacks, which is a lot. Such Rings can be worn at Level 36 if you are not too picky about remaining modifiers. Corrupted Ring - on the market you can find a cheap Corrupted Ring that grants you level 21 Wrath. At that level, Wrath grants 17 to 267 Lightning Damage for your Attacks, which is a lot. Such Rings can be worn at Level 36 if you are not too picky about remaining modifiers. |
|
| Mandatory modifier: Grants Level 21 Wrath Skill (Implicit) |
|
 Tabula Rasa - it is a mandatory Unique to make your leveling smooth. It grants you tons of Damage via easy access to a 6-link setup. Tabula Rasa - it is a mandatory Unique to make your leveling smooth. It grants you tons of Damage via easy access to a 6-link setup. |
|
| Item has no level requirement and Energy Shield (Hidden) Item has 6 White Sockets and is fully linked (Hidden) |
|
 Goldrim - a very useful Helmet that grants you all Elemental Resistances. You don't need to cap your Resistances during leveling, but it makes it significantly easier. Goldrim - a very useful Helmet that grants you all Elemental Resistances. You don't need to cap your Resistances during leveling, but it makes it significantly easier. |
|
| +(30-50) to Evasion Rating 10% increased Rarity of Items found +(30-40)% to all Elemental Resistances Reflects 4 Physical Damage to Melee Attackers Level Requirement reduced by 100 (Hidden) |
|
 Prismweave - this Belt provides you with a lot of Elemental Damage for your Attacks. It also increases your Damage during any Flask, which you should have active at most times anyway. Prismweave - this Belt provides you with a lot of Elemental Damage for your Attacks. It also increases your Damage during any Flask, which you should have active at most times anyway. |
|
| Adds (14-16) to (30-32) Fire Damage to Attacks Adds (10-12) to (24-28) Cold Damage to Attacks Adds 1 to (60-68) Lightning Damage to Attacks +(6-15)% to all Elemental Resistances 30% increased Elemental Damage with Attack Skills during any Flask Effect |
|
 Karui Ward - grants you Projectile Damage and Speed. Furthermore, it increases your Movement Speed, making it one of the best Amulets to Level with. Karui Ward - grants you Projectile Damage and Speed. Furthermore, it increases your Movement Speed, making it one of the best Amulets to Level with. |
|
| +(20-30) to Dexterity +(20-30) to Strength +100 to Accuracy Rating 30% increased Projectile Speed 10% increased Movement Speed 30% increased Projectile Damage |
|
 Wanderlust - it is a common pair of Boots that grants decent Movement Speed, some Mana Regeneration, and makes you Immune to Freeze. Wanderlust - it is a common pair of Boots that grants decent Movement Speed, some Mana Regeneration, and makes you Immune to Freeze. |
|
| +5 to Dexterity +(10-20) to maximum Energy Shield (20-40)% increased Mana Regeneration Rate 20% increased Movement Speed Cannot be Frozen |
|
 Seven-League Step - this pair of Boots grants you insane amounts of Movement Speed that will allow you to speed through the whole Campaign. Seven-League Step - this pair of Boots grants you insane amounts of Movement Speed that will allow you to speed through the whole Campaign. |
|
| 50% increased Movement Speed Level Requirement reduced by 100 (Hidden) |
|
4. Final Skill Tree, Ascendancy Points, and Pantheon
Final Skill Tree:
108 Points Final Passive Tree (doesn't include Cluster or Unique Jewels)
119 Points Path of Building (PoB) link
Ascendancy points:
Preferably in this order:
- Pursuit of Faith
- Ritual of Awakening
- Divine Guidance
- Conviction of Power
Pantheon:
Major God: Brine King: You cannot be Stunned if you've been Stunned in the past 2 seconds, Cannot be Frozen, 50% reduced Effect of Chill on you
Minor God: Soul of Ralakesh: 25% reduced Physical Damage over Time taken while moving; Moving while Bleeding doesn't cause you to take extra Damage
5. Final Gems links
| [DPS] Lightning Arrow setup | |
 |
Lightning Arrow - shots an Arrow that Hits 3 nearby enemies when collided with the target. It has increased the effectiveness of Shock. |
 |
Elemental Damage with Attacks Support - increases the Elemental Damage you deal with Attacks. The Awakened version allows you to ignore Elemental Reflect. |
 |
Lightning Penetration Support - it grants you Lightning Penetration and the Awakened Version grants a small chance to inflict Lightning Exposure on Hit. |
 |
Inspiration Support - lowers your Mana Costs and increases your Elemental Damage. |
 |
Faster Attacks Support - grants a decent Boost for Lightning Arrow but an even better Boost for your Siege Ballistas since we are also using the Focused Ballista Support there. |
 |
Pierce Support - allows up to 6 Pierces if you use the Anomalous Version. You don't want Global Pierce modifiers since it would break the Ensnaring Arrow interaction. |
| [DPS] Siege Ballista setup | |
 |
Siege Ballista - deploys a Totem that shoots Piercing projectiles. It has greatly reduced Attack Speed, but inherently adds up to 3 maximum summoned Totems. |
 |
Elemental Damage with Attacks Support - again, it is the best Damage Support for Elemental Attacks. |
 |
Lightning Penetration Support - grants a lot of Lightning Penetration for your Totems. If you have only 1 Awakened Gem, put it in this Setup. |
 |
Barrage Support - changes the behavior of Projectiles so they all can Hit the same Target many times. |
 |
Focused Ballista Support - makes your Ballistas shot only when you also perform an Attack. Since you have a much better Attack Speed, it is a massive bonus to total Damage output. |
 |
Elemental Focus Support - despite Ballistas dealing the majority of your Damage, they inflict rather weak Shocks. You can disable the Ailments and get much more Damage in return. |
| [UTILITY] Wrath | |
 |
Wrath - grants a lot of Lightning Damage for your Attacks and gives access to useful Unique Jewel modifiers. |
 |
Eternal Blessing - makes your Aura free, but disables all other Auras. You will need your Mana to be Unreserved, so it is a good deal. |
| [UTILITY] Sniper's Mark | |
 |
Sniper's Mark - increases the Damage of your Projectile Hits and makes them Split towards nearby Enemies. |
 |
Mark on Hit Support - automatically applies this Mark to every Rare and Unique Enemy you Hit with your Attacks. |
| [UTILITY] Manaforged setup | |
 |
Ensnaring Arrow - Ensnared Enemies take increased Damage from your Projectiles. It only Ensnares the last Enemy it Hits, so you shouldn't have any source of Pierce for this Skill. |
 |
Frenzy - grants you Frenzy Charge each time it Hits any Enemy. |
 |
Innervate Support - Divergent Quality of this Support Gem grants you the chance to gain this Damage Buff if supported Skill Shock an Enemy. |
 |
Manaforged Arrows Support - Triggers linked Bow Skills when you spend enough Mana with any other Bow Skill. |
| [UTILITY] Arcane Cloak and Flame Dash | |
 |
Arcane Cloak - consumes a large portion of your Mana to grant you an absorbing shield and added Lightning Damage based on the amount of Mana consumed. |
 |
Flame Dash - quickly teleports you in a short distance. It can store up to 3 charges. Quality increases the Cooldown Recovery Rate. |
 |
Increased Duration Support - increases the Duration of your Arcane Cloak. |
 |
Enhance Support - increases the Quality of supported Gems, making your Arcane Cloak last longer, and Flame Dash recover faster. |
|
|
6. Gear Setup
On your Gear, you will want lots of Life, Mana, and Accuracy Rating. You will also want various sources of increased Damage, since you barely have any on your Passive Tree, making them highly effective. You can use modifiers such as Elemental, Projectile, Lightning, Attack Damage, or even Projectile Speed thanks to the Bow Mastery. Attack Speed and additional Projectiles are also very useful in that regard. Precise Technique requires you to have more Accuracy than maximum Life, so you should control how much Accuracy you have with each upgrade. You might need to grab nearby Accuracy Notables on Passive Tree if you can't get enough on your Gear, but it should be only a temporary solution. Your Spell Suppression is almost capped just with the Passive Tree, but if you want to have a reliable and unconditional 100% chance to Suppress Spell Hits, you will need it on your Boots, or raise your Dexterity Attribute way higher.
|
Stat priorities on items:
|
 (Helmet) Mind of the Council - this Helmet grants you lots of Mana, additional protection against Lightning Damage, and tons of Damage for your Attacks. (Helmet) Mind of the Council - this Helmet grants you lots of Mana, additional protection against Lightning Damage, and tons of Damage for your Attacks. |
|
| (230-260)% increased Evasion and Energy Shield +(15-20) to maximum Energy Shield (20-30)% increased maximum Mana 10% chance to Shock +20% chance to be Shocked 30% of Lightning Damage is taken from Mana before Life Attack Skills have Added Lightning Damage equal to 6% of maximum Mana Lose 3% of Mana when you use an Attack Skill |
|
| Helmet enchantments: Siege Ballista Attack Speed/Damage Sniper Mark Effect Arcane Cloak Spends an additional #% of current Mana |
|
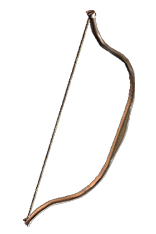 (Weapon) Rare Bow - use a Bow with very fast Attack Speed, so you can benefit from other Sources of Added Damage such as the Arcane Cloak. You should prioritize the Lightning Damage, but Cold is also useful to inflict Chills. Other than that, look for a chance to deal Double Damage, Accuracy Rating, or even Shaper's modifier that grants more Attack Damage for socketed Ballistas. (Weapon) Rare Bow - use a Bow with very fast Attack Speed, so you can benefit from other Sources of Added Damage such as the Arcane Cloak. You should prioritize the Lightning Damage, but Cold is also useful to inflict Chills. Other than that, look for a chance to deal Double Damage, Accuracy Rating, or even Shaper's modifier that grants more Attack Damage for socketed Ballistas. |
|
| Min. requirements: +1000 Elemental DPS Optional affixes: Accuracy Rating 10% chance to deal Double Damage Attacks with this Weapon Penetrate (11-13)% Elemental Resistances Socketed Skills deal 20% more Attack Damage |
|
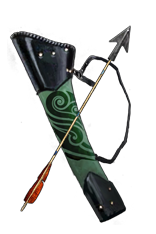 (Quiver) Rare Quiver - on a Quiver you want as many modifiers that increase your Damage as possible. Thanks to the Bow Mastery you can also use the Projectile Speed modifiers. Attack Speed, Additional Arrows, or Accuracy Rating is also welcome here. Try to avoid having additional Pierce here. (Quiver) Rare Quiver - on a Quiver you want as many modifiers that increase your Damage as possible. Thanks to the Bow Mastery you can also use the Projectile Speed modifiers. Attack Speed, Additional Arrows, or Accuracy Rating is also welcome here. Try to avoid having additional Pierce here. |
|
| Min. requirements: +60 to maximum Life +50% increased Damage with Bows Optional affixes: Accuracy Rating increased Attack Speed increased Projectile Speed Bow Attacks fire an additional Arrow |
|
 (Body Armour) Cloak of Defiance - a good starting Armour that grants you plenty of flat Mana and Mana Regeneration, and saves you 1 Passive Skill Point. (Body Armour) Cloak of Defiance - a good starting Armour that grants you plenty of flat Mana and Mana Regeneration, and saves you 1 Passive Skill Point. |
|
| (300-400)% increased Evasion and Energy Shield +(100-150) to maximum Mana Regenerate 1% of Mana per second Mind Over Matter |
|
 (Body Armour) Rare Armour - on a Rare Armour you can get lots of Life, Mana, and Spell Suppression Chance. You can also craft a modifier to take part of the Physical Damage taken as Elemental, or the increased effect of Mind over Matter Keystone while focused. (Body Armour) Rare Armour - on a Rare Armour you can get lots of Life, Mana, and Spell Suppression Chance. You can also craft a modifier to take part of the Physical Damage taken as Elemental, or the increased effect of Mind over Matter Keystone while focused. |
|
|
Min. requirements: |
|
 (Boots) Rare Boots - you will need plenty of Life, Mana, and Movement Speed on your Boots. You should also try to get Spell Suppression Chance and Elemental Resistances here. (Boots) Rare Boots - you will need plenty of Life, Mana, and Movement Speed on your Boots. You should also try to get Spell Suppression Chance and Elemental Resistances here. |
|
| Min. requirements: +70 to maximum Life +50 to maximum Mana 50% total Elemental Resistances 30% increased Movement Speed Optional affixes: Attributes chance to gain Onslaught for 4 seconds on Kill chance to Suppress Spell Damage |
|
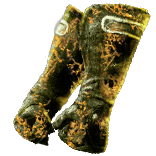 (Gloves) Breathstealer - those can give you additional Anointment, Attack Speed, Resistances, and some bonus Mana. Blighted Spores grant you random Aura if you are nearby, which is pretty useful during Map Clear, but not so much when fighting singular Bosses. You can easily find ones with useful Corruption such as additional Attack Speed or Frenzy Charge. (Gloves) Breathstealer - those can give you additional Anointment, Attack Speed, Resistances, and some bonus Mana. Blighted Spores grant you random Aura if you are nearby, which is pretty useful during Map Clear, but not so much when fighting singular Bosses. You can easily find ones with useful Corruption such as additional Attack Speed or Frenzy Charge. |
|
| (100-150)% increased Armour and Evasion +(30-50) to maximum Mana +(10-16)% to all Elemental Resistances (5-10)% increased Attack and Cast Speed Create a Blighted Spore when your Skills or Minions Kill a Rare Monster |
|
| Recommended Anointment: Surveillance |
|
 (Gloves) Rare Gloves - pair of Rare Gloves should grant you the usual defensive modifiers such as Life, Mana, or Spell Suppression. Rage Generation from Eldritch Implicit makes up for the loss of Anointment, and you have room to get lacking Resistances or Accuracy Rating. (Gloves) Rare Gloves - pair of Rare Gloves should grant you the usual defensive modifiers such as Life, Mana, or Spell Suppression. Rage Generation from Eldritch Implicit makes up for the loss of Anointment, and you have room to get lacking Resistances or Accuracy Rating. |
|
| Min. requirements: +70 to maximum Life +50 to maximum Mana 60% total Elemental Resistances Optional affixes: Gain 1 Rage on Hit with Attacks, no more than once every 1.2 seconds +x to Accuracy Rating Attack Speed chance to Suppress Spell Damage |
|
 (Belt) Graven's Secret - since you have no use for Power Charges, you can convert them into Absorption Charges instead. This will grant you 48% of Elemental Damage Recouped as Energy Shield. You can also get a Corrupted Implicit that increases your global Energy Shield or grants you Elemental Resistances. (Belt) Graven's Secret - since you have no use for Power Charges, you can convert them into Absorption Charges instead. This will grant you 48% of Elemental Damage Recouped as Energy Shield. You can also get a Corrupted Implicit that increases your global Energy Shield or grants you Elemental Resistances. |
|
| +(60-70) to maximum Energy Shield (16-20)% increased maximum Mana +(40-60)% to Lightning Resistance +1 to Maximum Power Charges Modifiers to Minimum Power Charges instead apply to Minimum Absorption Charges Maximum Absorption Charges is equal to Maximum Power Charges Gain Absorption Charges instead of Power Charges |
|
 (Belt) Rare Belt - on a Rare Belt you can find a lot of Life, Mana, and Resistance modifiers. It can also increase your Damage and grant you an Abyss socket if you use a Stygian Vise as a Base. (Belt) Rare Belt - on a Rare Belt you can find a lot of Life, Mana, and Resistance modifiers. It can also increase your Damage and grant you an Abyss socket if you use a Stygian Vise as a Base. |
|
| Min. requirements: +70 to Maximum Life +50 to maximum Mana 50% total Elemental Resistances Optional affixes: % Increased Maximum Life Attributes Chaos Resistances Elemental Damage with Attacks |
|
 (Jewel) Rare Abyss Jewel - you can get lots of flat Life, Mana, and Accuracy Rating here. Other than that, you can get Added Damage for your Attacks, a Chance to gain Phasing on Kill, a chance to Blind Enemies you Hit, or various Elemental Avoidances. (Jewel) Rare Abyss Jewel - you can get lots of flat Life, Mana, and Accuracy Rating here. Other than that, you can get Added Damage for your Attacks, a Chance to gain Phasing on Kill, a chance to Blind Enemies you Hit, or various Elemental Avoidances. |
|
| Min. requirements: +30 to maximum Life +30 to maximum Mana Optional affixes: Attributes Resistances Added Elemental Damage to Attacks Corrupted Blood cannot be inflicted on you chance to Blind Enemies you Hit |
|
 (Amulet) Voice of the Storm - it is a very powerful Amulet that grants you Lucky Damage, which means it will be rolled twice and choose the best outcome. It also grants you plenty of Mana, Lightning Damage, and Attributes. (Amulet) Voice of the Storm - it is a very powerful Amulet that grants you Lucky Damage, which means it will be rolled twice and choose the best outcome. It also grants you plenty of Mana, Lightning Damage, and Attributes. The Vengeant Cascade Anointment is mandatory, as it simply doubles your Damage. |
|
| 50% increased Lightning Damage +(10-15) to all Attributes (10-20)% increased maximum Mana Lightning Damage with Non-Critical Strikes is Lucky |
|
| Recommended Anointments: Vengeant Cascade |
|
 (Ring) Rare Ring - those can give you lots of Life and Mana. Other than that, try to get some Accuracy Rating, Resistances, or Attribute modifiers. You can use the Fertile Catalysts to boost Life and Mana modifiers even further. (Ring) Rare Ring - those can give you lots of Life and Mana. Other than that, try to get some Accuracy Rating, Resistances, or Attribute modifiers. You can use the Fertile Catalysts to boost Life and Mana modifiers even further. |
|
| Min. requirements: +60 to Maximum Life +60 to Maximum Life Optional affixes: Resistances Attributes Accuracy Rating Elemental Damage with Attacks Mana Regeneration |
|
 (Jewel) Rare Jewels - on your Jewels you can find missing Resistances, Attributes, and Accuracy Rating. They should also boost your Life and Mana. (Jewel) Rare Jewels - on your Jewels you can find missing Resistances, Attributes, and Accuracy Rating. They should also boost your Life and Mana. |
|
| Recommended affixes: increased maximum Life increased maximum Mana increased Accuracy Rating Resistances Attributes |
|
 (Jewel) Watcher's Eye - you will be using only one Aura, so the choice is rather straightforward. Getting multiple modifiers for one Aura is possible, although rather costly. (Jewel) Watcher's Eye - you will be using only one Aura, so the choice is rather straightforward. Getting multiple modifiers for one Aura is possible, although rather costly. |
|
| (4-6)% increased maximum Energy Shield (4-6)% increased maximum Life (4-6)% increased maximum Mana <Two or Three random aura modifiers> Recommended Aura mods: Damage Penetrates (10-15)% Lightning Resistance while affected by Wrath (40-60)% increased Lightning Damage while affected by Wrath |
|
 (Jewel) Sublime Vision - this Jewel has essentially no downside for this Build, and greatly boosts your Damage and survivability. Enemies Sapped by you deal significantly Less Damage. (Jewel) Sublime Vision - this Jewel has essentially no downside for this Build, and greatly boosts your Damage and survivability. Enemies Sapped by you deal significantly Less Damage. |
|
| Always Sap while affected by Wrath Aura Skills other than Wrath are Disabled Auras from your Skills have (20-40)% increased Effect on you |
|
 (Jewel) Large Cluster Jewel - on a large cluster jewel you can find an amazing combination of Notables that grants you Life Leech, Energy Shield Leech, and some additional Mana and Lightning Penetration. (Jewel) Large Cluster Jewel - on a large cluster jewel you can find an amazing combination of Notables that grants you Life Leech, Energy Shield Leech, and some additional Mana and Lightning Penetration. |
|
| 1 Added Passive Skill is Doryani's Lesson 1 Added Passive Skill is Scintillating Idea 1 Added Passive Skill is Storm Drinker |
|
 (Jewel) Medium Cluster Jewel - on a Projectile focused Cluster you can get an insane amount of Damage. Having 2 such Jewels would be great, but you are rather short on Passive Points to spend. (Jewel) Medium Cluster Jewel - on a Projectile focused Cluster you can get an insane amount of Damage. Having 2 such Jewels would be great, but you are rather short on Passive Points to spend. |
|
| 1 Added Passive Skill is Eye to Eye 1 Added Passive Skill is Repeater |
|
 (Flask) Dying Sun - it is a great Flask that grants you 2 additional Arrows for your Bow Attack, which improves both your Clear Speed and Single-target thanks to the Barrage Support. (Flask) Dying Sun - it is a great Flask that grants you 2 additional Arrows for your Bow Attack, which improves both your Clear Speed and Single-target thanks to the Barrage Support. |
|
| (125-150)% increased Charges per use (60-40)% less Duration (10-20)% increased Area of Effect during Effect Skills fire 2 additional Projectiles during Effect |
|
|
Suggested Flasks:
|
|
     |
|
|
If you have any other build requests please leave that in the comments below. We are always open to suggestions and constructive feedback.
Pictures used in this article are the intellectual property of Grinding Gear Games.


