 Buy/Sell
 Log in

Lacerate Druid Build for Diablo 4
Swipe, leap, repeat. Lacerate turns a Werewolf into a whirlwind of claws.Lacerate Druid Build
Last Update: November 4, 2026
Introduction
The Lacerate Druid fights like a wolf that has forgotten what standing still means. One moment you are beside an Elite, the next you are tearing through the far end of the pack, dragging smaller monsters along for another round of claws. Mad Wolf's Glee makes that possible by removing Lacerate's Cooldown and turning it into a Core Skill. A well-fed Spirit bar lets you chain those attacks, while the damage keeps growing as Lacerate strikes different enemies and repeatedly catches tougher targets.
This is a demanding way to spend Spirit. Each Lacerate costs 100 Spirit and no longer grants Immunity when Mad Wolf's Glee is equipped. The build therefore uses Ring of Starless Skies, Spirit-generating Werewolf hits and the Inner Beast Paragon board to make repeated casts affordable. Gift of the Stag provides a larger resource pool, and Lust for Carnage supports recovery whenever Werewolf Skills connect. You still have to watch the bar during long encounters, especially when Hurricane is running.
For damage, the Druid carries an unusually nasty combination. Dark Howl converts Debilitating Roar into a Werewolf Skill and turns it into an offensive buff, while Malefic Crescent automatically triggers Blood Howl as you fight in wolf form. Aspect of the Rabid Beast converts direct damage into Poison damage, giving Lacerate another route into the build's Poison-oriented bonuses. Poison Creeper supplies additional Poisoning and pins down monsters just before the claws begin flying.
Crowded dungeons are where the character feels most comfortable. Cyclone Armor draws enemies into a useful position, Hurricane applies pressure and Vulnerable through Overcharged Aspect, and Rush of the Red Wolf Moon rewards Werewolf attacks with Blood Hunt and Feral Rage. Bosses are less forgiving: there are fewer enemies to build momentum on, and every failed Spirit refill is noticeable.
Pros
- Very Fast Pack Clearing
- Strong Werewolf Damage
- Excellent Mobility
- Good Crowd Control
Cons
- Very High Spirit Costs
- No Lacerate Immunity
You can also visit this page to check our other Best Diablo 4 Builds
Equipment
Chest Armor - Mad Wolf's Glee is mandatory. Without it, Lacerate remains a long-Cooldown Ultimate that cannot serve as your main attack. The Unique removes that Cooldown, adds the Core Skill tag and increases damage, but every cast now demands 100 Spirit and loses the normal Immunity window. That last drawback matters. You can no longer ignore boss mechanics while Lacerate is active, so invest in Maximum Life, Armor, Resistances and movement before chasing every possible damage roll. A Greater Affix on Core Skill Ranks is a useful target.
Gloves - Dark Howl and Amulet - Malefic Crescent support a Werewolf-focused rotation. Dark Howl changes Debilitating Roar into a Werewolf Skill and provides a strong damage window while it is active. Malefic Crescent triggers Blood Howl automatically on entering Werewolf form and periodically while you remain there. The triggered Howl supplies additional damage, and its Unstoppable upgrade activates the bonus from Tibault's Will on the Pants. These pieces are worth securing before trying to push difficult bosses.
Ring 1 - Ring of Starless Skies is the expensive resource upgrade that sets this configuration apart. Spending Spirit builds its cost-reduction and damage bonuses, which is particularly valuable when every Lacerate begins with a 100-Spirit price tag. Until you obtain it, use a Legendary Ring with Maximum Spirit and useful resource affixes; the rest of the build can stay in place. The ring improves your long-fight rhythm, but its stacks need to be maintained through actual resource spending, and it cannot recover an empty bar by itself.
For the offensive Legendary slots, place Aspect of the Rabid Beast on a one-handed Main Hand weapon and Vehement Brawler's Aspect on the Off-Hand Totem. Rabid Beast converts direct attacks into Poison damage while you are Shapeshifted, helping Lacerate benefit from the Poison-focused package. Vehement Brawler rewards casts of an Ultimate Skill, and Lacerate retains that original tag while gaining Core from Mad Wolf's Glee. The one-handed weapon and Totem offer separate Aspect slots and give you useful Critical Strike, Maximum Spirit and defensive modifiers.
Aspect of the Followed Path occupies Ring 2. Its damage bonus applies to Skills cast in their base Shapeshift form, matching a Lacerate-centered Werewolf setup. Overcharged Aspect belongs on Boots, where it allows Storm damage from Hurricane to make targets Vulnerable. This is particularly useful against a boss that is too large for Cyclone Armor to gather. Keep enough Cooldown Reduction or Hurricane uptime to refresh Vulnerable, then use Debilitating Roar before committing your Spirit to another attack sequence.
Aspect of Debilitating Toxins on the Helm provides a substantial defensive layer and reduces incoming damage from Poisoned enemies. Poison Creeper gives you an immediate way to activate the second half of its power, and Hurricane can add Poisoning through the Overload Spirit Boon. This is a more reliable choice for dangerous melee fights than an offensive Helm that contributes nothing when Spirit runs dry. Maximum Life, Armor and Resistance to All Elements remain important even with the Aspect equipped.
Use the five-piece Rush of the Red Wolf Moon Talisman set and add The Furnace as the sixth Charm. Blood Hunt improves Attack Speed and Movement Speed after attacking marked enemies, while the full set eventually grants Feral Rage for stronger Werewolf attacks. The Furnace gives you extra damage against Elites, which suits a build that leaps straight into dangerous groups. On Charms, look for Werewolf Skill Ranks, Maximum Spirit, Willpower, Critical Strike Damage and the defensive attributes your character still needs.
Prioritize Maximum Spirit, Resource Generation, Spirit Cost Reduction, Ranks to Lacerate, Critical Strike Chance and Critical Strike Damage wherever compatible. Willpower and Vulnerable Damage strengthen the main attack, while Movement Speed makes chain attacks feel smoother. The extra maximum Spirit from Gift of the Stag is valuable, but it no longer provides passive Spirit Regeneration; Ring of Starless Skies and your Werewolf recovery effects must carry that part of the setup. Aim for Greater Affixes on Core Skill Ranks and meaningful resource or defensive stats.
Rush of the Red Wolf Moon
- Berú of the Red Wolf Moon
- Fer of the Red Wolf Moon
- Linta of the Red Wolf Moon
- Mlor of the Red Wolf Moon
- Phoba of the Red Wolf Moon
- (2) Set: While in Werewolf form, you periodically mark enemies with dread. Werewolf Skills deal 60%[x] increased damage. Attacking a marked enemy grants 1 second of Blood Hunt, increasing Movement Speed and Attack Speed by 20%. Killing a marked enemy grants 2 seconds.
- (3) Set: Gain 20% Damage Reduction while in Werewolf form. Heal for 70% of damage taken over 3 seconds.
- (5) Set: After Blood Hunt exceeds 20 seconds, gain Feral Rage for 10 seconds. Feral Rage grants 25% Movement Speed and Cast Speed, makes Werewolf Skills dash toward targets, and increases their damage by 250%[x]. Kills extend Feral Rage by 1 second.
Mad Wolf's Glee
- Ranks to Core Skills
Lacerate has no Cooldown, costs 100 Spirit to cast and deals [80 - 100]%[x] increased damage, but it no longer grants Immunity. Lacerate is also a Core Skill.
Dark Howl
- Critical Strike Chance
Debilitating Roar is now a Werewolf Skill. Debilitating Roar also increases your damage by [60 - 80]%[x] while in Werewolf form for its duration.
Tibault's Will
- Maximum Life
While Unstoppable and for 5 seconds afterward, you deal [15 - 20]%[x] increased damage and gain 25 Primary Resource Regeneration.
Malefic Crescent
- Ranks to Blood Howl
Blood Howl is automatically cast when you Shapeshift into a Werewolf and every 4 seconds while in Werewolf form. You deal [27 - 40]%[x] increased damage for 4 seconds whenever Blood Howl is triggered.
Ring of Starless Skies
- Attack Speed
- Critical Strike Chance
- Lucky Hit Chance
- Ranks to Core Skills
Spending your Primary Resource reduces the Resource cost of Skills and increases damage by 10%[x] for 3 seconds, stacking up to 50%[x].
The Furnace
Deal [75 - 100]%[x] increased damage to Elites.
The main setup uses five Legendary Aspects: Debilitating Toxins on Helm, Overcharged on Boots, Rabid Beast on the one-handed Main Hand, Vehement Brawler on the Off-Hand, and Followed Path on Ring 2. Each has its own compatible slot. The Chest, Gloves, Pants, Amulet and first Ring are reserved for the listed Uniques. Do not imprint an Aspect on a slot occupied by one of those items.
Aspect of Debilitating Toxins
Gain 30% Damage Reduction. Poisoned enemies deal 15% less damage to you.
Overcharged Aspect
Storm Skill damage makes enemies Vulnerable for 4 seconds. You deal 20%[x] increased damage to Vulnerable enemies.
Aspect of the Rabid Beast
Deal 80%[x] increased Poison damage. While Shapeshifted, your direct damage is converted into Poison damage.
Vehement Brawler's Aspect
Casting an Ultimate Skill increases your damage by 55%[x] for 8 seconds. Gain 2 additional Ranks to Ultimate Skills.
Aspect of the Followed Path
Skills cast in their base Shapeshift form deal 60%[x] increased damage.
Use a Legendary one-handed weapon and Totem as the equipment base for this setup. These slots give you two offensive Aspects alongside Ring 2. A two-handed weapon would remove the Off-Hand slot entirely, so it would need a different Aspect arrangement. If Spirit management is still weak, improve Maximum Spirit and Cost Reduction before giving up the weapon and Totem affixes for a small damage increase. Frequent Lacerate casts are worth more than an impressive damage tooltip that you can only use once per pack.
Skills
 15/15
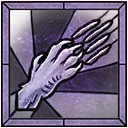
Primary DPS: Lacerate rapidly dashes between enemies and delivers repeated Werewolf strikes. Mad Wolf's Glee removes the normal cooldown, which makes it possible to cross a room and strike another group immediately if you have enough Spirit. The damage increases when it hits different enemies and builds up again against a sturdy single target. The attack is no longer Immune with Mad Wolf's Glee, so avoid committing all your Spirit when a boss is preparing a dangerous counterattack.
Maximize the skill and choose Damage Bonus to Multiple, Damage Bonus to Target, Werewolf and Temperance Training. Temperance Training pulls lesser enemies along and increases your damage and mobility. For a long single-target boss encounter, Hunter Killer is a practical alternative to Temperance Training because it delivers more strikes in a shorter burst.
 12/15
Damage/Defense: Debilitating Roar Weakens nearby enemies and cuts incoming damage when you are surrounded. Dark Howl converts it into a Werewolf Skill and adds a substantial damage bonus during its active period. Activate it before the first heavy Lacerate into a dangerous group, then use the next Roar to maintain the damage window when the pack is still alive. This timing is especially useful against bosses whose attacks can continue during your Lacerate sequence.
Prioritize Werewolf through Dark Howl, Booming Roar and Increased Duration. The longer duration scales with Resolve, so its value depends on the Resolve available to your character. Keep Roar on your action bar; it is one of the build's main offensive buttons and a key defensive tool.
 1/15
Storm/Vulnerable: Hurricane damages nearby enemies while you move through them. As a Storm Skill it triggers Overcharged Aspect, making enemies Vulnerable so your following Lacerate hits land much harder. It also works with Overload to add Poisoning, giving Lust for Carnage more reliable Poisoned targets during longer fights. The Storm continues damaging enemies between Lacerate casts, making it useful even when your Spirit pool needs a short refill.
Use Derecho, Weaken and its available duration or damage upgrades. Derecho turns Hurricane into a toggle with a Spirit drain of 15 per second. Turn it off between distant packs or when a boss forces you into a long defensive phase; leaving it active while your Spirit is already low can prevent the next 100-Spirit Lacerate.
 15/15
Control/Resistance: Cyclone Armor gives the Druid passive Elemental Resistance and an active way to control enemy positioning. Its Reversal choice pulls nearby enemies into range, letting Lacerate strike several targets without wasting its first jumps chasing scattered monsters. When a dangerous Elite group is spread around an arena, use Cyclone Armor to gather them, apply Debilitating Roar, and then start the Lacerate sequence.
Invest heavily in the skill and choose Reversal, Resistance and the appropriate Cooldown or utility upgrades. The passive resistance benefit remains useful even when Cyclone Armor is not being actively cast. Against enemies immune to displacement, rely on Hurricane for Vulnerable and keep Cyclone Armor available for nearby adds.
 1/15
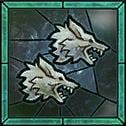
Summons/Resource: Wolves provide two Companions that draw attention away from the Druid and keep the Nagu Rune generating Offering while they remain active. Their attacks also benefit from the parts of the build that reward Companion damage or Lucky Hits. In fights with few targets, the Wolves continue working even while you recover Spirit or briefly move out of range of the boss.
Choose upgrades that improve Attack Speed after Critical Strikes, Companion uptime and any useful survivability bonuses. Keep the Wolves alive, since losing active summons delays the Nagu + Que Barrier. The active command can focus a troublesome enemy, but do not interrupt a strong Lacerate sequence just to use it on an almost-dead target.
 1/15
Poison/Control: Poison Creeper applies Poisoning through its passive attacks, and the active ability Immobilizes enemies in a sizeable area. That gives the Druid a safe place to begin Lacerate and creates Poisoned targets for the Lust for Carnage board. The Poisoning also improves the value of Aspect of Debilitating Toxins during close-range combat, particularly when enemies survive the opening series of attacks.
Select Fortify, Additional Poison Creeper and available Poisoning or control upgrades. Fortify helps protect the Druid during long fights and gives the Companion useful work beyond raw damage. Use its active ability before Lacerate if a pack is scattered or you need a moment to let Spirit recover.
Core Rotation
Start with Hurricane running and keep your Wolves active. When a pack approaches, use Poison Creeper or Cyclone Armor to hold enemies together. Activate Debilitating Roar for the Dark Howl damage window, then spend Spirit on Lacerate. The first chain strikes several targets, gathers smaller monsters through Temperance Training and raises your Werewolf damage bonuses. Continue attacking while the Starless Skies discount and Inner Beast cost reduction support the next casts.
During a longer boss fight, wait until enough Spirit is available before committing to a new Lacerate chain. Keep the target Vulnerable through Hurricane, refresh Debilitating Roar before another attack window, and watch the automatic Blood Howl from Malefic Crescent for Unstoppable and Tibault's Will. When the boss forces you away, toggle off Hurricane if its Spirit drain will prevent your next Lacerate. A careful reposition is safer than launching a costly attack that ends inside a dangerous telegraph. Switch to Hunter Killer for bosses where pulling additional enemies has no value.
Miscellaneous
Paragon Board
Start on the Starting Board with Fang and Claw, building toward Werewolf damage, Willpower and Maximum Life. Attach Lust for Carnage next. Its Legendary Node restores Spirit through Werewolf Skill hits and increases damage against Poisoned enemies, so Poison Creeper and Hurricane help its offensive half remain relevant. Use the Spirit Glyph on this board to reinforce the resource-dependent attack and take efficient Rare Nodes before stretching toward distant bonuses.
The third board is Inner Beast, using Werewolf as its Glyph. Its Legendary Node grants Shapeshifting damage and reduces Spirit costs as your Shapeshifting Skills deal damage. Since Lacerate delivers repeated hits, this is one of the most valuable boards for keeping the attack going during Elites and bosses. The discount resets after Shapeshifting again, so avoid unnecessary shifts out of Werewolf form when you are maintaining a strong cost-reduction stack.
Follow with Howling Thunder and Constricting Tendrils. Howling Thunder strengthens Werewolf Skills along with Storm Skills. Constricting Tendrils gives your Nature Magic and Companion Skills a chance to Immobilize and apply Poisoning. Use Outmatch and Headhunter in the remaining Glyph sockets, meeting their nearby attribute requirements and grabbing efficient Maximum Life, Critical Strike and defensive nodes. Ancestral Guidance is not part of this route, because its damage bonus applies to Human Skill casts.
Spirit Boons
Choose Gift of the Stag from Deer for 100 additional Maximum Spirit, then take Avian Wrath from Eagle for Critical Strike Damage. Bond with the Eagle to add Iron Feather and increase Maximum Life. The extra Spirit is important, although Gift of the Stag increases the resource cap but does not regenerate Spirit, so a large pool alone does not make Lacerate sustainable.
For Wolf, use Energize, which has a Lucky Hit chance to restore a percentage of Maximum Spirit on damage. With the large pool from Gift of the Stag, those refills can be meaningful. From Snake, take Overload: Hurricane applies extra Poisoning through its Storm hits and supports the Poison-focused paragon choices. Avoid relying on Masochistic for healing in this configuration, since its effect strengthens Shapeshifting Skills while Berserking and this setup does not have a dependable Berserking engine.
Runes
Use Nagu + Que for automatic Earthen Bulwark. Maintaining Wolves and Poison Creeper as summons generates Offering for Nagu, and Que spends 500 Offering to invoke the protective Barrier. The Barrier is useful during aggressive Lacerate sequences, but its activation is periodic. It should supplement the defenses from Dark Howl, Debilitating Toxins and Tibault's Will and does not replace them.
The second pair is Zan + Lac. Lacerate retains its Ultimate tag despite Mad Wolf's Glee adding Core, allowing Ultimate casts to contribute Offering through Zan. Lac uses 600 Offering to invoke Challenging Shout for additional protection and enemy control. The Offering costs make both Runewords periodic, so plan your base survivability around the equipment and skills you can use at any moment. Each pair requires its own valid two-socket item.
Talisman
Complete Rush of the Red Wolf Moon with Berú, Fer, Linta, Mlor and Phoba of the Red Wolf Moon. Its first bonus rewards Werewolf hits against marked enemies with Blood Hunt, increasing your Attack Speed and Movement Speed. The three-piece bonus adds Damage Reduction and delayed healing while in Werewolf form. Building enough Blood Hunt activates Feral Rage, granting stronger Werewolf attacks that dash toward targets and creating particularly fast clearing chains in crowded dungeons.
Place The Furnace in the sixth Charm slot for additional damage to Elites and bosses. Favor Ranks to Werewolf Skills, Maximum Spirit, Willpower, Critical Strike bonuses and the defenses needed for your chosen difficulty. If the character still struggles with resource recovery, concentrate on Maximum Spirit and useful resource properties before chasing damage-only Charm rolls; the full Talisman damage bonus does little good when Lacerate cannot be cast again.
Mercenary
Hire Raheir with Ground Slam, Raheir's Aegis, Bastion and Inspiration. His protection is particularly helpful when Mad Wolf's Glee removes the Immunity normally associated with Lacerate. Choose Aldkin as Reinforcement with Field of Languish triggered by Lacerate, slowing and weakening nearby enemies during the first part of your attack chain.
Final Thoughts
With Mad Wolf's Glee, Lacerate becomes a fast Werewolf attack that can be repeated as long as Spirit keeps coming back. Dark Howl and Malefic Crescent make the Roar and Blood Howl windows worth timing, while Rabid Beast, Followed Path and Rush of the Red Wolf Moon reward staying in Werewolf form. The most demanding upgrade is reliable Spirit recovery: Starless Skies, Inner Beast and Lust for Carnage determine how many times you can tear through a dangerous pack before having to reset your position.
We plan to continue updating this guide alongside future Diablo 4 patches and expand our Diablo 4 content with additional builds, strategies, and seasonal updates.
If you have suggestions or would like to see other Builds covered, feel free to share your feedback - it helps us improve and create better guides for the community.
Images used in this article are the intellectual property of Blizzard Entertainment or its corresponding owners.