Kinetic Blast/Power Siphon Totem Hierophant Build
A Hierophant build that uses Kinetic Blast and Power Siphon to deal MASSIVE damage via TotemsKinetic Blast/Power Siphon
Totem
Hierophant Build
Updated for Patch 3.19
The Best Crafty Guides by Odealo
| Guide notes |
| September 14, 2022 -Build created |
| Build Overview | |||
| Tags: [TOTEM] [ELEMENTAL] [LIFE] | |||
|
Budget: Defenses: |
|
Boss DPS: AoE: |
|
Patch 3.19 introduced some new Items that enable one of the most powerful defensive gimmicks in the game, that is redirecting damage to be taken as one of a different type. The Font of Thunder Unique Shield combined with Divine Flesh Keystone, allows you to convert 90% of Elemental Damage Taken as Chaos and Lightning. Combined with two Shadowed Rings, you can easily reach 100% conversion for both Fire and Cold Damage taken, meaning you only need to cap your Lightning and Chaos Resistances. With Mind Over Matter, Divine Guidance, and Mind of the Council Helmet, half of the Chaos and 80% (10% more with a specific Watcher's Eye mod for Clarity) of Lightning Damage will be taken first from Mana before Life, that's why having a lot of unreserved Mana and rapid Mana Regeneration is vital. Any damage that goes to your miserable Life Pool can be quickly recovered via steady Life Recovery from The Agnostic Keystone that Recovers your Life very quickly by depleting your Mana - the more Mana you have, the faster you will Recover your Life. You also recover Life from the Ritual of Awakening Keystone and Vitality Aura, however, those are used to fuel up Rage from Kaom's Spirit Gloves. These gloves cause your Life Regeneration to not recover your Life, but to generate Rage instead, that is 1 Rage per 100 Life Recovered from Regeneration. Rage is a powerful game mechanic that grants you Attack Damage and Attack Speed, and it can stack up to 50 times.
The build uses Kinetic Blast for clearing maps and Power Siphon for single targets. Both of these Attacks are fired via Ballista Totems that you'll be able to have up to 7 of. Despite not having a lot of Armour and a relatively low Life Pool, the build is very tanky, and with Divine Flesh, you're also getting an extra 5% to Maximum Chaos Resistance. Damage is sourced from Transfiguration of Mind, Wand Masteries, and a lot of added Lightning Damage to Attacks which is sourced from rare gear pieces and Mind of the Council Helmet.
Important note: Like most of the Lightning damage builds, this one goes exceptionally well with Doryani's Prototype. You can basically quadruple your damage at the cost of reduced defenses, but because it would make this setup extremely complex and expensive, it will not be included in the following Guide
You can also check our other Path of Exile builds right over here Odealo's Crafty Guides - Full List
1. Gameplay
Due to Ancestral Bond, you can only deal damage via Totems. For mapping use Kinetic Blast, these Projectiles Fork and explode ensuring smooth and fast progression. For single target damage, we recommend Power Siphon. An important part of the build is Arcane Cloak which is able to mitigate a lot of incoming damage, but it also consumes a lot of Mana of extra damage. To generate Frenzy Charges use Frenzy Skill, which can also apply Sniper's Mark on Critical Hits. Sigil of Power and Frost Shield Skills create areas in which you're significantly stronger. Berserk is to be used after accumulating Rage to significantly boost your performance, use it when fighting tougher opponents. For movement Skills use Flame Dash. You don't want to reserve a lot of Mana, you will need a lot of it unreserved. Vitality, Clarity, and Precision reserve a flat amount of Mana, so compared to your vast Mana Pool, it won't be much.
|
|
|
|

2. Build's PROS & CONS
| PROS |
|
| CONS |
|
3. Leveling tips
As a Hierophant, we recommend starting as a Totem Build. Elemental Spell Totems are much more accessible early on, change into Ballista Totems after getting the necessary upgrades. Pick Holy Flame Totem, it deals half Physical half converted Fire Damage. You can use it with any makeshift gear for Fire Spell Damage. Change into Attack Wands only after allocating the three Wand Clusters with their masteries. The final form of the build that includes redirecting damage is only available after getting all the unique items, which is possible after level 69. Be sure to completely change the rest of your rare gear too, as it requires some more specific modifiers than a regular build. Start investing in Mana at the later stages, preferably after allocating Divine Guidance, which we recommend to take for the 3rd Ascension. Note that Atziri's Foible requires only level 16, you should equip it early on for more Mana.
Suggested leveling Gem setups:
| Holy Flame setup | |
 |
Holy Flame Totem - Deals Physical / Fire Spell Projectile Damage. It's good enough to carry you into yellow maps and you should be able to reach level 69 with this setup. |
 |
Added Fire Damage Support - Adds Fire Damage based on Physical Damage, which is a lot considering Holy Flame Totem deals base Physical Damage, later converted. |
 |
Controlled Destruction Support - Disables Elemental Ailments you can cause with Fire, that is Ignite, but it's not a big loss. The Spell Damage bonus is definitely worth it. |
 |
Arcane Surge Support - Grants a buff for more Spell Damage and Mana Regeneration. |
 |
Infused Channelling Support - Totems gain more Spell Damage while Channeling their Spell, and are slightly more durable. |
 |
Fire Penetration Support - Damage penetrates Fire Resistance, it is very powerful later in the game. |
| Mana Reservation setup | |
 |
Anger - use it for additional Fire Damage with Spells. Abandon it after allocating Mind over Matter or The Agnostic as you will need a big Mana Pool. |
 |
Purity of Elements - Grants Elemental Resistances and protects you from any Elemental Ailments. |
 |
Clarity - increases Mana Regeneration Rate. |
| Utility Gems | |
 |
Flammability - Lowers Fire Resistance of affected enemies. |
 |
Arcane Cloak - If you have a lot of unreserved Mana and high Mana Regeneration Rate, start using Arcane Cloak to mitigate incoming Damage. |
 |
Flame Dash - A simple movement Spell. |
Bandits:
you should kill all three Bandits for two additional Skill Points
Leveling Skill Trees:
32 Points Skill Tree
Go for the Ancestral Bon Keystone picking up the Elemental, Spell, Mana, and Life notables as you go
78 Points Skill Tree
At this point, you should think of switching to a final form which is Wand/Attack. First, go for the Fire Mastery to convert Physical Damage to Fire. Allocate some more useful masteries, and head for the Shaper notable. If you feel like you can withstand the Mana drain, take The Agnostic and mind over Matter at any point in time.
Recommended leveling items:
 Le Heup of All - use it for more Attributes, Damage, and Resistances Le Heup of All - use it for more Attributes, Damage, and Resistances |
| Adds 1 to 4 Physical Damage to Attacks +(10-30) to all Attributes (10-30)% increased Damage (10-30)% increased Rarity of Items found +(10-30)% to all Elemental Resistances |
 Goldrim - offers a lot of Elemental Resistances which are important Goldrim - offers a lot of Elemental Resistances which are important |
| +(30-50) to Evasion Rating 10% increased Rarity of Items found +(30-40)% to all Elemental Resistances Reflects 4 Physical Damage to Melee Attackers Level Requirement reduced by 100 (Hidden) |
 Praxis - One of the best leveling Rings for Mana-consuming characters Praxis - One of the best leveling Rings for Mana-consuming characters |
| +(20-30) to maximum Mana +(30-60) to maximum Mana Regenerate (3-6) Mana per second -(8-4) to Total Mana Cost of Skills 8% of Damage taken Recouped as Mana |
 Lifesprig - An amazing early-game weapon for all characters using Spells. Lifesprig - An amazing early-game weapon for all characters using Spells. |
| (8-12)% increased Spell Damage +1 to Level of Socketed Spell Gems (20-28)% increased Spell Damage (5-8)% increased Cast Speed +(15-20) to maximum Life +(15-20) to maximum Mana Regenerate (6-8) Life over 1 second when you Cast a Spell |
 Trolltimber Spire - At level 17 you will be able to equip this Shield, it grants some good stats early on. Trolltimber Spire - At level 17 you will be able to equip this Shield, it grants some good stats early on. |
| +(20-30) to maximum Life (130-150)% increased Armour +(40-60) to maximum Life You and your Totems Regenerate 0.5% of Life per second for each Summoned Totem 15% increased Area of Effect for Skills used by Totems 0.5% of Damage dealt by your Totems is Leeched to you as Life |
 Tabula Rasa - Use Tabula for the six, white, linked sockets. Tabula Rasa - Use Tabula for the six, white, linked sockets. |
|
| Item has no level requirement and Energy Shield (Hidden) Item has 6 White Sockets and is fully linked (Hidden) |
|
4. Final Skill Tree, Ascendancy Points, and Pantheon
Final Skill Tree:
92 Points Final Skill Tree (doesn't include Cluster or Unique or Cluster Jewels)
122 Points Path of Building (PoB) link
Ascendancy points:
Preferably in that order:
- Pursuit of Faith
- Ritual of Awakening
- Divine Guidance
- Conviction of Power
Pantheon:
Major God: Soul of the Brine King: You cannot be Stunned if you've been Stunned or Blocked a Stunning Hit in the past 2 seconds
Minor God: Soul of Ralakesh: Moving while Bleeding doesn't cause you to take extra Damage; 25% reduced Physical Damage over Time taken while moving
5. Final Gems links
| [DPS] Power Siphon setup | |
 |
Power Siphon - A Projectile with extra Critica Strike Chance and Multiplier per power Charge, it fires 8 extra Projectiles, and has a built-in Culling Strike. |
 |
Ballista Totem Support - Power Shiphon should be fired via Ballista Totems, it won't do any damage otherwise. |
 |
Barrage Support - All the Projectiles are fired in a sequence allowing for a massive increase in damage against single targets. |
 |
Lightning Penetration Support - You're dealing mostly Lightning Damage, be sure to have high Lightning penetration. |
 |
Elemental Damage with Attacks Support - increases the Elemental Damage you deal with Attack Skills. |
 |
Increased Critical Damage Support - You should reach high Critical Strike Chance rather effortlessly, get more Critical Strike Multiplier here. |
| [DPS] Kinetic Blast setup socketed in Rare Boots |
|
 |
Kinetic Blast - Kinetic Blast fires an explosive Projectile, it explodes four times - each time it interacts with an enemy by Splitting, Chaining, Piercing, or Forking. |
 |
Fork Support - Kinetic Blast Forks, it's, therefore, able to reach much more opponents. |
 |
Greater Multiple Projectiles - Use it to simply fire more Projectiles. |
 |
Added Cold Damage Support - Adds Cold Damage to Attacks. The reason for using Cold Damage and not Lightning is the ability to Chill and Freeze opponents. |
| Support Gem granted by Rare Boots | |
|
Ballista Totem Support - It can be found as a Shaper's Suffix. If you don't have it, replace one of the Support Gems with it. |
| [UTILITY] Arcane Cloak setup | |
|
Arcane Cloak - Arcane Cloak consumes over half of your Current Mana to grant you a Shield that's absorbing this much hit Damage. It mitigates 75% of incoming damage. |
 |
Enhance Support - Increases Aracne Cloak's Quality, which should be Divergent for an increased Buff Effect. |
|
Arcane Surge Support - Arcane Surge Buff is very potent, it provides you with more Spell Damage and mana Regeneration Rate. |
 |
Increased Duration Support - Arcane Cloak lasts longer. |
| [UTILITY] CoC setup | |
 |
Frenzy - Frenzy won't do any damage, but its role is to generate Frenzy Charges on Hit. Use it when you're out of Frenzy Charges for a better Attack and Movement Speed. |
 |
Sniper's Mark - Sniper's Mark causes the Cursed opponent to take increased Projectile Damage and Hitting it Splits your Projectiles. |
| Cast on Critical Support - After hitting an opponent with Critically with Frenzy you will also Cast Sniper's Mark and Frot Shield. | |
 |
Frost Shield - Creates a Protective Shield that mitigates incoming Damage. It won't gain Stages as you have exactly 0 Energy Shield, but it grants useful effects even at stage 1. |
| [UTILITY] Auras | |
 |
Vitality - Vitality Regenerates your Life, it's important to do so as it is transformed into Rage. |
|
Clarity - Mana Regeneration is crucial for survivability, you can get a lot of it with Clarity. |
 |
Precision - Increases Critical Strike Chance and grants extra Accuracy, both are needed. |
| [UTILITY] Berserk | |
 |
Berserk - Use Bereser to spend your Rage and gain tons of Attack Speed, Movement Speed, more Damage, and less Damage Taken for a short time. |
| [MOBILITY] Flame Dash | |
|
Flame Dash - Flame Dash is a simple and effective movement ability, it stores up to three charges you can spend to teleport with no delay. |
| [UTILITY] Sigil of Power | |
 |
Sigil of Power - Place Sigil of Power and Spend Mana when in its range, it reduces damage taken and adds lightning Damage to your Attack. It gains Stages after spending Mana. |
|
|
6. Gear Setup
Maximum Mana is by far the most important resource, the overwhelming majority of the incoming damage will be taken from mana before Life. You don't need any Energy Shield due to the Agnostic Keystone, and you also shouldn't invest in Fire or Cold Resistances. Only Chaos and Lightning Resistances will be important. Maximum Life is not as valuable as it is in most builds, having around 2000 of it is usually enough. Armour is still necessary to mitigate Physical Damage. As for offensive modifiers, seek added Lightning Damage and Attack Speed. Maximum Mana will also get you more Damage due to Transfiguration of Mind. Don't forget about Spell Damage, it will apply to your Attack Damage due to Wand mastery. Critical Strike modifiers are great to have too. You should have t trouble with Accuracy, but getting enough Strength and Dexterity might be a problem, it has to be sourced from your rare gear. The build uses some Unique Items, all of these are build-enabling gear pieces and cannot be replaced.
Our recommended items will:
- Cap your resistances at 75%
- Provide you with enough DPS and Life to start mapping
|
Stat priorities on items:
|
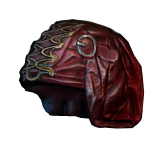
 (Helmet) Mind of the Council - This Helmet is essential for your survivability - it grants a lot of Mana and redirects 30% of Lighting Damage to be taken from Mana. It also adds a lot of Lightning Damage to Attacks. (Helmet) Mind of the Council - This Helmet is essential for your survivability - it grants a lot of Mana and redirects 30% of Lighting Damage to be taken from Mana. It also adds a lot of Lightning Damage to Attacks. |
|
| (230-260)% increased Evasion and Energy Shield +(15-20) to maximum Energy Shield (20-30)% increased maximum Mana 10% chance to Shock +20% chance to be Shocked 30% of Lightning Damage is taken from Mana before Life Attack Skills have Added Lightning Damage equal to 6% of maximum Mana Lose 3% of Mana when you use an Attack Skill |
|
| Helmet enchantments: Power Siphon enchantment |
|
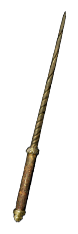 (Weapon) Rare Wand - A good Rare Wand would be very expensive, there are a lot of modifiers worth your attention. Added Lightning Damage would be the most important one, try to get one with tier 1. Maximum Mana, Attack Speed, increased Lighting Damage, Critical Strike mods, and Penetrations are to be looked for. (Weapon) Rare Wand - A good Rare Wand would be very expensive, there are a lot of modifiers worth your attention. Added Lightning Damage would be the most important one, try to get one with tier 1. Maximum Mana, Attack Speed, increased Lighting Damage, Critical Strike mods, and Penetrations are to be looked for. |
|
| Min. requirements: Adds Lightning Damage +40 to Maximum mana 10% increased Attack Speed 90% increased Lightning Damage Optional affixes: Critical Strike Modifiers Attacks with this Weapon Penetrate #% Elemental Resistances |
|
 (Off-Hand) Font of Thunder - This Shield is another core Unique Item, it makes 40% of your Cold and Fire Damage to be taken as Lightning, and combined with Rings and Divine Flesh, you won't take any Fire or Cold Damage. (Off-Hand) Font of Thunder - This Shield is another core Unique Item, it makes 40% of your Cold and Fire Damage to be taken as Lightning, and combined with Rings and Divine Flesh, you won't take any Fire or Cold Damage. |
|
| (400-500)% increased Evasion and Energy Shield (25-40)% increased Mana Regeneration Rate +50% chance to be Shocked 40% of Cold Damage taken as Lightning Damage 40% of Fire Damage taken as Lightning Damage |
|
 (Body Armour) Cloak of Defiance - Cloak of Defiance grants a lot of Mana, Mana Regeneration, and MoM. Unfortunately, Energy Shield is obsolete. (Body Armour) Cloak of Defiance - Cloak of Defiance grants a lot of Mana, Mana Regeneration, and MoM. Unfortunately, Energy Shield is obsolete. |
|
| (300-400)% increased Evasion and Energy Shield +(100-150) to maximum Mana Regenerate 1% of Mana per second Mind Over Matter |
|
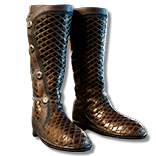 (Boots) Rare Boots - Rare Boots should provide Movement Speed, Mana, Life, and Shaper's Suffix for built-in Ballsita Support. You should be able to find a pair with an additional Lightning or Chaos Resistance, and some Attributes like Dexterity or Strength. (Boots) Rare Boots - Rare Boots should provide Movement Speed, Mana, Life, and Shaper's Suffix for built-in Ballsita Support. You should be able to find a pair with an additional Lightning or Chaos Resistance, and some Attributes like Dexterity or Strength. |
|
| Min. requirements: Socketed Gems are Supported by Ballista Totem +50 to Maximum Mana +50 to Maximum Life 25% increased Movement Speed Optional affixes: Lightning / Chaos Resistance Attributes You have Tailwind if you have dealt a Critical Strike Recently |
|
 (Gloves) Kaom's Spirit - Kaom's Spirit Gloves Generate Rage, which is a welcome addition to all Attack Builds. You won't be able to Regenerate Life, but it's not a problem due to The Agnostic Keystone. (Gloves) Kaom's Spirit - Kaom's Spirit Gloves Generate Rage, which is a welcome addition to all Attack Builds. You won't be able to Regenerate Life, but it's not a problem due to The Agnostic Keystone. |
|
| +(50-70) to maximum Life +(20-30)% to Fire Resistance (0.3-0.5)% of Physical Attack Damage Leeched as Life Life Recovery from Regeneration is not applied Regenerate 1 Rage per second for every 100 Life Recovery per second from Regeneration |
|
 (Belt) Rare Belt - This is where the Life, Mana, Resistances, and Attributes come in bulk. Try to gain as much of it as you can. (Belt) Rare Belt - This is where the Life, Mana, Resistances, and Attributes come in bulk. Try to gain as much of it as you can. |
|
| Min. requirements: 70 Maximum Mana +50% to Lightning / Chaos Resistance Optional affixes: increased Damage Maximum Life increased Attributes Attributes increased Lightning Damage |
|
 (Amulet) Atziri's Foible - This cheap Amulet provides you with unmatched amounts of Mana and Mana Regeneration Rate, which is essential. (Amulet) Atziri's Foible - This cheap Amulet provides you with unmatched amounts of Mana and Mana Regeneration Rate, which is essential. |
|
| (20-30)% increased Mana Regeneration Rate +100 to maximum Mana (16-24)% increased maximum Mana (80-100)% increased Mana Regeneration Rate Items and Gems have 25% reduced Attribute Requirements |
|
| Recommended Anointments: Watchtowers Cleansed Thoughts |
|
 (Ring) Rare Right Shadowed Ring - Your Right Shadowed Ring should redirect 25% of Cold Damage to be taken as Lightning. Strive for a copy with a lot of Mana, Maximum Life, added Lightning Damage to Attacks, and Resistances. (Ring) Rare Right Shadowed Ring - Your Right Shadowed Ring should redirect 25% of Cold Damage to be taken as Lightning. Strive for a copy with a lot of Mana, Maximum Life, added Lightning Damage to Attacks, and Resistances. |
|
| Min. requirements: Left ring slot: 25% of Lightning Damage from Hits taken as Cold Damage Right ring slot: 25% of Cold Damage from Hits taken as Lightning Damage Adds Lightning Damage to Attacks +60 to Maximum Mana Optional affixes: Accuracy Rating Lightning / Chaos Resistance increased Mana Regeneration Rate Non-channeling Skills have -7 to Total Mana Cost (crafted) Attributes Lightning Damage per Power Charge |
|
| (Ring) Rare Left Shadowed Ring - Left Ring is more or less the same as the Rare Ring when it comes to the prefixes and suffixes, but remember that the implicit modifier should cause to redirect 25% of Fire Damage to be taken as Lightning. |
|
| Min. requirements: Left ring slot: 25% of Fire Damage from Hits taken as Lightning Damage Right ring slot: 25% of Lightning Damage from Hits taken as Fire Damage Adds Lightning Damage to Attacks +60 to Maximum Mana Optional affixes: Accuracy Rating Lightning / Chaos Resistance increased Mana Regeneration Rate Non-channeling Skills have -7 to Total Mana Cost (crafted) Attributes Lightning Damage per Power Charge |
|
 (Jewel) Rare Jewels - Go for the Searching Abyss Jewels, these should add flat, numerical modifiers to your Mana, Life, and Added Damage to Attacks. If you're short on Attributes or Resistances you can get them here too. (Jewel) Rare Jewels - Go for the Searching Abyss Jewels, these should add flat, numerical modifiers to your Mana, Life, and Added Damage to Attacks. If you're short on Attributes or Resistances you can get them here too. |
|
| Recommended affixes: Maximum Mana Lightning / Chaos Resistance added Lightning Damage Strength Dexterity Maximum Life Critical Strike modifiers |
|
 (Jewel) Glorious Vanity - Transform your Mind over Matter into Divine Flesh via Xibaqua's variant of Glorious Vanity. Mind over Matter will be sourced from the Body Armour. (Jewel) Glorious Vanity - Transform your Mind over Matter into Divine Flesh via Xibaqua's variant of Glorious Vanity. Mind over Matter will be sourced from the Body Armour. |
|
| Bathed in the blood of (100-8000) sacrificed in the name of Xibaqua Passives in radius are Conquered by the Vaal Historic |
|
 (Jewel) Impossible Escape - The Iron Reflexes Keystone is surrounded by two very beneficial notables - Panopticon and Ironwood. It will get you more damage. (Jewel) Impossible Escape - The Iron Reflexes Keystone is surrounded by two very beneficial notables - Panopticon and Ironwood. It will get you more damage. |
|
| Passive in Radius of Iron Reflexes can be Allocated without being connected to your tree | |
 (Jewel) Thread of Hope - A medium-sized Ring surrounding the socket near Instability notable can be used to allocate Arcane Will, Cruel preparation, Heart of Thunder, and Breath of Lightning. (Jewel) Thread of Hope - A medium-sized Ring surrounding the socket near Instability notable can be used to allocate Arcane Will, Cruel preparation, Heart of Thunder, and Breath of Lightning. |
|
| Only affects Passives in Medium Ring Passives in Radius can be Allocated without being connected to your tree -(20-10)% to all Elemental Resistances |
|
 (Jewel) Watcher's Eye - You're using Vitality, Clarity, and Precision. The best modifier on a Watcher's Eye is Clarity's Damage taken from Mana Before Life, but you can check the other ones - they're good too in most cases. (Jewel) Watcher's Eye - You're using Vitality, Clarity, and Precision. The best modifier on a Watcher's Eye is Clarity's Damage taken from Mana Before Life, but you can check the other ones - they're good too in most cases. |
|
| (4-6)% increased maximum Energy Shield (4-6)% increased maximum Life (4-6)% increased maximum Mana <Two or Three random aura modifiers> |
|
 (Jewel) Large Cluster Jewel - Use two Large Cluster Jewels with Prismatic Heart, Scintillating Idea, and Widespread Destruction. These are the best Notables that can be found on a Lighting Cluster Jewel. (Jewel) Large Cluster Jewel - Use two Large Cluster Jewels with Prismatic Heart, Scintillating Idea, and Widespread Destruction. These are the best Notables that can be found on a Lighting Cluster Jewel. |
|
| Recommended affixes: 1 Added Passive Skill is Prismatic Heart 1 Added Passive Skill is Scintillating Idea 1 Added Passive Skill is Widespread Destruction |
|
 (Jewel) Medium Cluster Jewel - One Sleepless Sentries notable is mandatory for it grants you near-permanent Onslaught. Other Cluster Jewels can be used for more Projectile Damage via Repeater and Shrieking Bolts. (Jewel) Medium Cluster Jewel - One Sleepless Sentries notable is mandatory for it grants you near-permanent Onslaught. Other Cluster Jewels can be used for more Projectile Damage via Repeater and Shrieking Bolts. |
|
| Recommended affixes: 1 Added Passive Skill is Ancestral Reach 1 Added Passive Skill is Sleepless Sentries 1 Added Passive Skill is Repeater 1 Added Passive Skill is Shrieking Bolts |
|
 (Jewel) Small Cluster Jewel - Stubborn Student notable gets you more Mana and a lot of Armour, we recommend one or two of these. Born of Chaos grants +3% to Maximum Chaos Resistance. (Jewel) Small Cluster Jewel - Stubborn Student notable gets you more Mana and a lot of Armour, we recommend one or two of these. Born of Chaos grants +3% to Maximum Chaos Resistance. |
|
| Recommended affixes: 1 Added Passive Skill is Stubborn Student 1 Added Passive Skill is Born of Chaos |
|
 (Flask) Bottled Faith - A very expensive unique flask that simply grants more Damage and Consecrated Ground, which in this build is particularly good. (Flask) Bottled Faith - A very expensive unique flask that simply grants more Damage and Consecrated Ground, which in this build is particularly good. |
|
| 40% increased Damage Creates Consecrated Ground on Use (30-15)% reduced Duration Consecrated Ground created by this Flask has Tripled Radius Consecrated Ground created during Effect applies (7-10)% increased Damage taken to Enemies (100-150)% increased Critical Strike Chance against Enemies on Consecrated Ground during Flask effect |
|
|
Other suggested Flasks:
|
|
    |
|
|
If you have any other build requests please leave that in the comments below. We are always open to suggestions and constructive feedback.
Pictures used in this article are the intellectual property of Grinding Gear Games.
