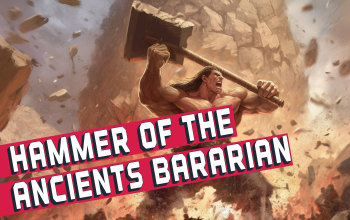
Hammer of the Ancients Barbarian Diablo 4 Build
A very powerful Barbarian Build specialized in one-shooting Enemies with his mighty Hammer of the AncientsHammer of the Ancients
Barbarian Build for Diablo 4
Last Update: June 13, 2023
| Build notes: |
| June 13, 2023 -Build created |
Build Overview
Hammer of the Ancients is a famous Barbarian Skill first introduced in Diablo 3. With this Skill, you will slam the ground in front of you with a gigantic ancestral Hammer for a massive amount of Damage. Initially, it's a bit underwhelming ability, but thanks to the very good scaling it has the potential to deal the highest Damage numbers you can encounter in the game from a single Hit. The AoE is also not that great at first, but it is also easy to overcome through the Legendary Aspect found in the Codex of Power. In the early game, you will have to use a Basic Skill to generate your Rage - here we recommend using Lunging Strike for its free dash and either Bleeding on the Enemies or Berserking Buff when you Crit, but the Flay with its chance to inflict Vulnerability is even better when you push for maximum Damage.
Unfortunately, all Barbarian Builds are heavily reliant on the Shouts and Wrath of the Berserker ability, as they are simply too good to pass up, which gets a bit stale after some time. They grant you Damage, Resource Generation, Damage Reduction, and even Movement Speed, which puts heavy emphasis on Cooldown Reduction on your Gear to help with their uptime.
Please keep in mind, that the following Guide explains the basic variant of the build, without diving into all alternative variants that may utilize different utility skills for various benefits. This will be obviously updated as we have a chance to test out this build properly in the actual game.
You can also check our other Diablo 4 Builds
 Pros Pros |
 Cons Cons |
 Satisfying High Damage numbers Satisfying High Damage numbers |
 Needs to generate lots of Fury to deal Damage Needs to generate lots of Fury to deal Damage |
 Easy to gear up Easy to gear up |
|
 Not a Whirlwind Not a Whirlwind |
Skills
|
HAMMER OF THE ANCIENTS [5/5] |
|
A heavy hit with Ancient Hammer. You want to use it when you have maximum Fury to benefit the most from the advancement bonuses. The AoE starts small, but it gets better with more Skill Ranks and relevant Legendary Aspect. Modifiers:
|
|
LUNGING STRIKE [1/5] |
|
Performs a quick dash to the enemy and generates some Fury. It is great for overall mobility, but you can also use the Flay for better Vulnerability uptime on enemies. Modifiers:
|
|
RALLYING CRY [5/5] |
|
Grants lots of Movement Speed and even more Resource Generation for a short time. Modifiers:
|
|
CHALLANGING SHOUT [3/5] |
|
A defensive Shout that greatly Reduces the Damage you take for 6 seconds after use. It also Taunts nearby Enemies, which may be useful when you play with friends. Modifiers:
|
|
WAR CRY [5/5] |
|
A main offensive Shout, after using it you will deal increased Damage for 6 seconds. Modifiers:
|
|
WRATH OF THE BERSERKER [1/1] |
|
It is your Ultimate Ability, it grants you the Berserking status for up to 15 seconds if you keep fighting Enemies. Modifiers:
|
Passive Skills
|
PRESSURE POINT [3/3] |
| It is an important Passive that grants your Lucky Hits with Core Skills a chance to inflict Vulnerability on Enemies for 2 seconds. |
|
IMPOSING PRESENCE [3/3] |
| Improves your maximum Life which is very important for your survival. |
|
MARTIAL VIGOR [3/3] |
| Further improves your Damage Reduction against Elite Enemies, which are usually the most dangerous ones. |
|
BOOMING VOICE [3/3] |
| Increases the duration of all your Shouts, which as stated before, are essential for your Damage and durability. |
|
AGGRESSIVE RESISTANCE [3/3] |
| You will have high uptime on the Berserking buff, so additional Damage Reduction is very helpful. |
|
PROLIFIC FURY [3/3] |
| With this Passive allocated, the Berserking buff will also increase your Resource generation. |
|
PIT FIGHTER [3/3] |
| It is a great passive that grants you both offense and defense power. Both conditions are quite easy to achieve. |
|
NO MERCY [3/3] |
| Gives up to 9% Critical Strike Chance against enemies affected by your Slows. |
|
HAMSTRING [1/3] |
| Very important Passive that Slows all Enemies affected by your Bleeding, which allows for powerful combinations. |
Key Passive
|
UNBRIDLED RAGE |
| Massively improves your Damage at the cost of a higher amount of Fury needed to use the Skill. If your Resource generation is not that great yet, use the Unconstrained for better Berserk duration and effectiveness. |
Technique
|
Two-Handed Sword Expertise |
| Grants 20% of your Direct Damage as extra Bleeding on the Enemy, which also activates the Hamstring Passive to inflict Slow. |
Items
|
You can never have too many Cooldown Reductions, Critical Strike Chance and Damage, Vulnerability Damage, and Resource Generation. You should also look for additional Ranks for your main Skills and extra maximum Fury which will massively improve your Damage through the Hamme of the Ancientr's upgrade. As Barbarian you can use 3 sets of Weapons, make sure the Bludgeon is the strongest one DPS-wise, as it will be used by Hammer of the Ancient. On the remaining ones, you should look just for the statistics that will make your Hammer stronger.
As always, you should put Sapphires in your Weapons since you can very easily trigger the required condition for them. In Armor Sockets, the Ruby will work the best as it increases your Maximum Life. For Jewelry only the Skulls are an acceptable choice. |
|
|
OPTIONAL UNIQUE ITEMS |
|
|
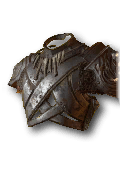
Rage of Harrogath (Armour) - a decent option if you happened to obtain one. It provides much better uptime on your Shouts when you fight Elite Enemies, and some useful stats on top of that.
|
+Physical Damage +Physical Critical Strike Chance against Elites +Damage Reduction from Bleeding Enemies +Thorns Lucky Hit: Up to a [20 - 40%] chance to reduce the Cooldowns of your Non-Ultimate Skills by 1.5 seconds when you inflict Bleeding on Elites. |
|
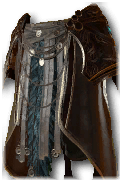
Temerity (Pants) - BiS Item for most Builds currently, grants you a very strong Barrier based on your overhealing. It also boosts your regular Healing, making it a very defense-packed option.
|
+ Potion Charges + Potion Drop Rate + Lucky Hit: Chance to Heal + Healing Effects that Heal you beyond 100% Life grant you a Barrier up to [40 - 80%] of your Maximum Life that lasts for 8 seconds. |
|
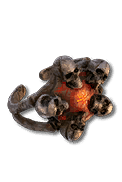
Mother's Embrace (Ring) - very useful Ring that allows you to spam your Core ability more often in AoE situations.
|
+Critical Strike Chance +Critical Strike Damage +Overpower Damage +Core Skill Damage If a Core Skill hits 5 or more Enemies, [20 - 40%] of the Resource cost is refunded. |
|
CODEX OF POWER |
|
|
Mandatory/Heavily recommended Aspects
Optional Aspects
|
|
Paragon
|
1st Board - Starting Board Nodes - Path through the Damage and Glyph Socket, and come back to fulfill the remaining lesser Nodes when you have more Points to Spend. Glyphs - At first use the Exploit Glyph here just to inflict the Vulnerability on the first Hit. Later put in the Crusher for more Damage. |
|
2nd Board - Warbringer Board Nodes - Warbringer is an excellent Node to generate Fortify as you will spend your Fury almost all the time. It also has all 3 types of Rare Nodes we would want: Raw Power for Damage, Hungering Fury for Resources, and Guarded Advance for durability. Glyphs - here is the best place to put the Exploit Glyph. |
|
3rd Board - Flawless Technique Board Nodes - this Legendary Node is actually not useful for us, but the Havoc Node available here is extremely powerful. The Brash is also good to improve your survival. Glyphs - Territorial Glyph further emphasizes the Close combat style of the Barbarians. |
|
4th Board - Decimator Board Nodes - another Legendary Node that you should skip, but keep the board for powerful Rare Node bonuses. The Arrogance and Demolish grant offensive and defensive powers against Vulnerable Enemies. Glyphs - The Marshal Glyph socketed there greatly boosts the effectiveness of nearby Nodes. It also reduces the Cooldown of your Shouts. |
|
5th Board - Blood Rage Board Nodes - The Blood Rage is not a bad Node, but it is just too inefficient to pick it up. Instead, try to path for the Grit, Revel, and the next gateway. Glyphs - It is a good place to put the Ire Glyph, which further boosts the Damage you have while Berserking is active. |
|
6th Board - Bone Breaker Board Nodes - the final Board, and it also doesn't pick up the Legendary Node. It is however great Board for the specific Glyph. Glyphs - Wrath Glyph greatly benefits from all the Dexterity Nodes available here. It also grants you Fury Generation when you fulfill the requirements. |
|
END NOTE This is the beta version of our Tornado Druid Build for Diablo 4. The game has just launched so we expect all of the Guides will require constant updates when we get to test all the builds properly. Make sure to check out the Guides regularly to keep track of all the changes! If you have any Build requests, please post them in the Comments section below. We will be happy to cover your most requested builds in the future! Also, we hope that you have found this guide useful and informative. Also, we will be happy to receive constructive criticism that will help us improve our future work, so don't hesitate to give us your feedback. |
Pictures used in this article are the intellectual property of Blizzard Entertainment
