Frozen Legion/Static Strike Inquisitor Build
A powerful Attack-based Inquisitor Build that uses Shockwave and Static Strike to effortlessly kill enemies by simply walking past themStatic Shockwave
Inquisitor Build
Created for Patch 3.20
The Best Crafty Guides by Odealo
| Guide notes |
| February 20, 2023 -Build created |
| Build Overview | |||
| Tags: [MELEE] [ELEMENTAL] [LIFE] | |||
|
Budget: Defenses: |
|
Boss DPS: AoE: |
|
Frozen Legion is a newly added Skill that is very unique and sometimes confusing in its nature. It is a Spell that summons Statues that perform a wide Area of Effect Attack which is fairly similar to Totems, but not quite the same. This Skill is slightly affected by Attack Speed but it's mostly limited by the Cooldown of its Charges, which can store up to 6 at once. Note that you also spend all Charges simultaneously to summon more Statues with a single Cast. The Statues are summoned in a circle around you, so you have to position yourself pretty precisely to Hit an enemy with all your Frozen Sweeps. Thankfully, this Build is very tanky, so it's quite safe to stand eye-to-eye with your enemies!
While it's a very powerful Skill to deal with singular enemies, the clear speed is quite lacking. For that reason, we use another Cooldown-based Skill - a Shockwave. It's a Support Gem that deals heavy Damage in a quite big Area of Effect but it can work only with Staves and Maces. You can't use it directly, it has to be triggered by another Skill. You can use basically any Melee Attack you want, but in our opinion, the best results are achieved with the Static Strike. Once you land a hit with that Skill, you will send energy beams at nearby enemies at fixed intervals for a short period of time. Those beams can also trigger the Shockwave, which makes up the semi-automatic gameplay loop.
As for your Weapon of choice, there are a lot of possibilities, but we decided to use pure Elemental Staves. It's a very underused archetype nowadays, as it gets outshined by high-end Physical Conversion setups eventually, but it works much better at a lower budget ceiling. The biggest drawback of Staves is their very low base Attack Speed, and it just happens that our Skills completely ignore that aspect due to being Cooldown based. It makes the initial Hit of the Statick Strike somehow clunky to play at first, but since you only need to Attack once every so often, it's not that noticeable. As an Inquisitor, you will ignore all types of Elemental Resistances with your Critical Strikes, but Lightning Damage is preferred as it makes your Shocks significantly stronger.
As mentioned before, this Build is very tanky. You will have a very high amount of maximum Life, a decent amount of Armour and Evasion Rating, Fortify, very potent Health Recovery thanks to the Leech and Inquisitor's Regeneration, and solid Block Chance. Glancing Blows slightly reduce the value of your Blocks, but they are still very helpful in avoiding lethal Hits.
This Build uses almost exclusively Rare Items, which makes it very flexible when it comes to budget. You can start with just the most basic Gear and progressively make upgrades as you acquire more Currency on your journey.
You can also check our other Path of Exile builds right over here Odealo's Crafty Guides - Full List
1. Gameplay
You will occasionally Hit enemies with your Static Strike to refresh its duration and then simply run from pack to pack as your Beams and Shockwave automatically kill nearby enemies. For single-target situations, you will have to get very close to your target and use the Frozen Legion to nuke it down. Ancestral Warchief is also very useful to improve your burst as it improves your Attack Damage by a solid amount. You will also automatically apply your Assassin's Mark, so you don't have to worry about that. Slow Attack Speed makes Leap Slam very ineffective, so you will have to resort to Flame Dash or Frost Blink as your Travel Skill.
|
|
|
|

2. Build's PROS & CONS
| PROS |
|
| CONS |
|
3. Leveling tips
Leveling with this Build is a very pleasant experience. Static Strike may not be the best choice, as the Cooldown on Shockwave is quite long at lower levels, so you can choose any other Elemental Attack of your liking, such as Smite. Frozen Legion is quite viable even from the beginning, so you can get used to its usage. Staves would be the best to use, but you should prioritize any Weapon that simply has a lot of Damage.
Suggested leveling Gem setups:
| Smite setup | |
 |
Smite - deals a decent amount of Lightning Damage in Area and grants a temporary Aura that boosts your Lightning Damage. |
 |
Ancestral Call Support - adds additional Strikes to your Attack for better Clear. |
 |
Added Lightning Damage Support - adds a lot of Lightning Damage to your Attacks. |
 |
Elemental Damage with Attacks Support - improves the Elemental Damage you deal with your Attacks. |
 |
Elemental Focus Support - disables your Elemental Ailments but in exchange, it massively boosts your Damage. |
 |
Multistrike Support - adds additional repeats to your Attack. |
| Frozen Legion setup | |
 |
Frozen Legion - summons icy Statues that deal Damage with a powerful Swing around them. |
|
Elemental Damage with Attacks Support - boost the Damage you deal with your Elemental Attacks. |
|
Elemental Focus Support - it improves your Elemental Damage even further. |
 |
Pulverise Support - slows your Attack Speed but grants a lot of Damage and Area of Effect. |
| Aura setup | |
 |
Determination - this Aura is very important during leveling as it grants you a lot of Armour Rating. |
 |
Herald of Ice - this Herald grants you a bit of Cold Damage and adds explosions when you kill a frozen Enemy. |
| Utility setup | |
 |
Flame Dash - a short teleport that moves you in a short distance. |
 |
Assassin's Mark - significantly improves your Critical Strikes against the marked enemy. |
 |
Molten Shell - forms a protective Shell around you which absorbs incoming Damage. |
Bandits:
Kill all Bandits to get additional 2 Passive Tree Skill Points.
Leveling Skill Trees:
34 Points Passive Tree
We recommend this order:
1) Divine Fervour 2) Holy Dominion 3) Discipline and Training 4) Divine Judgement 5) Smashing Strikes 6) Tireless
62 Points Passive Tree
Allocate:
1) Steelwood Stance 2) Glancing Blows 3) Devotion 4) Disemboweling 5) Barbarism 6) Versatility 7) Constitution
Recommended leveling items:
 Le Heup of All - it's a very useful Ring to cap your Resistances and Attribute Requirements while also providing some Damage. Le Heup of All - it's a very useful Ring to cap your Resistances and Attribute Requirements while also providing some Damage. |
|
| Adds 1 to 4 Physical Damage to Attacks +(10-30) to all Attributes (10-30)% increased Damage (10-30)% increased Rarity of Items found +(10-30)% to all Elemental Resistances |
|
 Goldrim - very helpful to cap your Resistances very early, as it can be equipped at level 1. Goldrim - very helpful to cap your Resistances very early, as it can be equipped at level 1. |
|
| +(30-50) to Evasion Rating 10% increased Rarity of Items found +(30-40)% to all Elemental Resistances Reflects 4 Physical Damage to Melee Attackers Level Requirement reduced by 100 (Hidden) |
 Tabula Rasa - grants access to early 6-link setup. You can freely experiment with your Gems as it has White Sockets. Tabula Rasa - grants access to early 6-link setup. You can freely experiment with your Gems as it has White Sockets. |
|
| Item has no level requirement and Energy Shield (Hidden) Item has 6 White Sockets and is fully linked (Hidden) |
|
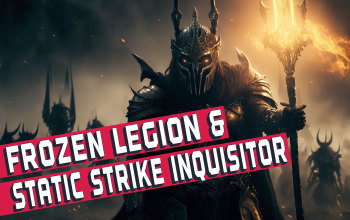
 Stormheart - a very good leveling Staff that grants a lot of Elemental Damage with Attacks. Stormheart - a very good leveling Staff that grants a lot of Elemental Damage with Attacks. |
|
| +18% Chance to Block Attack Damage while wielding a Staff (80-100)% increased Physical Damage Adds (25-35) to (45-60) Cold Damage Adds (1-10) to (70-90) Lightning Damage (20-35)% increased Critical Strike Chance Cannot be Shocked while Chilled 50% chance to Shock Chilled Enemies |
|
 Thief's Torment - you can only equip one Ring, but it's powerful enough that you won't need a second one. It grants a lot of Elemental Resistances and amazing sustain. Thief's Torment - you can only equip one Ring, but it's powerful enough that you won't need a second one. It grants a lot of Elemental Resistances and amazing sustain. |
|
| (10-16)% increased Quantity of Items found Can't use other Rings +(25-40)% to all Elemental Resistances Gain (40-60) Life per Enemy Hit with Attacks Gain 30 Mana per Enemy Hit with Attacks 50% reduced Effect of Curses on you |
|
 Perandus Blazon - grants some Fire Resistances and useful Attributes. With this, your Falsks will last longer so you can use them more often. Perandus Blazon - grants some Fire Resistances and useful Attributes. With this, your Falsks will last longer so you can use them more often. |
|
| (15-25)% increased Stun and Block Recovery +(20-30) to all Attributes (6-8)% increased Quantity of Items found +20% to Fire Resistance 20% increased Flask Effect Duration -2 Physical Damage taken from Attack Hits |
|
 Replica Karui Ward - grants some Area of Effect alongside a Damage boost, while also providing precious Movement Speed. Replica Karui Ward - grants some Area of Effect alongside a Damage boost, while also providing precious Movement Speed. |
|
| +(20-30) to Dexterity +(20-30) to Intelligence +100 to Accuracy Rating 10% increased Movement Speed 30% increased Area of Effect 30% increased Area Damage |
|
 Wanderlust - make you immune to Freeze which can be very deadly in the Campaign. They also grant a decent amount of Movement Speed and some Mana Regeneration. Wanderlust - make you immune to Freeze which can be very deadly in the Campaign. They also grant a decent amount of Movement Speed and some Mana Regeneration. |
|
| +5 to Dexterity +(10-20) to maximum Energy Shield (20-40)% increased Mana Regeneration Rate 20% increased Movement Speed Cannot be Frozen |
|
 Seven-League Step - those are the fastest Boots you can ever wear. The only problem is, it's the only modifier they grant. Seven-League Step - those are the fastest Boots you can ever wear. The only problem is, it's the only modifier they grant. |
|
| 50% increased Movement Speed Level Requirement reduced by 100 (Hidden) |
|
4. Final Skill Tree, Ascendancy Points, and Pantheon
Final Skill Tree:
103 Points Final Passive Tree
120 Points Path of Building (PoB) link
Ascendancy points:
Preferably in this order:
- Righteous Providence
- Inevitable Judgement
- Sanctuary
- Augury of Penitence
Pantheon:
Major God: Brine King: You cannot be Stunned if you've been Stunned in the past 2 seconds, Cannot be Frozen, 50% reduced Effect of Chill on you
Minor God: Soul of Shakari: 50% less Duration of Poisons on You; You cannot be Poisoned while there are at least 3 Poisons on you
5. Final Gems links
| [DPS] Static Strike setup | |
 |
Static Strike - after Hitting a target you shoot Energy Beams at nearby enemies for a short duration. The intervals are fixed and not affected by your Attack Speed. |
 |
Shockwave Support - Hitting an enemy with a linked Skill will trigger a Shockwave which deals Area Damage based on your Weapon. You can store up to 4 Charges. |
|
Pulverise Support - improves the Area of Effect and it's Damage, but significantly lowers the Attack Speed. |
 |
Increased Critical Damage Support - improves the Critical Strike Multiplier of your Skills. |
|
Elemental Damage with Attacks Support - improves the Elemental Damage you deal with your Attacks. |
 |
Hypothermia Support - increases your Damage against Chilled and Frozen enemies. It also makes it easier to Freeze your opponents. |
| [DPS] Frozen Legion setup | |
|
Frozen Legion - a Spell that summons Icy Statues that perform a wide Area of Damage Attack. You can store up to 6 Charges. |
|
Pulverise Support - vastly improves the Damage of your Statues' Attack. The Attack Speed penalty doesn't affect the total DPS output. |
|
Increased Critical Damage Support - increases the Damage you deal with your Critical Strikes. |
|
Elemental Focus Support - disables Elemental Ailments but grants a lot of Elemental Damage. |
|
Elemental Damage with Attacks Support - grants a lot of Elemental Damage for your Attacks. |
|
Hypothermia Support - your Skills deal more Damage against Chilled or Frozen Enemies. Chill will be inflicted by your Shockwave, as Elemental Focus disables it here. |
| [UTILITY] Auras | |
|
Determination - a defensive Aura that adds a lot of Armour Rating and improves it even more. |
 |
Grace - another defensive Aura, this time it adds a lot of Evasion Rating. It puts a heavy strain on your Dexterity Requirements. |
 |
Herald of Ice - adds some Cold Damage for your Attacks, and creates a satisfying explosion upon shattering an enemy. |
 |
Enlighten Support - significantly lowers the Reserved amount of Mana of linked Auras. |
| [UTILITY] Mark setup | |
|
Assassin's Mark - adds a lot of Base Critical Strike Chance and improves the Damage of your Critical Strikes. |
 |
Mark on Hit Support - lowers the effectiveness of your Mark, but makes it automatic. |
 |
Lifetap Support - supported Skills cost Life instead of Mana, which is very limited in this case. |
| [UTILITY] Ancestral Warchief setup | |
 |
Ancestral Warchief - summons a Totem that grants you a powerful Buff that improves your Melee Damage. You can use the Vaal version for an even stronger Buff. |
 |
Culling Strike Support - your Totem will Cull your enemies, which means instant death once they reach 10% maximum Life. |
| [UTILITY] Flame Dash setup | |
|
Flame Dash - a swift teleport that leaves a fiery path on its way. You can store up to 3 Charges, but only the first one will be instant to use. |
| [UTILITY] Molten Shell | |
 |
Molten Shell - a Guard Spell that grants you a powerful absorption Shield. It also improves your Armour Rating during its Duration. |
|
|
6. Gear Setup
Almost all of your Gear consists of Rare Equipment, and the Uniqes are not vital to use, which means you can greatly adjust your choices to your budget. As always, the more you spend, the better results you will get. The most Damage comes obviously from your Weapon, which we recommend to self-craft since Elemental Staves are a very unpopular choice. The best option is to get Fractured T1 Lightning Damage on the Judgement Staff and use Essence of Hatred until you get satisfying results. The remaining gear is fairly typical - you just want a lot of maximum Life, Resistances, and Elemental Damage if you have those 2 sorted out. You should also aim for some Cooldown Recovery Rate on your Boots and Belt, as it will greatly improve your single-target Damage and Clear Speed. The Precision Aura, especially the level 30 one from the Hyrri's Truth Amulet, is very helpful at fixing your Accuracy Rating, but it's not enough on its own and you will need to get some Accuracy Rating on your Rare Gear too. You can also get some additional Mana Reservation Efficiency modifiers on your Jewels and Helmet. Reduced Mana Costs on your Rings are important to freely Spam your Skills, you can even get most of them down to 0 costs at all!
|
Stat priorities on items:
|
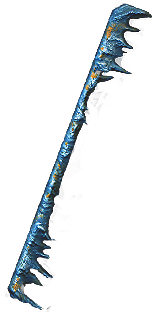
 (Helmet) Rare Helmet - a Blizzard Crown with relevant Enchant would be an ideal base for this Build. As for its actually Rare modifiers, it should include maximum Life, Essence's Mana Reservation Efficiency, and some Resistances. (Helmet) Rare Helmet - a Blizzard Crown with relevant Enchant would be an ideal base for this Build. As for its actually Rare modifiers, it should include maximum Life, Essence's Mana Reservation Efficiency, and some Resistances. |
|
|
Min. requirements: |
|
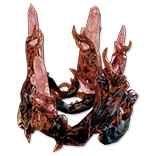
 (Weapon) Rare Weapon - the market for Elemental Staves is pretty niche, so you might need to craft a Weapon for yourself. Fortunately, it's quite easy to get good results with just Fractured Base and Essences, since you don't need fancy mods like Attack Speed or Elemental Penetration. (Weapon) Rare Weapon - the market for Elemental Staves is pretty niche, so you might need to craft a Weapon for yourself. Fortunately, it's quite easy to get good results with just Fractured Base and Essences, since you don't need fancy mods like Attack Speed or Elemental Penetration. |
|
| Min. requirements: 800+ Elemental DPS Optional affixes: Critical Strike Chance Chance to Deal Double Damage Critical Strike Multiplier |
|
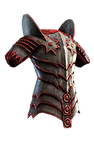 (Body Armour) Rare Armour - you can get a lot of defensive value on your Rare Chest. It should grant a lot of maximum Life and boost the effectiveness of your Auras, which can be achieved by Redeemer or Searing Excharch influence. You can also get some Block Chance here. If you are lucky, you can also get Frenzy Charge generation on top of that. (Body Armour) Rare Armour - you can get a lot of defensive value on your Rare Chest. It should grant a lot of maximum Life and boost the effectiveness of your Auras, which can be achieved by Redeemer or Searing Excharch influence. You can also get some Block Chance here. If you are lucky, you can also get Frenzy Charge generation on top of that. |
|
| Min. requirements: 100+ maximum Life 18% increased effect of Non-Curse Auras from your Skills Optional affixes: (6-8)% Chance to Block Attack/Spell Damage 10% chance to gain a Frenzy Charge on Hit Elemental Resistances |
|
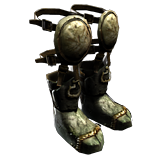 (Boots) Rare Boots - on your Boots you can get a lot of Cooldown Recovery Rate and mobility in the form of Movement Speed, Action Speed, or Onslaught. You should also look for standard maximum Life and Resistances. (Boots) Rare Boots - on your Boots you can get a lot of Cooldown Recovery Rate and mobility in the form of Movement Speed, Action Speed, or Onslaught. You should also look for standard maximum Life and Resistances. |
|
| Min. requirements: 70+ maximum Life 20% increased Movement Speed 50% to Elemental Resistances Optional affixes: increased Action Speed increased Cooldown Recovery Rate chance to gain Onslaught for 4 seconds on Kill |
|
 (Gloves) Rare Gloves - your Gloves can provide plenty of Damage thanks to the unique Alva's modifier as well as some maximum Life and Resistances. You can get Additional Strikes with the Edlritch Implicits which is great Quality of Life improvement for Static Strike. (Gloves) Rare Gloves - your Gloves can provide plenty of Damage thanks to the unique Alva's modifier as well as some maximum Life and Resistances. You can get Additional Strikes with the Edlritch Implicits which is great Quality of Life improvement for Static Strike. |
|
| Min. requirements: +70 to maximum Life +50% to Elemental Resistances Optional affixes: increased Damage with Hits against Chilled Enemies Strike Skills target 1 additional nearby Enemy Accuracy Rating |
|
 (Belt) Rare Belt - it is another important piece to get Cooldown Recovery Rate. You should pair it up with maximum Life and Resistances. You can also get some solid amount of Elemental Damage with Attacks here. (Belt) Rare Belt - it is another important piece to get Cooldown Recovery Rate. You should pair it up with maximum Life and Resistances. You can also get some solid amount of Elemental Damage with Attacks here. |
|
| Min. requirements: +80 to Maximum Life +50% to Elemental Resistances Optional affixes: % Increased Maximum Life increased Cooldown Recovery Rate increased Elemental Damage with Attack Skills |
|
 (Jewel) Rare Abyss Jewel - those can grant a lot of flat Damage for your Attacks for quite cheap since it's not a popular choice. You can also get some maximum Life here if you are willing to sacrifice Damage rolls. (Jewel) Rare Abyss Jewel - those can grant a lot of flat Damage for your Attacks for quite cheap since it's not a popular choice. You can also get some maximum Life here if you are willing to sacrifice Damage rolls. |
|
| Recommended modifiers: +30 to maximum Life Adds # to # Lightning/Cold/Fire Damage to Attacks # to # Added Lightning/Cold/Fire Damage with Staff Attacks |
|
 (Amulet) Hyrri's Truth - this Amulet single-handedly solves all Accuracy Rating and Dexterity problems. It also grants a lot of Critical Strike Multiplier. Unfortunately, it doesn't provide any defensive value. You can use Attribute Catalysts to boost Dexterity even more. (Amulet) Hyrri's Truth - this Amulet single-handedly solves all Accuracy Rating and Dexterity problems. It also grants a lot of Critical Strike Multiplier. Unfortunately, it doesn't provide any defensive value. You can use Attribute Catalysts to boost Dexterity even more. |
|
| +(20-30) to Dexterity Grants Level 30 Precision Skill +(40-80) to Dexterity Bow Attacks have Culling Strike +(25-50)% to Global Critical Strike Multiplier Precision has 100% increased Mana Reservation Efficiency |
|
| Recommended Anointments: Charisma Titanic Impacts |
|
 (Ring) Rare Ring - you can get a lot of Elemental Damage here, especially if you use Turbulent Catalyst. You should also get maximum Life and reduced Costs of Skills here. Top it up with some Elemental Resistances or lacking Attributes. (Ring) Rare Ring - you can get a lot of Elemental Damage here, especially if you use Turbulent Catalyst. You should also get maximum Life and reduced Costs of Skills here. Top it up with some Elemental Resistances or lacking Attributes. |
|
| Min. requirements: +50% to Elemental Resistances +60 to Maximum Life Optional affixes: Non-Channelling Skills have -7 to Total Mana Cost increased Elemental Damage with Attack Skills Accuracy Rating |
|
 (Ring) The Taming - it's a good budget option that grants a lot of Resistances and Damage. It however doesn't give any maximum Life, so should be replaced fairly quickly. (Ring) The Taming - it's a good budget option that grants a lot of Resistances and Damage. It however doesn't give any maximum Life, so should be replaced fairly quickly. |
|
| 20% increased Damage with Hits and Ailments per Freeze, Shock or Ignite on Enemy +(20-30)% to all Elemental Resistances 30% increased Elemental Damage 10% chance to Freeze, Shock and Ignite 30% increased Elemental Damage with Attack Skills |
|
 (Jewel) Rare Jewels - regular Jewels are also powerful as they can give a lot of Critical Strike Multiplier, but you should balance out Crit Multiplier and Flat Added Damage from Abyss Jewels for the best result. (Jewel) Rare Jewels - regular Jewels are also powerful as they can give a lot of Critical Strike Multiplier, but you should balance out Crit Multiplier and Flat Added Damage from Abyss Jewels for the best result. |
|
| Recommended affixes: increased maximum Life Mana Reservation Efficiency Critical Strike Multiplier with Two Handed Melee Weapons Melee Critical Strike Multiplier Global Critical Strike Multiplier |
|
 (Jewel) Large Cluster Jewel - the Overlord Notable can be used to obtain an almost permanent Fortify Buff which lowers the Damage you take. Feed the Fury is also useful as it grants you a Life Leech which is inconvenient to get the other way. Third Notable can be skipped to save Passive Points. (Jewel) Large Cluster Jewel - the Overlord Notable can be used to obtain an almost permanent Fortify Buff which lowers the Damage you take. Feed the Fury is also useful as it grants you a Life Leech which is inconvenient to get the other way. Third Notable can be skipped to save Passive Points. |
|
| Recommended affixes: 1 Added Passive Skill is Feed the Fury 1 Added Passive Skill is Overlord 1 Added Passive Skill is Martial Prowess |
|
 (Jewel) Medium Cluster Jewels - those 2 Notables are the best ones to get here as they provide valuable Critical Strike Chance and some Damage. Getting 100% Critical Strike Chance is vital as it's our only way to bypass Elemental Resistances. (Jewel) Medium Cluster Jewels - those 2 Notables are the best ones to get here as they provide valuable Critical Strike Chance and some Damage. Getting 100% Critical Strike Chance is vital as it's our only way to bypass Elemental Resistances. |
|
| Recommended affixes: 1 Added Passive Skill is Basics of Pain 1 Added Passive Skill is Pressure Points |
|
 (Jewel) Watcher's Eye - it's a good way to cap your lacking Block Chance as well as get some Damage from Precision modifiers. (Jewel) Watcher's Eye - it's a good way to cap your lacking Block Chance as well as get some Damage from Precision modifiers. |
|
| (4-6)% increased maximum Energy Shield (4-6)% increased maximum Life (4-6)% increased maximum Mana <Two or Three random aura modifiers> Recommended Aura mods: (40-60)% increased Attack Damage while affected by Precision +(5-8)% Chance to Block Attack Damage while affected by Determination |
|
 (Flask) Bottled Faith - a very powerful Flask that massively improves your Damage with fully charged Frozen Legion. You can improve its Effect via Enchant for an even stronger burst. (Flask) Bottled Faith - a very powerful Flask that massively improves your Damage with fully charged Frozen Legion. You can improve its Effect via Enchant for an even stronger burst. |
|
| Creates Consecrated Ground on Use (30-15)% reduced Duration Consecrated Ground created by this Flask has Tripled Radius Consecrated Ground created during Effect applies (7-10)% increased Damage taken to Enemies (100-150)% increased Critical Strike Chance against Enemies on Consecrated Ground during Effect |
|
|
Suggested Flasks:
|
|
     |
|
|
If you have any other build requests please leave that in the comments below. We are always open to suggestions and constructive feedback.
Pictures used in this article are the intellectual property of Grinding Gear Games.
