Frenzy Trickster Build
A Frenzy-stacking, Fortify-Sacking Frenzy Trickster buildFrenzy
Tricker Build
Updated for Patch 3.24
The Best Crafty Guides by Odealo
| Guide notes | |||
| May 5, 2024 -Build created |
|||
| Build overview | |||
| Tags: [MELEE] [FORTIFY] [CHAOS] [LIFE] | |||
|
Budget: Defenses: |
|
Boss DPS: AoE: |
|
The Frenzy-stacker archetype is known for being expensive, so just to be clear, it's not a cheap build. It's hard to get more than 6 Maximum Frenzy Charges, but with Corrupted Gloves, two pricey Rings, and the Trickster's Swift Killer you will extend this limit to 11. Frenzy Charges grants 4% increased Attack Speed and 4% more Damage each. The Frenzy Attack also grant 7% more Attack Damage and 7% more Attack Speed per Charge, but these grow fast alongside Gem Quality. The Replica Badge of the Brotherhood Amulat causes the Maximum Frenzy Charge limit to be applied to Endurance Charges as well, providing you with a lot of Elemental Resistances and Physical Damage reduction already. The same Amulet also extends your Maximum Fortify limit by 1 per Endurance Charge. Fortify is one of the best defensive buffs, but it's hard to get for most builds. It reduces all incoming Hit Damage by 1% per Fortify and is naturally capped at 20. The more of it you have the more efficient it is. Go for The Celestial Brace Gloves for another 10 Maximum Fortify, and allocate nodes in the Steadfast Cluster for a total of 47 Fortify. These Gloves will increase your Attack Speed by 47% in this configuration, and generate Fortify for you as long as you use a Melee Attack.
You now have a lot of "increased" and "more" Attack Speed and Attack Damage, but you still need the actual flat damage to begin with. You can either find a good weapon, such as Rakiata's Dance, or use a Forbidden Shako with a high-level Ice Bite. Ice Bite Support adds Cold Damage per Frenzy Charge and scales up extremely well with Gem Level. We have prepared two versions of this build as they are quite different.
Because of the high Fortification, any incoming hit damage is already nearly halved. On top of that the build has very high Armour and Evasion, sourced from Auras, Armour and Evasion Mastery for Armour and Evasion per Frenzy and Endurance Charge, high Spell Suppression, and reduced Physical Damage via Endurance Charges. You're extremely resilient to Physical Hit Damage, which is often very hard to achieve - most builds tend to shift incoming Physical Damage to be taken as Elemental Damage. We don't need to do that here. As for Recovery, the high Attack Speed combined with a Leech Mastery for instant Leech is enough in most cases. The passive Regeneration may be lacking, and if that's a problem you can implement Enduring Cry or The Restless Ward. With a Fortify Mastery, all Ailments will have reduced Duration on you by up to 94%.
You can also check our other Path of Exile builds right over here Odealo's Crafty Guides - Full List
1. Gameplay
Use Frenzy to slay foes as you go. It's a basic Strike Attack so you might want to enhance it with Herald of Ice, Devastator, or Fall of Oriath. Two Ancestral Totems are to be deployed during a boss fight. Blood Rage and a Hex Curse (if you have any) will be cast manually. Your other Curse is the Assassin's Mark linked to Mark on Hit Support. For a Movement Skill, you may use Frostblink. For a Guard Spell, we recommend Molten Shell. Your Auras are Grace, Determination, Precision, Defiance Banner, and maybe Herald of Ice, Herald of Thunder, Skitterbots, or Arctic Armour.
|
|
|
|
2. Build's PROS & CONS
| PROS |
|
| CONS |
|
3. Leveling tips
It's not a starter build and it's hard to level up using Frenzy and Frenzy Charges, especially as the Unique Items require level 60. Instead, start as a generic Frost Blades Trickster. It's an excellent starter that also uses Melee Strike Skill to deal Elemental Damage. You can make the switch after acquiring the necessary items and levelling up the character.
Bandits:
Killing all Bandits for two additional Passive Points is the best option
4. Final Skill Tree, Ascendancy Points, and Pantheon
Final Skill Tree:
116 Points Final Skill Tree - Fordibben Shako version (doesn't include Unique or Cluster Jewels)
123 Points Path of Building (PoB) link - Fordibben Shako version
119 Points Final Skill Tree - Rakiata's Dance version (doesn't include Unique or Cluster Jewels)
119 Points Path of Building (PoB) link - Rakiata's Dance version
Ascendancy points:
Preferably in that order:
- Polymath
- Swift Killer
- One Step Ahead
- Heartstopper
Pantheon:
Major God: Soul of Lunaris: 1% increased Movement Speed for each nearby Enemy, up to 8%; 1% additional Physical Damage Reduction for each nearby Enemy, up to 8%
Minor God: Soul of Yugul: 50% chance to Reflect Hexes; You and your Minions take 50% reduced Reflected Damage; 30% reduced Effect of Curses on you
5. Final Gems links
| [DPS] Frenzy setup can be socketed in Forbidden Shako |
|
 |
Frenzy - Frenzy is the Strike Attack that scales up its Attack Speed and Damage with Frenzy Charges. |
 |
Cold to Fire Support - Good with Forbidden Shako and Ice Bite. It grants a lot of Fire Damage sourced from Cold Damage and Converts half of it. You may then benefit from Brittle and Scorch from Secrets of Suffering. It can be replaced with  Volatility if you deal a lot of Lightning Damage (with Rakiata's Dance), or Volatility if you deal a lot of Lightning Damage (with Rakiata's Dance), or  Enhance if using a weapon with mixed damage, or if the flat Cold Damage is low. Enhance if using a weapon with mixed damage, or if the flat Cold Damage is low. |
 |
Elemental Damage with Attacks Support - Grants more Elemental Damage with Attacks. It can be replaced with a level-4  Enhance if you happen to have it. It provides a similar damage boost. Enhance if you happen to have it. It provides a similar damage boost. |
 |
Ice Bite Support - Ice Bite grants flat Cold Damage per Frenzy Charge. If using Forbidden Shako, make sure this one has a high Gem Level. It can be replaced with  Inspiration if the Mana Cost is too high. Inspiration if the Mana Cost is too high. |
 |
Endurance Charge on Melee Stun Support - Generates Brutal Charges and grants more Damage per Endurance Charge, which is very efficient with 10 or more of these. |
 |
Multistrike Support - Attacks repeat additional time with higher Attack Speed, but lower Attack Damage. |
| [UTILITY] Aura setup | |
 |
Grace - Added and increased Evasion Rating for a higher chance of Evading Attacks. |
 |
Determination - Added and increased Armour Rating to reduce Physical Hit Damage. If you have the Sublime Vision, you'll have to replace it with something like  Arctic Armour. Arctic Armour. |
 |
Defiance Banner - Increased Evasion and Armour. Nearby enemies have reduced Critical Strike Chance. With Sublime Vision, you will have to replace it with Aspect of the Cat, or Aspect of the Crab (These are from Items, not Gems). |
 |
Summon Skitterbots - Skitterbots are to be used if you have Secrets of Suffering Allocated. They will Chill and Shock. If you don't have this Keystone, it can be replaced with  Herald of Ice or Herald of Ice or  Herald of Thunder, depending on your gear pieces. Herald of Thunder, depending on your gear pieces. |
 |
Precision - Adds Accuracy and increases Critical Strike Chance. You should be able to level it up quite high, maybe even up to level 20. |
 |
Enlighten Support - Linked Skills Reserve less Mana. |
| [UTILITY] Various Gems | |
 |
Assassin's Mark - Marked enemy takes increased Critical Damage and strikes against them are more likely to be Critical. Use a Level 21 Gem if you have a Level 20 CwDT in the same setup. |
 |
Mark on Hit Support - Assassin's Mark is applied automatically on Hit against Rare and Unique enemies. |
 |
Lifetap Support - Linked Skills cost Life instead of Mana. |
 |
Molten Shell - A Guard Spell that absorbs a portion of incoming Hit Damage. It scales up with Arour which you should have a lot of. |
 |
Cast when Damage Taken Support - It triggers Molten Shell after taking enough damage. |
| [UTILITY] Totem setup | |
 |
Multiple Totems Support - It lets you summon both totems at the same time. |
 |
Ancestral Protector - Grants more Attack Speed for as long as it stays active. |
 |
Vaal Ancestral Warchief - Grants more Melee Damage. The Vaal version has more Totem Life and the Buff Effect is improved. |
| [MOBILITY] Frostblink setup | |
 |
Leap Slam - Your low Movement Speed is not a big problem if you use Leap Slam to move around. |
 |
Lifetap Support |
| [UTILITY] Various Gems | |
 |
Elemental Weakness - If you can apply two Curses thanks to Whispers of Doom on the Amulet, and if you don't use Rakiata's Dance, cast Elemental Weakness manually. |
 |
Blood Rage - It is used mainly for increased Attack Speed - you already have Life Leech and Frenzy Charges. |
|
|
6. Gear Setup
There is more than one way to gear up the character, but the most important are The Celestial Brace Gloves, Replica Badge of the Brotherhood Amulet, and Ralakesh's Impatience Boots. It's the foundation of the build, all the other items derive from the synergy between them. After that's settled, it's all about Maximum Frenzy Charges and a source of flat Damage. Flat Damage can be gained from a good weapon of the Forbidden Shako Helmet. Items for Maximum Frenzy Charges are very expensive, it's the main reason for the overall high price of this build. It's possible to use only Unique Items, but that institutes a whole set of Attribute and Resistance-related issues.
Our recommended items will:
- Cap your resistances at 75%
- Provide you with enough DPS and Life to start mapping
|
Stat priorities on items:
|
 (Helmet) Forbidden Shako - With a high-level Ice Bite it gets prohibitively expensive, but it can be a great choice on account of your high number of Frenzy Charges (Helmet) Forbidden Shako - With a high-level Ice Bite it gets prohibitively expensive, but it can be a great choice on account of your high number of Frenzy Charges |
|
| Socketed Gems are Supported by Level (1-10) <random Support Gem> Socketed Gems are Supported by Level (25-35) <random Support Gem> +(25-30) to all Attributes |
|
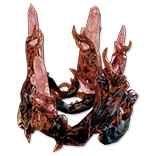 (Helmet) Rare Helmet - Rare Blizzard Crown is great, especially with Rakiata's Dance. It should grant you the basic defensive stats, but you can also seek Shaper's Suffix that causes nearby enemies to receive increased Elemental Damage, or Shaper's Prefix for one additional Maximum Power Charge. (Helmet) Rare Helmet - Rare Blizzard Crown is great, especially with Rakiata's Dance. It should grant you the basic defensive stats, but you can also seek Shaper's Suffix that causes nearby enemies to receive increased Elemental Damage, or Shaper's Prefix for one additional Maximum Power Charge. |
|
| Min. requirements: +70 Maximum Life +80% Total Elemental Resistances Spell Suppression Chance Optional affixes: Nearby enemies take #% Increased Elemental Damage Nearby enemies have -#% to Cold Resistance (not with Rakiata's Dance) Chaos Resistance Maximum Power Charge Accuracy Rating Attributes |
|
 (Weapon) Cane of Kulemak - Cane of Kulemak with increased Attack Speed, Elemental Penetration, and increased Cold Damage (2 Prefixes, 1 Suffix), may be excellent if you already have a source of flat Cold Damage, for example, Ice Bite Support. Replica Covenant would introduce too many problems, but it too can work. (Weapon) Cane of Kulemak - Cane of Kulemak with increased Attack Speed, Elemental Penetration, and increased Cold Damage (2 Prefixes, 1 Suffix), may be excellent if you already have a source of flat Cold Damage, for example, Ice Bite Support. Replica Covenant would introduce too many problems, but it too can work. |
|
| +20% Chance to Block Attack Damage while wielding a Staff (60-90)% increased Unveiled Modifier magnitudes Veiled Prefix Veiled Suffix <Veiled Prefix or Veiled Suffix> <veiled mod pool> |
|
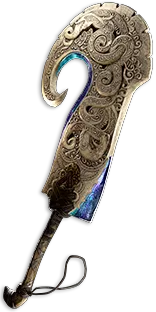 (Weapon) Rakiata's Dance - Makes you deal a lot of Cold and Lightning Damage with no need for Resistance Penetration. It's actually great in maps where enemies have their Resistance high, which happens often. Use it if you lack a meaningful source of flat damage. (Weapon) Rakiata's Dance - Makes you deal a lot of Cold and Lightning Damage with no need for Resistance Penetration. It's actually great in maps where enemies have their Resistance high, which happens often. Use it if you lack a meaningful source of flat damage. |
|
| 60% increased Global Accuracy Rating Adds (150-200) to (300-350) Cold Damage Adds 1 to (550-600) Lightning Damage (15-20)% increased Attack Speed Treats Enemy Monster Elemental Resistance values as inverted |
|
 (Weapon) Rare Sword or Claw - We recommend a Rare Sword or a Claw only if you want to pair it up with a Shield with a +1 Max Frenzy Charge. Such weapons should have high Elemental DPS with Critical Strike modifiers. (Weapon) Rare Sword or Claw - We recommend a Rare Sword or a Claw only if you want to pair it up with a Shield with a +1 Max Frenzy Charge. Such weapons should have high Elemental DPS with Critical Strike modifiers. |
|
| Min. requirements: ~900 Elemental DPS Optional affixes: Critical Strike Chance Critical Strike Multiplier |
|
 (Off-hand) Rare Shield - A synthesized Shield with +1 Max Frenzy Charge is the most expensive item on the list so we recommend it only for committed players. It should have the basic defensive mods and increased Damage of a specific Element if it's a pure INT Shield. (Off-hand) Rare Shield - A synthesized Shield with +1 Max Frenzy Charge is the most expensive item on the list so we recommend it only for committed players. It should have the basic defensive mods and increased Damage of a specific Element if it's a pure INT Shield. |
|
| Min. requirements: +1 to Maximum Frenzy Charges (Synthesised Implicit) +80 Maximum Life Spell Suppression Optional affixes: increased Elemental Damage added Elemental Damage Chance to deal Double Damage Resistances |
|
 (Body Armour) The Restless Ward - It has the much-needed Movement Speed, some Life Regeneration, and Maximum Life. It's a fine choice given your Boots grant you no Movement Speed, but if that is no issue, replace it with a Rare Body Armour or Dialla's Malefaction. (Body Armour) The Restless Ward - It has the much-needed Movement Speed, some Life Regeneration, and Maximum Life. It's a fine choice given your Boots grant you no Movement Speed, but if that is no issue, replace it with a Rare Body Armour or Dialla's Malefaction. |
|
| +(20-25) to maximum Mana (220-250)% increased Evasion and Energy Shield +(60-80) to maximum Life 4% increased Movement Speed per Frenzy Charge Regenerate 75 Life per second per Endurance Charge (100-200)% increased Endurance, Frenzy and Power Charge Duration |
|
 (Body Armour) Dialla's Malefaction - Frenzy (The Skill) scales really well with Gem Quality, given you have a lot of Frenzy Charges, which you do. It makes the Green Sockets in Dialla's Malefaction very appealing. (Body Armour) Dialla's Malefaction - Frenzy (The Skill) scales really well with Gem Quality, given you have a lot of Frenzy Charges, which you do. It makes the Green Sockets in Dialla's Malefaction very appealing. |
|
| Gems can be Socketed in this Item ignoring Socket Colour Gems Socketed in Red Sockets have +2 to Level Gems Socketed in Green Sockets have +30% to Quality Gems Socketed in Blue Sockets gain 100% increased Experience Has no Attribute Requirements |
|
 (Boots) Ralakesh's Impatience - You have the ability to generate all of the Charges when mapping but you can also lose them quickly, and scrambling to gain them back during boss fights is not ideal, so these Boots should be mandatory. (Boots) Ralakesh's Impatience - You have the ability to generate all of the Charges when mapping but you can also lose them quickly, and scrambling to gain them back during boss fights is not ideal, so these Boots should be mandatory. |
|
| +(15-25)% to Cold Resistance +(15-25)% to Chaos Resistance Count as having maximum number of Endurance Charges Count as having maximum number of Frenzy Charges Count as having maximum number of Power Charges |
|
 (Gloves) The Celestial Brace - The basic 20 Fortification can be enhanced by an additional 10 with these Gloves, which also generate Fortify on Melee Strike Hits. You can reach nearly 50 Fortification with other Items and passives. It results in increased Attack Speed. Corrupted Gloves can give you one additional Maximum Frenzy Charge and obtaining such a pair should be one of your priorities. (Gloves) The Celestial Brace - The basic 20 Fortification can be enhanced by an additional 10 with these Gloves, which also generate Fortify on Melee Strike Hits. You can reach nearly 50 Fortification with other Items and passives. It results in increased Attack Speed. Corrupted Gloves can give you one additional Maximum Frenzy Charge and obtaining such a pair should be one of your priorities. |
|
| (80-120)% increased Armour 1% increased Attack Speed per Fortification +(1-10) to maximum Fortification Melee Hits from Strike Skills Fortify |
|
 (Belt) Arn's Anguish - You can generate Brutal Charges with Enduring Cry or Endurance Charge on Melee Stun. Each Brutal Charge grants a 3% chance to deal Triple Damage. It's one of the best Belts for builds with around 10 Endurance Charges and finding a substitute that comes even close to that in terms of DPS is hard. You can Corrupt it for a chance for extra Elemental Resistances. (Belt) Arn's Anguish - You can generate Brutal Charges with Enduring Cry or Endurance Charge on Melee Stun. Each Brutal Charge grants a 3% chance to deal Triple Damage. It's one of the best Belts for builds with around 10 Endurance Charges and finding a substitute that comes even close to that in terms of DPS is hard. You can Corrupt it for a chance for extra Elemental Resistances. |
|
| (15-25)% increased Stun and Block Recovery +(600-700) to Armour (12-15)% increased maximum Life +(40-60)% to Fire Resistance +1 to Maximum Endurance Charges Modifiers to Minimum Endurance Charges instead apply to Minimum Brutal Charges Maximum Brutal Charges is equal to Maximum Endurance Charges Gain Brutal Charges instead of Endurance Charges |
|
 (Amulet) Replica Badge of the Brotherhood - It's a mandatory Amulet. It provides you with Maximum Endurance Charges equal to your Maximum Frenzy Charges. Each Endurance Charge grants +1 Maximum Fortification, which this builds also stacks. The Attributes and increased Cooldown for Frostblink are other minor boons. (Amulet) Replica Badge of the Brotherhood - It's a mandatory Amulet. It provides you with Maximum Endurance Charges equal to your Maximum Frenzy Charges. Each Endurance Charge grants +1 Maximum Fortification, which this builds also stacks. The Attributes and increased Cooldown for Frostblink are other minor boons. |
|
| +(16-24) to Dexterity and Intelligence Your Maximum Endurance Charges is equal to your Maximum Frenzy Charges +1 to maximum Fortification per Endurance Charge (7-10)% increased Cooldown Recovery Rate of Travel Skills per Frenzy Charge (20-25)% chance to lose a Frenzy Charge when you use a Travel Skill (20-25)% chance to lose an Endurance Charge when you gain Fortification |
|
| Recommended Anointments: Whispers of Doom Sovereignty Disciple of the Unyielding |
|
 (Ring) Rare Ring - A Ring with Synthesied Max Frenzy charge is your best option. These are always very expensive, but eventually, you will have to get one. Get the basic Maximum Life, Resistances, Attributes, and craft Reduced Mana Cost of Skills. (Ring) Rare Ring - A Ring with Synthesied Max Frenzy charge is your best option. These are always very expensive, but eventually, you will have to get one. Get the basic Maximum Life, Resistances, Attributes, and craft Reduced Mana Cost of Skills. |
|
| Min. requirements: +1 to Maximum Frenzy Charges (Synthesised Implicit) +70 Maximum Life Non-Channelling Skills have -7 to Total Mana Cost (crafted Prefix) Optional affixes: Resistances Attributes Added Elemental Damage to Attacks increased Elemental Damage with Attacks increased Elemental Damage Added Cold Damage per Frenzy Charge (Redeemer's Prefix) |
|
 (Ring) Precursor's Emblem - If you want to use the Precursor's Emblem it should have some useful stats related to Endurance or Frenzy Charges. The +1 Maximum Frenzy Charge mod is expensive, so if you have such a Ring feel free to mirror it with Kalandra's Touch. (Ring) Precursor's Emblem - If you want to use the Precursor's Emblem it should have some useful stats related to Endurance or Frenzy Charges. The +1 Maximum Frenzy Charge mod is expensive, so if you have such a Ring feel free to mirror it with Kalandra's Touch. |
|
| +(12-16)% to Fire and Cold Resistances 5% increased maximum Energy Shield 5% increased maximum Life +20 to Strength and Dexterity <Two Endurance Charge mods and one Frenzy Charge Mod> or <One Endurance Charge mod and Two Frenzy Charge Mods> |
|
 (Ring) Circle of Fear - When it comes to Rings with Maximum Frenzy Charge on them, Circle Rings are the cheapest as they always drop with a Synthesised Implicit. They're a good reason to use Herald of Ice or Thunder. (Ring) Circle of Fear - When it comes to Rings with Maximum Frenzy Charge on them, Circle Rings are the cheapest as they always drop with a Synthesised Implicit. They're a good reason to use Herald of Ice or Thunder. |
|
| <One to three random Synthesis implicit modifiers> +(20-30) to Dexterity Adds (20-25) to (26-35) Cold Damage +(20-30)% to Cold Resistance <Two Random Herald of Ice modifiers> |
|
 (Jewel) Rare Jewels - Jewels should patch up your Resistances and Attributes. After that, look for Critical Strike Chance and Multiplier. Each Jewel must also have a modifier for increased Maximum Life. (Jewel) Rare Jewels - Jewels should patch up your Resistances and Attributes. After that, look for Critical Strike Chance and Multiplier. Each Jewel must also have a modifier for increased Maximum Life. |
|
| Recommended affixes: Maximum Life Attributes Resistances Critical Strike mods Attack Speed |
|
 (Jewel) Large Cluster Jewel - Attack, Elemental, or a Cluster for your specific weapon with passives for missing stats or powerful notables will do. It's optional, but likely necessary. (Jewel) Large Cluster Jewel - Attack, Elemental, or a Cluster for your specific weapon with passives for missing stats or powerful notables will do. It's optional, but likely necessary. |
|
| Recommended affixes: 1 Added Passive Skill is Fuel the Fight 1 Added Passive Skill is Prismatic Heart 1 Added Passive Skill is Sadist 1 Added Passive Skill is Bloodscent 1 Added Passive Skill is Calamitious 1 Added Passive Skill is Stormrider 1 Added Passive Skill is Martial Prowess |
|
 (Jewel) The Interrogation - If you deal high Cold or mixed Cold Damage we recommend Secrets of Suffering to Brittle your enemies. Scorch and Sap are also great, while Shock can be applied with Skitterbots. (Jewel) The Interrogation - If you deal high Cold or mixed Cold Damage we recommend Secrets of Suffering to Brittle your enemies. Scorch and Sap are also great, while Shock can be applied with Skitterbots. |
|
| Adds Secrets of Suffering | |
 (Jewel) Thread of Hope - Large Ring Thread of Hope socketed near Savagery lets you allocate Mana Flows, Art of the Gladiator, Panopticon, Rampart, and Master of the Arena. (Jewel) Thread of Hope - Large Ring Thread of Hope socketed near Savagery lets you allocate Mana Flows, Art of the Gladiator, Panopticon, Rampart, and Master of the Arena. |
|
| Radius: Large Only affects Passives in (Small-Very Large) Ring Passives in Radius can be Allocated without being connected to your tree -(20-10)% to all Elemental Resistances |
|
 (Jewel) Brutal Restraint - Dance with Death from Asenath's variant may be good in some cases. Your low Crit Chance and high damage roll range with Volatility Support and Lightning Damage from Rakiata's Dance can make it a great option. (Jewel) Brutal Restraint - Dance with Death from Asenath's variant may be good in some cases. Your low Crit Chance and high damage roll range with Volatility Support and Lightning Damage from Rakiata's Dance can make it a great option. |
|
| Denoted service of (500-8000) dekhara in the akhara of (Asenath-Balbala-Nasima) Passives in radius are Conquered by the Maraketh Historic |
|
 (Jewel) Sublime Vision - If you can afford to give up Determination and Precision, get Sublime Vision for much more Evasion (which can easily be transmogrified into Armour with Iron Reflexes), and one additional Maximum Frenzy Charge. (Jewel) Sublime Vision - If you can afford to give up Determination and Precision, get Sublime Vision for much more Evasion (which can easily be transmogrified into Armour with Iron Reflexes), and one additional Maximum Frenzy Charge. |
|
| +1 to Maximum Frenzy Charges while affected by Grace Aura Skills other than Grace are Disabled Auras from your Skills have (20-40)% increased Effect on you |
|
 (Jewel) Watcher's Eye - You're using Grace, Determination, and Precision. Grace and Determination may get you good defensive stats, but Precision can roll Attack Speed, Critical Strike Multiplier, or Flask Charge on Critical Strike. (Jewel) Watcher's Eye - You're using Grace, Determination, and Precision. Grace and Determination may get you good defensive stats, but Precision can roll Attack Speed, Critical Strike Multiplier, or Flask Charge on Critical Strike. |
|
| (4-6)% increased maximum Energy Shield (4-6)% increased maximum Life (4-6)% increased maximum Mana <Two or Three random aura modifiers> |
|
 (Jewel) Starlight Chalice - Applies Exposure which reduces Elemental Resistance. It increases the Effect of Non-Damaging Ailments which can be of use. Exposure may also be applied with (Jewel) Starlight Chalice - Applies Exposure which reduces Elemental Resistance. It increases the Effect of Non-Damaging Ailments which can be of use. Exposure may also be applied with  Hydrosphere if you can spare a socket and a button for it. Hydrosphere if you can spare a socket and a button for it. |
|
| +200 to Ward Restores Ward on use (20-30)% increased Charge Recovery Inflict Fire, Cold and Lightning Exposure on nearby Enemies when used (20-30)% increased Effect of Non-Damaging Ailments you inflict during Effect |
|
 (Jewel) Bottled Faith - All of its stats are great - Consecrated Ground, increased Damage, and Critical Strikes Chance. (Jewel) Bottled Faith - All of its stats are great - Consecrated Ground, increased Damage, and Critical Strikes Chance. |
|
| 40% increased Damage Creates Consecrated Ground on Use (30-15)% reduced Duration Consecrated Ground created by this Flask has Tripled Radius Consecrated Ground created during Effect applies (7-10)% increased Damage taken to Enemies (100-150)% increased Critical Strike Chance against Enemies on Consecrated Ground during Effect |
|
|
Other suggested Flasks:
|
|
     |
|
|
If you have any other build requests please leave that in the comments below. We are always open to suggestions and constructive feedback.
Pictures used in this article are the intellectual property of Grinding Gear Games.


