 Buy/Sell
 Log in

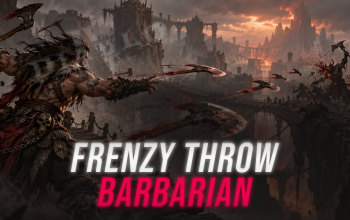
Frenzy Throw Barbarian Build for Diablo 4
Build up Frenzy, unleash a storm of Iron Shrapnel, and keep moving. Here is what makes this ranged Barbarian tick.Frenzy Throw Barbarian Build
Last Update: October 30, 2026
Introduction
The Frenzy Throw Barbarian takes one of the class's fastest melee attacks and sends it flying across the battlefield. With the Throwing Variant, Frenzy pierces enemies from a distance and scatters Iron Shrapnel through crowded packs. Each attack builds momentum, and once the Barbarian reaches maximum Frenzy stacks, the screen fills with rapid projectiles. The result is a fast-moving ranged Build with the familiar aggression of a dual-wielding Barbarian.
The key combination is Battle Trance and Hooves of the Mountain God. Battle Trance grants the Barrage Variant, adds more Frenzy stacks and greatly increases damage at maximum stacks. Hooves of the Mountain God causes Basic Skills to cleave when the Fury bar is full. With both effects active, Frenzy can tear into an entire group, while Paingorger's Gauntlets spread its damage to enemies marked by another attack. A quick Rend before a pack is often enough to turn the next volley into a burst of damage across the room.
A strong Frenzy Barbarian still has to solve a surprisingly demanding resource problem. Shard of Verathiel makes Basic Skills cost Fury, Ramaladni's Magnum Opus drains additional Fury in combat, and the Hooves consume more as their bonus continues. We combine these items with Aspect of Adaptability, the resource bonuses from Rallying Cry and an Iron Skin activation that triggers Tibault's Will. When the loop is working, you can keep throwing through enemy packs with very little interruption.
For the Talisman, Sescheron's Fury turns high Fury into a massive damage advantage. Its Colossal effect slows casting, although the Cast Speed gained through Frenzy helps keep the attacks moving. This setup rewards aggressive play and good Fury management. It handles dense dungeons especially well once the supporting Uniques are equipped, while bosses demand more attention to maintaining Frenzy stacks, Paingorger marks and the resource bar.
Pros
- Very Fast Attacks
- Strong Ranged Damage
- Incredible Tankiness
- Excellent Mobility
Cons
- High Fury Consumption
- Requires Several Uniques
You can also visit this page to check our other Best Diablo 4 Builds
Equipment
Battle Trance is the most important Unique to obtain. It provides a free Barrage Variant, adds two Frenzy stacks and rewards you with a substantial damage bonus at maximum stacks. Pick the Throwing Variant in the Skill Tree so the two effects work together. Hooves of the Mountain God are the next priority, giving your ranged Frenzy attacks the cleaving effect that makes large packs easier to handle. Aim for Greater Affixes on Ranks to Frenzy and Fury Regeneration when improving these items.
The dual-wield setup uses Shard of Verathiel and Ramaladni's Magnum Opus. Both offer major damage bonuses, but they put constant pressure on your Fury pool. Shard adds a cost to Frenzy, while Ramaladni scales damage with your current Fury and drains it during combat. Keep Aspect of Adaptability on Ring 2 to generate additional Fury every time Frenzy is used. Tibault's Will restores momentum when Iron Skin grants Unstoppable. Reliable resource recovery makes the Build feel much better than a small increase in damage on paper.
Paingorger's Gauntlets solve a weakness of ranged Basic Skills: enemies outside the narrow line of your projectiles. Start with Scorching Rend to mark several targets and spread Burning damage. Your next Frenzy hit sends its damage across the marked group. The Gloves also work well against Elites standing among smaller enemies. They occupy the Gloves slot throughout the main configuration.
Barbarians can carry two additional two-handed weapons even when Frenzy attacks with the dual-wielded pair. Use a Legendary Two-Handed Slashing Weapon with Aspect of the Moonrise and a Two-Handed Bludgeoning Weapon with Crushing Aspect. Moonrise builds Attack Speed from Basic Skill hits and gives Frenzy another damage multiplier. Crushing adds damage while Fortified, which is maintained through Rallying Cry. These weapon Aspects remain part of the loadout while the one-handed weapons perform Frenzy attacks.
The remaining Legendary slots are straightforward. Heavy Hitting Aspect on Ring 1 strengthens skills that produce Iron Shrapnel, Aspect of Disobedience on Chest Armor grants Damage Reduction from Bleeding and Burning damage, and Aspect of Might on Helm provides an additional defensive layer from Basic Skill use. Leoric's Crown is an optional Helm for extra Attack Speed and a stronger socketed gem; using it removes Aspect of Might.
Sescheron's Fury is the preferred Talisman Set. Keep your Fury at or above 100 to maintain Colossal, and complete the five-piece bonus for its stronger damage and larger Maximum Fury pool. Its sizeable Cast Speed penalty is noticeable during the first few attacks, but the additional Frenzy stacks and offensive buffs help overcome it. Prioritize Maximum Fury and Frenzy Ranks on Charms whenever possible.
Sescheron's Fury
- Berú of Sescheron's Fury
- Fer of Sescheron's Fury
- Linta of Sescheron's Fury
- Mlor of Sescheron's Fury
- Phoba of Sescheron's Fury
- (2) Set: While at or above 100 Fury, become Colossal, losing 50% Cast Speed but gaining 20% Character and Skill Size and 120% increased damage.
- (3) Set: Gain 10 additional Fury when hit and 40% Maximum Life.
- (5) Set: Maximum Fury is increased by 50. Colossal increases Skill Size by 50% and damage by 600%.
Battle Trance
- Ranks to Frenzy
Frenzy gains the Barrage Variant for free and can stack 2 additional times. At maximum stacks, you deal [75 - 100]%[x] increased damage and your other Skills gain [35 - 45]%[+] Attack Speed.
Hooves of the Mountain God
- Fury Regeneration
Casting a Basic Skill while at Maximum Fury causes your Fury to drain at an increasing rate until depleted. During this effect, Basic Skills cleave and deal [45 - 60]%[x] increased damage.
Shard of Verathiel
- Ranks to Basic Skills
Basic Skills deal [70 - 100]%[x] increased damage but additionally cost 25 Primary Resource.
Ramaladni's Magnum Opus
- Maximum Resource
Skills deal [0.35 - 0.50]%[x] increased damage per point of Fury you have, but 7% of your Maximum Fury drains each second while in combat.
Paingorger's Gauntlets
- Attack Speed
Damaging enemies with a cast Non-Basic Skill marks them for 3 seconds. When a Basic Skill first hits a marked target, its damage is echoed to all marked enemies, dealing [100 - 125]%[x] increased damage.
Tibault's Will
- Maximum Life
While Unstoppable and for 5 seconds afterward, you deal [15 - 20]%[x] increased damage and gain 25 Primary Resource Regeneration.
Leoric's Crown
- Attack Speed
This item counts as Jewelry. The effect of a gem socketed in this Helm is increased by [35 - 50]%[x].
For Legendary Aspects, the main setup uses Moonrise on the two-handed Slashing Weapon, Crushing on the two-handed Bludgeoning Weapon, Heavy Hitting on Ring 1, Adaptability on Ring 2, Disobedience on Chest Armor and Might on Helm. The two one-handed weapon slots, Gloves, Pants, Boots and Amulet remain occupied by their Unique Items. Moonrise, Heavy Hitting and Crushing provide damage bonuses that apply to the chosen Frenzy configuration; Adaptability and the two defensive Aspects keep the setup practical during long fights.
Aspect of the Moonrise
Damaging an enemy with a Basic Skill grants 4%[+] Attack Speed for 10 seconds, up to 5 stacks. At maximum stacks, gain Vampiric Bloodrage for 10 seconds, increasing Basic Skill damage by [40 - 60]%[x] and Movement Speed by 15%.
Crushing Aspect
While Fortified, you deal 65%[x] increased damage.
Heavy Hitting Aspect
Skills that create Iron Shrapnel, Earthquakes or Dust Devils deal 60%[x] increased damage.
Aspect of Adaptability
Basic Skills generate [15 - 25] additional Primary Resource, once per Skill.
Aspect of Disobedience
Your Damage over Time grants 1.5% Damage Reduction for 2 seconds, stacking up to 30 times.
Aspect of Might
Basic Skills grant 30% Damage Reduction for 4 seconds.
For offensive Affixes, focus on Ranks to Frenzy, Maximum Fury, Fury Generation, Attack Speed, Critical Strike Chance, Vulnerable Damage and Strength. Resource Generation and Fury Regeneration help stabilize the damage bonuses from Shard of Verathiel, Ramaladni's Magnum Opus and Sescheron's Fury. Defensive priorities are Maximum Life, Armor and Elemental Resistances. Masterwork Frenzy Ranks, Maximum Fury and your best damage bonuses, followed by the Fury-related affixes that keep the attack sequence running.
Skills
 15/15
Primary DPS: Throwing turns Frenzy into a piercing ranged attack. At high stacks it releases Iron Shrapnel, while Battle Trance supplies the Barrage Variant and more stacks for stronger sustained damage. Keeping those stacks active is the heart of the Build.
Max Frenzy and select Throwing, Frenzy Stacks and Ferocity. Each additional stack improves the pace of your attacks and helps offset the Cast Speed penalty from Sescheron's Fury.
 1/15
Utility/Offence: Rend marks enemies for Paingorger's Gauntlets before Frenzy hits them. Its Bleeding also supports Aspect of Disobedience. In tight rooms, a quick slash across several targets can make the following volley much more effective.
Take Scorching to send a wave of Fire damage through enemies and Healing to recover Life from Bleeding targets. Refresh Rend before another Paingorger burst, particularly against Elites and Bosses.
 15/15
Utility/Resource: Rallying Cry increases Movement Speed and Resource Generation, helping the Barbarian keep attacking as Fury drains. Its Fortify upgrade also keeps Crushing Aspect active during dangerous encounters.
Use Booming, Fortify and Fury Gain. Activate the Shout at the start of a pack and keep moving to benefit from the resource recovery.
 15/15
Utility/Offence: War Cry provides an immediate damage boost and helps Frenzy cut through tougher enemies. The Berserking from Mighty Roar is particularly valuable when several Elites survive the opening volley.
Take Mighty Roar, Ferocity and Duration Increase. Use War Cry before sustained Frenzy attacks on Elites or Bosses.
 1/15
Utility/Def: Iron Skin supplies a Barrier and, with the right upgrade, Unstoppable. This also triggers the bonus damage and resource regeneration from Tibault's Will, making it one of the most important buttons when Fury starts to drop.
Choose Juggernaut, Movement Speed and Maximum Life. Activate Iron Skin when preparing to attack a large pack, when Fury is falling, or when a dangerous hit is incoming.
 1/15
Utility/Offence: Call of the Ancients brings an extra burst of pressure against tougher enemies. The summoned Ancients can hold the attention of enemies while the Barbarian continues throwing Frenzy projectiles.
Use Highlander for a permanent Ancient and the Attack Speed and Damage Bonus upgrade for additional offensive support. Position yourself to keep Frenzy hitting the target.
 1/15
Rune Support: Challenging Shout helps the Barbarian survive surrounded by enemies. In the main setup, it is invoked through the Poc + Lac Runeword and does not need to occupy an active Skill Bar slot.
Take Bawl and Fury Generation if investing in its upgrades. Its defensive effect is useful when passing through dense packs or maintaining Frenzy stacks near Bosses.
 1/15
Optional Mobility: Leap provides a straightforward way to cross gaps and escape unfavorable positioning. It is useful while farming and during early gearing, especially when the extra defensive support from the full setup is not yet available.
Use Leap in place of Call of the Ancients if you prefer more movement between packs. Once Fury generation and defensive tools are established, the main six-skill setup offers better sustained damage.
Core Rotation
Start a fight with Rallying Cry to build Fortify and establish resource recovery. Apply Scorching Rend across the enemy pack, then use War Cry and begin throwing Frenzy through the marked targets. The first successful Basic Skill hit echoes its damage through Paingorger's Gauntlets. Once maximum Frenzy stacks are active, stay on the move and keep firing. Against ordinary packs, the cleaving projectiles and Iron Shrapnel usually do the work before enemies can close the distance.
For Elites and Bosses, watch the Fury bar closely. Iron Skin provides Unstoppable and activates Tibault's Will, opening another window for sustained attacks. Use Call of the Ancients for additional damage and keep the target marked with Rend. Maintaining at least 100 Fury is especially important with Sescheron's Fury; dropping below that threshold removes the Colossal bonus. Frenzy is at its strongest once its stacks, Moonrise bonus and resource recovery are all working together.
Miscellaneous
Paragon Board
Begin with Warbringer and Flawless Technique, then expand into Carnage and Blood Rage. Warbringer is particularly useful for a Fury-heavy character, while Flawless Technique works with the dual-wield setup. Carnage supports fast attacking, and Blood Rage helps during longer battles with several Elite packs.
For Glyphs, prioritize Undaunted, Wrath, Exploit, Ambidextrous and Challenger. Undaunted complements the Fortify gained from Rallying Cry, and Ambidextrous rewards the Barbarian's one-handed weapon attacks. Complete the attribute requirements of each Glyph while taking nearby Maximum Life and Fury-related nodes.
Runes
Poc + Lac provides automatic Challenging Shout activation during repeated Fury spending. The extra Damage Reduction makes it easier to stay within range of powerful enemies. Cir + Gar is an offensive alternative that boosts Critical Strike Chance during frequent Skill usage. Equip each pair in a valid two-socket item.
Talisman
Sescheron's Fury is the main Talisman Set. At 100 Fury, Colossal grants a large damage bonus and increases Skill Size. The three-piece bonus supplies extra Fury when hit and Maximum Life, while the five-piece bonus expands Maximum Fury and significantly strengthens Colossal. This is a natural fit for an aggressive Frenzy character that can quickly rebuild Fury between attacks.
Equip the full five-piece set and look for Ranks to Frenzy, Maximum Fury and offensive bonuses on the individual Charms. A Seal of the Diamond Mind can reduce the number of pieces required for set bonuses, allowing an additional Charm once it is available.
Mercenary
Hire Subo with Seeker, Opening Fire, Piercing Arrows and Wire Trap. His ranged support and additional Critical Strike Damage fit the fast-moving Frenzy playstyle.
Choose Aldkin as Reinforcement with Field of Languish to slow and weaken enemies during fights. Its control helps keep dangerous targets in the path of your thrown attacks.
Final Thoughts
The Frenzy Throw Barbarian combines rapid attacks, powerful Basic Skill multipliers and surprisingly good ranged clearing. Battle Trance and Hooves of the Mountain God give Frenzy its signature momentum, while Paingorger's Gauntlets help spread each burst across crowded packs. Fury management takes some practice, but the finished Build offers a satisfying and highly mobile way to play Barbarian.
We plan to continue updating this guide alongside future Diablo 4 patches and expand our Diablo 4 content with additional builds, strategies, and seasonal updates.
If you have suggestions or would like to see other Builds covered, feel free to share your feedback - it helps us improve and create better guides for the community.
Images used in this article are the intellectual property of Blizzard Entertainment or its corresponding owners.