 Buy/Sell
 Log in


Freezing Pulse Totem Hierophant
One of the best Totem Starters with solid transition into end-gameFreezing Pulse Totem
Hierophant build
Updated for Patch 3.29
The Best Crafty Guides by Odealo
| Guide notes |
| July 26, 2026 -Adjusted for the Buffs received in Patch 3.29, resulting in greatly improved performance |
| Build overview | |||
| Tags: [TOTEM] [ELEMENTAL] [HYBRID] | |||
|
Budget: Defenses: |
|
Boss DPS: AoE: |
|


Freezing Pulse is a Spell that deals Cold Damage over a long range, but slowly dissipates during its travel, dealing up to 50% less Damage at the end of its flight. In Patch 3.29, it received massive Buffs to its Damage, but it also gains additional Projectiles as it levels up, which removes the need for Greater Multiple Projectile Supports to reach comfortable AoE Coverage. You can use it manually, but it is still an excellent choice for a Spell Totem playstyle.
The Soul Mantle Unique Armour is a very important piece for nearly every Spell Totem Build, as it provides you with an additional Support Gem for your main setup. It comes with a price, however. Every time your Totem dies or is replaced, a random Hex will be applied to you, lowering your Damage and survivability. You can embrace the Curses with the Coward's Legacy Belt to enable the Pain Attunement Keystone for 30% More Damage, and the Self-Flagelation Jewel that increases Damage based on Curses on you. To avoid crippling debuffs, you will need the Viridi's Veil Helmet and a Magic Ring to ignore the effect of Curses. It also provides a very useful defensive modifier that makes all Damage dealt by your Enemies Unlucky. Alternatively, you can use the Sublime Vision Unique Jewel that makes you unaffected by Curses while you have the Zealotry Aura active. It frees up a Ring and Helmet slot, allowing you to use powerful Uniques such as Indigon for a massive Spell Damage boost or Polaric Devastation that covers Enemies in Frost.
The build is not particularly tanky, but it can take a hit or two thanks to the high Life and Mana pool. The Mana is quite important here as you will redirect 40% of the Damage taken there. You will also Block most of the incoming Spell and Attack Hits. The Totem playstyle is naturally safe, even more so in this case as you will Freeze most enemies, completely stopping them from attacking you.
You can also check our other Path of Exile builds right over here Odealo's Crafty Guides - Full List
1. Gameplay
Place down Totems near Enemies to maximise your Damage. After that, you will have plenty of utility Skills to use against Bosses. The Arcanist Brand helps apply all your Curses, while the Automation or Cast When Damage Taken Setup triggers your Guard Skills, although smart manual usage of them at the right time yields better results.
|
|
|
|


2. Build's PROS & CONS
| PROS |
|
| CONS |
|
3. Leveling tips
Holy Flame is an excellent leveling skill for this and many other Totem builds; it's available right from the start and doesn't require alternating your Passive Skill Tree in a significant way. It can carry you up to level 49 with just four links with no problem. Use it until you get yourself a Soul Mantle. Shortly after that, you'll be able to wear Coward's Legacy Belt. Wear Kikazaru - one or two of them so the Curses won't have a detrimental effect on you. While switching from Holy Flame Totem to Freezing Pulse, it is important to look back at the Skills you're using. Adjust Gem links and Resistances.
Suggested leveling Gem setups:
| Holy Flame Totem setup | |
 |
Holy Flame Totem - a decent spell for leveling Totem builds. The Support Gems that will synergize with it are available right at the start of the game. Use it until you're able to wear Soul Mantle. |
 |
Combustion Support |
 |
Added Fire Damage Support |
 |
Controlled Destruction Support |
| Flame Dash | |
 |
Herald of Ash - it is a very powerful Herald for Fire Spells. Swap it to Zealotry Aura once you start using Freezing Pulse. |
 |
Clarity - you will need this Aura to comfortably use your Skills without running out of Mana. |
 |
Vitality - high Life Regeneration can make a huge difference during the campaign. It is especially useful when completing the Labyrinth. |
| Utility Gems | |
 |
Elemental Weakness - lowers Elemental Resistances of affected Enemies. If you have a source of additional Curse, you can include Sniper's Mark. |
 |
Flame Dash - your main Mobility Skill, one of the best in the game. It offers instant relocation and holds up to three charges. |
Bandits:
Kill all the Bandits to be rewarded with 1 bonus Passive Skill Point, or help Alira to ease early progression.
Leveling Skill Trees:
41 Points Skill Tree
Travel towards the Ancestral Bond Keystone to get an additional Totem, but pick up some Damage and Life on the way there. The Fire Mastery grants a huge boost to Damage.
79 Points Skill Tree
Seek increases to your Damage, Cast Speed, and maximum Life. Replace Fire Notables with Cold Notables once you are ready to swap to your main Skill.
Important: Do not take Mind over Matter Keystone until you're able to sustain Mana, and do not take Pain Attunement until you have your Unique Belt.
4. Final Skill tree, Ascendancy Points, and Pantheon
Final Skill Tree:
103 Points Final Skill Tree (doesn't include Cluster or Unique Jewels)
121 Points Path of Building(PoB) link
Ascendancy points:
Preferably in the order:
- Pursuit of Faith
- Ritual of Awakening
- Conviction of Power
- Arcane Blessing
Pantheon:
Major God: Soul of the Brine King: You cannot be Stunned if you've been Stunned or Blocked a Stunning Hit in the past 2 seconds; 100% chance to Avoid being Frozen
Minor God: Soul of Shakari 50% less Duration of Poisons on You, You cannot be Poisoned while there are at least 3 Poisons on you
5. Final Gems links
| [DPS] Freezing Pulse Totem setup | |
 |
Freezing Pulse - the Spell most suitable for this type of build. It shoots projectiles at very high speed, Pierces all targets, has high base damage, and it's safe. |
 |
Hypothermia Support |
 |
Inspiration Support |
 |
Increased Critical Damage Support |
 |
Multiple Totems Support |
 |
Empower/Cold Penetration Support |
 |
Spell Totem Support - 7th link provided by Unique Body Armour Soul Mantle, makes Freezing Pulse a Totem Spell. |
| [MOBILITY] Mobility setup | |
 |
Frostblink - an instant teleport that leaves Chilling Ground. At first you can use it to apply Bonechill effect. |
 |
Shield Charge - your main movement Skill. It is fast and efficient, but can't get over terrain gaps. |
 |
Faster Attacks Support |
| [UTILITY] Guard Setup | |
 |
Arcane Cloak - Guard Spell that grants a brief absorption of the incoming Damage, depending on the amount of Mana Spent. It also grants a bit of Lightning Damage to your Spells. |
 |
Automation - you can use this Skill to automate only your Arcane Cloak. |
 |
Frost Shield - creates a Shield that absorbs incoming Damage but also greatly enhances your Critical Strike Chance. |
 |
Summon Lightning Golem - improves your Cast Speed and Mana Regeneration. |
 |
Cast when Damage Taken - allows you to automate all your utility Skills. |
| [UTILITY] Aura setup | |
 |
Zealotry - an Aura that increases your Spell Damage and Critical Strike Chance. |
 |
Eternal Blessing Support |
| [UTILITY] Curse setup | |
 |
Arcanist Brand - the Anathema Ring allows you to use 4 Curses, but obviously you don't want to Cast them manually. This Brand will cast all linked Spells in succession. |
 |
Frostbite - this Curse lowers Cold Resistance and makes Enemies more susceptible to Freeze. |
 |
Assassin's Mark - grants you a lot of Critical Strike Chance and Multiplier against Marked Enemies. |
|
Elemental Weakness - further lowers Elemental Resistances of affected foes. |
|
|
5. Gear Setup
The soul mantle approach is very efficient, but requires a few unique items working in tandem to be worth it. At first, you can use simple defensive armour pieces. For Damage, you will need Gem Levels, increases to Spell or Cold Damage, Critical Strikes, and Cast Speed. Your defense is largely based on high maximum Life and Mana, and a solid Shield with a high chance to Block.
|
Stat priorities on items:
|
 (Weapon) Rare Wand - you can get Gem Levels, lots of Cast Speed and Critical Strike Chance for Spells, and Spell Damage here. The Critical Strike Multiplier or flat Cold Damage for Spells is also good. (Weapon) Rare Wand - you can get Gem Levels, lots of Cast Speed and Critical Strike Chance for Spells, and Spell Damage here. The Critical Strike Multiplier or flat Cold Damage for Spells is also good. |
|
| Min. requirements: 60% Increased Cold/Spell Damage +1 to Level of all Cold/Spell Skill Gems Optional affixes: Adds # to # Cold Damage to Spells Increased Cast Speed Critical Strike Chance for Spells Global Critical Strike Multiplier Increased Projectile Speed |
|
 (Weapon) Rare Shield - with the Shaper Influence, you can get additional maximum Totem, which will considerably boost your Damage and AoE coverage. Other than that, try to look for Gem Levels, Critical Strike Chance for Spells, Cast Speed, or some defensive modifiers such as maximum Life or Resistances. (Weapon) Rare Shield - with the Shaper Influence, you can get additional maximum Totem, which will considerably boost your Damage and AoE coverage. Other than that, try to look for Gem Levels, Critical Strike Chance for Spells, Cast Speed, or some defensive modifiers such as maximum Life or Resistances. |
|
| Min. requirements: +50 to maximum Life +1 to maximum number of Summoned Totems Optional affixes: +1 to Level of all Cold/Spell Skill Gems Critical Strike Chance for Spells Chance to deal Double Damage Increased Cast Speed Elemental Resistances |
|
 (Helmet) Viridi's Veil - by equipping a Magic Ring in your right slot, you become Hexproof, which means the Curses still apply to you, but they have no effect. You need at least one source of Curse Immunity in this Build. (Helmet) Viridi's Veil - by equipping a Magic Ring in your right slot, you become Hexproof, which means the Curses still apply to you, but they have no effect. You need at least one source of Curse Immunity in this Build. |
|
| +(1–2) to Level of Socketed Gems (120–160)% increased Armour and Energy Shield +(15–25)% to all Elemental Resistances Damage of Enemies Hitting you is Unlucky while you have a Magic Ring Equipped You are Hexproof if you have a Magic Ring in right slot Take no Extra Damage from Critical Strikes if you have a Magic Ring in left slot |
|
| Helmet enchantments: #% Increased Freezing Pulse Damage #% increased Assassin's Mark Curse Effect |
|
 (Helmet) Indigon - the Indigon offers a large amount of Spell Damage, but requires very good Mana sustain to be worth it. You can use it only if you have Curse Immunity elsewhere. (Helmet) Indigon - the Indigon offers a large amount of Spell Damage, but requires very good Mana sustain to be worth it. You can use it only if you have Curse Immunity elsewhere. |
|
| (150-180)% increased Energy Shield (6-10)% increased maximum Mana Recover (8-10)% of Life when you use a Mana Flask Non-instant Mana Recovery from Flasks is also Recovered as Life (50-60)% increased Cost of Skills for each 200 total Mana Spent Recently (20-25)% increased Spell Damage for each 200 total Mana you have Spent Recently, up to 2000% |
|
 (Body Armour) Soul Mantle - this Body Armour grants you roughly 30% More Damage, as it saves you one Support Gem. If you can't deal with Curses yet, simply use a regular defensive Rare Armour. (Body Armour) Soul Mantle - this Body Armour grants you roughly 30% More Damage, as it saves you one Support Gem. If you can't deal with Curses yet, simply use a regular defensive Rare Armour. |
|
| Socketed Gems are Supported by Level 20 Spell Totem (20-25)% increased Spell Damage (100-120)% increased Energy Shield (20-30)% increased Totem Life Inflicts a random Hex on you when your Totems die |
|
 (Boots) Rare Boots - Look for Maximum Life and Elemental Resistances. It's also good to have Increased Movement Speed and Action Speed (Boots) Rare Boots - Look for Maximum Life and Elemental Resistances. It's also good to have Increased Movement Speed and Action Speed |
|
| Min. requirements: 100 maximum Life 70% Total Elemental Resistances 30% Movement Speed Optional affixes: Maximum Mana Cannot be Frozen Attributes |
|
 (Gloves) Rare Gloves - those should also provide lots of Maximum Life and Elemental Resistances, but you can also get a decent amount of Damage here. The Eldritch Implicits are also very important, and quite cheap to obtain on any pair. (Gloves) Rare Gloves - those should also provide lots of Maximum Life and Elemental Resistances, but you can also get a decent amount of Damage here. The Eldritch Implicits are also very important, and quite cheap to obtain on any pair. |
|
| Min. requirements: 100 maximum Life 70% Total Elemental Resistances Optional affixes: Maximum Mana #% increased Damage with Hits against Chilled Enemies #% increased Damage during any Flask Effect #% chance to Unnerve Enemies for 4 seconds on Hit (Searing Exarch) Inflict Cold Exposure on Hit (Eater) |
|
 (Belt) Coward's Legacy - this Belt is required to benefit from the Paint Attunement Keystone for the 30% More Spell Damage bonus. It also makes it harder to bypass the downside of your Armour, so you need total immunity. (Belt) Coward's Legacy - this Belt is required to benefit from the Paint Attunement Keystone for the 30% More Spell Damage bonus. It also makes it harder to bypass the downside of your Armour, so you need total immunity. |
|
| +(15-20) to all Attributes (5-10)% increased Movement Speed 50% increased Effect of Curses on you You count as on Low Life while you are Cursed with Vulnerability You are Cursed with Vulnerability |
|
 (Amulet) Rare Amulet - look for additional Gem Levels, Cast Speed, maximum Life, and possibly lacking Resistances and Attributes. You can also get Projectile Speed here, which will improve your Clear Speed a bit. (Amulet) Rare Amulet - look for additional Gem Levels, Cast Speed, maximum Life, and possibly lacking Resistances and Attributes. You can also get Projectile Speed here, which will improve your Clear Speed a bit. |
|
| Min. requirements: 80 maximum Life +1 to Level of all Cold Skill Gems 40% Total Elemental Resistances Optional affixes: Cast Speed Critical Strike Multiplier +1 to Level of all Skill Gems Resistance |
|
 (Amulet) Replica Dragonfang's Flight - it is very hard to find a better Amulet for Spell users than Replica Dragonfang's Flight with associated Skill modifier. It grants a lot of Damage, but also helps with Attributes. (Amulet) Replica Dragonfang's Flight - it is very hard to find a better Amulet for Spell users than Replica Dragonfang's Flight with associated Skill modifier. It grants a lot of Damage, but also helps with Attributes. |
|
| +(10-16) to all Attributes +3 to Level of all <Random Skill> Gems +(5-10)% to all Elemental Resistances (5-10)% increased Reservation Efficiency of Skills Items and Gems have (10-5)% reduced Attribute Requirements |
|
 (Ring) Anathema - this Ring grants you 3 additional Curses basically for free, and you can easily add the 5th one if you want so. The Cast Speed is also quite useful. (Ring) Anathema - this Ring grants you 3 additional Curses basically for free, and you can easily add the 5th one if you want so. The Cast Speed is also quite useful. |
|
| +(30-40) to Intelligence (10-15)% increased Cast Speed (10-20)% chance to gain a Power Charge when you Cast a Curse Spell Your Curse Limit is equal to your maximum Power Charges |
|
 (Ring) Rare Ring - This is the Magic Ring you keep in your right Ring Slot. You can have only two mods on in it, so try to find the best ones. You should look for maximum Life, Resistances, Recoup, or Mana Regeneration here. You can also try to find a decent Corrupted Implicit. (Ring) Rare Ring - This is the Magic Ring you keep in your right Ring Slot. You can have only two mods on in it, so try to find the best ones. You should look for maximum Life, Resistances, Recoup, or Mana Regeneration here. You can also try to find a decent Corrupted Implicit. |
|
| Min. requirements: +90 to Maximum Life Optional affixes: Elemental or Chaos Resistance Attributes Mana Regeneration Minimum Frenzy Charge |
|
 (Jewel) Rare Jewels - here you can get a lot of Critical Strike Multipliers for your Cold Spells. It should also provide some defense, such as maximum Life or Resistance. (Jewel) Rare Jewels - here you can get a lot of Critical Strike Multipliers for your Cold Spells. It should also provide some defense, such as maximum Life or Resistance. |
|
| Recommended affixes: % to Critical Strike Multiplier with Cold Skills % to Critical Strike Multiplier with Elemental Skills increased Global Critical Strike Multiplier increased Maximum Life increased Maximum Mana Resistances |
|
 (Jewel) The Light of Meaning - the Cold variant offers a great amount of increases for your Cold Damage when socketed near the Instability Notable. (Jewel) The Light of Meaning - the Cold variant offers a great amount of increases for your Cold Damage when socketed near the Instability Notable. |
|
| Passive Skills in Radius also grant 6% increased Cold Damage | |
 (Jewel) Self-Flagellation - free damage boost at all times, thanks to the Unique Belt and Unique Body Armour of yours. (Jewel) Self-Flagellation - free damage boost at all times, thanks to the Unique Belt and Unique Body Armour of yours. |
|
| (10-20)% increased Damage per Curse on you An additional Curse can be applied to you |
|
 (Jewel) Sublime Vision - it is another way to deal with Curses. It allows you to use the Heatshiver Helmet and a proper Rare Ring, but it can be very expensive, as it only drops from the Uber Bosses. (Jewel) Sublime Vision - it is another way to deal with Curses. It allows you to use the Heatshiver Helmet and a proper Rare Ring, but it can be very expensive, as it only drops from the Uber Bosses. |
|
| Unaffected by Curses while affected by Zealotry Aura Skills other than Zealotry are Disabled Auras from your Skills have (20-40)% increased Effect on you |
|
 (Jewel) Watcher's Eye - Look for Zealotry bonuses on it. It's potentially the best possible Jewel you can get for this build, depending on your available budget. (Jewel) Watcher's Eye - Look for Zealotry bonuses on it. It's potentially the best possible Jewel you can get for this build, depending on your available budget. |
|
| (4-6)% increased maximum Energy Shield (4-6)% increased maximum Life (4-6)% increased maximum Mana Recommended modifiers: (100-120)% increased Critical Strike Chance against Enemies on Consecrated Ground while affected by Zealotry Consecrated Ground you create while affected by Zealotry causes enemies to take (8-10)% increased Damage |
|
 (Jewel) Militant Faith - the Inner Conviction Keystone granted by this Jewel grants you a free 12% More Damage bonus, since you have no way to generate Frenzy Charges anyway. (Jewel) Militant Faith - the Inner Conviction Keystone granted by this Jewel grants you a free 12% More Damage bonus, since you have no way to generate Frenzy Charges anyway. |
|
| Carved to glorify (2000-10000) new faithful converted by High Templar Dominus Passives in radius are Conquered by the Templars Historic |
|
 (Jewel) Large Cluster Jewel - the Blast-Freeze Notable spreads Freeze to nearby Enemies, which is a massive improvement for your survivability during mapping. Try to pair it with Blanketed Snow and other damage-oriented Notables. (Jewel) Large Cluster Jewel - the Blast-Freeze Notable spreads Freeze to nearby Enemies, which is a massive improvement for your survivability during mapping. Try to pair it with Blanketed Snow and other damage-oriented Notables. |
|
| Recommended affixes: 1 Added Passive Skill is Blanketed Snow 1 Added Passive Skill is Blast-Freeze 1 Added Passive Skill is Disorienting Display |
|
 (Jewel) Medium Cluster Jewel - you should use two different Medium Clusters. One that grants you Onslaught via Totem Passives, and a second that increases your Projectile Damage and Speed. (Jewel) Medium Cluster Jewel - you should use two different Medium Clusters. One that grants you Onslaught via Totem Passives, and a second that increases your Projectile Damage and Speed. |
|
| Recommended affixes: 1 Added Passive Skill is Sleepless Sentries 1 Added Passive Skill is Snaring Spirits 1 Added Passive Skill is Eye to Eye 1 Added Passive Skill is Streamlined |
|
 (Flask) Lavianga's Spirit - this Unique Flask recovers much more Mana than a regular Mana Flask. Remember, 30% of the Damage goes to your Mana instead of Life, so it is important to keep it at high levels. (Flask) Lavianga's Spirit - this Unique Flask recovers much more Mana than a regular Mana Flask. Remember, 30% of the Damage goes to your Mana instead of Life, so it is important to keep it at high levels. |
|
| (30-50)% increased Amount Recovered 100% increased Recovery rate Skills Cost no Mana during Effect |
|
 (Flask) Bottled Faith - One of the best offensive Flasks in the game. It increases Damage and Critical Strike Chance against enemies on Consecrated Ground. (Flask) Bottled Faith - One of the best offensive Flasks in the game. It increases Damage and Critical Strike Chance against enemies on Consecrated Ground. |
|
| (30-15)% reduced Duration Consecrated Ground created by this Flask has Tripled Radius Consecrated Ground created during Effect applies (7-10)% increased Damage taken to Enemies (100-150)% increased Critical Strike Chance against Enemies on Consecrated Ground during Effect |
|
 (Flask) Stormblood - this Flask allows you to inflict Shock despite dealing only Cold Damage. (Flask) Stormblood - this Flask allows you to inflict Shock despite dealing only Cold Damage. |
|
| (20-40)% chance to gain a Flask Charge when you deal a Critical Strike 50% reduced Duration All Damage from Critical Strikes can apply Lightning Ailments during effect |
|
|
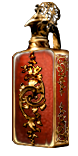
Other suggested Flasks:
|
|
   |
|
|
If you have any other build requests please leave that in the comments below. We are always open to suggestions and constructive feedback.
Pictures used in this article are the intellectual property of Grinding Gear Games.
