Flicker Strike Ascendant Scion Build - Odealo's Crafty Guide
One of the fastest builds in Path of Exile. Zip around maps, instantly obliterating enemies with this seizure-inducing build Flicker Strike
Ascendant/Scion build
Updated for Patch 3.11
The Best Crafty Guides by Odealo
Estimated budget: high

| Guide notes |
| July 26, 2020 -Updated for Patch 3.11 |
Flicker Strike is the build with one of the fastest clear speed in the entire game. Zipping around entire maps, killing whole packs of monsters in no time while maintaining very high defenses is what makes this build insanely good. This Guide has been thoroughly redesigned for Patch 3.10 which now included mainly end-game Item options based on rather expensive Items. You should note that Scion/Ascendant is usually one of the most popular classes for high level builds and usually shines when you are able to invest slightly more currency into your characters. This build utilizes several expensive Uniques including Farrul's Fur, The Saviour and Paradoxica swords, Unnatural Instinct, and several other moderately expensive Items. Thanks to Farrul's Fur with Unset Ring combination, you get to generate enough Frenzy Charges for undisturbed Flicker Strike spam and pick up Elementalist and Inquisitor Ascendancies for massive damage bonuses. This damage offers nearly 100% Damage Conversion to Cold, which makes it perfect for the Pandemonius Amulet which offers amazing DPS bonuses and defensive utility.
To check the full list of our other Path of Exile Crafty Guides go here: Odealo's Crafty Guides - Full List
1. Gameplay
This build is hybrid between melee and range, due to the mechanics of Flicker Strike, which teleports you between monsters while doing damage in melee range. The build is very straightforward to play - you are killing whole screens with your Flicker Strike, and its' cooldown can be bypassed by expanding Frenzy charges from Blood Rage skill and Farrul's Fur unique property. For the defenses, you should have over 5,000 Life, high chance to Dodge, Elusive, and slow down enemies via Pandemonius Amulet. This build also utilizes a very interesting combo, by using Farrul's Fur you will gain your maximum number of Frenzy Charges (in most cases, it will be 6) whenever you gain Cat's Stealth. Then, by picking up a Rare Unset Ring with Socket, Crafting Aspect of the Cat on it, and socketing a Less Duration Support Gem inside, you will gain Cat's Stealth almost twice as frequently, giving you enough Frenzy Charges for Flicker Strike spam on Bosses without having to get Raider's Ascendacy. If you don't plan on using Farrul's Fur you will have to take it though.
|
|
|
|

2. Build's PROS & CONS
| PROS |
|
| CONS |
|
3. Leveling tips
It’s recommended to use Oni-Goroshi or dual wield one-handed swords with the highest physical damage possible while leveling. For the skill part, it’s recommended to use Cleave initially, then you can use Consecrated Path which offers similar style to Flicker Strike but doesn't require you to generate Frenzy Charges (which may be difficult on a lower level character). You can switch to Flicker Strike when you meet the level requirements to use all the endgame items. Try to level Flicker Strike Gems set up in your spare sockets.
Suggested leveling Gem setups:
| Cleave setup | |
 |
Cleave - Cleave will be the first skill you are using, and replace it with Consecrated Path as soon as you hit level 28 |
 |
Added Fire Damage Support - great buff to your DPS |
 |
Melee Physical Damage Support - this will increase your Physical Damage which is partly converted to Fire |
| Consecrated Path setup | |
 |
Consecrated Path - an Attack that teleports you to enemies similar to Flicker Strike and dealing AoE damage. It's one of the fastest Attacks for leveling but doesn't require you to generate charges on low-level |
 |
Added Fire Damage Support |
|
Melee Physical Damage Support |
 |
Faster Attacks Suppor |
| Utility Gems | |
 |
Ancestral Warchief – this Totem Spell increases your melee damage and deals a lot of damage by itself, which might come in handy versus strong rare monsters or bosses. You can buy it at level 28. You can link it to Maim, Faster Attacks and Culling Strike Support Gems to increase its damage |
 |
Assassin's Mark - the recommended curse option for this build. You can start using it manually as soon as you reach level 24. Will increase the chance to Critically Strike cursed enemies |
 |
Leap Slam - recommended Mobility Skill for this build |
 |
Herald of Ash - grants high bonus DPS and causes fiery explosions when you kill enemies |
Bandits:
We recommend killing all the Bandits for two additional Passive Points
Leveling Skill Trees:
31 Points Skill Tree
Priorities: 1) Constitution 2) Art of the Gladiator 3) Dismembering 4) Blade of Cunning
64 Points Skill Tree
Priorities: 1) Life and Mana Leech 2) Thick Skin 3) Primeval Force 4) Fatal Blade 5) Acrobatics
Recommended leveling items:
 Blackheart - a great Physical DPS leveling ring. Available as soon as level 1 will grant you amazing DPS bonuses Blackheart - a great Physical DPS leveling ring. Available as soon as level 1 will grant you amazing DPS bonuses |
|
| Adds 1 to 4 Physical Damage to Attacks 5% increased Physical Damage Adds 1 to 3 Chaos Damage to Attacks +(20-30) to maximum Life (2-4) Life Regenerated per second 10% chance to Cause Monsters to Flee |
|
 Belt of the Deceiver - extremely powerful belt, provides life, resistances and intimidate, which increases damage monsters receive by 10%. We are going to use it in endgame as well Belt of the Deceiver - extremely powerful belt, provides life, resistances and intimidate, which increases damage monsters receive by 10%. We are going to use it in endgame as well |
|
| (25-35) to Strength (15-25)% increased Physical Damage You take 30% reduced Extra Damage from Critical Strikes +(30-40) to maximum Life +(10-15)% to all Elemental Resistances Nearby Enemies are Intimidated |
|
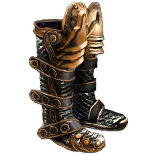 Wake of Destruction - extremely powerful boots. This pair of Boots gives you a lot of damage and is available from level 28 Wake of Destruction - extremely powerful boots. This pair of Boots gives you a lot of damage and is available from level 28 |
|
| Adds 1 to 120 Lightning Damage to Attacks (20-60)% increased Armour and Energy Shield +(10-20) Life gained on Kill 10% chance to Cause Monsters to Flee 15% increased Movement Speed |
|
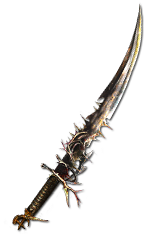
 Oni-Goroshi - definitely best in slot Weapon for leveling. Its damage scales as you level up and you can use it from level 1 Oni-Goroshi - definitely best in slot Weapon for leveling. Its damage scales as you level up and you can use it from level 1 |
|
| Uses both hand slots (70-90)% increased Critical Strike Chance Adds 2 to 3 Physical Damage to Attacks per Level Gain Her Embrace for 3 seconds when you Ignite an Enemy While in Her Embrace, take 0.5% of your total Maximum Life and Energy Shield as Fire Damage per second per Level Item has 6 Sockets and is fully linked (Hidden) |
|
|
|
|
| +190 to Accuracy Rating Uses both hand slots (250-300)% increased Physical Damage (90-110)% increased Critical Strike Chance +(20-30)% to Global Critical Strike Multiplier +(40-50)% to Fire Resistance Cannot be Ignited 100% of Physical Damage Converted to Fire Damage Ignited Enemies Burn 50% faster You can only deal Damage with this Weapon and Ignite |
|
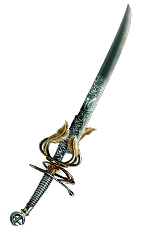
 The Goddess Scorned - another nice Sword, that will use both hand slots, very high base Critical Strike Chance combined with Increase Critical Strike Chance Support Gem and passive nodes will make it hit like a truck
|
|
|
| +305 to Accuracy Rating (120-150)% increased Physical Damage 20% increased Attack Speed +(150-200) to Accuracy Rating 10% increased Movement Speed |
|
 Ringwald's Charge - if you prefer Two-Handed Swords then it will be a nice option for leveling, can be used since level 44
4. Final Skill Tree, Ascendancy Points, and Pantheon
Final Skill Tree:
121 Points Final Skill Tree (if you include Cluster Jewels and Passives from Thread of Hope)
121 Points Path of Building(PoB) link
Ascendancy points:
Preferably in that order:
- Shadow Ascendancy - Inquisitor
- Witch Ascendancy - Elementalist
- Path of the Templar/Witch
Optionally, you should take Ranger Ascendancy - Raider instead of Inquisitor if you aren't using Farrul's Fur otherwise you won't generate enough Frenzy Charges against Bosses
Pantheon:
Major God: Soul of Lunaris 1% additional Physical Damage Reduction for each nearby Enemy, up to 8%; 1% increased Movement Speed for each nearby Enemy, up to 8%
Minor God: Soul of Garukhan +5% chance to Evade Attack Hits if you've taken a Savage Hit Recently
5. Final Gems links
| [DPS] Flicker Strike setup | |
 |
Flicker Strike - your main DPS skill. It grants amazing AoE, and very good single target DPS |
 |
Inspiration Support - increases your Elemental Damage and Critical Strike Chance. Also, greatly reduces Flicker Strike's Mana Cost which helps you have all the recommended Auras active |
 |
Fortify Support - grants high DPS bonus and a very strong defensive buff |
 |
Added Cold Damage Support - mandatory Support Gem as your Weapons base DPS is rather low. This Gem has an Awakened variant |
 |
Multistrike Support - boosts your DPS by a lot by making Flicker Strike to repeat two additional times at the cost of one Frenzy Charge. This Gem has an Awakened variant |
 |
Close Combat Support - grants up to 60% More Damage to enemies as you are always in the closest range possible. It will also increase the Attack Speed of Leap Slam |
| [UTILITY] Ancestral Warchief, Vaal Grace, Blood Rage | |
|
Ancestral Warchief - Totem Spell which increases your Melee Damage. Cast it during Boss fights mainly, trying to do it against normal enemies will just slow you down |
 |
Vaal Grace - the Vaal part of this skill will increase your Chance to Dodge, offering some extra utility during Boss fights |
 |
Blood Rage - grants a buff that lets you generate Frenzy Charges when killing enemies and increases your Attack Speed and Life Leech |
| [UTILITY] Golems | |
 |
Cast when Damage Taken Support - this Gem will automatically summon your Golems once in a while |
 |
Summon Ice Golem - increases your Accuracy Rating and Critical Strike Chance. It's the most important Golem for this build |
 |
Summon Flame Golem - this one, on the other hand, increases your Damage |
 |
Minion Life Support |
| [UTILITY] Leap Slam and Immortal Call | |
|
Leap Slam - the recommended Movement Skill for this build. It lets you progress faster when there are no nearby enemies to Flicker to |
|
Cast when Damage Taken Support - will cast supported spells after a certain amount of damage is taken. Keep this Gem at level 1 |
 |
Immortal Call - grants brief immunity to Physical Damage. Keep this Gem at level 1 |
| [UTILITY] Wave of Conviction | |
|
Cast when Damage Taken Support - another level 1 CwDT Gem is needed to trigger low-level Wave of Conviction Spell |
 |
Wave of Conviction - used to apply your Curse (or Second Curse) and debuff enemies with Cold Exposure. Use a level 7 Gem so that it's automatically triggered |
 |
Curse on Hit Support - makes Wave of Conviction apply the linked Curse (Frostbite), You can use Awakened Gem to apply a second Curse if you don't have Whispers of Doom Anointment |
 |
Frostbite - a Curse Spell which reduces affected enemies Cold Resistance |
| [UTILITY] Herald, Auras | |
 |
Herald of Ice - grants additional Cold Damage to your Attacks and causes AoE Explosions when you kill Frozen enemies |
 |
Hatred - the best DPS-oriented Aura in Path of Exile for this Cold Conversion build. We need it to get an extra 40% Physical to Cold Conversion via Watcher's Eye |
 |
Precision - grants high bonus Accuracy Rating and Critical Strike Chance. Depending on your Maximum Mana you may need to use a lower level Precision Gem (7-12 should suffice) |
 |
Enlighten Support - a level 3+ Enlighten is a must-have so that you have enough Mana left with all the Auras active |
|
|
5. Gear Setup
Flicker Strike Ascendant/Scion is an extremely versatile build. It can be played with a lot of different item variations. You can use One-handed, Two-handed Swords, and a lot of different Unique Items. However, the following guide is based on just one setup which utilizes expensive Uniques including Farrul's Fur, The Saviour, Paradoxica, Pandemonius, Unnatural Instinct, and two Might of the Meek Jewels. Scion, in general, is an end-game Class which is best played on a high budget and high-level where it can utilize all the extra Passives and Jewel Sockets it provides.
Our recommended items will:
- Cap your Resistances
- Give you enough DPS/Life to clear all content
- Save you at least a few hours on planning your build!
|
Stat priorities on items:
|
 (Helmet) Rare Helmet - a Delve Crafted Helmet which reduced Cold Resistance of nearby enemies, and at the same time, provides extra Life and Resistances is the best option (Helmet) Rare Helmet - a Delve Crafted Helmet which reduced Cold Resistance of nearby enemies, and at the same time, provides extra Life and Resistances is the best option |
|
| Min. requirements: 60 Maximum Life 60% Elemental Resistances Nearby enemies have -#% to Cold Resistance Optional affixes: Accuracy Rating |
|
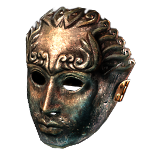
 (Helmet) Abyssus - offers the highest DPS bonus out of all Helmets in the game, however offers no Life and Elemental Resistances. Use only if you are comfortable without those (Helmet) Abyssus - offers the highest DPS bonus out of all Helmets in the game, however offers no Life and Elemental Resistances. Use only if you are comfortable without those |
|
| Adds 40 to 60 Physical Damage to Attacks +(20-25) to all Attributes +(100-125)% to Melee Critical Strike Multiplier (100-120)% increased Armour (40-50)% increased Physical Damage taken |
|
| Helmet enchantment: 9% increased Flicker Strike Damage per Frenzy Charge 40% increased Flicker Strike Damage |
|
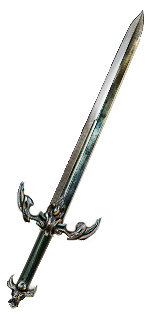
 (Weapon) Paradoxica - this is the best option for the Main-hand weapon. Aim to get one with Increased Physical Damage% and added Accuracy Rating (Weapon) Paradoxica - this is the best option for the Main-hand weapon. Aim to get one with Increased Physical Damage% and added Accuracy Rating |
|
| +25% to Global Critical Strike Multiplier Attacks with this Weapon deal Double Damage <Two Veiled Mods> |
|
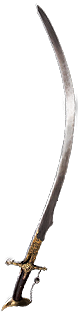
 (Weapon) The Saviour - the BiS Weapon for the Off-hand slot. It allows you to create two Reflections that will Attack with Flicker Strike dealing 40% of your regular damage (Weapon) The Saviour - the BiS Weapon for the Off-hand slot. It allows you to create two Reflections that will Attack with Flicker Strike dealing 40% of your regular damage |
|
| 40% increased Global Accuracy Rating Triggers Level 20 Reflection when Equipped (40-50)% increased Physical Damage Adds (16-22) to (40-45) Physical Damage (8-12)% increased Attack Speed (8-12)% increased Critical Strike Chance |
|
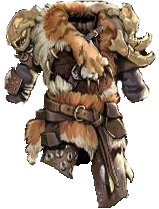 (Body Armour) Farrul's Fur - a mandatory Body Armour for this setup. It's used to generate Frenzy Charges without the necessity to pick up Raider's Ascendancy. It also grants high DPS bonus and Life (Body Armour) Farrul's Fur - a mandatory Body Armour for this setup. It's used to generate Frenzy Charges without the necessity to pick up Raider's Ascendancy. It also grants high DPS bonus and Life |
|
| (100-150)% increased Armour and Evasion +(80-100) to maximum Life Aspect of the Cat Reserves no Mana +2 seconds to Cat's Stealth Duration Gain up to your maximum number of Frenzy and Power Charges when you gain Cat's Stealth You have Phasing while you have Cat's Stealth |
|
 (Boots) Rare Boots - Boots were the most expensive Items we picked up for this build. You should aim at getting a pair with Elusive and Tailwind which are extremely useful for this build (Boots) Rare Boots - Boots were the most expensive Items we picked up for this build. You should aim at getting a pair with Elusive and Tailwind which are extremely useful for this build |
|
| Min. requirements: 25% increased Movement Speed You have Tailwind if you have dealt a Critical Strike Recently 9% chance to gain Elusive on Critical Strike Optional affixes: Maximum Life Attributes Elemental Resistances |
|
| Boots enchantment: 16% increased Attack and Cast Speed if you've Killed Recently 10% Chance to Dodge Attack Hits if you've taken a Critical Strike Recently |
|
 (Belt) Rare Belt - aim for the highest defensive stats possible (Belt) Rare Belt - aim for the highest defensive stats possible |
|
| Min. requirements: 90 maximum Life 35% Fire Resistance 35% Lightning Resistance 35% Cold Resistance Optional affixes: increased Elemental Damage with Attack Skills |
|
 (Amulet) The Pandemonius - one of the best Amulets for Cold-based builds. It grants very high bonus Damage and amazing defensive utility by slowing down monsters' Action Speed (Amulet) The Pandemonius - one of the best Amulets for Cold-based builds. It grants very high bonus Damage and amazing defensive utility by slowing down monsters' Action Speed |
|
| +(20-30) to Dexterity (20-30)% increased Cold Damage +(35-40)% to Cold Resistance Chill Enemy for 1 second when Hit, reducing their Action Speed by 30% Blind Chilled Enemies on Hit Damage Penetrates 20% Cold Resistance against Chilled Enemies |
|
| Recommended Anointments: Whispers of Doom - allows you to save some Currency on Awakened Curse on Hit Support Tribal Fury - the best option for Map farming if you have the Awakened Gem mentioned earlier Disemboweling/Assassination - the best single-target DPS bonus |
|
 (Ring) Rare Ring - aim for high defensive stats as you will be lacking them if you have chosen all the other Items from the list. Also, it's best to have a Shaper Ring with Assassin's Mark Curse (Ring) Rare Ring - aim for high defensive stats as you will be lacking them if you have chosen all the other Items from the list. Also, it's best to have a Shaper Ring with Assassin's Mark Curse |
|
| Min. requirements: 60 maximum Life 75% Total Elemental Resistances curses enemies with level# Assassin's Mark on Hit Optional affixes: Accuracy Rating Attributes |
|
 (Ring) Rare Unset Ring - this items needs to give you the Aspect of the Cat Skill which will be supported by Less Duration socketed in the Ring (Ring) Rare Unset Ring - this items needs to give you the Aspect of the Cat Skill which will be supported by Less Duration socketed in the Ring |
|
| Min. requirements: 60 maximum Life 75% Total Elemental Resistances Grants level 20 Aspect of the Cat Skill Optional affixes: Accuracy Rating Attributes |
|
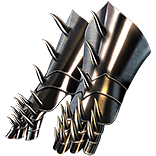 (Gloves) Rare Gloves - Rare Gloves with Crated Physical to Cold Conversion is a must-have in this build (Gloves) Rare Gloves - Rare Gloves with Crated Physical to Cold Conversion is a must-have in this build |
|
| Min. requirements: 60 maximum Life 75% Total Elemental Resistances 25% of Physical Damage Converted to Cold Damage Optional affixes: Accuracy Rating Melee Damage (Spiked Gloves) |
|
 (Jewels) Watcher's Eye - this Jewel with Physical to Cold Conversion from Hatred is mandatory (Jewels) Watcher's Eye - this Jewel with Physical to Cold Conversion from Hatred is mandatory |
|
| (4-6)% increased maximum Energy Shield (4-6)% increased maximum Life (4-6)% increased maximum Mana (25-40)% of Physical Damage Converted to Cold Damage while affected by Hatred |
|
 (Jewels) Unnatural Instinct - socketed right to the Scion's starting Point grants high Accuracy, Attack Speed, Movement Speed, and Life (Jewels) Unnatural Instinct - socketed right to the Scion's starting Point grants high Accuracy, Attack Speed, Movement Speed, and Life |
|
| Allocated Small Passive Skills in Radius grant nothing Grants all bonuses of Unallocated Small Passive Skills in Radius |
|
 (Jewels) Might of the Meek - you should get two of these to increase the effect of all Small Life Passive around Constitution for massive Life boost (Jewels) Might of the Meek - you should get two of these to increase the effect of all Small Life Passive around Constitution for massive Life boost |
|
| 50% increased Effect of non-Keystone Passive Skills in Radius Notable Passive Skills in Radius grant nothing |
|
 (Jewels) Thread of Hope - a Jewel which affected Passives in a "Small Ring" has to be socketed on the right of the Skill Tree to grant four very important Passives (Jewels) Thread of Hope - a Jewel which affected Passives in a "Small Ring" has to be socketed on the right of the Skill Tree to grant four very important Passives |
|
| Only affects Passives in a Small Ring Passives in Radius can be Allocated without being connected to your tree -(20-10)% to all Elemental Resistances Allows you to allocate: Winter Spirit Weapon Artistry Aspect of The Lynx Forces of Nature |
|
 (Jewels) Rare Abyss Jewels - for the extra Sockets get Abyss Jewels with high Added Physical/Cold Damage to Attacks which performs better than regular Jewels (Jewels) Rare Abyss Jewels - for the extra Sockets get Abyss Jewels with high Added Physical/Cold Damage to Attacks which performs better than regular Jewels |
|
| Recommended affixes: maximum Life added Physical/Cold Damage to Attacks/Sword Attacks Optional affixes: Critical Strike Multiplier |
|
 (Jewel) Large Cluster Jewel - you should get one Large Cluster Jewel which increases Attack Damage. There are a lot of useful Passives it can grant, we have taken one with both Mana and Life Leech bonuses. 2 Jewel Sockets are mandatory though (Jewel) Large Cluster Jewel - you should get one Large Cluster Jewel which increases Attack Damage. There are a lot of useful Passives it can grant, we have taken one with both Mana and Life Leech bonuses. 2 Jewel Sockets are mandatory though |
|
| Recommended affixes: 1 Added Passive Skill is Feed the Fury 1 Added Passive Skill is Fuel the Fight 2 Added Passive Skills are Jewel Sockets Optional affixes: 1 Added Passive Skill is Martial Prowess |
|
 (Jewel) Small Cluster Jewel - you can get them with extra Life Bonuses, preferably with Fettle Passive (Jewel) Small Cluster Jewel - you can get them with extra Life Bonuses, preferably with Fettle Passive |
|
| Recommended affixes: 1 Added Passive Skill is Fettle |
|
 (Flask) Bottled Faith - great Utility Flask, which provides high DPS bonus and amazing defensive utility (Flask) Bottled Faith - great Utility Flask, which provides high DPS bonus and amazing defensive utility |
|
| 40% increased Damage Creates Consecrated Ground on Use (30-50)% increased Duration Consecrated Ground created by this Flask has Tripled Radius +(1-2)% to Critical Strike Chance against Enemies on Consecrated Ground during Effect Consecrated Ground created during Effect applies (7-10)% increased Damage taken to Enemies |
|
 (Flask) Lion’s Roar - increases your Melee Damage greatly. It's one of the best Flasks for Melee builds (Flask) Lion’s Roar - increases your Melee Damage greatly. It's one of the best Flasks for Melee builds |
|
| +3000 to Armour Adds Knockback to Melee Attacks during Flask effect 75% chance to cause Enemies to Flee on use (20-25)% more Melee Physical Damage during effect Knocks Back Enemies in an Area when you use a Flask |
|
 (Flask) Cinderswall Urn - an amazing Flask that grants high Life/Mana Recovery, and if rolled correctly it can give you very high bonus Crit. Chance (Flask) Cinderswall Urn - an amazing Flask that grants high Life/Mana Recovery, and if rolled correctly it can give you very high bonus Crit. Chance |
|
| Recharges 1 Charge when you Consume an Ignited corpse Enemies Ignited by you during Flask Effect take 10% increased Damage Recover (1-3)% of Life when you Kill an Enemy during Flask Effect Recover (1-3)% of Mana when you Kill an Enemy during Flask Effect Recover (1-3)% of Energy Shield when you Kill an Enemy during Flask Effect <One Veiled Mod> |
|
Other suggested Flasks:
|
|
  |
|
|
If you have any other build requests please leave that in the comments below.
Pictures used in this article are the intellectual property of Grinding Gear Games.
