 Buy/Sell
 Log in


Flameblast Oil Grenade Gemling Legionnaire POE 2 Build
Turn every map into a burning carpet with Flameblast and Oil Grenade. Light the floor, spread the Ignite, and watch everything burn.Flameblast + Oil Grenade
Gemling Legionnaire Build
Updated for Path of Exile 2 Early Access
The Best Crafty Guides by Odealo
| Guide notes |
| September 2, 2026 - Created for Early Access Patch 0.5.5 |
| Build Overview | |||
| Tags: [IGNITE] [ELEMENTAL] [LIFE] | |||
|
Budget: Defenses: |
|
Boss DPS: AoE: |
|




This Flameblast Oil Grenade Gemling build abuses Gemling’s quality scaling to turn Flameblast into an absurd Ignite damage engine. With the additional quality Flameblast, every stage massively increases Ignite magnitude, allowing a fully charged cast to create an enormous DoT that can carry the build through both mapping and endgame bosses.
The core loop is simple: fully charge Flameblast to create a massive Ignite, then use Oil Grenade to spread it through packs. Cast on Ailment automatically triggers Tornado, giving us another way to carry the Ignite across the screen and making the clear much smoother. Once the initial Flameblast is set up, you can mostly focus on moving and spreading the damage.
Defensively, the build uses Armour and "armour applies to Elemental Damage" to create a surprisingly sturdy setup for a character that invests so heavily into damage. The huge Ignite also means you don’t need to constantly stand still and cast, giving you plenty of time to move away from dangerous mechanics while enemies continue burning.
The build is extremely cheap to get started and has a very strong upgrade path. As you improve your gems quality, stack more Ignite magnitude, increase gem levels and upgrade your fire scaling, the damage quickly reaches ridiculous levels. The main downside is visual clarity - once Oil Grenade, Ignite and Tornado fill the screen with fire, things can get messy. But if you can live with that, this fresh Gemling setup offers incredible damage, strong defenses and one of the best budget-to-endgame progressions.
You can also check our other Path of Exile 2 builds right over here Odealo's Crafty Guides - Full List
1. Gameplay
You move through the map by throwing an Oil Grenade first, then casting Flameblast directly onto the oil to create a massive Ignite. Once the ground is burning, you only need to throw more Oil Grenades to spread the Ignite from pack to pack, while Cast on Ailment triggers Tornado for additional clear.
For bosses, the setup is even simpler. You throw an Oil Grenade under the target and fully charge Flameblast on top of it, creating an enormous Ignite. Once it’s applied, you can keep your distance and focus on dodging while the burn does the heavy lifting.
|
|
|
|


2. Build's PROS & CONS
| PROS |
|
| CONS |
|
3. Leveling tips
We recommend leveling with one of our other starter builds, such as Permafrost Bolts Witchhunter or Explosive Grenade Gemling, until around level 60. Both provide a smooth campaign and early mapping experience without requiring major changes to your gear.
Around level 60, once you have the Advanced Thaumaturgy and 20% quality on your Flameblast, you can safely swap into the final Flameblast Oil Grenade setup and start scaling its Ignite damage.
4. Final Skill Tree, Ascendancy Points, and Pantheon
Final Skill Tree:
 |
|
Click on the image to open the Passive Tree preview in a new window, or use the Path of Building (PoB) tool, |
Ascendancy points:
Preferably in this order:
- Essence of Virtue
- Advanced Thaumaturgy
- Neurological Implants
- Gem Studded
5. Final Gems links
| [DPS] Flameblast setup | |
 |
Flameblast - a powerful fire spell that charges through multiple stages before unleashing a massive explosion and applying a devastating Ignite. We support it with Burgeon II for additional fire damage, Considered Casting for more damage at the cost of Cast Speed, Concentrated Area to increase the explosion’s damage, Searing Flame II for more Ignite scaling, and Ignite III to further boost our burning damage. |
 |
Burgeon II |
 |
Considered Casting |
 |
Concentrated Area |
 |
Searing Flame II |
 |
Ignite III |
| [Utility] Oil Grenade setup | |
 |
Oil Grenade - a grenade skill that creates an oil-covered area, allowing us to ignite it with Flameblast and spread our powerful Ignite between packs. We support it with Short Fuse II for faster activation, Elemental Focus for increased elemental damage, Multishot II for additional projectiles, Nova Projectiles I for wider coverage, and Encroaching Ground to further improve the area covered by the grenades. |
 |
Short Fuse II |
 |
Elemental Focus |
 |
Multishot II |
 |
Nova Projectiles I |
 |
Encroaching Ground |
| [Utility] Cast on Elemental Ailment setup | |
 |
Cast on Elemental Ailment - automatically triggers Tornado when we inflict elemental ailments, adding extra damage and clear while we focus on spreading Ignite. |
 |
Tornado - a powerful spell that creates a damaging vortex around enemies, helping us clear additional monsters caught in its area. We support Tornado with Morgana's Tempest for it to be faster and to increase the limit of tornados by one, Efficiency II for reduced cost, Boundless Energy II for additional energy, and Magnified Area II for a larger area of effect. |
 |
Morgana's Tempest |
 |
Efficiency II |
 |
Boundless Energy II |
 |
Magnified Area II |
| [Utility] Infernal Cry setup | |
 |
Infernal Cry - just a filler skill that we use for Gem Studded, feel free to use any matching‑color supports. |
 |
Deliberation |
 |
Mobility |
|
Ignite III |
 |
Brutality III |
| [Utility] Seismic Cry setup | |
 |
Seismic Cry - just a filler skill that we use for Gem Studded, feel free to use any matching‑color supports. |
 |
Pin II |
|
Deliberation |
 |
Shock |
 |
Lightning Penetration |
| [Utility] Arctic Armour setup | |
 |
Arctic Armour - a defensive skill that provides additional protection against incoming damage and helps us survive dangerous encounters. We support it with Cannibalism for additional recovery and Cooldown Recovery for faster skill cooldowns. |
 |
Cannibalism I |
 |
Cooldown Recovery II |
| [Utility] Mana Remnants setup | |
 |
Mana Remnants - generates Remnants that restore Mana when collected, helping us maintain our resource during combat. We support it with Remnant Potency I to increase the effect of collected Remnants and Harmonic Remnants II to collect them from further away with a chance to create an additional Remnant. |
 |
Remannt Potency I |
 |
Harmonic Remnants II |
| [Utility] Virtuous Barrier setup | |
 |
Virtuous Barrier - a defensive passive that provides additional protection and improves our overall survivability. |
 |
Armour Demolisher - just a filler skill that we use for Gem Studded, feel free to use any matching‑color supports. |
|
|
6. Gear Setup
This is a Life and Armour DoT build, so our main goal is to stack Life, Armour, Spell Damage and Fire Damage while keeping our gear simple and efficient. Armour is especially valuable because we also look for "applies to Elemental Damage", giving us strong all-around protection. Cast Speed has very little value for this build, as our damage comes from fully charged Flameblast and the resulting Ignite rather than repeated fast casts. Item Rarity is also highly valuable, since the build does not require a large number of specific offensive stats.
Most importantly, avoid Flat Fire Damage added to Attacks on your gear. This can cause Oil Grenade to apply an unwanted Ignite, interfering with our main Flameblast Ignite and significantly hurting the build's damage setup.
|
Stat priorities on items:
|
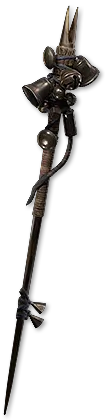 (Weapon) Rare Staff - our main weapon and the most important offensive upgrade for the build. We want level of all Fire Spell Skills, Damage as Extra Fire Damage, and increased Spell Damage as our core modifiers. Flammability Magnitude and Fire Damage are excellent optional affixes for further scaling our Ignite. (Weapon) Rare Staff - our main weapon and the most important offensive upgrade for the build. We want level of all Fire Spell Skills, Damage as Extra Fire Damage, and increased Spell Damage as our core modifiers. Flammability Magnitude and Fire Damage are excellent optional affixes for further scaling our Ignite. |
|
| Min. requirements: Gain 30% of Damage as Extra Fire Damage +5 to level of all Fire Spell Skills 70% increased Spell Damage Optional affixes: #% increased Flammability Magnitude #% increased Fire Damage |
|
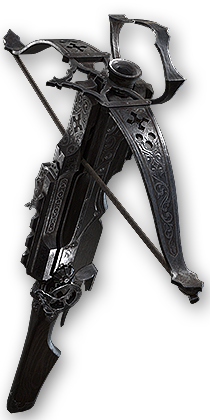 (Weapon) Rare Crossbow - the main stat we are looking for is +5 to level of all Projectile Skills, which significantly improves the power of our Oil Grenade. Other mods are irrelevant but avoid added Fire Damage to attacks. (Weapon) Rare Crossbow - the main stat we are looking for is +5 to level of all Projectile Skills, which significantly improves the power of our Oil Grenade. Other mods are irrelevant but avoid added Fire Damage to attacks. |
|
| Min. requirements: +5 to level of all Projectile Skills |
|
 (Body Armour) Morior Invictus - incredibly strong body armour and your best in slot. If you’re on a higher budget, look for a 5‑socket Morior. (Body Armour) Morior Invictus - incredibly strong body armour and your best in slot. If you’re on a higher budget, look for a 5‑socket Morior. |
|
| (300—400)% increased Armour, Evasion and Energy Shield +(10—14) to Spirit per Socket filled Recommended other mods: +(8—10)% to all Elemental Resistances per Socket filled +(10—13)% to Chaos Resistance per Socket filled |
|
 (Body Armour) Rare Body Armour - a strong defensive piece that provides a large amount of Life, Armour and Elemental Resistances, while also giving us the Spirit needed to support our skills. Item Rarity and Chaos Resistance are excellent additional stats if available. (Body Armour) Rare Body Armour - a strong defensive piece that provides a large amount of Life, Armour and Elemental Resistances, while also giving us the Spirit needed to support our skills. Item Rarity and Chaos Resistance are excellent additional stats if available. |
|
| Min. requirements: +50 to Spirit +150 to Maximum Life 80% increased Armour and Evasion 60% total Elemental Resistances Optional affixes: #% increased Rarity of Items found #% to Chaos Resistances |
|
 (Amulet) Rare Amulet - boosts our Spell Damage and Spell Skill Levels while providing a large amount of Life. Item Rarity, Resistances, Attributes and Armour are valuable additional stats. (Amulet) Rare Amulet - boosts our Spell Damage and Spell Skill Levels while providing a large amount of Life. Item Rarity, Resistances, Attributes and Armour are valuable additional stats. |
|
|
Min. requirements: |
|
 (Ring) Rare Ring - a well-rounded offensive piece that provides Spell/Fire Damage, Life and Elemental Resistances. Item Rarity, Chaos Resistance and Attributes are valuable additional stats. (Ring) Rare Ring - a well-rounded offensive piece that provides Spell/Fire Damage, Life and Elemental Resistances. Item Rarity, Chaos Resistance and Attributes are valuable additional stats. |
|
|
Min. requirements: |
|
 (Belt) Rare Belt - provides a large amount of Life and Elemental Resistances, while leaving room for additional defensive stats such as Armour, Chaos Resistance and Attributes. (Belt) Rare Belt - provides a large amount of Life and Elemental Resistances, while leaving room for additional defensive stats such as Armour, Chaos Resistance and Attributes. |
|
| Min. requirements: 90% total Elemental Resistance +130 to maximum Life Optional affixes: +# to Attributes #% to Chaos Resistances # to Armour |
|
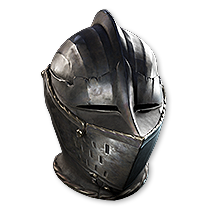 (Helmet) Rare Helmet - defensive gear slot focused on Armour, Life and Elemental Resistances. The Armour modifier that also applies to Elemental Damage makes this especially valuable for our defensive setup. (Helmet) Rare Helmet - defensive gear slot focused on Armour, Life and Elemental Resistances. The Armour modifier that also applies to Elemental Damage makes this especially valuable for our defensive setup. |
|
| Min. requirements: +30% of Armour also applies to Elemental Damage 70% total Elemental Resistances +120 to maximum Life 70% increased Armour and Evasion Optional affixes: # to Armour and Evasion Rating +#% to Chaos Resistances |
|
|
|
|
| Min. requirements: 30% increased Movement Speed +90 to maximum Life 100% total Elemental Resistances Optional affixes: % increased Armour and Evasion +#% to Chaos Resistances |
|
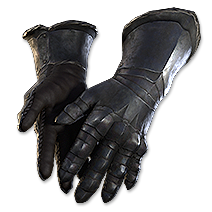 (Gloves) Rare Gloves - provides Armour, Life and Elemental Resistances, with the Armour modifier applying to Elemental Damage making it particularly valuable for our setup. (Gloves) Rare Gloves - provides Armour, Life and Elemental Resistances, with the Armour modifier applying to Elemental Damage making it particularly valuable for our setup. |
|
| Min. requirements: +25% of Armour also applies to Elemental Damage +90 to maximum Life 60% total Elemental Resistances 70% increased Armour and Evasion Optional affixes: +#% to Chaos Resistances |
|
 (Jewel) Rare Jewel - we mainly need Ignite Magnitude and increased Armour on our Jewels. Any other useful modifiers, such as faster damaging ailments or Spell Damage, are only minor upgrades. (Jewel) Rare Jewel - we mainly need Ignite Magnitude and increased Armour on our Jewels. Any other useful modifiers, such as faster damaging ailments or Spell Damage, are only minor upgrades. |
|
| Recomended Modifiers: (5—15)% increased Ignite Magnitude (10—20)% increased Armour Optional Modifiers: Damaging Ailments deal damage (3—7)% faster (5—15)% increased Spell Damag |
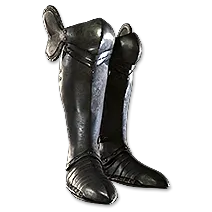 (Boots) Rare Boots - Movement Speed slot and another important piece for capping Resistances.
 |
|
If you have any other build requests please leave that in the comments below. We are always open to suggestions and constructive feedback.
Pictures used in this article are the intellectual property of Grinding Gear Games.