
Explosive Grenade Gemling Legionnaire POE 2 Build
A powerful Explosive Grenade setup for the Gemling Legionnaire, firing enhanced grenades with bonus quality for massive chained blasts.Explosive Grenade
Gemling Legionnaire
Updated for Path of Exile 2 Early Access
The Best Crafty Guides by Odealo
| Guide notes |
| June 12 2026 - Created for Early Access Patch 0.5.0 |
| Build Overview | |||
| Tags: [GRENADE] [CROSSBOW] [EVASION] | |||
|
Budget: Defenses: |
|
Boss DPS: AoE: |
|
The newly reworked Gemling Legionnaire Ascendancy empowers a completely new style of ranged demolition gameplay built around firing multiple types of Grenades with enhanced Quality scaling. Explosive, Cluster, Flash, and Oil Grenades all benefit from the Gemling’s signature alternate quality, allowing them to hit far harder than their base versions while maintaining excellent utility. Unlike traditional projectile builds, Grenades function as delayed‑impact explosives that reward positioning and timing, creating a fast‑paced rhythm of firing, repositioning, and detonating entire packs at once. The addition of Mirage Archer linked to Explosive Grenade provides constant off‑screen pressure, while Mortar Cannon with Explosive Grenade adds another powerful bombardment option.
Each Grenade type contributes a distinct tactical advantage, and combining them creates a flexible toolkit capable of handling any encounter. Explosive Grenades deliver the core burst damage, while Cluster Grenades multiply the number of detonations across wide areas. Flash Grenades provide reliable blind uptime for defense, and Oil Grenades apply potent debuffs that amplify your overall damage output. The Gemling’s bonus quality significantly enhances all of these effects, turning even modest gear into a surprisingly strong offensive package.
To further enhance consistency, the build incorporates Mirage Archer with Explosive Grenade, ensuring that additional explosions continue even while repositioning. Mortar Cannon Explosive Grenade serves as a powerful supplemental tool, enabling additional bombardment that helps with tougher enemies or pressures bosses while we're busy with mechanics. The Redemption crossbow unique is the optimal weapon choice, offering both Cooldown Recovery Rate and Additional Projectiles, the two strongest stats for any Grenade setup, while also providing excellent attack speed. ts drawbacks stem from the Explosive Rhythm mechanic, which requires building up stacks before gaining full power, and from the complete lack of any critical strike damage bonuses, but the sheer number of Grenade Skills used in this build makes maintaining Rhythm effortless. The only Unique item required beyond your weapon is the Constricting Command helmet, which makes it far easier to maintain the “surrounded” state for its powerful bonuses. Neither this helmet nor the weapon is strictly mandatory for the build to function, but both provide noticeable improvements in consistency and overall performance.
One of the greatest advantages of this setup is that it requires no weapon swapping, making it far more stable and beginner‑friendly than many other builds. All damage sources, utility skills, and support mechanics operate from a single weapon configuration, eliminating the risk of breaking setups or interrupting your rotation. This streamlined playstyle allows you to focus entirely on movement, spacing, and detonating enemies with perfectly timed Grenade volleys. Whether you prefer a methodical approach or a fast, aggressive rhythm, the build adapts naturally and remains effective throughout the entire game.
You can also check our other Path of Exile 2 builds right over here Odealo's Crafty Guides - Full List
1. Gameplay
It is a fast and explosive playstyle. You constantly fire different Grenade Skills to build up Explosive Rhythm while moving between packs, letting chained detonations clear everything around you. You can use Oil Grenades to weaken tougher enemies, apply Flash Grenades for safety, and let Mirage Archer keep pressure on targets as you reposition.
|
|
|
|

2. Build's PROS & CONS
| PROS |
|
| CONS |
|
3. Leveling tips
You can level with Grenades right from the very beginning of the game, making the early progression smooth and consistent. In the first acts the playstyle is slightly more involved, as you use Gas Grenade together with Explosive Grenade to clear packs with a simple two‑button rotation. From there, you gradually replace Gas Grenade as the rest of your Grenade Skills unlock, and the build naturally scales into its full explosive potential.
| [DPS] Explosive Grenade leveling setup | |
 |
Explosive Grenade - a simple, high‑impact Grenade that delivers your main burst of damage. It also detonates the Poison cloud from Gas Grenade, turning the combo into a fast and reliable bossing tool during leveling |
 |
Multishot I |
 |
Elemental Armament I |
 |
Deliberation |
| [DPS] Gas Grenade leveling setup | |
 |
Gas Grenade - creates a growing Poison cloud on detonation, which can then be detonated by your Explosive Grenade, triggering a powerful fiery blast that massively amplifies your damage potential during leveling |
|
Multishot I |
|
Elemental Armament I |
4. Final Skill Tree, Ascendancy Points, and Pantheon
Final Skill Tree:
 |
|
Click on the image to open the Passive Tree preview in a new window, or use the Path of Building (PoB) tool, |
Ascendancy points:
Preferably in this order:
- Gem Studded
- Integrated Efficiency
- Essence of Virtue
- Advanced Thaumaturgy
5. Final Gems links
| [DPS] Explosive Grenade setup | |
|
Explosive Grenade - our primary damage-dealing ability and the highest-damaging skill in the build. In the endgame, it is mainly used against tougher monsters and Bosses, as its detonation time is noticeably longer than that of Cluster Grenade, making it less efficient for clearing weaker enemies. We support it with Multishot II, Elemental Armament II, Short Fuse, Deliberation, and Fire Penetration. Since this is the skill we use most frequently throughout all content, we prioritize consistency and smooth gameplay over maximizing tooltip damage. For this reason, we use Short Fuse, willingly sacrificing a small portion of our damage in exchange for faster detonations, improved responsiveness, and a more fluid combat experience. |
|
Multishot II |
|
Elemental Armament II |
 |
Short Fuse |
|
Deliberation |
 |
Fire Penetration |
| [DPS] Cluster Grenade setup | |
 |
Cluster Grenade - our main mapping skill later in the game. It detunes almost instantly with Gemling's additional quality effect. |
|
Multishot II |
|
Elemental Armament II |
 |
Magnified Area II |
|
Deliberation |
 |
Payload |
| [DPS] Mirage Archer setup | |
 |
Mirage Archer - it's a meta skill that triggers when you dodgeroll. It will create a Mirage that uses a socketed gem for a few seconds and then vanishes. It has 10 s cooldown, but will help in risky situations and against bosses. |
|
Explosive Grenade - since it's our main skill, we're using it in Mirage Archer as well |
|
Multishot II |
|
Elemental Armament II |
|
Magnified Area II |
|
Deliberation |
| [DPS/Utility] Flash Grenade setup | |
 |
Flash Grenade - our fastest grenade, which blinds enemies and stuns enemies, dealing damage as well |
|
Multishot II |
|
Magnified Area II |
|
Elemental Armament II |
 |
Cooldown Recovery II |
 |
Rapid Attacks II |
| [DPS] Mortar Canon setup | |
 |
Mortar Canon - a ballista totem used as another source of damage for tough rares and bosses. |
|
Explosive Grenade - can be swapped for Cluster Grenade depending on your preference |
|
Multishot II |
|
Payload |
 |
Urgent Totems III |
|
Deliberation |
| [Utility] Oil Grenade setup | |
 |
Oil Grenade - it covers monsters and ground with oil, which can be ignited with detonator skills. Oiled enemies become exposed, lowering their elemental resistances by 20%. |
 |
Potent Exposure |
 |
Encroaching Ground |
 |
Persistent Ground III |
|
Short Fuse |
| [Utility] Wind Dancer setup | |
 |
Wind Dancer - a strong defensive‑control layer that keeps enemies away from you while you throw Grenades. The setup increases your evasion, expands the area of Wind Dancer’s knockback pulse, and makes enemies far less likely to hit you by blinding them. |
 |
Knockback |
 |
Blind II |
|
Magnified Area II |
| [Utility] Herald of Ash setup | |
 |
Herald of Ash - with these supports gives you a consistent damage aura that boosts your fire output and improves clear |
|
Magnified Area II |
 |
Cannibalism I |
 |
Fire Mastery |
| [Utility] War Banner setup | |
 |
War Banner - provides a stronger, longer‑lasting buff in a wider area, making it ideal for burst windows during boss encounters |
 |
Refraction III |
|
Magnified Area II |
 |
Prolonged Duration II |
|
|
6. Gear Setup
Your damage scales primarily from projectile gem levels, quality of gems, and additional projectiles, making your weapon the most important slot. The rest of your gear contributes mostly through generic attack modifiers. Attack Speed does not directly scale Grenade damage, yet it noticeably improves your Clear Speed by letting you cycle through your Grenade rotation more smoothly.
For defences, you rely on a mix of life, evasion and deflection. Since Grenade builds have high attribute requirements your rings, amulet, and belt often need to cover these gaps. You will also need solid resistances on all of your gear.
|
Stat priorities on items:
|
 (Weapon) Redemption - builds up Explosive Rhythm, granting increasing Cooldown Recovery for your Grenade Skills with every stack. Upon reaching 10 stacks, it triggers Explosive Fervour, letting you ignore cooldowns, fire extra projectiles, and detonate Grenades on impact for a massive burst window. Despite its drawback to base CDR, Redemption remains the strongest weapon for Grenade builds thanks to its unique ability to supercharge your rotation and unleash explosive damage cycles. Use Runes of the Sky, Ancient Rune of Detonation or Rune of Agony. Early on you can use the usual: Greater Iron Rune. (Weapon) Redemption - builds up Explosive Rhythm, granting increasing Cooldown Recovery for your Grenade Skills with every stack. Upon reaching 10 stacks, it triggers Explosive Fervour, letting you ignore cooldowns, fire extra projectiles, and detonate Grenades on impact for a massive burst window. Despite its drawback to base CDR, Redemption remains the strongest weapon for Grenade builds thanks to its unique ability to supercharge your rotation and unleash explosive damage cycles. Use Runes of the Sky, Ancient Rune of Detonation or Rune of Agony. Early on you can use the usual: Greater Iron Rune. |
|
| (300—400)% increased Physical Damage Hits with this Weapon have no Critical Damage Bonus (20—40)% reduced Cooldown Recovery Rate Gain 1 Explosive Rhythm every (2—3) times you use a Grenade Skill Remove all Explosive Rhythm on reaching 10 to gain Explosive Fervour for 10 Seconds |
|
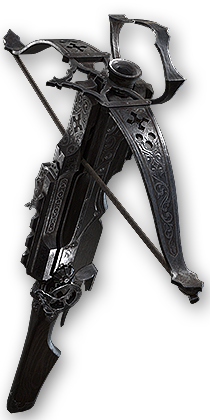 (Weapon) Rare Crossbow - well‑rolled rare Crossbow can also be a strong option, especially if it provides high flat Physical or Elemental Damage, +Levels to Projectile Skills, or bonuses to Grenade Skills such as chance to activate another time. With the right combination of flat damage, attack speed and projectile modifiers, a rare weapon can rival or even outperform uniques later on, making it a reliable and flexible choice throughout progression. (Weapon) Rare Crossbow - well‑rolled rare Crossbow can also be a strong option, especially if it provides high flat Physical or Elemental Damage, +Levels to Projectile Skills, or bonuses to Grenade Skills such as chance to activate another time. With the right combination of flat damage, attack speed and projectile modifiers, a rare weapon can rival or even outperform uniques later on, making it a reliable and flexible choice throughout progression. |
|
|
Min. requirements: |
|
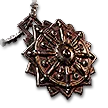
 (Helmet) Constricting Command - lowers the number of enemies required to count as Surrounded, letting you activate all “while Surrounded” bonuses much more reliably. This makes it the best helmet for Grenade Legionnaire, as it guarantees your defensive and offensive Surrounded effects even in small packs or during boss fights. (Helmet) Constricting Command - lowers the number of enemies required to count as Surrounded, letting you activate all “while Surrounded” bonuses much more reliably. This makes it the best helmet for Grenade Legionnaire, as it guarantees your defensive and offensive Surrounded effects even in small packs or during boss fights. |
|
| +(80—120) to maximum Life +(10—15) to all Attributes (8—12) Life Regeneration per second Require (2—4) fewer enemies to be Surrounded |
|
 (Amulet) Rare Amulet - look primarily for the Level of all Projectile Skills, but it is also a potent source of Attributes, Spirit, Rarity, or the usual defensive modifiers. Instil the Heavy Ammunition or ideally Paragon (Amulet) Rare Amulet - look primarily for the Level of all Projectile Skills, but it is also a potent source of Attributes, Spirit, Rarity, or the usual defensive modifiers. Instil the Heavy Ammunition or ideally Paragon |
|
| Min. requirements: +80 to maximum Life +2 to Level of all Projectile Skills +30 to Spirit Optional affixes: +# to Attributes +#% total Elemental and Chaos Resistance |
|
 (Ring) Rare Ring - use regular resistance Rings with tons of maximum Life, Resistance, Flat Elemental Damage and Attributes. (Ring) Rare Ring - use regular resistance Rings with tons of maximum Life, Resistance, Flat Elemental Damage and Attributes. |
|
| Min. requirements: +80 to maximum Life +40% total Elemental and Chaos Resistance Optional affixes: % increased Rarity of Items found +# to Attributes Adds # to # Fire Damage to Attacks |
|
 (Belt) Rare Belt - you will need lots of Life, Resistances, and Strength here. Life Flask Recovery Rate is also useful to have, as it is your only way to recover Life. (Belt) Rare Belt - you will need lots of Life, Resistances, and Strength here. Life Flask Recovery Rate is also useful to have, as it is your only way to recover Life. |
|
| Min. requirements: +100 to maximum Life +40% total Elemental and Chaos Resistance +# to Strength Optional affixes: # Life Regeneration per second % increased Flask Life Recovery rate |
|
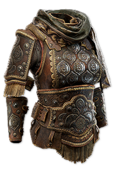 (Body Armour) Rare Armour - look for a high amount of maximum Life, Evasion and flat Evasion. You can also include Deflection Chance or Attributes. (Body Armour) Rare Armour - look for a high amount of maximum Life, Evasion and flat Evasion. You can also include Deflection Chance or Attributes. |
|
| Min. requirements: +120 to maximum Life +1200 to Evasion Rating +40% total Elemental and Chaos Resistance Optional affixes: Gain Deflection Rating equal to #% of Evasion Rating +# to Attributes |
|
|
|
|
| Min. requirements: +90 to maximum Life +40% total Elemental and Chaos Resistance Optional affixes: Gain Deflection Rating equal to #% of Evasion Rating % increased Rarity of Items found +# to Attributes % increased Evasion Rating |
|
 (Boots) Rare Boots - your Boots should grant you tons of Movement Speed and defensive modifiers. You can also use your Rune Slot for Rune of the Chase if you have enough Resistances. (Boots) Rare Boots - your Boots should grant you tons of Movement Speed and defensive modifiers. You can also use your Rune Slot for Rune of the Chase if you have enough Resistances. |
|
| Min. requirements: 30% increased Movement Speed +100 to maximum Life +40% total Elemental and Chaos Resistance Optional affixes: % increased Rarity of Items found +# to Evasion Rating Gain Deflection Rating equal to #% of Evasion Rating +# to Attributes % increased Evasion Rating |
|
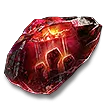
 (Jewel) Rare Jewel - round out your character with valuable offensive and utility bonuses, adapting them to whatever your build currently lacks. If you're playing with Rare Crossbow instead of Redemption you'll need a lot of crit stats on jewels. (Jewel) Rare Jewel - round out your character with valuable offensive and utility bonuses, adapting them to whatever your build currently lacks. If you're playing with Rare Crossbow instead of Redemption you'll need a lot of crit stats on jewels. |
|
| Optional affixes: #% increased Evasion Rating #% increased Damage with Crossbows #% increased Movement Speed #% increased Attack Speed #% increased Cooldown Recovery Rate #% increased Evasion Rating #% increased Projectile Damage |
|
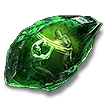
 (Jewel) Heart of the Well - this Jewel can roll a huge variety of powerful modifiers, letting you tailor it to your build’s needs. No matter which combination you hit, its purpose is simple: to give you a meaningful boost to your overall Damage. (Jewel) Heart of the Well - this Jewel can roll a huge variety of powerful modifiers, letting you tailor it to your build’s needs. No matter which combination you hit, its purpose is simple: to give you a meaningful boost to your overall Damage. |
|
| Recommended modifiers: Gain (9–15)% of Damage as Extra Fire Recover (1—2)% of maximum Life on Kill Recover (1—2)% of maximum Mana on Kill (10—18)% increased Cooldown Recovery Rate |
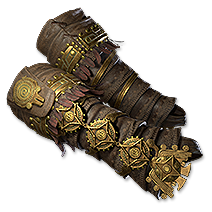 (Gloves) Rare Gloves - simply look for solid base defenses and tons of Resistances and Attributes, you will need lots of it
 |
|
If you have any other build requests please leave that in the comments below. We are always open to suggestions and constructive feedback.
Pictures used in this article are the intellectual property of Grinding Gear Games.