Flame Wall Elementalist Build
A quite simple Elementalist Build that uses Flame Wall to burn all enemies foolish enough to get caught in its fireFlame Wall
Elementalist Build
Updated for Patch 3.24
The Best Crafty Guides by Odealo
| Guide notes |
| March 29, 2024 -Build updated |
| Build Overview | |||
| Tags: [CASTER] [ELEMENTAL] [LIFE] [DOT] | |||
|
Budget: Defenses: |
|
Boss DPS: AoE: |
|
Flame Wall is a quite popular supportive Skill used mostly at the early stages of the game. It is a Damage over Time Spell that has 2 main components: Flame Wall itself and a secondary debuff applied to any monster standing in the fire or hit by a projectile that traveled through the Flame Wall. As it turns out, it can be a very powerful standalone Skill once you properly scale it with your Gear and Passive Tree. To spread the flames we are using the Ball Lightning Spell for the convenience of built-in Pierce and some base Lightning Damage to apply very potent Shocks to increase the Damage they take from the Flame Wall.
It is a 2-button playstyle Build by nature. You could lure monsters to run into your Flame Wall, but using Ball Lightning is simply faster and requires less effort after all. It can be a bit clunky at first, but with time it gets quite comfortable.
It is important to note that while it is Burning Damage, it is not an Ignite. Thanks to this property, you can make use of Pain Attunement Keystone and other Spell scaling modifiers, and you can ignore the monster's chances to Avoid Ailments or bypass Proximity Shields.
Thanks to the Elementalist Ascendency, you can easily inflict up to 50% Shock on any enemy you hit with Lightning Damage. For your last Ascendency Passives, you can choose to also Chill them with increased effectiveness or have Elemental Aegis which works similarly to Energy Shield, but protects only against Elemental Damage. Either way provides enormous defensive value to the Build and you should choose the one fitting your playstyle best. At later stages, you can invest in Forbidden Jewels and have both of them for maximum effect. Another form of defense you can get with this Build is high Armour and Evasion Rating value, decent Block, Petrified Blood which delays the Damage you take from Hits, and a bunch of Life Recoup and Life Regeneration.
You don't need to have any gear prior to starting this Build, and it gets much better as you invest more Currency into it. It is a really good League starter build that can take care of clearing Maps and taking down Bosses when you just began your journey.
You can also check our other Path of Exile builds right over here Odealo's Crafty Guides - Full List
1. Gameplay
You will alternate between using two Skills, Flame Wall and Ball Lightning to spread the fiery Damage over Time Effect everywhere. Against tougher opponents, you will also want to use your Aura linked with Divine Blessing to get a temporary buff and use Flammability to lower the enemy's Fire Resistances. Flame Dash is used to moving between packs and dodge incoming attacks.
|
|
|
|

2. Build's PROS & CONS
| PROS |
|
| CONS |
|
3. Leveling tips
It is one of the best Builds to level up with. To deal with Act Bosses and other tough Rares the Flame Wall can be supplemented by Fire Trap or other Fire DoT Skills such as Scorching Ray or even Searing Bond, as they scale very similarly. During the campaign, you don't need to fully clear each area, so just casting Flame Wall and letting monsters run through it is enough to keep up with Area Level as you progress. Getting Items that improve your Gem Levels is a huge Damage boost.
Suggested leveling Gem setups:
| Flame Wall setup | |
 |
Flame Wall - you can start using your final Skill at level 12. The mechanics of this Skill allow you to progress very fast through the campaign. |
 |
Efficacy Support - adds additional Strikes to your Attack for better Clear. |
 |
Arcane Surge Support - adds a lot of Lightning Damage to your Attacks. |
 |
Elemental Focus Support - improves the Elemental Damage you deal with your Attacks. |
 |
Controlled Destruction Support - disables your Elemental Ailments but in exchange, it massively boosts your Damage. |
 |
Swift Affliction Support - adds additional repeats to your Attack. |
| Aura setup | |
 |
Determination - it is important to use at least one defensive Aura during the leveling process. Determination grants lots of Armour Rating. |
 |
Clarity - this Aura grants you some Mana Regeneration so you can use your Skills without worrying about Mana. |
| Utility setup | |
 |
Flame Dash - a short-distanced Teleport that allows you to go through various terrain gaps. |
 |
Flammability - reduces Fire Resistance of affected enemies. |
 |
Steelskin - grants you a defensive layer that absorbs incoming Damage. |
Bandits:
Kill all Bandits to get an additional 2 Passive Tree Skill Points.
Leveling Skill Trees:
39 Points Passive Tree
We recommend this order:
1) Fire Walker 2) Heart and Soul 3) Breath of Flames 4) Infused Flesh 5) Holy Fire 6) Purity of Flesh 7) Sovereignty
65 Points Passive Tree
Allocate:
1) Pain Attunement 2) Melding 3) Blood Siphon 4) Elemental Focus 5) Divine Judgement 6) Devotion
Recommended leveling items:
 Le Heup of All - a very good ring that improves your Damage dealt and raises all your Resistances. Le Heup of All - a very good ring that improves your Damage dealt and raises all your Resistances. |
|
| Adds 1 to 4 Physical Damage to Attacks +(10-30) to all Attributes (10-30)% increased Damage (10-30)% increased Rarity of Items found +(10-30)% to all Elemental Resistances |
|
 Goldrim - thanks to this Helmet you won't need to worry too much about getting elemental Resistances until the very late Acts. Goldrim - thanks to this Helmet you won't need to worry too much about getting elemental Resistances until the very late Acts. |
|
| +(30-50) to Evasion Rating 10% increased Rarity of Items found +(30-40)% to all Elemental Resistances Reflects 4 Physical Damage to Melee Attackers Level Requirement reduced by 100 (Hidden) |
|
 Rare Wand - you can get Weapons with global additional Levels for your Main Gems even in the Act 1. Having some Spell Damage is also useful there. Rare Wand - you can get Weapons with global additional Levels for your Main Gems even in the Act 1. Having some Spell Damage is also useful there. |
|
| +1 to Level of all Fire Spell Skill Gems #% increased Fire Spell Damage |
|
 Tabula Rasa - a great Item to significantly boost your Damage. If possible, try to get one with Corrupted Implicit which would raise the level of the socketed Flame Wall. Tabula Rasa - a great Item to significantly boost your Damage. If possible, try to get one with Corrupted Implicit which would raise the level of the socketed Flame Wall. |
|
| Item has no level requirement and Energy Shield (Hidden) Item has 6 White Sockets and is fully linked (Hidden) |
|
 Pyre - this Ring grants enormous amounts of Damage to your Flame Wall. If possible, try to equip it on both Ring Slots for maximum Damage! Pyre - this Ring grants enormous amounts of Damage to your Flame Wall. If possible, try to equip it on both Ring Slots for maximum Damage! |
|
| +(20-30)% to Cold Resistance +(25-35)% to Fire Resistance (60-80)% increased Burning Damage 40% of Cold Damage Converted to Fire Damage 10% increased Light Radius Ignited Enemies Killed by your Hits are destroyed |
|
 Doedre's Tenure - slightly lower your Cast Speed, but massively improve your Damage over Time effect in return. Doedre's Tenure - slightly lower your Cast Speed, but massively improve your Damage over Time effect in return. |
|
| +(20-50) to Intelligence 100% increased Spell Damage (25-15)% reduced Cast Speed |
|
 Perandus Blazon - grants lots of Attributes, a bit of Fire Resistances, and makes your Flasks last longer which is quite useful. Perandus Blazon - grants lots of Attributes, a bit of Fire Resistances, and makes your Flasks last longer which is quite useful. |
|
| (15-25)% increased Stun and Block Recovery +(20-30) to all Attributes (6-8)% increased Quantity of Items found +20% to Fire Resistance 20% increased Flask Effect Duration -2 Physical Damage taken from Attack Hits |
|
 Karui Ward - it doesn't do much for your Damage, but grants Movement Speed which is very valuable at early levels. Karui Ward - it doesn't do much for your Damage, but grants Movement Speed which is very valuable at early levels. |
|
| +(20-30) to Dexterity +(20-30) to Intelligence +100 to Accuracy Rating 10% increased Movement Speed 30% increased Projectile Speed 30% increased Projectile Damage |
|
 Wanderlust - grants a bit of Mana Regeneration so you can cast your Spells more freely. It also makes you immune to Freeze Ailments. Wanderlust - grants a bit of Mana Regeneration so you can cast your Spells more freely. It also makes you immune to Freeze Ailments. |
|
| +5 to Dexterity +(10-20) to maximum Energy Shield (20-40)% increased Mana Regeneration Rate 20% increased Movement Speed Cannot be Frozen |
|
 Seven-League Step - those grant lots of Movement Speed which is great if you want to speed up your leveling progress to the maximum. Seven-League Step - those grant lots of Movement Speed which is great if you want to speed up your leveling progress to the maximum. |
|
| 50% increased Movement Speed Level Requirement reduced by 100 (Hidden) |
|
4. Final Skill Tree, Ascendancy Points, and Pantheon
Final Skill Tree:
105 Points Final Passive Tree
119 Points Path of Building (PoB) link
Ascendancy points:
Preferably in this order:
- Mastermind of Discord
- Heart of Destruction
- Shaper of Storms
- Liege of the Primordial / Shaper of Winter / Bastion of Elements
Pantheon:
Major God: Brine King: You cannot be Stunned if you've been Stunned in the past 2 seconds, Cannot be Frozen, 50% reduced Effect of Chill on you
Minor God: Soul of Shakari: 50% less Duration of Poisons on You; You cannot be Poisoned while there are at least 3 Poisons on you
5. Final Gems links
| [DPS] Flame Wall setup | |
|
Flame Wall - creates up to 3 Fiery Walls that burn anything it touches. Any Projectile moving through the wall will inflict this Debuff on enemies it Hits. There are two Damage over Time components to that, and they can be stacked at the same time. |
 |
Burning Damage Support - improves all your Burning Damage. The awakened version also raises the level of your Flame Wall. |
|
Elemental Focus Support - increases all Elemental Damage but disables Ailmens, which we can't inflict with Flame Wall anyway. |
|
Controlled Destruction Support - severely reduces the Critical Chance but grants a lot of Spell Damage. |
|
Swift Affliction Support - boosts the Damage output of your Flame Wall at the cost of lowering the Duration. |
 |
Empower Support - simply increases the level of your Flame Wall Gem. If you don't have access to this Gem, use the Efficacy Support instead. |
| [Utility] Ball Lightning setup | |
 |
Ball Lightning - it is used to spread Flame Wall's Debuff and inflict powerful Shocks on enemies. Freezing Pulse is also a good option, but it has less Shock potential. |
 |
Greater Multiple Projectiles Support - adds more Projectiles to improve the spread. |
 |
Unbound Ailments Support - improves the effectiveness of your Shocks. |
| Combustion Support - thanks to the added Fire Damage from Flame Wall, you can lower the enemy's Fire Resistances by Igniting them. You can swap this for Faster Projectiles Support if you prefer better Clear. | |
| [UTILITY] Auras socket in your Helmet |
|
 |
Grace - your second defensive Aura, provides you with tons of Evasion Rating so you can evade most of the incoming Attacks. |
 |
Malevolence - improves your Damage over Time and the Duration of all your Effects. |
 |
Petrified Blood - splits half of the incoming Damage into DoT effect, and lets you Reserve some Auras with your maximum Life without any downside. |
 |
Enlighten Support - lowers the Reservation required by your Auras. |
| [UTILITY] Arrogance setup | |
 |
Herald of Ash - improves the Fire Damage you deal with Fire Spells. It works very well with the Circle of Anguish Ring. |
 |
Vitality - grants you a lot of Life Regeneration which is very important to keep you alive after taking a Hit. |
 |
Arrogance Support - linked Auras reserve Life instead of Mana. Thanks to the Petrified Blood, you don't lose any effective Life Pool anyway. |
| [UTILITY] Curse | |
|
Flammability - lowers the Fire Resistance of Cursed enemies. Casting it manually has the highest effectiveness, but you can automate it via certain modifiers on your Gear. |
 |
Elemental Weakness - lowers the Fire Resistance of Cursed enemies. Casting it manually has the highest effectiveness, but you can automate it via certain modifiers on your Gear. |
| [UTILITY] Movement | |
|
Flame Dash - teleports you in a short distance and leaves a path of fire on the ground. You can store up to 3 Charges, and the first one you use is going to be an Instant Cast. |
| [UTILITY] Guard | |
 |
Steelskin - it is a very strong Guard Skill that covers you in a barrier that absorbs incoming Damage and disables Bleeding. |
| [UTILITY] Golem | |
 |
Stone Golem - a quite helpful Minion that grants you plenty of Life Regeneration. You can automate it via Cast When Damage Taken setup, or use it manually. |
|
|
6. Gear Setup
You can start up with just basic Rare Gear and make upgrades as you get more Currency. The Dragonflight's Fang Amulet is an amazing option for this Build, as the version for the Flame Wall is always cheap. With the Rare Amulet, you will need to use 1 or 2 Rare Jewels with Mana Reservation Efficiency instead of typical Damage bonuses, but it is not that big of a difference overall. Flame Wall scales very well with Gem Levels, so any modifiers to that are welcome. You should also look for modifiers to Fire Spell Damage, DoT Multiplier, and Effect of Non-Damaging Ailments which will allow you to inflict maximum Shocks more reliably. For your defenses, you want to get a lot of maximum Life and Life Regeneration. You should prioritize Evasion Rating Bases, as they are able to give you the Spell Suppression Chance modifiers, which are very important for your survivability. A bit of Energy Shield can also be useful, but you don't have a reliable way to quickly recover it during combat.
|
Stat priorities on items:
|
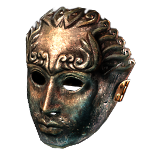 (Helmet) Rare Helmet - look for a Helmet with lots of Spell Suppression, Life, and Resistance. You should be able to craft an additional Prefix modifier that converts part of the incoming Physical Damage into Elemental Damage. (Helmet) Rare Helmet - look for a Helmet with lots of Spell Suppression, Life, and Resistance. You should be able to craft an additional Prefix modifier that converts part of the incoming Physical Damage into Elemental Damage. |
|
|
Min. requirements: |
|
 (Helmet) The Devouring Diadem - you can use this Helmet if you have problems with Mana, or want to use extra Auras such as Zealotry. It will be harder to cap your Spell Suppression Chance. (Helmet) The Devouring Diadem - you can use this Helmet if you have problems with Mana, or want to use extra Auras such as Zealotry. It will be harder to cap your Spell Suppression Chance. |
|
| +1 to Level of Socketed Gems Socketed Gems have 25% increased Reservation Efficiency Trigger Level 15 Feast of Flesh every 5 seconds (180-220)% increased Energy Shield 10% chance for Energy Shield Recharge to start when you use a Skill Eldritch Battery |
|
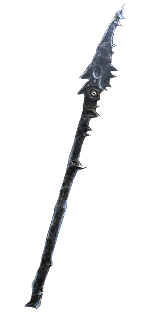
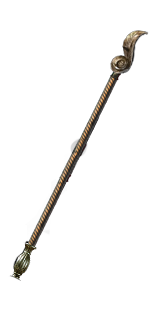 (Weapon) The Searing Touch - is a surprisingly powerful Weapon for this Build. It grants everything you need - Block Chance, a lot of Damage, and additional Levels for your Flame Wall Gems. (Weapon) The Searing Touch - is a surprisingly powerful Weapon for this Build. It grants everything you need - Block Chance, a lot of Damage, and additional Levels for your Flame Wall Gems. |
|
| +18% Chance to Block Attack Damage while wielding a Staff +(40-60)% to Fire Damage over Time Multiplier (70-90)% increased Fire Damage 10% increased Cast Speed +2 to Level of all Fire Spell Skill Gems |
|
 (Weapon) Rare Weapon - you will want to eventually upgrade your Weapon for a Rare Staff with lots of Damage over Time Multiplier and even more Levels for your Flame Wall Gem. (Weapon) Rare Weapon - you will want to eventually upgrade your Weapon for a Rare Staff with lots of Damage over Time Multiplier and even more Levels for your Flame Wall Gem. |
|
| Min. requirements: +3 to Level of all Fire Spell Skill Gems 30% Fire Damage over Time Multiplier Optional affixes: +2 to Level of all Spell Skill Gems 30% Damage over Time Multiplier |
|
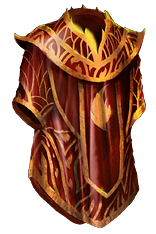 (Body Armour) Cloak of Flame - it is a very powerful Armor for Evasion Builds, as it grants tons of Physical Damage mitigation from just one Gear Slot. You can easily find a Corrupted version with additional Gem Levels, and link it using the Tainted Currency. You can also use the Lightning Coil, but you would need a lot more Resistances on your Gear. (Body Armour) Cloak of Flame - it is a very powerful Armor for Evasion Builds, as it grants tons of Physical Damage mitigation from just one Gear Slot. You can easily find a Corrupted version with additional Gem Levels, and link it using the Tainted Currency. You can also use the Lightning Coil, but you would need a lot more Resistances on your Gear. |
|
| +(50-75)% to Fire Resistance (40-75)% increased Ignite Duration on Enemies Reflects 100 Fire Damage to Melee Attackers 40% of Physical Damage taken as Fire Damage |
|
 (Body Armour) Skin of the Lords - grants a total of 4 Levels for your Flame Wall and boosts your Armour, Evasion, and Energy Shield. The best Keystone to get here would be the Glancing Blows, but any other that doesn't hurt the Build is good enough. (Body Armour) Skin of the Lords - grants a total of 4 Levels for your Flame Wall and boosts your Armour, Evasion, and Energy Shield. The best Keystone to get here would be the Glancing Blows, but any other that doesn't hurt the Build is good enough. |
|
| Item has no level requirement and Energy Shield (Hidden) Sockets cannot be modified +2 to Level of Socketed Gems 100% increased Global Defences You can only Socket Corrupted Gems in this item Item has 6 Sockets and is fully linked (Hidden) |
|
 (Boots) Rare Boots - on your Boots you should prioritize Movement Speed, Maximum Life, and Elemental Resistances. You can also get a bit of Action Speed and Life Regeneration thanks to the Eldritch Implicts. Crafting Modifiers are also useful, as you can obtain some Ailment Avoidance or improved effectiveness of your Shocks. (Boots) Rare Boots - on your Boots you should prioritize Movement Speed, Maximum Life, and Elemental Resistances. You can also get a bit of Action Speed and Life Regeneration thanks to the Eldritch Implicts. Crafting Modifiers are also useful, as you can obtain some Ailment Avoidance or improved effectiveness of your Shocks. |
|
| Min. requirements: 70+ maximum Life 20% increased Movement Speed 50% to Elemental Resistances Optional affixes: increased Action Speed increased Life Regeneration Rate increased Effect of Non-Damaging Ailments |
|
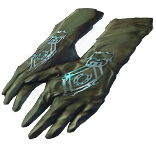
 (Gloves) Rare Gloves - aim to get as much maximum Life and Resistances here. Eldritch Implicits are extremely valuable here, as you get automatic Fire Exposure and lots of Fire Damage over Time Multiplier with them. (Gloves) Rare Gloves - aim to get as much maximum Life and Resistances here. Eldritch Implicits are extremely valuable here, as you get automatic Fire Exposure and lots of Fire Damage over Time Multiplier with them. |
|
| Min. requirements: +70 to maximum Life +50% to Elemental Resistances Optional affixes: Inflict Fire Exposure on Hit, applying -14% to Fire Resistance +(7-25)% to Fire Damage over Time Multiplier Life Regeneration |
|
 (Belt) Rare Belt - your Belt is another mostly defensive Gear piece, you can get a lot of maximum Life and Resistance here. The Stygian Vise allows you to use additional Abyss Jewel, which is very helpful. (Belt) Rare Belt - your Belt is another mostly defensive Gear piece, you can get a lot of maximum Life and Resistance here. The Stygian Vise allows you to use additional Abyss Jewel, which is very helpful. |
|
| Min. requirements: +80 to Maximum Life +50% to Elemental Resistances Optional affixes: % Increased Maximum Life Life Regeneration increased Flask Charges gained |
|
 (Jewel) Rare Abyss Jewel - try to get the Corrupted Blood Immunity here, ideally on a Jewel that also grants maximum Life and Resistances. You can get a bit of Damage here too, but it's a rather minuscule amount. (Jewel) Rare Abyss Jewel - try to get the Corrupted Blood Immunity here, ideally on a Jewel that also grants maximum Life and Resistances. You can get a bit of Damage here too, but it's a rather minuscule amount. |
|
| Recommended modifiers: +30 to maximum Life Resistances Attributes Corrupted Blood cannot be inflicted on you |
|
 (Amulet) Rare Amulet - the Amulet is very impactful on your Damage. Try to get additional Levels for your Gems and some DoT Multipliers. You can top it up with some Life, Resistance, or Non-Damaging Ailment Effect. (Amulet) Rare Amulet - the Amulet is very impactful on your Damage. Try to get additional Levels for your Gems and some DoT Multipliers. You can top it up with some Life, Resistance, or Non-Damaging Ailment Effect. |
|
| Min. requirements: +50 to Maximum Life +1 to Level of all Skill Gems +20% to Damage over Time Multiplier Optional affixes: +20% to Fire Damage over Time Multiplier +1 to Level of all Fire Skill Gems increased Effect of Non-Damaging Ailments |
|
| Recommended Anointments: Charisma |
|
 (Amulet) Replica Dragonfang's Flight - it is a great Amulet as it boosts your Damage and severely helps with Mana Reservation. The Flame Wall version is usually considered bad, so you shouldn't have problems finding it listed for very cheap. (Amulet) Replica Dragonfang's Flight - it is a great Amulet as it boosts your Damage and severely helps with Mana Reservation. The Flame Wall version is usually considered bad, so you shouldn't have problems finding it listed for very cheap. |
|
| +(10-16) to all Attributes +3 to Level of all Flame Wall Gems +(5-10)% to all Elemental Resistances (5-10)% increased Reservation Efficiency of Skills Items and Gems have (10-5)% reduced Attribute Requirements |
|
 (Ring) Circle of Anguish - this greatly improves your Damage, and you can get very useful Synthesis Implicits, such as Arcane Surge on Spell Hit. Make sure to get the correct Herald modifiers. (Ring) Circle of Anguish - this greatly improves your Damage, and you can get very useful Synthesis Implicits, such as Arcane Surge on Spell Hit. Make sure to get the correct Herald modifiers. |
|
| +(20-30) to Strength Adds (20-25) to (26-35) Fire Damage +(20-30)% to Fire Resistance Herald of Ash has (40-60)% increased Buff Effect (40-60)% increased Fire Damage while affected by Herald of Ash |
|
 (Ring) Polaric Devastation - thanks to this Ring you will be able to Cover Enemies in Ash, which slows their Movement and increase the Damage they take from Fire Damage. You can inflict Ignite with the Ball Lightning Skill thanks to the flat Fire Damage provided by the Flame Wall. (Ring) Polaric Devastation - thanks to this Ring you will be able to Cover Enemies in Ash, which slows their Movement and increase the Damage they take from Fire Damage. You can inflict Ignite with the Ball Lightning Skill thanks to the flat Fire Damage provided by the Flame Wall. |
|
| (15-25)% increased Elemental Damage (15-25)% increased Global Critical Strike Chance +(20-40)% to Fire Resistance +(20-40)% to Cold Resistance (10-20)% increased Duration of Ailments on Enemies Left Ring slot: Cover Enemies in Ash for 5 seconds when you Ignite them Right Ring slot: Cover Enemies in Frost for 5 seconds when you Freeze them |
|
 (Ring) Rare Ring - if you use a Rare Ring, you should aim for lots of maximum Life and Resistances there. You can also get some Damage over Time Multiplier with Essences or craft minimum Frenzy Charges. (Ring) Rare Ring - if you use a Rare Ring, you should aim for lots of maximum Life and Resistances there. You can also get some Damage over Time Multiplier with Essences or craft minimum Frenzy Charges. |
|
| Min. requirements: +50% to Elemental Resistances +60 to Maximum Life Optional affixes: +1 to Minimum Frenzy Charge +(12-15)% to Damage over Time Multiplier |
|
 (Jewel) Rare Jewels - if you don't have enough Mana Reservation Efficiency for your Auras, you can get it on your Rare Jewels. Otherwise, aim for maximum Life and potent Damage bonuses or more Resistances. (Jewel) Rare Jewels - if you don't have enough Mana Reservation Efficiency for your Auras, you can get it on your Rare Jewels. Otherwise, aim for maximum Life and potent Damage bonuses or more Resistances. |
|
| Recommended affixes: increased maximum Life Mana Reservation Efficiency DoT Multiplier Burning Damage Resistances |
|
 (Jewel) Large Cluster Jewel - you can use any combination of Notables that improve your Fire Spell Damage. The Doryani's Lesson Notable is very useful, as it provides Life Leech. Try to get it on a jewel that adds only 8 Passive Points. (Jewel) Large Cluster Jewel - you can use any combination of Notables that improve your Fire Spell Damage. The Doryani's Lesson Notable is very useful, as it provides Life Leech. Try to get it on a jewel that adds only 8 Passive Points. |
|
| Recommended affixes: 1 Added Passive Skill is Cremator 1 Added Passive Skill is Doryani's Lesson 1 Added Passive Skill is Smoking Remains |
|
 (Jewel) Medium Cluster Jewels - here you should look for some minor Damage bonuses and some utility, such as Smoke Cloud on Kill or Life Regeneration. Remember that Flame Wall is not an Ignite, so don't use Notables affecting that. You can also use a Jewel that boosts the Effect of non-damaging Ailments such as Shock and Scorch, and automatically applies Chill to nearby Enemies. (Jewel) Medium Cluster Jewels - here you should look for some minor Damage bonuses and some utility, such as Smoke Cloud on Kill or Life Regeneration. Remember that Flame Wall is not an Ignite, so don't use Notables affecting that. You can also use a Jewel that boosts the Effect of non-damaging Ailments such as Shock and Scorch, and automatically applies Chill to nearby Enemies. |
|
| Recommended affixes: 1 Added Passive Skill is Flow of Life 1 Added Passive Skill is Smoking Remains 1 Added Passive Skill is Chilling Presence 1 Added Passive Skill is Inspired Oppression |
|
 (Jewel) Watcher's Eye - you can get very useful modifiers for both Damage and survivability here. DoT Multiplier from Malevolence is the most impactful, but modifiers for Grace can also be used. The combination of them both will probably be very expensive. (Jewel) Watcher's Eye - you can get very useful modifiers for both Damage and survivability here. DoT Multiplier from Malevolence is the most impactful, but modifiers for Grace can also be used. The combination of them both will probably be very expensive. |
|
| (4-6)% increased maximum Energy Shield (4-6)% increased maximum Life (4-6)% increased maximum Mana <Two or Three random aura modifiers> Recommended Aura mods: +(18-22)% to Damage over Time Multiplier while affected by Malevolence (30-50)% chance to Blind Enemies which Hit you while affected by Grace +(12-15)% chance to Suppress Spell Damage while affected by Grace (10-15)% increased Movement Speed while affected by Grace |
|
  (Jewel) Forbidden Flesh&Flame - thanks to this combination of Jewels you can obtain the 5th Ascendency Notable. We recommend getting Shaper of Winter or Bastion of Elements, as going into Golem's route is very Socket-restrictive. (Jewel) Forbidden Flesh&Flame - thanks to this combination of Jewels you can obtain the 5th Ascendency Notable. We recommend getting Shaper of Winter or Bastion of Elements, as going into Golem's route is very Socket-restrictive. |
|
| Allocates <Random Ascendancy Notable> if you have the matching modifiers on Forbidden Flesh/Flame | |
 (Jewel) Lethal Pride - This jewel will provide you with tons of Strength, which will make your gearing process much easier. It can also add the 5% Physical Damage taken as a Fire Damage modifier to any Notable in its radius, which is what you should aim for. (Jewel) Lethal Pride - This jewel will provide you with tons of Strength, which will make your gearing process much easier. It can also add the 5% Physical Damage taken as a Fire Damage modifier to any Notable in its radius, which is what you should aim for. |
|
| Commanded leadership over (10000-18000) warriors under (Akoya-Kaom-Rakiata) Passives in radius are Conquered by the Karui Historic |
|
 (Flask) Bottled Faith - creates a Consecrated Ground on a very big area, which causes monsters standing on it to take more Damage, and you will regenerate 5% of your maximum Life every second. You can use a simple Sulphur Flask if you don't have access to this Unique. (Flask) Bottled Faith - creates a Consecrated Ground on a very big area, which causes monsters standing on it to take more Damage, and you will regenerate 5% of your maximum Life every second. You can use a simple Sulphur Flask if you don't have access to this Unique. |
|
| Creates Consecrated Ground on Use (30-15)% reduced Duration Consecrated Ground created by this Flask has Tripled Radius Consecrated Ground created during Effect applies (7-10)% increased Damage taken to Enemies (100-150)% increased Critical Strike Chance against Enemies on Consecrated Ground during Effect |
|
|
Suggested Flasks:
|
|
    |
|
|
If you have any other build requests please leave that in the comments below. We are always open to suggestions and constructive feedback.
Pictures used in this article are the intellectual property of Grinding Gear Games.
