
Firestorm Hierophant Build
A powerful and versatile Caster Build that obliterates enemies with huge meteors falling down from the skyFirestorm
Hierophant Build
Updated for Patch 3.21
The Best Crafty Guides by Odealo
| Guide notes |
| April 10, 2023 -Build created |
| Build Overview | |||
| Tags: [CASTER] [ELEMENTAL] [LIFE] [CRIT] | |||
|
Budget: Defenses: |
|
Boss DPS: AoE: |
|
The Hierophant is usually associated with Totems or Brands, but thanks to the new changes to the Arcane Surge it looks very promising for a classical caster build just as well. Additional Cast Speed, permanent Power, and Endurance Charges, enormous Mana Reservation Efficiency, and Energy Shield bonuses are all very valuable and generic allowing you to try out many combinations. The Arcane Blessing now grants 20% More Spell Damage and allows you to gain Arcane Surge even if you don't spend Mana to Cast your Spells anymore. It is extremely beneficial for Spell Casters, as it allows picking up Eldritch Battery Keystone, which opens up possibilities to reserve 100% of your Mana and never again worry about Mana sustain at all.
It can be easily adjusted to any Elemental Spell you want, but we picked the Firestorm, as we wanted to try out the new Vaal version of this Skill. Like many others in this update, it is focused mostly on increasing the single-target potential. Firestorm is definitely not the king of mapping, but it is proving to be a good mix of clear speed and single-target capability, allowing you to steadily progress your Atlas without any major obstacles. For Fire abilities that use Critical Strikes, the regular Ignite is not very useful - it is much better to reach out for alternative Ailments instead, and by using the Skittebots you can still enjoy having Shock and Chill at your enemies. Thanks to the Petrified Blood you can make use of the Pain Attunement Keystone to get massive amounts of Spell Damage and Reserve half of your Health to get even more Auras.
The close proximity to block-related and recovery notables allows this build to become quite tanky at a reasonably low cost. You will have lots of Armour and Evasion Ratings, easy access to Leech, and the Damage delay from Petrified Blood. You also redirect 10% of incoming Damage to your Mana, which is now covered by Energy Shield.
Thanks to the mentioned properties it's a very cheap Build to start playing with. It also has a pretty clear path of upgrades as you progress further into the end game.
You can also check our other Path of Exile builds right over here Odealo's Crafty Guides - Full List
1. Gameplay
To move around you will be using the Flame Dash, and for everything else just use the Firestorm. Depending on your preferences you can choose to use it with Spell Echo or Unleash, as they are very similar in terms of Damage output. The newly added Vaal Firestorm is a great addition to burst harder opponents. All your utility Spells like Curses or Wave of Conviction should be linked with Arcanist Brand to make it simple to use with just 1 button.
|
|
|
|

2. Build's PROS & CONS
| PROS |
|
| CONS |
|
3. Leveling tips
It is a very pleasant build to level up. You will have to get to Act 3 in order to get the Firestorm Gem, but you can use any Spell to level up on your way to Maps. We recommend using the Freezing Pulse which is available right from Level 2. It has very good Single-target Damage and decent Clear thanks to the built-in Pierce. During Leveling we recommend going the Non-Crit route and taking the Elemental Overload Keystone.
Suggested leveling Gem setups:
| Smite setup | |
 |
Freezing Pulse - an icy Projectile that slowly fades out with the traveled distance. Deals more Damage if you are close to the target. |
 |
Added Lightning Damage Support - grants additional Lightning Damage for your Spell. |
 |
Added Cold Damage Support - this one adds Cold Damage instead. You should look out for Dexterity on your Gear to be able to level up this Gem. |
 |
Arcane Surge Support - grants Cast Speed and Spell Damage if you spend Mana for your Spells. |
 |
Controlled Destruction Support - grants lots of Spell Damage but drastically lowers your Critical Strike Chance. |
 |
Elemental Focus Support - provides you with tons of Spell Damage bonus but disables the Elemental Ailments. |
| Aura setup | |
 |
Determination - grants a very high amount of flat Armour Rating. It will be the main source of Armour during leveling. |
 |
Petrified Blood - splits part of the incoming Damage into DoT Effect and allows you to benefit from Low Life status with Pain Attunement Keystone. |
 |
Herald of Ice - grants a bit of Cold Damage for your Spells. |
 |
Clarity - it gives you a lot of Mana Regeneration which you will need to cast your Spells. |
| Utility setup | |
 |
Frostblink - an Instant Blink that leaves patches of Chilled Ground. You can also use Flame Dash instead. |
 |
Elemental Weakness - lowers all Elemental Resistance types of affected Enemies. |
 |
Steelskin - stops all Bleed effects and absorbs part of incoming Damage. |
Bandits:
Kill all Bandits to get additional 2 Passive Tree Skill Points
Leveling Skill Trees:
39 Points Passive Tree
We recommend this order:
1) Light of Divinity 2) Divine Judgement 3) Purity of Flesh 4) Elemental Overload 5) Heart of Flame (Heart of Ice if you use Cold Skill, or Heart of Thunder if you use Lightning Skill)
64 Points Passive Tree
Allocate:
1) Pain Attunement 2) Deep Thoughts 3) Sovereignty 4) Cruel Preparations 5) Nimbleness 6) Melding
Recommended leveling items:
 Le Heup of All - provides a high amount of Attributes and Elemental Resistances, as well as increases your Damage. Le Heup of All - provides a high amount of Attributes and Elemental Resistances, as well as increases your Damage. |
|
| Adds 1 to 4 Physical Damage to Attacks +(10-30) to all Attributes (10-30)% increased Damage (10-30)% increased Rarity of Items found +(10-30)% to all Elemental Resistances |
|
 Tabula Rasa - this Armour provides tons of Damage in the form of easy accessible 6-link setup. Tabula Rasa - this Armour provides tons of Damage in the form of easy accessible 6-link setup. |
|
| Item has no level requirement and Energy Shield (Hidden) Item has 6 White Sockets and is fully linked (Hidden) |
|
 Goldrim - it's a Helmet that grants you tons of Elemental Resistances to cruise through the Acts easier. Goldrim - it's a Helmet that grants you tons of Elemental Resistances to cruise through the Acts easier. |
|
| +(30-50) to Evasion Rating 10% increased Rarity of Items found +(30-40)% to all Elemental Resistances Reflects 4 Physical Damage to Melee Attackers Level Requirement reduced by 100 (Hidden) |
|
 Perandus Blazon - gives tons of Attributes and improves the Duration of your Flasks. Perandus Blazon - gives tons of Attributes and improves the Duration of your Flasks. |
|
| (15-25)% increased Stun and Block Recovery +(20-30) to all Attributes (6-8)% increased Quantity of Items found +20% to Fire Resistance 20% increased Flask Effect Duration -2 Physical Damage taken from Attack Hits |
|
 Karui Ward - improves the Damage of your Projectile Spells and grants you Movement Speed. The Dexterity bonus is also useful. Karui Ward - improves the Damage of your Projectile Spells and grants you Movement Speed. The Dexterity bonus is also useful. |
|
| +(20-30) to Dexterity +(20-30) to Strength +100 to Accuracy Rating 30% increased Projectile Speed 10% increased Movement Speed 30% increased Projectile Damage |
|
 Wanderlust - makes you immune to Freeze, boosts your Mana Regeneration Rate and Movement Speed. Wanderlust - makes you immune to Freeze, boosts your Mana Regeneration Rate and Movement Speed. |
|
| +5 to Dexterity +(10-20) to maximum Energy Shield (20-40)% increased Mana Regeneration Rate 20% increased Movement Speed Cannot be Frozen |
|
 Seven-League Step - it's the best pair of Boots in terms of pure Movement Speed in the entire Game. Seven-League Step - it's the best pair of Boots in terms of pure Movement Speed in the entire Game. |
|
| 50% increased Movement Speed Level Requirement reduced by 100 (Hidden) |
|
4. Final Skill Tree, Ascendancy Points, and Pantheon
Final Skill Tree:
117 Points Final Passive Tree (doesn't include Cluster or Unique Jewels)
118 Points Path of Building (PoB) link
Ascendancy points:
Preferably in this order:
- Arcane Blessing
- Divine Guidance
- Sanctuary of Thoughts
- Conviction of Power
Pantheon:
Major God: Brine King: You cannot be Stunned if you've been Stunned in the past 2 seconds, Cannot be Frozen, 50% reduced Effect of Chill on you
Minor God: Soul of Ralakesh: 25% reduced Physical Damage over Time taken while moving; Moving while Bleeding doesn't cause you to take extra Damage
5. Final Gems links
| [DPS] Blade Flurry setup | |
 |
Firestorm - a Meteor falls from the sky, and creates a rain of Fire in the location for a short Duration. The Vaal version of this Skill can be used to further boost single-target potential. |
 |
Empower Support - increases the Level of support Gem, raising its base Damage substantially. |
 |
Increased Critical Damage Support - grants tons of Critical Strike Multiplier which is the main way of scaling Damage in this Build. |
|
Arcane Surge Support - grants lots of Cast Speed and Spell Damage if you have the Arcane Surge Buff, which is always. |
 |
Intensify Support - it gives a lot of Area of Effect, which gets reduced as you continuously Cast supported Spells. In return, you will gain a Spell Damage bonus. |
 |
Spell Echo Support - significantly increases your Cast Speed and causes you to repeat your Casts. |
| [UTILITY] Auras | |
|
Determination - it is a defensive Aura that grants you a lot of Armour Rating and improves it further with the More Armour modifier. |
 |
Grace - similarly to the previous Aura, this one grants you Evasion Rating and then raises it even more. |
 |
Petrified Blood - it causes half of the incoming Damage to be dealt as a DoT effect, and allows you to reserve half of your Life without any downside. |
 |
Vitality - grants you a lot of Life Regeneration. Adjust its level to your remaining available Mana. |
 |
Summon Skitterbots - Skitterbots are used to inflict Shock and Chill effects on nearby enemies even if you don't have any Cold or Lightning Damage in your Build or use Alternative Ailments. |
 |
Enlighten Support - link it with your most Mana-reserving Auras to reduce their costs. |
| [UTILITY] Divine Blessing | |
 |
Zealotry - it grants you a generic Spell Damage bonus and some Critical Strike Chance. You will also create Consecrated Ground under enemies you Hit with a Critical Strike sometimes. |
 |
Divine Blessing Support - turns a permanent Aura into a temporary Buff. Thanks to the Eldritch Battery Keystone you can pay its cost with Energy Shield and Reserve 100% of your Mana anyway. |
| [UTILITY] Arrogance Aura | |
 |
Herald of Ash - grants lots of Fire Damage for your Spells. If you use a different Spell, use an Herlad associated with that Element instead. |
 |
Arrogance Support - linked Auras Reserve your Life instead of Mana at increased Cost. Half of your Life is effectively Reserved by the Petrified Blood anyway, so you don't lose any survivability that way. |
| [UTILITY] Arcanist Brand setup | |
 |
Arcanist Brand - it is a Brand Spell that will automatically cycle through the linked Spells and Cast them on the target. |
 |
Flammability - lowers the Fire Resistance of the affected Enemy. Use Frostbite or Conductivity if you use other Elemental type Spell. |
|
Elemental Weakness - lowers all types of Elemental Resistance of Cursed Enemy. Use it if you have a source of additional Curse limit such as Whispers of Doom anoint or Corruption Implicit on your Amulet. |
 |
Wave of Conviction - applies Exposure matching the highest Damage type it deals to a target. Use level 1 of this Spell to easier adjust it to the desired Damage type. |
| [UTILITY] Other Utility setups | |
 |
Flame Dash - it is your Main Travel Spell, it teleports you in a short distance and can store up to 3 charges. |
 |
Molten Shell - grants you a bit of Armour and absorbs incoming Damage. You can use the Vaal version for improved effects. |
 |
Enduring Cry - grants you a lot of Life Regeneration and generates Endurance Charges. Use it if you also use the Arn's Anguish Unique Belt. |
| [UTILITY] Molten Shell |
|
|
6. Gear Setup
To improve your Damage you will need Items with modifiers to your main Gem Levels, Critical Strike Chance and Multiplier, Cast Speed, and Elemental Damage. The Price of Leadership grants access to alternative Ailments that greatly improve your Damage, but it requires constant tinkering with your Attributes. If you have lots of Mana Reservation Efficiency on your Helmet you can skip using the Enlighten Support Gem and vice versa, but getting said Helmet is usually much cheaper than a high-level Enlighten. The Energy Shield is useful to have, but it is not required, as you will have plenty of it from your Ascendency. Defensively, you will want to get as much maximum Life as possible and cap your Resistances. It is beneficial to use bases with Armour and Energy Shield, but good modifiers are more important.
|
Stat priorities on items:
|
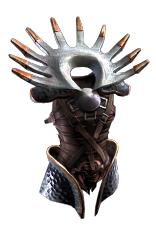
 (Helmet) Rare Helmet - it can grant you tons of Mana Reservation Efficiency. Proper Enchant, Eldritch Implicits, and Essence modifier will allow you to use more Auras than usual. On top of that try to look for bonuses to maximum Life, Resistances, and Attributes. (Helmet) Rare Helmet - it can grant you tons of Mana Reservation Efficiency. Proper Enchant, Eldritch Implicits, and Essence modifier will allow you to use more Auras than usual. On top of that try to look for bonuses to maximum Life, Resistances, and Attributes. |
|
| Min. requirements: +80 to maximum Life 60% Elemental Resistances Optional affixes: increased Mana Reservation Efficiency of Skills Chaos Resistances Physical Damage taken as Elemental Damage |
|
| Helmet enchantments: Increased Mana Reservation Efficiency for any of your Auras |
|
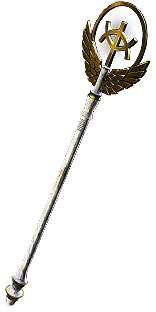 (Weapon) Martyr of Innocence - it is a decent budget option to use at the start. It grants tons of flat Fire Damage for your Spells through the Battlemage, and rewards you with Fire Penetration if you Blocked a Hit Recently. (Weapon) Martyr of Innocence - it is a decent budget option to use at the start. It grants tons of flat Fire Damage for your Spells through the Battlemage, and rewards you with Fire Penetration if you Blocked a Hit Recently. |
|
| Grants Level 15 Vengeance Skill +(12-16)% Chance to Block Attack Damage while wielding a Staff 100% increased Fire Damage Adds (315-360) to (450-540) Fire Damage Battlemage Damage Penetrates 15% of Fire Resistance if you have Blocked Recently Immune to Freeze and Chill while Ignited |
|
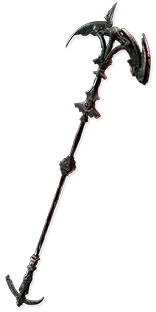 (Weapon) The Annihilating Light - an insanely powerful Staff that Triples your Damage but requires heavy investments into Elemental Resistances. It is a common drop, but it is hard to offset the downsides. (Weapon) The Annihilating Light - an insanely powerful Staff that Triples your Damage but requires heavy investments into Elemental Resistances. It is a common drop, but it is hard to offset the downsides. |
|
| +18% Chance to Block Attack Damage while wielding a Staff (70-60)% reduced Elemental Resistances Deal Triple Damage with Elemental Skills |
|
 (Weapon) Rare Staff - a good Rare Weapon can grant you up to 5 levels for your Main Gem Level, increase the Damage and Cast Speed for your Spells, and improve your Critical Strike Chance and Multiplier. Fractured modifiers and Essences will greatly aid you in Crafting a good one. (Weapon) Rare Staff - a good Rare Weapon can grant you up to 5 levels for your Main Gem Level, increase the Damage and Cast Speed for your Spells, and improve your Critical Strike Chance and Multiplier. Fractured modifiers and Essences will greatly aid you in Crafting a good one. |
|
| Min. requirements: +3 to Level of all Fire Spell Skill Gems Optional affixes: increased Cast Speed increased Spell Damage +2 to Level of all Spell Skill Gems |
|
 (Body Armour) Skin of the Lords - it grants a total of 4 Gem Levels if you also use the Empower Support, and improves your Global Defences such as Armour or Evasion Rating. For a Randomised Keyston try to look for the Iron Will Keystone, but it's not required. (Body Armour) Skin of the Lords - it grants a total of 4 Gem Levels if you also use the Empower Support, and improves your Global Defences such as Armour or Evasion Rating. For a Randomised Keyston try to look for the Iron Will Keystone, but it's not required. |
|
| Item has no level requirement and Energy Shield (Hidden) Sockets cannot be modified +2 to Level of Socketed Gems 100% increased Global Defences You can only Socket Corrupted Gems in this item Item has 6 Sockets and is fully linked (Hidden) |
|
 (Body Armour) Rare Armour - at first you will probably need to use a regular Rare Armour with maximum Life, Resistances, and possibly some Eldritch Implicits to boost all your Aura effects. (Body Armour) Rare Armour - at first you will probably need to use a regular Rare Armour with maximum Life, Resistances, and possibly some Eldritch Implicits to boost all your Aura effects. |
|
| Min. requirements: +100 to maximum Life 70% total Elemental Resistances Optional affixes: Chaos Resistances Life Regeneration per Second % of Physical Damage from Hits taken as Fire/Lightning Damage increased effect of Non-Curse Auras from your Skills |
|
 (Boots) Rare Boots - on your Boots you should focus mostly on Movement Speed, maximum Life, and Resistances. You can also look for certain Elemental Avoidances, or a chance to gain Onslaught on Kill. (Boots) Rare Boots - on your Boots you should focus mostly on Movement Speed, maximum Life, and Resistances. You can also look for certain Elemental Avoidances, or a chance to gain Onslaught on Kill. |
|
| Min. requirements: +70 to maximum Life 60% total Elemental Resistances 5% increased Action Speed (Searing Exarch Implicit) Optional affixes: Attributes chance to gain Onslaught for 4 seconds on Kill 100% chance to Avoid being Chilled/Frozen |
|
 (Gloves) Rare Gloves - your Gloves are also focused mostly on Defensives. You can look for specific Alva's modifiers against Enemies affected by specific Ailments, but getting high maximum Life, Resistance, or Attribute modifiers is more important. (Gloves) Rare Gloves - your Gloves are also focused mostly on Defensives. You can look for specific Alva's modifiers against Enemies affected by specific Ailments, but getting high maximum Life, Resistance, or Attribute modifiers is more important. |
|
| Min. requirements: +70 to maximum Life 60% total Elemental Resistances Optional affixes: Fire Damage Leeched as Life (Eater Implicit) chance to Unnerve Enemies for 4 seconds on Hit (Exarch Implicit) increased Damage against Chilled Enemy Attributes |
|
 (Belt) Arn's Anguish - thanks to your Ascendency you will have permanent 4 Brutal Charges, and with a single use of Enduring Cry you can gather up to 6 of them for tougher fights. You will get a 3% chance to deal Triple Damage for each Charge you have. (Belt) Arn's Anguish - thanks to your Ascendency you will have permanent 4 Brutal Charges, and with a single use of Enduring Cry you can gather up to 6 of them for tougher fights. You will get a 3% chance to deal Triple Damage for each Charge you have. |
|
| +(600-700) to Armour (12-15)% increased maximum Life +(40-60)% to Fire Resistance +1 to Maximum Endurance Charges Modifiers to Minimum Endurance Charges instead apply to Minimum Brutal Charges Maximum Brutal Charges is equal to Maximum Endurance Charges Gain Brutal Charges instead of Endurance Charges |
|
 (Belt) Rare Belt - a regular Rare Belt is also good, you should look for maximum Life, Resistances, Attributes, and possibly some Life Regeneration. The Stygian Vise is the best base as it allows you to use additional Abyss Jewel. (Belt) Rare Belt - a regular Rare Belt is also good, you should look for maximum Life, Resistances, Attributes, and possibly some Life Regeneration. The Stygian Vise is the best base as it allows you to use additional Abyss Jewel. |
|
| Min. requirements: +70 to Maximum Life 60% total Elemental Resistances Optional affixes: % Increased Maximum Life Attributes Life Regeneration |
|
 (Jewel) Rare Abyss Jewel - those can be pretty useful to gain some Damage, Critical Strike Multiplier, or lacking Resistances and Attributes. You can also aim for one with Immunity to Corrupted Blood in their implicit. (Jewel) Rare Abyss Jewel - those can be pretty useful to gain some Damage, Critical Strike Multiplier, or lacking Resistances and Attributes. You can also aim for one with Immunity to Corrupted Blood in their implicit. |
|
| Min. requirements: +30 to maximum Life Optional affixes: Attributes Resistances Added Elemental Damage to Spells Corrupted Blood cannot be inflicted on you +(9–12)% to Global Critical Strike Multiplier |
|
 (Amulet) Leadership's Price - if you balance your Attributes properly you will be able to easily inflict all Alternative Ailemnts on your Enemies. It is a major Damage bonus as they significantly increase your Critical Strike Chance and Damage against affected foes. (Amulet) Leadership's Price - if you balance your Attributes properly you will be able to easily inflict all Alternative Ailemnts on your Enemies. It is a major Damage bonus as they significantly increase your Critical Strike Chance and Damage against affected foes. |
|
| +(-3-3)% to maximum Fire Resistance +(-3-3)% to maximum Cold Resistance +(-3-3)% to maximum Lightning Resistance You have Scorching Conflux, Brittle Conflux and Sapping Conflux while your two highest Attributes are equal Cannot Ignite, Chill, Freeze or Shock |
|
 (Amulet) Rare Amulet - at first you should simply use a Rare Amulet with bonuses to maximum Life, Gem Levels, and Critical Strike Multiplier or Cast Speed. Additional Resistances or Attributes are also useful. (Amulet) Rare Amulet - at first you should simply use a Rare Amulet with bonuses to maximum Life, Gem Levels, and Critical Strike Multiplier or Cast Speed. Additional Resistances or Attributes are also useful. |
|
| Min. requirements: +60 to Maximum Life Optional affixes: Attributes +1 to Level of all Fire Skill Gems Elemental and Chaos Resistances Critical Strike Multiplier Cast Speed |
|
| Recommended Anointments: Whispers of Doom Disciple of Slaughter |
|
 (Ring) Mark of the Shaper - it will grant you a ton of Spell Damage if your other Ring is an Elder Item. You can also boost that bonus with the use of Catalysts. A double-influenced Item would also grant you Stun immunity, but it is rather hard to obtain. (Ring) Mark of the Shaper - it will grant you a ton of Spell Damage if your other Ring is an Elder Item. You can also boost that bonus with the use of Catalysts. A double-influenced Item would also grant you Stun immunity, but it is rather hard to obtain. |
|
| (15-25)% increased Elemental Damage 20% chance to Trigger Level 20 Summon Volatile Anomaly on Kill Adds (13-18) to (50-56) Lightning Damage to Spells (6-10)% increased maximum Energy Shield (6-10)% increased maximum Life (60-80)% increased Spell Damage if your other Ring is an Elder Item Cannot be Stunned by Spells if your other Ring is a Shaper Item |
|
 (Ring) Rare Ring - on a Rare Ring you should look for maximum Life, Resistances, and lacking Attributes. You can also get some Damage or minimum Frenzy Charges, but remember to use an Elder Base. (Ring) Rare Ring - on a Rare Ring you should look for maximum Life, Resistances, and lacking Attributes. You can also get some Damage or minimum Frenzy Charges, but remember to use an Elder Base. |
|
| Min. requirements: +60 to Maximum Life Optional affixes: Resistances Attributes Cast Speed Critical Strike Multiplier +1 to Minimum Frenzy Charge |
|
 (Jewel) Rare Jewels - those Jewels are a great source of Critical Strike Multiplier if you can afford good ones. They also come with bonuses to maximum Life, Resistances, or Attributes if needed. (Jewel) Rare Jewels - those Jewels are a great source of Critical Strike Multiplier if you can afford good ones. They also come with bonuses to maximum Life, Resistances, or Attributes if needed. |
|
| Recommended affixes: increased maximum Life Mana Reservation Efficiency Critical Strike Multiplier with Elemental Skills / Fire Skills / Global Resistances Attributes |
|
 (Jewel) Watcher's Eye - you will use a lot of Auras, so you can pick up many modifiers on this Jewel. The best one would be related to Zealotry, but defensive ones from Grace or Determination are also useful. (Jewel) Watcher's Eye - you will use a lot of Auras, so you can pick up many modifiers on this Jewel. The best one would be related to Zealotry, but defensive ones from Grace or Determination are also useful. |
|
| (4-6)% increased maximum Energy Shield (4-6)% increased maximum Life (4-6)% increased maximum Mana <Two or Three random aura modifiers> Recommended Aura mods: Consecrated Ground you create while affected by Zealotry causes enemies to take (8-10)% increased Damage |
|
 (Jewel) Brutal Restraint - it will grant you tons of Dexterity with is required in high amounts for your Gem Requirements. You can also opt for the Traitor Keystone which will improve your Flask sustain at the cost of losing out one Flask Slot. (Jewel) Brutal Restraint - it will grant you tons of Dexterity with is required in high amounts for your Gem Requirements. You can also opt for the Traitor Keystone which will improve your Flask sustain at the cost of losing out one Flask Slot. |
|
| Denoted service of (500-8000) dekhara in the akhara of (Asenath-Balbala-Nasima) Passives in radius are Conquered by the Maraketh Historic |
|
 (Flask) Bottled Faith - it is a great Flask to improve your Damage against Bosses, as it increases your Critical Strike Chance and Damage against enemies standing in the Consecrated Ground. (Flask) Bottled Faith - it is a great Flask to improve your Damage against Bosses, as it increases your Critical Strike Chance and Damage against enemies standing in the Consecrated Ground. |
|
| (30-15)% reduced Duration Consecrated Ground created by this Flask has Tripled Radius Consecrated Ground created during Effect applies (7-10)% increased Damage taken to Enemies (100-150)% increased Critical Strike Chance against Enemies on Consecrated Ground during Effect |
|
|
Suggested Flasks:
|
|
    |
|
|
If you have any other build requests please leave that in the comments below. We are always open to suggestions and constructive feedback.
Pictures used in this article are the intellectual property of Grinding Gear Games.
