Firestorm Elementalist Build
Burn enemies as fire falls from the sky! Cheap and tanky Firestorm Elementalist perfect for the upcoming LeagueFirestorm Ignite
Elementalist Build
Updated for Patch 3.19
The Best Crafty Guides by Odealo
| Guide notes |
| August 15, 2022 -Build created |
| Build overview | |||
| Tags: [CASTER] [IGNITE] [ELEMENTAL] [LIFE] | |||
|
Budget: Defenses: |
|
Boss DPS: AoE: |
|
Firestorm is one of the most old-school skills in Path of Exile. A huge meteor falling from the sky is a very iconic skill design in all RPG games. In Path of Exile, in particular, it is one big hit followed up by many other, smaller hits. Because there can be only one Ignite on the enemy at once, it is best to scale it with a big, singular hit, which is where Firestorm shines the most. Those smaller hits coming from fires raining down for a duration after the first meteor are not to be neglected. They help us to wipe out the remaining strugglers who happened to miss the big party.
Thanks to Ignite Spread and Ignite Proliferation provided by specified items, we can clear mobs outside our initial range, often killing monsters before they could even see us. Boss damage is not our defining manner, but it is fairly manageable, especially with higher investments. Damage Over Time builds usually can start with empty pockets, but require some items to truly shine. We also have a plethora of useful tools to help our single target such as Curses, Exposure or Shock granted by Elementalist Ascendancy Node.
You can also check our other Path of Exile builds right over here Odealo's Crafty Guides - Full List
1. Gameplay
The gameplay revolves around casting our Firestorms at enemies and using Arcanist Brand at particularly tough opponents, such as Map Bosses or Guardians. It will curse them with Flammability, reducing their Fire Resistances to amplify our damage even more, and smack them with Flame Surge, which will create Fire Ground Degen that deals a quarter of our Ignite Damage per second, as long the enemy stands inside its range. Thanks to Flame Dash we remain mobile, moving from pack to pack faster, are able to dodge incoming attacks and apply Combustion debuff if we Dash through an opponent. Since we don't have access to Life Leech, we must rely on Summoning Stone Golem and Life Flask to fill our Life.
|
|

2. Build's PROS & CONS
| PROS |
|
| CONS |
|
3. Leveling tips
Flame Wall and Fire Trap will carry you through the first Acts with no problem. After the first Lab, which will make you Ignite with every hit, you can switch to Firestorm and cruise through the rest of the campaign. Flame Wall scales its damage from the same passives as Ignite, so you can keep using it until maps, where its damage becomes obsolete. Look for items that help reach your Elemental Resistances limit and have some Life or Fire Elemental Damage.
Suggested leveling Gem setups:
| Flame Wall setup | |
 |
Flame Wall - place Flame Wall on top of enemies or make them run through it to apply its Fire DoT on them. |
 |
Combustion Support - it will cause more fire Damage over Time from Flame Wall |
 |
Arcane Surge Support - Grants more Damage and some mana regeneration. Keep at Gem level 7 to trigger on every cast |
 |
Controlled Destruction Support - gives a lot of Damage at the cost of Critical Strike Chance, which doesn't affect us at all |
| Fire Trap setup | |
 |
Fire Trap - deals high impact damage, causes Ignite and leaves additional fire Ground DoT effect to supplement Flame Wall |
|
Combustion Support - it will cause more fire Damage over Time and lowers Fire Resistances if we Ignite |
|
Arcane Surge Support - Grants more Damage and some mana regeneration. Keep at Gem level 7 to trigger on every cast |
 |
Trap and Mine Damage Support - perfect Support Gem for any Trap skill, gives most Damage out of all early game Support Gems |
| Auras setup | |
 |
Anger - gives a big amount of flat Fire Damage to your Spells which tremendously helps with progressing the early acts |
 |
Determination - Grants a lot of flat base Armour Rating so you don't have to worry about monsters with high Physical Damage during leveling |
 |
Clarity - helps with mana sustain during early levels, allowing for smoother gameplay especially if using 6 Link Setup |
| Curse and Flame Dash setup | |
 |
Flame Dash - this Skill is used to move faster and skip some pathways or rocks |
 |
Faster Casting Support - makes your Flame Dash and Flammability faster to use |
 |
Flammability - causes enemies to take more Fire Damage, and makes them easier to ignite |
Bandits:
Kill all three bandits and be rewarded with two additional Skill Points
Leveling Skill Trees:
33 Points Passive Tree
We recommend this order: 1) Fire Walker, 2)Heart and Soul, 3)Quick recovery, 4)Acrimony, 5) Elemental Overload, 6)Breath of Flames 7) Cruel Preparations
64 Points Passive Tree
Allocate 1) Holy Fire, 2)Purity of Flesh, 3)Sovereignty, 4)Divine Judgement, 5) Constitution 6)Ash, Frost and Storm
Recommended leveling items:
 Le Heup of All - generic increased Damage, all Elemental Resistances and Attributes make this Ring one of the best ones to use during leveling Le Heup of All - generic increased Damage, all Elemental Resistances and Attributes make this Ring one of the best ones to use during leveling |
|
| Adds 1 to 4 Physical Damage to Attacks +(10-30) to all Attributes (10-30)% increased Damage (10-30)% increased Rarity of Items found +(10-30)% to all Elemental Resistances |
|
 Goldrim - this famous Helmet can be worn straight from level 1, providing a massive bonus to all Elemental Resistances Goldrim - this famous Helmet can be worn straight from level 1, providing a massive bonus to all Elemental Resistances |
|
| +(30-50) to Evasion Rating 10% increased Rarity of Items found +(30-40)% to all Elemental Resistances Reflects 4 Physical Damage to Melee Attackers Level Requirement reduced by 100 (Hidden) |
 Tabula Rasa - has Six Linked Sockets, all colored white, so you can put any gem combinations without needing to spend Chromatic Orbs Tabula Rasa - has Six Linked Sockets, all colored white, so you can put any gem combinations without needing to spend Chromatic Orbs |
|
| Item has no level requirement and Energy Shield (Hidden) Item has 6 White Sockets and is fully linked (Hidden) |
|
 Perandus Blazon - an early game Belt that helps with Attribute Requirements and prolongs our Quicksilver Flasks Perandus Blazon - an early game Belt that helps with Attribute Requirements and prolongs our Quicksilver Flasks |
|
| (15-25)% increased Stun and Block Recovery +(20-30) to all Attributes (6-8)% increased Quantity of Items found +20% to Fire Resistance 20% increased Flask Effect Duration -2 Physical Damage taken from Attack Hits |
|
 Rare Wand or Sceptre- look for one with the modifier "+1 to Level of all Fire Spell Skill Gems". It will grant a boost to both Fire Trap and Flame Wall, and it is fairly easy to obtain even on early levels. Make sure to not mistake with similar "level of socketed skill gems" modifier Rare Wand or Sceptre- look for one with the modifier "+1 to Level of all Fire Spell Skill Gems". It will grant a boost to both Fire Trap and Flame Wall, and it is fairly easy to obtain even on early levels. Make sure to not mistake with similar "level of socketed skill gems" modifier |
|
|
+1 to Level of all Fire Spell Skill Gems |
|
 Berek's Respite - adds high flat Fire Damage to Spells and gives unique way of spreading our Damage on enemies Berek's Respite - adds high flat Fire Damage to Spells and gives unique way of spreading our Damage on enemies |
|
| +(12-16)% to Fire and Lightning Resistances Adds (20-25) to (30-50) Fire Damage to Spells and Attacks (25-30)% increased Lightning Damage +(30-40) to maximum Mana When you Kill a Shocked Enemy, inflict an equivalent Shock on each nearby Enemy When you Kill an Ignited Enemy, inflict an equivalent Ignite on each nearby Enemy |
|
 Wanderlust - decent bonus Movement speed and immunity to be Frozen. which is especially dangerous without proper Flask setup Wanderlust - decent bonus Movement speed and immunity to be Frozen. which is especially dangerous without proper Flask setup |
|
| +5 to Dexterity +(10-20) to maximum Energy Shield (20-40)% increased Mana Regeneration Rate 20% increased Movement Speed Cannot be Frozen |
|
4. Final Skill Tree, Ascendancy Points, and Pantheon
Final Skill Tree:
95 Points Final Passive Tree (doesn't include Cluster or Unique Jewels)
116 Points Path of Building (PoB) link
Ascendancy points:
Preferably in that order:
- Shaper of Flames
- Mastermind of Discord
- Heart of Destruction
- Shaper of Storms
Pantheon:
Major God: Brine King: You cannot be Stunned if you've been Stunned in the past 2 seconds, Cannot be Frozen, 50% reduced Effect of Chill on you
Minor God: Soul of Shakari: You cannot be Poisoned while there are at least 3 Poisons on you; 50% less Duration of Poisons on You
5. Final Gems links
| [DPS] Firestorm setup | |
 |
Firestorm - Huge meteor falls from the sky dealing damage on impact, followed by smaller meteors. You can have up to 3 smaller storms at once |
 |
Deadly Ailments Support - increases Damage Over Time but reduces Hit Damage |
 |
Burning Damage Support - boost our Ignite Damage significantly |
 |
Unbound Ailments Support - increases Duration and Damage of our Ignite, as well as increases Effect of Shock |
 |
Cruelty Support - hitting with Spells grants Cruelty Buff, which increases Damage over Time effects |
 |
Swift Affliction Support - Ignite lasts shorter, but deals More Damage during that time |
| [UTILITY] Auras | |
|
Anger - gives flat Fire Damage to spells to increase our Base Ignite Damage |
 |
Malevolence - an aura that boosts our Damage over Time Multiplier |
|
Determination - Grants a lot of flat base Armour Rating and on top of that it provides a More Armour multiplier for easier scaling |
| [UTILITY] Arcanist Brand setup | |
 |
Arcanist Brand - a Brand that will cast utility Spells for you and apply a Curse linked to it |
|
Flammability - a Curse that lowers enemy Fire Resistances |
 |
Flame Surge - creates Ground DoT dealing 25% of Ignite Damage applied to the hit enemy per second, and can't Ignite by itself |
| [UTILITY] Stone Golem setup | |
 |
Summon Stone Golem - a Minion Spell that grants Health Regen as long as it's summoned. You need to summon it manually. It will also apply Fire Exposure to enemies on hit |
 |
Meat Shield Support - gives Golem a chance to Taunt enemies on hit, making them deal Less Damage to You |
 |
Elemental Army Support - grants your Golem a chance to apply Exposure and massively increases golem Elemental Resistances |
 |
Minion Life Support - gives Golem more life making him more durable |
| [MOBILITY] Flame Dash setup | |
|
Flame Dash - a Movement Skill used to move faster and skip some pathways or rocks and apply the Combustion debuff on Hits in this setup |
|
Combustion Support - occasionally lower Enemy Fire Resistances if they happen to stand in your way |
|
Faster Casting - speeds up cast time of Flame Dash |
| [UTILITY] Molten Shell | |
 |
Molten Shell - a Guard Spell that protects your Life Pool based on your Armour stat and explodes at the end, providing an additional source of Damage |
 |
Cast when Damage Taken - this will ensure you have your Guard skill always ready when in need. |
|
|
6. Gear Setup
Our weapon of choice is The Martyr of Innocence Staff, providing a massive boost to our Fire Damage, and grating us Battlemage, which adds this weapon's massive flat Fire Damage to our Spell Base Damage. It also provides us extra Block Chance, making us tankier. Another very important items are our gloves. Try to find ones with a specific Temple mod that gives extra Fire Damage against Burning enemies and apply the newest Flaming Exarch and Eater of Worlds influences to get crucial modifiers. Devouring Diadem Unique Helmet allows us to use 3 auras and cast spells using Energy Shield instead of Mana, which is very helpful but not required, the build works just fine without it. Berek's Respite Unique Ring enables very unique mechanic of Spreading Ignite and Shock from dead enemies, making our map clear incredibly fast. Other than that, most of our items are Rare, focused mostly on getting high Life, Resistances, and meeting Attribute Requirements.
Our recommended items will:
- Cap your resistances at 75%
- Provide you with enough DPS and Life to start mapping
|
Stat priorities on items:
|
 (Helmet) Rare Helmet - before you acquire the Devouring Diadem, a Rare Helmet with high Maximum Life, Attributes and Elemental Resistances is more than enough (Helmet) Rare Helmet - before you acquire the Devouring Diadem, a Rare Helmet with high Maximum Life, Attributes and Elemental Resistances is more than enough |
|
| Min. requirements: +60% to Elemental Resistances +70 to Maximum Life +20 to Attributes Optional affixes: Nearby Enemies have -9% to Fire Resistance Armour |
|
 (Helmet) Devouring Diadem- this helmet paired with a Veiled mod " 95% increased Duration of Ailments you inflict while Focused" is ideal for late game setup (Helmet) Devouring Diadem- this helmet paired with a Veiled mod " 95% increased Duration of Ailments you inflict while Focused" is ideal for late game setup |
|
| +1 to Level of Socketed Gems Socketed Gems have 25% increased Reservation Efficiency Trigger Level 15 Feast of Flesh every 5 seconds (180-220)% increased Energy Shield 10% chance for Energy Shield Recharge to start when you use a Skill Eldritch Battery Veiled Suffix 95% increased Duration of Ailments you inflict while Focused |
|
| Helmet enchantments: 40% increased Firestorm Damage |
|
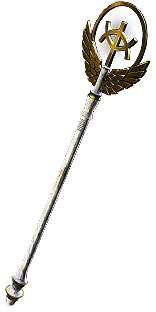 (Weapon) Martyr of Innocence - this weapon gives so much damage only the best Rare item could outperform it, at the cost of not giving a 30% Chance to Block Attack Damage this staff provides. Look for the highest Fire Damage roll since it's going to be added to our Firestorm Damage (Weapon) Martyr of Innocence - this weapon gives so much damage only the best Rare item could outperform it, at the cost of not giving a 30% Chance to Block Attack Damage this staff provides. Look for the highest Fire Damage roll since it's going to be added to our Firestorm Damage |
|
| +18% Chance to Block Attack Damage while wielding a Staff Grants Level 15 Vengeance Skill +(12-16)% Chance to Block Attack Damage while wielding a Staff 100% increased Fire Damage Adds (350-400) to (500-600) Fire Damage Battlemage Damage Penetrates 15% of Fire Resistance if you have Blocked Recently Immune to Freeze and Chill while Ignited |
|
 (Body Armour) Rare Body Armour - a Body Armour with a lot of Maximum Life, Elemental Resistances and Attributes is enough for most content (Body Armour) Rare Body Armour - a Body Armour with a lot of Maximum Life, Elemental Resistances and Attributes is enough for most content |
|
| Min. requirements: +120 to maximum Life +70% to Elemental Resistances Optional affixes: You can apply an additional Curse |
|
 (Boots) Rare Boots - try to get at least 25% Movement Speed paired with good defensive options (Boots) Rare Boots - try to get at least 25% Movement Speed paired with good defensive options |
|
| Min. requirements: +70 to maximum Life 25% increased Movement Speed +60% to Elemental Resistances Optional affixes: (8–12)% chance to gain Onslaught for 4 seconds on Kill (6–9)% increased Movement Speed if you haven't been Hit Recently Cannot be Chilled |
|
 (Gloves) Rare Gloves - You can start with very basic ones but try to look for a special Temple modifier that grants additional Fire Damage against Burning enemies, and use Eldritch influences to gain very convenient modifiers (Gloves) Rare Gloves - You can start with very basic ones but try to look for a special Temple modifier that grants additional Fire Damage against Burning enemies, and use Eldritch influences to gain very convenient modifiers |
|
| Min. requirements: +60 to maximum Life +40% to Elemental Resistances Optional affixes: 50 to 80 added Fire Damage against Burning Enemies Inflict Fire Exposure on Hit, applying -11% to Fire Resistance (Searing Exarch) Ignites you inflict spread to other Enemies within a Radius of 12 (Eater of Worlds) |
|
 (Belt) Rare Belt - Preferably a Stygian Vise base, but any good rolled will do. Aim for high Maximum Life, Elemental Resistances, and Attributes (Belt) Rare Belt - Preferably a Stygian Vise base, but any good rolled will do. Aim for high Maximum Life, Elemental Resistances, and Attributes |
|
| Min. requirements: +100 to Maximum Life +80% to Elemental Resistances Optional affixes: % Increased Maximum Life Attributes |
|
 (Amulet) Rare Amulet - on Rare Amulets, we can get very beneficial modifiers for our damage, although as usual Maximum Life and Resistances take priority (Amulet) Rare Amulet - on Rare Amulets, we can get very beneficial modifiers for our damage, although as usual Maximum Life and Resistances take priority |
|
| Min. requirements: +70% to Elemental Resistances +60 to Maximum Life Optional affixes: +1 to Level of all Skill Gems +1 to Level of all Fire Skill Gems +(15–26)% to Damage over Time Multiplier +(16–20)% to Fire Damage over Time Multiplier |
|
| Recommended Anointments: Dirty Techniques Searing Heat Discipline and Training Snowforged |
|
| Berek's Respite - adds Flat Fire Damage to our spells and provides Ignite Spread upon killing Ignited Enemy |
|
| +(12-16)% to Fire and Lightning Resistances Adds (20-25) to (30-50) Fire Damage to Spells and Attacks (25-30)% increased Lightning Damage +(30-40) to maximum Mana When you Kill a Shocked Enemy, inflict an equivalent Shock on each nearby Enemy When you Kill an Ignited Enemy, inflict an equivalent Ignite on each nearby Enemy |
|
 (Ring) Rare Ring - At first the other Ring can be just a Rare Ring that helps with capping your Elemental Resistances and boosting maximum Life (Ring) Rare Ring - At first the other Ring can be just a Rare Ring that helps with capping your Elemental Resistances and boosting maximum Life |
|
| Min. requirements: +80% to Elemental Resistances +60 to Maximum Life Optional affixes: Curse Enemies with Flammability on Hit Attributes |
|
 Polaric Devastation - this very unique Ring allows us to Cover Enemies in Ash for 5 seconds, increasing their Damage Taken and slowing them down Polaric Devastation - this very unique Ring allows us to Cover Enemies in Ash for 5 seconds, increasing their Damage Taken and slowing them down |
|
| (15-25)% increased Elemental Damage (15-25)% increased Global Critical Strike Chance +(20-40)% to Fire Resistance +(20-40)% to Cold Resistance (10-20)% increased Duration of Ailments on Enemies Left Ring slot: Cover Enemies in Ash for 5 seconds when you Ignite them Right Ring slot: Cover Enemies in Frost for 5 seconds when you Freeze them |
|
 (Jewel) Rare Jewels - increase your Maximum Life, Burning Damage, and Fire Damage over Time (Jewel) Rare Jewels - increase your Maximum Life, Burning Damage, and Fire Damage over Time |
|
|
Recommended affixes: |
|
  (Jewel) Forbidden Flame and Flesh - a very potent combination, but can be hard to acquire. Bastion of Elements is our recommendation since it provides Elemental Reflect Immunity (Jewel) Forbidden Flame and Flesh - a very potent combination, but can be hard to acquire. Bastion of Elements is our recommendation since it provides Elemental Reflect Immunity |
|
| Allocates <<Random Ascendancy Notable>> if you have the matching modifiers on Forbidden Flame/Flesh Good Notables: Bastion of Elements Malediction Profane Bloom |
|
 (Jewel) Watcher's Eye - any build can make use of those. In this build, Anger and Malevolence are the most potent ones, with increased Fire Damage while affected by Anger offers the highest DPS boost (Jewel) Watcher's Eye - any build can make use of those. In this build, Anger and Malevolence are the most potent ones, with increased Fire Damage while affected by Anger offers the highest DPS boost |
|
| (4-6)% increased maximum Energy Shield (4-6)% increased maximum Life (4-6)% increased maximum Mana <Two or Three random aura modifiers> Recommended Aura mods: Increased Fire Damage while affected by Anger Damage over Time multiplied while affected by Malevolence |
|
 (Jewel) Large Cluster Jewels - you can find some of the most powerful Notables on a Large Cluster Jewel, consider taking two if you can find decent ones. Best Jewels have 3 Notable Passives and a maximum of 8 Added Passive Skills (Jewel) Large Cluster Jewels - you can find some of the most powerful Notables on a Large Cluster Jewel, consider taking two if you can find decent ones. Best Jewels have 3 Notable Passives and a maximum of 8 Added Passive Skills |
|
| Recommended affixes: 1 Added Passive Skill is Sadist 1 Added Passive Skill is Disorienting Display 1 Added Passive Skill is Prismatic Heart 1 Added Passive Skill is Smoking Remains 1 Added Passive Skill is Cremator |
|
 (Jewel) Medium Cluster Jewels - together with Large Cluster Jewels, Medium ones have pretty interesting modifiers. Look for at least 2 Notable Passives, with a maximum of 5 Added Passive Skills (Jewel) Medium Cluster Jewels - together with Large Cluster Jewels, Medium ones have pretty interesting modifiers. Look for at least 2 Notable Passives, with a maximum of 5 Added Passive Skills |
|
| Recommended affixes: 1 Added Passive Skill is Smoking Remains 1 Added Passive Skill is Cremator 1 Added Passive Skill is Blowback 1 Added Passive Skill is Fan the Flames (if you don't have gloves implicit) 1 Added Passive Skill is Cooked Alive 1 Added Passive Skill is Brush with Death |
|
 (Jewel) Small Cluster Jewels - those are very flexible as they can provide big damage or Life boosts, depending on your preferences. Fettle is the best maximum Life source achievable in Jewels (Jewel) Small Cluster Jewels - those are very flexible as they can provide big damage or Life boosts, depending on your preferences. Fettle is the best maximum Life source achievable in Jewels |
|
| Recommended affixes: 1 Added Passive Skill is Fettle 1 Added Passive Skill is Brush with Death 1 Added Passive Skill is Evil Eye 1 Added Passive Skill Lord of Drought |
|
 (Flask) Cinderswallow Urn - gives us extra speed in form of Onslaught and a big damage boost if we Ignite during Flask Effect (Flask) Cinderswallow Urn - gives us extra speed in form of Onslaught and a big damage boost if we Ignite during Flask Effect |
|
| +90 to Maximum Charges Recharges 5 Charges when you Consume an Ignited corpse (175-200)% increased Charges per use Enemies Ignited by you during Flask Effect take (7-10)% increased Damage Veiled Suffix <One of the three modifiers> |
|
|
Suggested Flasks:
|
|
    |
|
|
If you have any other build requests please leave that in the comments below. We are always open to suggestions and constructive feedback.
Pictures used in this article are the intellectual property of Grinding Gear Games.
