Exsanguinate Poison Assassin Build
Critically poison your enemies without ever breaking your flow to cast a spell manually!Cast on Crit Exsanguinate Poison
Assassin Build
Updated for Patch 3.20
The Best Crafty Guides by Odealo
| Guide notes |
| December 23, 2022 -Build created |
| Build overview | |||
| Tags: [TRIGGER] [POISON] [LIFE] | |||
|
Budget: Defenses: |
|
Boss DPS: AoE: |
|
Cast on Critical Strike is a very unique playstyle in Path of Exile that allows you to Cast many Spells without actually Casting them - instead, you trigger them with your Attacks when you happen to land a Critical Strike. This setup, while not perfect, has many advantages over manually casting a Spell (often called self-casting). The biggest of them all is the high frequency of triggered Spells - getting similar levels of Cast Speed on self-cast is very hard, and if a specific Spell has a particularly slow base Cast Speed it's almost impossible. Another key factor is positioning, fast Attacks don't lock you in a place as most Spells do, and in the case of this Build, allow you to continuously move while performing said Attack. This significantly increases the survivability and enjoyment of the Build. In return, you have to invest in Critical Strike Chance for both Spells and Attacks. It just so happens that Assassin is a great Ascendancy for such requirements, as it offers immense Critical Strike bonuses.
With that being said, let's talk about our Spell of choice. Exsanguinate is a Physical based Spell that fires bloody Tendrils at nearby enemies. It offers great Damage but has one major downside - a very low base Cast Speed. To further emphasize the synergy with the Assassin, we decided to take the Poison route. Thanks to this Ascendancy you will have a higher Critical Strike Chance against Poisoned enemies, and your Poisons from Critical Strikes will deal more Damage.
Defensively speaking, it's quite a safe Build, but nothing out of the ordinary. You can easily reach a decent amount of Maximum Life with a little bit of Energy Shield on top of it, high amounts of Evasion, and capped Spell Suppression Chance. As an Assassin you will take greatly reduced Damage as long there are at least 2 Rare or Unique Monsters nearby, which happens very often during regular Mapping. Your biggest threat is your own Spell Cost - instead of Mana, it consumes Life. If the fight prolongs, you will need to help yourself with Enduring Cry and Life Flask to sustain it.
You don't need expensive Items to play comfortably with this Build, but some investments are recommended to achieve good survivability. There are many cheap and useful Unique Items that can be later replaced with proper Rare Items.
You can also check our other Path of Exile builds right over here Odealo's Crafty Guides - Full List
1. Gameplay
For the most part, all you really need to do is simply spin with your Cyclone, which will trigger the Exsanguinate at all nearby enemies, and move around using Whirling Blades. Occasionally you will have to cast your Despair Curse and apply Wither to your enemies. The latter one will become fully automated when you acquire a specific Unique Jewel.
|
|
|
|

2. Build's PROS & CONS
| PROS |
|
| CONS |
|
3. Leveling tips
Leveling with this Build is very smooth, but we recommend avoiding committing to both Poison and Cast on Crit until you reach the later Acts of the campaign. You can easily level up by self-casting the Exsanguinate Spell and rely on its initial Damage over Time effect. Getting Items that boost the level of your Spell Gems will greatly enhance your experience, as this Skill scales very well with it.
Suggested leveling Gem setups:
| Exsanguinate setup | |
 |
Exsanguinate - fires bloody tendrils that automatically target nearby enemies, applying severe Physical Damage over Time effect, which can stack up to 3 times. |
 |
Efficacy Support - improves the Damage over Time effects and their duration. |
 |
Controlled Destruction Support - gives a very strong bonus to your Spell damage. |
 |
Cruelty Support - increases both Hit Damage and DoT effect. |
 |
Brutality Support - if you have access to Tabula Rasa, it's an excellent Support Gem to boost your Physical Damage, but it disables your Poisons. |
 |
Swift Affliction Support - another great Support Gem to increase your Damage over Time effects. |
| Auras setup | |
 |
Grace - you can get a lot of Evasion Rating early into the game with this Aura, which drastically improves your survivability. |
 |
Vitality - casting Exsanguinate is very draining on your Life. Flat Regeneration from this aura is very helpful to counter that. |
 |
Clarity - you will also need a low-level Clarity Aura to cast your other Spells such as Flame Dash or Curse. |
| Utility | |
 |
Vulnerability - increases the Physical Damage taken by the Enemies. Swap to Despair once you transition into pure Poison setup. |
 |
Steelskin - gives you a protective buff that absorbs part of incoming Damage. |
 |
Flame Dash - quickly teleports you into the targeted location, leaving a fiery path on your way. |
Bandits:
Kill all three bandits to get two additional Passive Skill Points
Leveling Skill Trees:
We recommend picking up a few additional nodes that boost your Physical Damage and respec them later in the Campaign when you transition into Poison Setup.
33 Points Passive Tree
Suggested order of allocation: 1) Trickery 2) Entropy 3) Fangs of Viper 4) Will of Blades 5) Blood Drinker 6) Revenge of the Hunter
65 Points Passive Tree
Suggested order of allocation: 1) Fatal Toxins 2) Inveterate 3) Quickstep 4) Serpentine Spellslinger 5) Whispers of Doom 6) Written in Blood 7) Influence
Recommended leveling items:
 Le Heup of All - greatly helps with Attribute requirements while also providing a bit of Damage and Resistances Le Heup of All - greatly helps with Attribute requirements while also providing a bit of Damage and Resistances |
|
| Adds 1 to 4 Physical Damage to Attacks +(10-30) to all Attributes (10-30)% increased Damage (10-30)% increased Rarity of Items found +(10-30)% to all Elemental Resistances |
|
|
|
|
| +(30-50) to Evasion Rating 10% increased Rarity of Items found +(30-40)% to all Elemental Resistances Reflects 4 Physical Damage to Melee Attackers Level Requirement reduced by 100 (Hidden) |
 Goldrim - you can obtain a lot of Elemental Resistances with this Helmet
 Tabula Rasa - having an early six-link setup will greatly help with your progression Tabula Rasa - having an early six-link setup will greatly help with your progression |
|
| Item has no level requirement and Energy Shield (Hidden) Item has 6 White Sockets and is fully linked (Hidden) |
|
 Perandus Blazon - further helps with your Attributes and makes your Flask last longer Perandus Blazon - further helps with your Attributes and makes your Flask last longer |
|
| (15-25)% increased Stun and Block Recovery +(20-30) to all Attributes (6-8)% increased Quantity of Items found +20% to Fire Resistance 20% increased Flask Effect Duration -2 Physical Damage taken from Attack Hits |
|
 String of Servitude - one specific version of this Belt can give you a lot of Elemental Resistances String of Servitude - one specific version of this Belt can give you a lot of Elemental Resistances |
|
| <(1-2) Random corrupted implicit modifiers> Implicit Modifier magnitudes are tripled Desired modifier: 48% to All Elemental Resistances |
|
 Rare Weapon - the best Weapon you can get is a Rare Wand with a +1 Level to your main Spell Gem. It's a pretty common modifier even at lower levels. Rare Weapon - the best Weapon you can get is a Rare Wand with a +1 Level to your main Spell Gem. It's a pretty common modifier even at lower levels. |
|
| Min. requirements: +1 to Level of all Physical Spell Skill Gems Optional affixes: Spell Damage Damage over Time Multiplier |
|
 Doedre's Tenure - an insanely high amount of Spell Damage is very useful at lower levels to boost your DPS. Doedre's Tenure - an insanely high amount of Spell Damage is very useful at lower levels to boost your DPS. |
|
| +(20-50) to Intelligence 100% increased Spell Damage (25-15)% reduced Cast Speed |
|
 Wanderlust - immunity to Freeze is very useful if you don't have a good Flask setup. It also grants decent Movement Speed. Wanderlust - immunity to Freeze is very useful if you don't have a good Flask setup. It also grants decent Movement Speed. |
|
| +5 to Dexterity +(10-20) to maximum Energy Shield (20-40)% increased Mana Regeneration Rate 20% increased Movement Speed Cannot be Frozen |
|
4. Final Skill Tree, Ascendancy Points, and Pantheon
Final Skill Tree:
112 Points Final Passive Tree (doesn't include Cluster or Unique Jewels)
119 Points Path of Building (PoB) link
Ascendancy points:
Preferably in that order:
- Noxious Strike
- Toxic Delivery
- Opportunistic
- Unstable Infusion
Pantheon:
Major God: Soul of the Brine King: You cannot be Stunned if you've been Stunned or Blocked a Stunning Hit in the past 2 seconds; Cannot be Frozen
Minor God: Soul of Shakari: You cannot be Poisoned while there are at least 3 Poisons on you; 50% less Duration of Poisons on You
5. Final Gems links
| [DPS] Exsanguinate setup | |
|
Exsanguinate - it's your main damaging Spell, it fires tendrils that deal Physical Damage and apply DoTs at all nearby enemies. You can add extra Chains to improve your clear speed. |
| Cast on Critical Strike Support - you can't manually cast linked Spells, but they will be triggered when you land a Critical Strike with a linked Attack. | |
 |
Cyclone - it's the best Attack for this Setup due to the very high amount of Hits. Also, you can move while channeling this Skill, which makes a perfect combination. |
 |
Unbound Ailments Support - significantly improves the Duration and Damage of Ailments, in this case, Poisons. |
 |
Empower Support - increases the Level of your Active Gems, which means much higher base Damage. It's also affected by the Skin of the Lords, which adds 2 Levels to all Gems. |
 |
Deadly Ailments Support - gives a lot of Damage to your DoTs, but lowers the initial Hit Damage. Use it if you need a lot of single-target Damage. |
 |
Chain Support - greatly improves your Clear Speed, but hinders a bit your Damage output. Use it during general Mapping. |
| [UTILITY] Ancestral Totems Setup | |
 |
Wither - applies a stacking Debuff on the enemy that increases the Chaos Damage they take. |
 |
Spell Totem Support - with this Support, you won't need to manually cast Withers to apply the debuff. |
 |
Multiple Totems Support - used to increase the maximum limit of Summoned Totems. |
| [UTILITY] Auras | |
|
Grace - grants you a lot of Evasion Rating and improves it even further. You can also use the Vaal version to improve your Spell Suppression temporarily. |
 |
Herald of Agony - gives you a lot of Poison Chance and improves your Damage with them. Use the Divergent Quality to boost your Chances even more. |
 |
Vitality - grants a lot of flat Life Regeneration which you will need to sustain your Casts. |
 |
Malevolence - gives a huge bonus to your Damage over Time effects. |
| [UTILITY] Utility Spells setup | |
 |
Despair - lowers the Chaos Resistances of Cursed enemies. It's best to manually cast it to get maximum Damage effectiveness. |
 |
Plague Bearer - stores a portion of your Poison Damage and releases it on demand in AoE around you. |
 |
Withering Step - applies a few layers of Wither on your enemies and gives you an Elusive Buff for a short duration. |
 |
Lifetap Support - allows you to pay Mana Costs with your Life instead. You want to have as much Mana Reserved by your Auras, so you might need this Support to cast your Utility Spells at all. |
| [UTILITY] Whirling Blades and Enduring Cry setup | |
 |
Whirling Blades - a quick Attack that moves you in a specific direction. It can be spammed, as it doesn't have a Cooldown. |
 |
Faster Attacks Support - makes your Whirling Blades even faster to perform. |
|
Lifetap Support - you will need this Support to freely spam without worry about Mana Costs. |
 |
Enduring Cry - this Warcry can be used to give yourself a burst of Life Regeneration and generate Endurance Charges. It also needs Lifetap Support. |
| [MOBILITY] Guard setup | |
 |
Immortal Call - reduces all Damage Taken for a short duration. It scales poorly with Levels, so try to keep it as low as possible. |
 |
Cast when Damage Taken - triggers linked Skills upon reaching a certain threshold of Damage Taken. Keep at the 1 level to trigger as often as possible. |
|
Lifetap Support - this Setup also requires this Support Gem to avoid problems with Mana Costs. |
|
|
6. Gear Setup
There are many cheap Uniques that can be used to kickstart the Build until you can afford better Rare Items. On the other hand, there are also a few Uniques that are much better than any Rare Items. The Balance of Terror is a new Unique Jewel that with a proper modifier to Despair Curse can completely replace the Wither Spell Totem setup. Forbidden Flame&Flesh with Polymath Notable is a luxury choice, as it offers a great Quality of Life and solid Damage bonus, but it's not required. You should aim for high amounts of Spell suppression on your Shield and Boots, as it's pretty much unavailable on your other slots. You should aim to use hybrid Evasion and Energy Shield bases for your Gear, however, most of your Energy Shield comes from Timeless Jewel. If possible, get the Life Regeneration modifiers on all Gear pieces you can. It greatly improves your sustain, as Regeneration is the only form of recovery available for DoT Builds. You will need to get a bit of Poison Chance from various sources other than your Passive Tree, such as rare Weapon, Jewels, or alternate quality on your Gems.
|
Stat priorities on items:
|
 (Helmet) Alpha's Howl - a great Helmet to begin your journey with. It provides additional levels for your Auras and improves their Mana Reservation efficiency. (Helmet) Alpha's Howl - a great Helmet to begin your journey with. It provides additional levels for your Auras and improves their Mana Reservation efficiency. |
|
| +2 to Level of Socketed Aura Gems (80-100)% increased Evasion Rating +(20-30)% to Cold Resistance 25% chance to Avoid being Chilled Cannot be Frozen 16% increased Mana Reservation Efficiency of Skills |
|
 (Helmet) Rare Helmet - you can get similar levels of Aura Reservation efficiency as Alpha's Howl by using Essence of Loathing on Helmets with Eldritch Implicit that grants the same stat, especially if the Helmet has useful Enchant on it. (Helmet) Rare Helmet - you can get similar levels of Aura Reservation efficiency as Alpha's Howl by using Essence of Loathing on Helmets with Eldritch Implicit that grants the same stat, especially if the Helmet has useful Enchant on it. |
|
| Min. requirements: +15% increased Mana Reservation Efficiency of Skills Optional affixes: Maximum Life Spell Suppression Elemental Resistances Curse Effect |
|
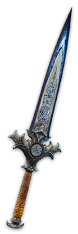 (Weapon) Cold Iron Point - this easily accessible Dagger provides an amazing Damage Bonus by increasing the Base Damage of your Spells, however, you will need to invest some Passives into Accuracy Rating to achieve a 100% chance to Hit (Weapon) Cold Iron Point - this easily accessible Dagger provides an amazing Damage Bonus by increasing the Base Damage of your Spells, however, you will need to invest some Passives into Accuracy Rating to achieve a 100% chance to Hit |
|
| 30% increased Global Critical Strike Chance +3 to Level of all Physical Spell Skill Gems Deal no Elemental Damage |
|
 (Weapon) Rare Claw - simply crafting Hits cannot be Evaded on a Weapon with a Fractured DoT Multiplier is already a big upgrade. You can also get increased Chaos Damage there or boosts to Weapon Attack Speed and base Critical Strike. (Weapon) Rare Claw - simply crafting Hits cannot be Evaded on a Weapon with a Fractured DoT Multiplier is already a big upgrade. You can also get increased Chaos Damage there or boosts to Weapon Attack Speed and base Critical Strike. |
|
| Min. requirements: Hits can't be Evaded +20% to Damage over Time Multiplier Optional affixes: Chaos Damage Poison Chance/Duration Attack Speed Critical Strike Chance |
|
 (Off-hand) Rare Shield - try to get as much Spell Suppression Chance as you can. Other than that, look for Life, Resistances, Regeneration, or open suffix to craft Extra Chaos Damage. (Off-hand) Rare Shield - try to get as much Spell Suppression Chance as you can. Other than that, look for Life, Resistances, Regeneration, or open suffix to craft Extra Chaos Damage. |
|
| Min. requirements: +20% chance to Suppress Spell Damage +70 to Maximum Life Optional affixes: Elemental Resistances Attributes Maximum Elemental Resistances 8% of Physical Damage as Extra Chaos Damage |
|
 (Body Armour) Skin of the Lords - it's a very powerful Unique Armour that provides both offense and defense. Fortunately, Socket Colours for our Setup are rather unpopular, so you can get them very cheaply. Try to get the Call to Arms Notable to make your Enduring Cry instant. (Body Armour) Skin of the Lords - it's a very powerful Unique Armour that provides both offense and defense. Fortunately, Socket Colours for our Setup are rather unpopular, so you can get them very cheaply. Try to get the Call to Arms Notable to make your Enduring Cry instant. |
|
| Sockets cannot be modified +2 to Level of Socketed Gems 100% increased Global Defences You can only Socket Corrupted Gems in this item Random Keystone |
|
 (Belt) Rare Belt - Try to get as much Life and Life Regeneration as you can, ideally on the Stygian Vise Base. Additionally, seek for lacking Resistances or Attributes. (Belt) Rare Belt - Try to get as much Life and Life Regeneration as you can, ideally on the Stygian Vise Base. Additionally, seek for lacking Resistances or Attributes. |
|
| Min. requirements: +70 to maximum Life +70% to Elemental Resistances Optional affixes: 10% increased maximum Life Regenerate 50+ Life per second |
|
 (Boots) Rare Boots - get at least 30% increased Movement Speed and high maximum Life. You should also get the remaining Spell Suppression here. (Boots) Rare Boots - get at least 30% increased Movement Speed and high maximum Life. You should also get the remaining Spell Suppression here. |
|
| Min. requirements: +70 to maximum Life +30% to Movement Speed +10% chance to Suppress Spell Damage Optional affixes: Regenerate 50+ Life per second Elemental Resistances |
|
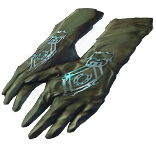
 (Gloves) Asenath's Gentle Touch - very strong Gloves for every Poison-based build. Temporal Chain on Hit is a very strong Curse even at level 1, and additional explosions are always welcome. Since they cost is rather low, you can try to get useful corrupted Implicit such as Critical Strike Chance for Attacks or Spells. (Gloves) Asenath's Gentle Touch - very strong Gloves for every Poison-based build. Temporal Chain on Hit is a very strong Curse even at level 1, and additional explosions are always welcome. Since they cost is rather low, you can try to get useful corrupted Implicit such as Critical Strike Chance for Attacks or Spells. |
|
| +(20-30) to Intelligence +(60-80) to maximum Life +(60-80) to maximum Mana Curse Enemies with Temporal Chains on Hit Non-Aura Curses you inflict are not removed from Dying Enemies Enemies near corpses affected by your Curses are Blinded Enemies Killed near corpses affected by your Curses explode, dealing 3% of their Life as Physical Damage |
|
 (Amulet) Ungil's Harmony- a very powerful Amulet for this Build. It grants a lot of Critical Strike Chances, while the downside is not affecting our Poisons. Use the Critical Catalyst to boost it even further. (Amulet) Ungil's Harmony- a very powerful Amulet for this Build. It grants a lot of Critical Strike Chances, while the downside is not affecting our Poisons. Use the Critical Catalyst to boost it even further. |
|
| (250-350)% increased Global Critical Strike Chance Your Critical Strikes do not deal extra Damage +(30-50) to maximum Life +(30-50) to maximum Mana 40% increased Stun and Block Recovery Recommended Anointments: Corruption |
|
 (Ring) Rare Ring - your Ring slots are rather flexible depending on your budget and the state of the remaining gear. You can opt for basic maximum Life and Resistances if those are the stats you lack the most, but you can also get a lot of damage through Chaos Damage or DoT Multiplier modifiers. (Ring) Rare Ring - your Ring slots are rather flexible depending on your budget and the state of the remaining gear. You can opt for basic maximum Life and Resistances if those are the stats you lack the most, but you can also get a lot of damage through Chaos Damage or DoT Multiplier modifiers. |
|
| Min. requirements: +60% to Elemental Resistances +60 to Maximum Life Optional affixes: % increased Chaos Damage Attributes Damage over Time Multiplier |
|
 (Ring) Icefang Orbit - a great starting Ring that provides a lot of Damage and Poison Chance. Use it if you can't get the Poison chance anywhere else. (Ring) Icefang Orbit - a great starting Ring that provides a lot of Damage and Poison Chance. Use it if you can't get the Poison chance anywhere else. |
|
| +(20-30) to Dexterity 25% chance to Poison on Hit (40-60)% increased Damage with Poison You are Chilled when you are Poisoned Non-Chilled Enemies you Poison are Chilled Poisoned Enemies you Kill with Hits Shatter |
|
 (Ring) Ming's Heart - if you simply want more Damage at all costs, you can use this Ring. It severely cuts your survivability, but gives a tremendous amount of Damage in return. (Ring) Ming's Heart - if you simply want more Damage at all costs, you can use this Ring. It severely cuts your survivability, but gives a tremendous amount of Damage in return. |
|
| 25% reduced maximum Energy Shield 25% reduced maximum Life +(40-50)% to Chaos Resistance Gain (40-60)% of Physical Damage as Extra Chaos Damage |
|
 (Jewel) Rare Jewels - Jewels are a great place to fill your lacking stats such as Resistances or Attributes. Try to get the maximum Life modifier on every Rare Jewel you get. If you got your Resistances covered, you can simply get more Damage here. (Jewel) Rare Jewels - Jewels are a great place to fill your lacking stats such as Resistances or Attributes. Try to get the maximum Life modifier on every Rare Jewel you get. If you got your Resistances covered, you can simply get more Damage here. |
|
|
Recommended affixes: |
|
 (Jewel) Large Cluster Jewels - provides a lot of Physical Damage bonus, which improves your Poisons and Exsanguinate initial DoT. (Jewel) Large Cluster Jewels - provides a lot of Physical Damage bonus, which improves your Poisons and Exsanguinate initial DoT. |
|
| Recommended affixes: Grim Oath Masters of Fundamentals Battle-Hardened |
|
  (Jewel) Forbidden Flesh&Flame - you can obtain a very strong Notable from any Shadow Ascendency using this Jewel combination. The best pick is the Polymath from Trickster Ascendency, but it's a bit pricy. (Jewel) Forbidden Flesh&Flame - you can obtain a very strong Notable from any Shadow Ascendency using this Jewel combination. The best pick is the Polymath from Trickster Ascendency, but it's a bit pricy. |
|
| Allocates <Random Ascendancy Notable> if you have the matching modifiers on Forbidden Flesh/Flame | |
 (Jewel) Glorious Vanity - Corrupted Soul granted by this Jewel if it's sacrificed in the name of Doryani provides an enormous amount of Energy Shield. (Jewel) Glorious Vanity - Corrupted Soul granted by this Jewel if it's sacrificed in the name of Doryani provides an enormous amount of Energy Shield. |
|
| Bathed in the blood of (100-8000) sacrificed in the name of (Ahuana-Doryani-Xibaqua) Passives in radius are Conquered by the Vaal Historic |
|
 (Jewel) Watcher's Eye - you can get a lot of useful Modifiers here, especially the defensive ones, such as Life gain on Hit or Flasks Charges on Critical Strike. (Jewel) Watcher's Eye - you can get a lot of useful Modifiers here, especially the defensive ones, such as Life gain on Hit or Flasks Charges on Critical Strike. |
|
| (4-6)% increased maximum Energy Shield (4-6)% increased maximum Life (4-6)% increased maximum Mana <Two or Three random aura modifiers> Recommended Aura mods: Life gain on Hit while affected by Vitality |
|
 (Jewel) Balance of Terror - a newly introduced Jewel that allows you to apply Wither stacks without using Spell Totem Setup, but you will need to remember to recast Despair every 10 seconds. (Jewel) Balance of Terror - a newly introduced Jewel that allows you to apply Wither stacks without using Spell Totem Setup, but you will need to remember to recast Despair every 10 seconds. |
|
| +(10-15)% to all Elemental Resistances <2-3 random curse modifiers> Recommended Curse mods: Inflict Withered for 2 seconds on Hit if you've cast Despair in the past 10 seconds |
|
 (Flask) Bottled Faith - significantly increases your Critical Strike Chance and overall Damage Taken by closeby foes. (Flask) Bottled Faith - significantly increases your Critical Strike Chance and overall Damage Taken by closeby foes. |
|
| (30-15)% reduced Duration Consecrated Ground created by this Flask has Tripled Radius Consecrated Ground created during Effect applies (7-10)% increased Damage taken to Enemies (100-150)% increased Critical Strike Chance against Enemies on Consecrated Ground during Effect |
|
 (Flask) Sin's Rebirth - this Flask grants you Unholy Might, which adds a lot of Extra Chaos Damage for your Spells. It also grants Immunity to Ignites. (Flask) Sin's Rebirth - this Flask grants you Unholy Might, which adds a lot of Extra Chaos Damage for your Spells. It also grants Immunity to Ignites. |
|
| Unholy Might during Effect Grants Immunity to Ignite for 4 seconds if used while Ignited Removes all Burning when used |
|
 (Flask) Coralito's Signature - it has great synergy with this Build, as it grants a lot of Dot Multiplier to Poisons applied with Critical Strikes. (Flask) Coralito's Signature - it has great synergy with this Build, as it grants a lot of Dot Multiplier to Poisons applied with Critical Strikes. |
|
| 25% chance to Poison on Hit during Effect Your Critical Strikes do not deal extra Damage during Effect +(20-30)% to Damage over Time Multiplier for Poison from Critical Strikes during Effect Take 250 Chaos Damage per Second during Effect |
|
|
Suggested Flasks:
|
|
  |
|
|
If you have any other build requests please leave that in the comments below. We are always open to suggestions and constructive feedback.
Pictures used in this article are the intellectual property of Grinding Gear Games.
