
Elemental Hit Trinity Wander Pathfinder Build
Elemental Hit build suitable for Pathfinder that uses a Wand to deal all the types of Elemental DamageElemental Hit
Trinity Wander Pathfinder Build
Updated for Patch 3.18
The Best Crafty Guides by Odealo
| Guide notes |
| September 17, 2021 -Build created September 24, 2021 -Added gameplay video July 04, 2021 -Updated for Patch 3.18 |
| Build overview | |||
| Tags: [RANGED] [ELEMENTAL] [LIFE] | |||
|
Budget: Defenses: |
|
Boss DPS: AoE: |
|
Elemental Hit Pathfinder is a more defensive-oriented version of the Raider build that uses a Wand with a Shield instead of a Bow. Pathfinder Ascendancy offers great synergies with Flask. You'll be able to use them much more often thanks to Nature's Boon and Master Surgeon, additionally, Veteran Bowyer enhances your Physical damage and increases your Elemental Damage. With Crown of Eyes your Spell Damage that is commonly found as Wand modifiers affect your Attack Damage, much like Wandslinger Notable, but with the effectiveness increased by 150%. With high Crit Chance and Hit Rate, you'll never be out of Flask Charges because you gain one each time you deal a Critical Strike. The build uses Ballista Totems to fight more resilient and stationary targets, and Hydrosphere, to Drench enemies and increase your damage.
You won't specialize in any particular Element, as is often the case in Elemental Hit builds, instead all the types of Elemental Damage will play a major role in total DPS. Use Trinity Support and Elemental weakness to make such a strategy work. Your Veteran Bowyer Keystone fits in this playstyle nicely as it grants you bonus damage of a random element. To stay alive you will mostly rely on your Maximum Life - around 5k of it, constant Flask usage, High Spell Suppression Chance, and a moderate amount of Evasion Rating. The overall damage of the build is good, not as good as the Raider version, but it has its own benefits that may suit a specific playstyle.
You can also check our other Path of Exile builds right over here Odealo's Crafty Guides - Full List
1. Gameplay
You're going to use Elemental Hit with a Wand, it's one setup for general use - boss fights and maps clear. Your Hydrosphere will be cast automatically as you use your Elemental Hit via Spellslinger Support. Blood Rage and Lightning Golem are utility Skills to support your overall DPS. Use Skitterbots to apply Elemental Ailments on enemies, if you kill such enemies you gain twice the normal amount of Flask Charges. For Boss fights, you can use additional firepower by placing Ballista Totems that use Elemental Hit. Curses should be applied automatically. For faster movement use Shield Dash.
|
|
|
|

2. Build's PROS & CONS
| PROS |
|
| CONS |
|
3. Leveling tips
Start with an Elemental Attack, Ice Shot is a great option. Use Bow until you're able to equip Crown of Eyes, or you can alternatively allocate Wandslinger Notable, after that start using Wands with high Spell Damage. Look for Attack Speed, Elemental Damage, Critical Strike Chance, and Multiplier. Keep your Elemental Resistances high through all the Acts, and make sure your Maximum Life is high too. Use Essences of Hatred for added Cold Damage, Essence of Loathing for more Crit Chance, Essence of Zeal for Attack Speed, or Essence of Woe for Spell Damage
Suggested leveling Gem setups:
| Ice Shot setup | |
 |
Ice Shot - Use Ice Shot until you complete the first Lab, then you can switch to Elemental Hit |
 |
Elemental Damage with Attacks Support - your Attacks deal more Elemental Damage |
 |
Mirage Archer Support - as long as you're using Bows, Mirage Archer is one of the best Support Gems |
 |
Inspiration Support - it gives you Elemental Damage and Critical Strike Chance while making your Skill cost less Mana |
| Aura setup | |
 |
Precision - you should use Precision even at a low level for a better Accuracy Rating and more Critical Strike Chance |
 |
Hatred - Hatred is an Aura that increases your Cold Damage which is great when combined with Ice Shot |
| Curse setup | |
 |
Frostbite - Frostbite should be the Curse of your choice as long as you're dealing mostly Cold Damage, switch to  Elemental Weakness later Elemental Weakness later |
 |
Increased Duration Support - it increases the duration of the Curse linked to it |
Bandits:
Two Additional Passive Skill Points seem like the best option for this build
Leveling Skill Trees:
35 Points Skill Tree
look for Projectile Damage, Elemental Damage - especially Cold, and Maximum Life
70 Points Skill Tree
Allocate more Elemental and Cold Damage with some Maximum Life and Life Leech
Recommended leveling items:
 Tasalio's Sign - adds a lot of Cold Damage, Cold Resistance, Evasion Rating, and Chance to Avoid being Chilled Tasalio's Sign - adds a lot of Cold Damage, Cold Resistance, Evasion Rating, and Chance to Avoid being Chilled |
|
| +(20-30)% to Cold Resistance Adds (7-10) to (15-20) Cold Damage to Spells and Attacks +(200-300) to Evasion Rating 50% chance to Avoid being Chilled 10% chance to Freeze Adds 40 to 60 Cold Damage against Chilled Enemies |
|
 Hrimburn - if you're using Ice Shot it should be your go-to item early in the game Hrimburn - if you're using Ice Shot it should be your go-to item early in the game |
|
| +(20-30) to Strength Adds (5-7) to (13-15) Cold Damage to Spells and Attacks +(40-50) to Evasion Rating +(20-30)% to Cold Resistance 50% of Physical Damage Converted to Cold Damage Reflects 10 Cold Damage to Melee Attackers Your Cold Damage can Ignite |
|
 Prismweave - adds all the damage types to your Attacks, increases your Physical Damage, Elemental Resistances, and Elemental Damage during Flask Effect Prismweave - adds all the damage types to your Attacks, increases your Physical Damage, Elemental Resistances, and Elemental Damage during Flask Effect |
|
| (12-24)% increased Global Physical Damage Adds (7-8) to (15-16) Fire Damage to Attacks Adds (5-6) to (12-14) Cold Damage to Attacks Adds 1 to (30-34) Lightning Damage to Attacks +(6-8)% to all Elemental Resistances 30% increased Elemental Damage with Attack Skills during any Flask Effect 10% increased Elemental Damage with Attack Skills |
|
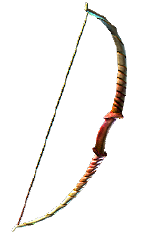 Quill Rain - one of the best options for a Bow when you're starting leveling the character Quill Rain - one of the best options for a Bow when you're starting leveling the character |
|
| +(10-20) to Dexterity 100% increased Physical Damage 100% increased Attack Speed +2 Mana gained for each Enemy hit by Attacks (50-100)% increased Projectile Speed +(25-50) to Accuracy Rating 30% less Damage |
|
 Goldrim - the best unique leveling helmet due to the Elemental Resistances it provides Goldrim - the best unique leveling helmet due to the Elemental Resistances it provides |
|
| +(30-50) to Evasion Rating 10% increased Rarity of Items found +(30-40)% to all Elemental Resistances Reflects 4 Physical Damage to Melee Attackers Level Requirement reduced by 100 (Hidden) |
 Tabula Rasa - it's a great option since you can connect any six Gems Tabula Rasa - it's a great option since you can connect any six Gems |
|
| Item has no level requirement and Energy Shield (Hidden) Item has 6 White Sockets and is fully linked (Hidden) |
|
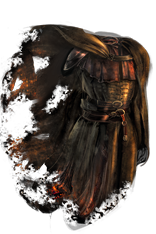 Ashrend - it's a cheap alternative to Rare Armours that's also great for builds dealing Elemental Damage such as this one Ashrend - it's a cheap alternative to Rare Armours that's also great for builds dealing Elemental Damage such as this one |
|
| Socketed Gems are Supported by Level 10 Added Fire Damage (80-100)% increased Evasion Rating +(30-50) to maximum Life +(40-50)% to Fire Resistance Cannot be Ignited (10-15)% increased Physical Damage with Ranged Weapons -(7-5) Physical Damage taken from Attack Hits |
|
4. Final Skill Tree, Ascendancy Points, and Pantheon
Final Skill Tree:
107 Points Final Skill Tree (doesn't include Cluster Jewels)
116 Points Path of Building (PoB) link
Ascendancy points:
Preferably in that order:
- Veteran Bowyer
- Nature's Adrenaline
- Master Surgeon
- Nature's Boon
Pantheon:
Major God: Soul of Lunaris: 1% additional Physical Damage Reduction for each nearby Enemy, up to 8%; 1% increased Movement Speed for each
nearby Enemy, up to 8%
Minor God: Soul of Garukhan: +5% chance to Evade Attack Hits if you've taken a Savage Hit Recently
5. Final Gems links
| [DPS] Elemental Hit setup | |
 |
Elemental Hit - It's your primary source of damage. You fire a series of Projectiles dealing Elemental Damage that bounces off the enemies or Hydrosphere. |
 |
Barrage Support - makes the Projectiles line up in a sequence instead of being shoot next to each other |
|
Elemental Damage with Attacks Support - increases the Elemental Damage you deal with Attack Skills |
|
Inspiration Support - increases your Elemental Damage and your Critical Strike Chance while reducing the Mana Cost of the Skill |
 |
Chain Support - your Projectiles will Chain upon reaching the enemy or Hydrosphere, bouncing to the next opponent. It can be switched for  increased Critical Strikes Support for more damage. increased Critical Strikes Support for more damage. |
 |
Trinity Support - Generates Resonance as you hit enemies with different types of damage, it works especially well with Elemental Hit. Resonance increases your Elemental Damage and Elemental Resistances |
| [Ballista DPS] Elemental Hit setup | |
|
Elemental Hit - in this setup Elemental Hit is used as extra additional damage against bosses |
 |
Elemental Focus Support - a lot more Elemental Damage, but causing Elemental Ailments with linked Skill is now impossible |
 |
Focused Ballista Support - Support Gem that summons Ballista Totems which are firing the linked Attack to give them more Damage, Attack, and Placement Speed |
|
Barrage Support |
| Support Gems provided by Shaper's Suffix on Boots | |
 |
Ballista Totem - allows your Attack to be cast in a form of a Totem which will fire automatically linked to its Attack |
| [UTILITY] Auras and Skitterbots setup (In shield with Reduced Mana Reserved) |
|
 |
Defiance Banner - a defensive banner that increases your Armour and Evasion Rating, reducing nearby enemies' Critical Strike Chance, and upon placing it Taunts enemies and provides AoE |
|
Precision - an Aura that increases your Accuracy Rating and Critical Strike Chance |
 |
Summon Skitterbots - Skitterbots are extremely useful in this build as they Shock and Chill nearby enemies granting you more Flask Charges |
 |
Unbound Ailments Support - effect of Shock and Chill caused by the Skitterbots are magnified |
| [MOBILITY] Shield Charge and Steelskin setup | |
 |
Shield Charge - an Attack that uses your Shield to charge in a straight line, great for navigating in open space |
 |
Faster Attacks Support - increases the frequency and Speed of your Shield Charge |
 |
Steelskin - the Guard Spell that reduces the amount of damage you take before being depleted |
| [UTILITY] Spellslinger setup | |
 |
Spellslinger - a Support Skill Gem that causes your Hydrosphere to be cast each time you Attack with a Wand, it reserves around 20% of your mana Pool |
 |
Hydrosphere - a Sphere of Water that Drenches nearby opponents reducing their Elemental Resistances, you can hit this sphere to make your Attack Chain and to apply Ailments on enemies |
 |
Blood and Sand - increase your Projectile Damage in Blood Stance, while Sand Stance increases your Projectile Speed |
 |
Enlighten Support - Linked Skills Reserve less Mana |
| [UTILITY] Golem and Blood Rage setup | |
 |
Blood Rage - a huge bonus to your Attack Speed and Life leech, it also generates Frenzy Charges as you kill enemies |
 |
Summon Lightning Golem - this Golem increases your Attack Speed, link it with Cast when Damage Taken |
 |
Cast when Damage Taken - activates your Lightning Golem after you take a certain amount of damage |
|
|
6. Gear Setup
You're using an Elemental Hit so the Stats you're looking for are Elemental Damage with Attacks, Critical Strike Chance and Multiplier, Elemental Penetration, Attack Speed, Accuracy Rating, and added or increased Elemental Damage with Attacks. Your defenses are primarily Maximum Life and Elemental Resistances. Since you have Crown of Eyes, you can also look for Spell Damage. 155 Strength will be required for the Maximum Level of Shield Charge and Steelskin. It's a medium-priced build with the standard Rare Items that the market is overflowing with.
Our recommended items will:
- Cap your resistances at 75%
- Provide you with enough DPS and Life to start mapping
|
Stat priorities on items:
|
 (Helmet) Crown of Eyes - It's an obligatory Helmet since it allows your Spell Damage to affect your Attacks at 150% of their value, the extra Accuracy Rating and Leech off Life and mana are useful too (Helmet) Crown of Eyes - It's an obligatory Helmet since it allows your Spell Damage to affect your Attacks at 150% of their value, the extra Accuracy Rating and Leech off Life and mana are useful too |
|
| +(300-350) to Accuracy Rating (120-150)% increased Energy Shield -30% to Fire Resistance (0.4-0.8)% of Attack Damage Leeched as Life (0.2-0.4)% of Attack Damage Leeched as Mana Increases and Reductions to Spell Damage also apply to Attacks at 150% of their value |
|
| Helmet enchantments: 15% increased Elemental Hit Attack Speed Elemental Hit deals 40% increased Damage |
|
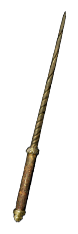 (Weapon) Rare Wand - Look for as much Spell Damage as possible, high Critical Strike Chance, and Attack Speed. Bury in mind that Crown of Eyes will affect your Elemental Hit Damage only when Spell Damage is increased, not when damage is added to Spells. (Weapon) Rare Wand - Look for as much Spell Damage as possible, high Critical Strike Chance, and Attack Speed. Bury in mind that Crown of Eyes will affect your Elemental Hit Damage only when Spell Damage is increased, not when damage is added to Spells. |
|
| Min. requirements: 100% increased Spell Damage 15% increased Attack Speed 30% increased Critical Strike Chance Optional affixes: Chance to deal Double Damage Global Critical Strike Multiplier Attacks with this Weapon Penetrate #% Elemental Resistances |
|
 (Weapon) Rare Shield - focus on the defensive mods such as Maximum Life and Elemental Resistances, increased Spell Damage is an additional very useful Affix that you can find here (Weapon) Rare Shield - focus on the defensive mods such as Maximum Life and Elemental Resistances, increased Spell Damage is an additional very useful Affix that you can find here |
|
| Min. requirements: +80 to maximum Life 80% increased Spell Damage +80% to Elemental Resistances Optional affixes: Chance to deal Double Damage #% increased Attack Speed Socketed Gems have reduced Reservation |
|
 (Body Armour) Rare Body Armour - Look for high Maximum Life roll and Elemental Resistances, additionally you should strive to increase your Base Critical Strike Chance, it's one of the few offensive mods you can find on Body Armour (Body Armour) Rare Body Armour - Look for high Maximum Life roll and Elemental Resistances, additionally you should strive to increase your Base Critical Strike Chance, it's one of the few offensive mods you can find on Body Armour |
|
| Min. requirements: +80 to Maximum Life +70% to Elemental Resistances Attacks have +1% to Critical Strike Chance Optional affixes: You can apply an additional Curse Enemies you Kill have a #% chance to Explode, dealing a tenth of their Maximum Life as Physical Damage #% increased Area of Effect #% increased Maximum Life |
|
 (Boots) Rare Boots - The Boots which offer a Ballista Totem Support Gem that's build-in are obviously very desirable, but keep in mind that other mods are also important (Boots) Rare Boots - The Boots which offer a Ballista Totem Support Gem that's build-in are obviously very desirable, but keep in mind that other mods are also important |
|
| Min. requirements: 50 Maximum Life +60% to Elemental Resistances +25% to Movement Speed Socketed Gems are Supported by Level 18 Ballista Totem Optional affixes: Chance to gain Onslaught on Kill You have Tailwind if you have dealt a Critical Strike Recently Increased Critical Strike Chance |
|
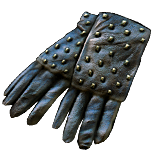
 (Gloves) Rare Gloves - You can use Gripped Gloves as a base for more Projectile Damage. Defensive mods are the priority, but there's a possibility to stumble upon many useful offensive Affixes. (Gloves) Rare Gloves - You can use Gripped Gloves as a base for more Projectile Damage. Defensive mods are the priority, but there's a possibility to stumble upon many useful offensive Affixes. |
|
| Min. requirements: 70 Maximum Life +70% to Elemental Resistances Optional affixes: Chaos Resistance increased Critical Strike Chance Accuracy Rating increased Global Accuracy Rating increased Damage with Hits against Chilled/Burning/Shocked Enemies increased Spell Damage |
|
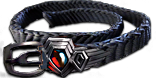
 (Belt) Rare Belt - Maximum Life and Elemental Resistances will be the mods to look for there, Stygian Vise is the recommended base (Belt) Rare Belt - Maximum Life and Elemental Resistances will be the mods to look for there, Stygian Vise is the recommended base |
|
| Min. requirements: 100 Maximum Life +100% to Elemental Resistances Optional affixes: increased Elemental Damage with Attack Skills increased maximum Life increased Flask Effect Duration |
|
 (Amulet) Rare Amulet - Amulets have a huge variety of mods that are unique to this gear slot, such as increased levels of specific Gems. What you should be interested in besides the obvious defensive mods are increases in Elemental Damage with Attacks (Amulet) Rare Amulet - Amulets have a huge variety of mods that are unique to this gear slot, such as increased levels of specific Gems. What you should be interested in besides the obvious defensive mods are increases in Elemental Damage with Attacks |
|
| Min. requirements: 80 Maximum Life +80% to Elemental Resistances Optional affixes: increased Elemental Damage with Attack Skills adds Fire/Cold/Lightning Damage to Attacks increased Global Critical Strike Chance Strength |
|
| Recommended Anointments: Prism Weave |
|
 (Ring) Rare Ring - Rings are similar to Amulets, you can find a lot of mods that could be of use, but your focus is to get one with Curse on Hit - Elemental Weakness is the more desired Curse (Ring) Rare Ring - Rings are similar to Amulets, you can find a lot of mods that could be of use, but your focus is to get one with Curse on Hit - Elemental Weakness is the more desired Curse |
|
| Min. requirements: 60 Maximum Life +80% to Elemental Resistances 30% increased Elemental Damage with Attacks Curse on Hit - Elemental Weakness or/and Enfeeble, Optional affixes: Chaos Resistance Accuracy Rating Non-channeling Skills have (-7–-6) to Total Mana Cost (crafted) Added Fire/Cold/Lightning Damage to Attacks |
|
 (Jewel) Rare Jewels - Look for Affixes with Maximum Life, Elemental Resistances, Attributes, or some Crit-related mods (Jewel) Rare Jewels - Look for Affixes with Maximum Life, Elemental Resistances, Attributes, or some Crit-related mods |
|
|
Recommended affixes: |
|
 (Jewel) Thread of Hope - use Thread of Hope with a Small Ring and put it next to Fervour Notable so that you can reach three Notables worth picking up (Jewel) Thread of Hope - use Thread of Hope with a Small Ring and put it next to Fervour Notable so that you can reach three Notables worth picking up |
|
| Only affects Passives in Small Ring Passives in Radius can be Allocated without being connected to your tree -(20-10)% to all Elemental Resistances |
|
 (Jewel) The Interrogation - unlocks Secrets of Suffering Keystone which is really great since your Skitterbots can cover the missing Chill and Shock Ailments while your character will Sap, Brittle, and Scorch. Each of those Ailments will increase your Elemental Hit Damage by 10% (Jewel) The Interrogation - unlocks Secrets of Suffering Keystone which is really great since your Skitterbots can cover the missing Chill and Shock Ailments while your character will Sap, Brittle, and Scorch. Each of those Ailments will increase your Elemental Hit Damage by 10% |
|
| Adds Secrets of Suffering | |
 (Jewel) Watcher's Eye - One of the most expensive, but impactful Jewels. Look for Precision Aura modifiers that will suit your build. (Jewel) Watcher's Eye - One of the most expensive, but impactful Jewels. Look for Precision Aura modifiers that will suit your build. |
|
| (4-6)% increased maximum Energy Shield (4-6)% increased maximum Life (4-6)% increased maximum Mana <Two or Three random aura modifiers> Recommended Aura modifiers: Precision: Inc Attack Damage Precision: Inc Attack Speed Precision: Inc Crit Strike Mult |
|
 (Jewel) Large Cluster Jewels - these Jewels are completely optional, however, you can add them to the build if you're lacking some specific offenses (Jewel) Large Cluster Jewels - these Jewels are completely optional, however, you can add them to the build if you're lacking some specific offenses |
|
| Recommended affixes: 1 Added Passive Skill is Drive the Destruction 1 Added Passive Skill is Opportunistic Fusilade 1 Added Passive Skill is Prismatic Heart 1 Added Passive Skill is Corrosive Elements 1 Added Passive Skill is Disorienting Display 1 Added Passive Skill is Martial Prowess |
|
 (Jewel) Medium Cluster Jewels - Medium Cluster Jewels offers some great Critical Strike or Flask-related Notables (Jewel) Medium Cluster Jewels - Medium Cluster Jewels offers some great Critical Strike or Flask-related Notables |
|
| Recommended affixes: 1 Added Passive Skill is Pressure Points 1 Added Passive Skill is Quick Getaway 1 Added Passive Skill is Basics of Pain 1 Added Passive Skill is Spiked Concoction 1 Added Passive Skill is Mender's Wellspring |
|
| 40% increased Damage Creates Consecrated Ground on Use (20-40)% increased Duration Consecrated Ground created by this Flask has Tripled Radius Consecrated Ground created during Effect applies (7-10)% increased Damage taken to Enemies (100-150)% increased Critical Strike Chance against Enemies on Consecrated Ground during Flask effect |
|
 (Flask) Dying Sun - makes you fire additional projectiles and increases your AoE, Fire Resistance, and you take less Fire Damage (Flask) Dying Sun - makes you fire additional projectiles and increases your AoE, Fire Resistance, and you take less Fire Damage |
|
| +50% to Fire Resistance 20% less Fire Damage taken (125-150)% increased Charges used (40-60)% reduced Duration (10-20)% increased Area of Effect during Flask Effect Skills fire 2 additional Projectiles during Flask Effect |
|
 (Flask) Varona's Preparation - grants around 300 Ward on use, Culling Strike and Debilitates nearby enemies (Flask) Varona's Preparation - grants around 300 Ward on use, Culling Strike and Debilitates nearby enemies |
|
| Restores Ward on use (-10–10)% reduced Charges used Debilitate nearby Enemies for 2 Seconds when Flask Effect ends Flask Effect is removed when Ward Breaks Culling Strike during Flask Effect (Enemies that are Debilitated have 20% less Movement Speed and deal 10% less damage) (Culling Strike means enemies that are on 10% or lower life after your Hit are Killed) |
|
|
Other suggested Flasks:
|
|
   |
|
|
If you have any other build requests please leave that in the comments below. We are always open to suggestions and constructive feedback.
Pictures used in this article are the intellectual property of Grinding Gear Games.
