Earthshatter
Slam Berserker build
Updated for Patch 3.11
The Best Crafty Guides by Odealo
Estimated budget: medium

| Guide notes |
July 28, 2020
-Build created
July 29, 2020
-Added gameplay video |
Earthshatter is one of the new Slam/Melee Attacks added in Patch 3.11 which sends out fissures in all directions dealing very high damage to enemies in its radius. Spikes created by it will shatter when you use your Warcries, dealing additional Area Damage to surrounding enemies. Thanks to Eartshatter's mechanics, you get very high Hit damage with great AoE and clear speed. On the other hand, you can use Berserker for this build which offers simply massive DPS bonuses to this playstyle with 10s of Millions DPS accessible if you can invest in top tier equipment.
While you most likely won't be able to face-tank end-game content, a lot of people say, the best defense is offense, and this Earthshatter Berserker seems to like the sound of it. You still get relatively high Life pool, good Physical Damage mitigation, and high Block Chance from using Staves with Glancing Blow Passive, but it's topping the DPS meters that this build excels in.
You can also find our other Path of Exile builds right over here Odealo's Crafty Guides - Full List
1. Gameplay
This is a standard Melee build that utilizes slow but deadly AoE Attacks. You are going to constantly use your Warcries (Intimidating and Seismic Cry) with increased "cast" speed and cooldown recovery. Warcries offer simply massive damage bonuses to your next Attacks by Exerting them, which let you take down end-game Bosses in just a few fully buffed Hits. For the defenses, this build utilizes Life, high Armour Rating, and Block Chance. With Glancing Blow Passive, you should have approximately 70% Chance to Block Attacks and 30% Chance to Block Spells which greatly adds up to your survivability.
|
0:08 Tier 16 Forge of the Phoenix
0:36 Tier 16 Lair of the Hydra
1:06 Tier 16 Maze of the Minotaur
1:39 Tier 16 Overgrown Shrine
1:57 Tier 17 Shaper
This video was recorded on a level 90 Berserker with 5,300 Life and approximately 12kk fully buffed DPS (including Impale). Our character wielded a 700 Physical DPS Staff with Endurance Charge on Melee Stun Support
|
|
 
Odealo is a secure gamer-driven marketplace for PoE Currency.
|
2. Build's PROS & CONS
| PROS |
- terrific DPS both single-target and AoE
- solid defenses based on high Life, Armour, and Block Chance
- nearly unlimited damage scaling
- enjoyable playstyle
- all content viable
|
| CONS |
- self-degen can be deadly
- vulnerable to Physical Reflect Maps
|
3. Leveling tips
Leveling as Marauder is very easy if you spend some time once in a while to upgrade your equipment, primarily to higher Physical DPS weapons, and Rares with higher Life and Resistances. While being easy, it's usually slower than most Classes, but the overall experience is quite satisfactory as you shouldn't die at all. Below you will find the basic Skill Gem setups for the early levels, which kind of reflect what you are going to use later on. There is also a number of very useful Unique Items that can be used on low-levels and greatly speed up the leveling process for you. It's best to play/level up with Earthshatter starting from level 12 - as soon as it becomes available to your character. You will be able to learn the Skill itself during the campaign, making it much easier when you finally delve into Maps.
Suggested leveling Gem setups:
| Earthshatter setup |
 |
Earthshatter - the primary Attack used in this build that deals high Area Damage to enemies around you. You can use it from level 12, and until then you can use any Attack you want - preferably Ground Slam, Cleave or Smite for their Area effects |
 |
Melee Physical Damage Support - great buff to your DPS and one of the core Gems in this build |
 |
Ruthless Support - this will make your every 3rd hit much stronger, which helps a lot with killing bosses |
 |
Maim Support - increases the Physical DPS of Supported Skills and the Physical Damage taken by enemies Maimed by it |
| Utility Gems |
 |
Ancestral Warchief - this Totem increases your melee damage and deals a lot of damage by itself, which might come in handy versus strong Rare enemies or Bosses |
 |
Vulnerability - one of the best Curses for this build. On lower levels, it has to be cast manually (assuming you need extra damage against Bosses) |
 |
Pride - the best Aura for this purely Physical DPS build |
 |
Precision - one of the core Auras for this build. It's very important on lower levels as your Attacks can miss quite often without additional sources of Accuracy Rating |
 |
Dash - recommended mobility Skill for this build |
Bandits:
We recommend helping all the Bandits for two additional Passive Points
Leveling Skill Trees:
35 Points Skill Tree
Priorities: 1) Born to Fight 2) Butchery 3) Kinetic Impacts 4) Constitution
62 Points Skill Tree
Priorities: 1) Art of the Gladiator 2) Forceful Skewering 3) Swift Skewering 4) Bloodless
Recommended leveling items:
 Blackheart - great Physical DPS leveling Ring. It is available as soon as level one. Blackheart grants amazing DPS bonuses and you can also use two of them Blackheart - great Physical DPS leveling Ring. It is available as soon as level one. Blackheart grants amazing DPS bonuses and you can also use two of them |
Adds 1 to 4 Physical Damage to Attacks
5% increased Physical Damage
Adds 1 to 3 Chaos Damage to Attacks
+(20-30) to maximum Life
(2-4) Life Regenerated per second
10% chance to Cause Monsters to Flee |
|
 Belt of the Deceiver - a fantastic mid-level Belt It provides Life, Resistances, and Intimidate, which increases damage monsters receive by 10% Belt of the Deceiver - a fantastic mid-level Belt It provides Life, Resistances, and Intimidate, which increases damage monsters receive by 10% |
(25-35) to Strength
(15-25)% increased Physical Damage
You take 30% reduced Extra Damage from Critical Strikes
+(30-40) to maximum Life
+(10-15)% to all Elemental Resistances
Nearby Enemies are Intimidated |
|
|
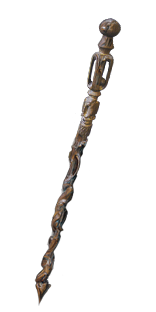
 The Blood Thorn - a very powerful Unique Staff which has no level requirements The Blood Thorn - a very powerful Unique Staff which has no level requirements
|
+18% Chance to Block Attack Damage while wielding a Staff
+12% Chance to Block Attack Damage while wielding a Staff
100% increased Physical Damage
(5-10)% increased Attack Speed
Reflects (22-44) Physical Damage to Attackers on Block
Curse Enemies with Level 5 Vulnerability on Block
Level Requirement reduced by 100 (Hidden) |
|
|
 Victario's Flight - my personal favorite leveling Boots. On top of giving you high bonus Movement Speed, they offer an extra Mana Recovery mechanic and Attributes which are very useful on lower levels Victario's Flight - my personal favorite leveling Boots. On top of giving you high bonus Movement Speed, they offer an extra Mana Recovery mechanic and Attributes which are very useful on lower levels
|
+15 to Dexterity
+15 to Intelligence
(100-150)% increased Evasion Rating
15% increased Movement Speed
(5-10)% of Damage taken gained as Mana over 4 seconds when Hit
10% increased Movement Speed for you and nearby Allies |
|
4.Final Skill Tree, Ascendancy Points, and Pantheon
Final Skill Tree:
116 Points Final Skill Tree
116 Points Path of Building(PoB) link
Ascendancy points:
Preferably in that order:
- Aspect of Carnage
- Crave the Slaughter
- War Bringer
- Rite of Ruin - optionally you can replace it with Pain Reaver for extra Leech. Just try to notice your Rage levels when you play, if it's usually low you may be better off with the Leech
Pantheon:
Major God - there are 2 choices depending on whether you are clearing Maps or want to challenge endgame Bosses
For clearing Maps:
Soul of Lunaris 1% additional Physical Damage Reduction for each nearby Enemy, up to 8%; 1% increased Movement Speed for each nearby Enemy, up to 8%
For single-target/Bosses:
Soul of Solaris 6% Physical Damage Reduction if there is only one nearby Enemy; 20% chance to take 50% less Area Damage from Hits
Minor God: Soul of Gruthkul 1% additional Physical Damage Reduction for each Hit you've taken Recently up to a maximum of 5%
5. Final Gems links
| [DPS] Earthshatter setup |
|
Earthshatter - primary DPS Attack used in this build. It deals very high Area Damage and creates Spikes that will be shattered by using Warcries for extra damage. If you have a Staff with Endurance Charge on Melee Stun Support Gem, make sure to Socket it there |
|
Melee Physical Damage Support - one of the core Support Gems in this build. It has an Awakened variant, which grants even higher DPS bonus but costs quite a bit |
 |
Fortify Support - grants high bonus Melee Damage and the Fortify buff |
 |
Brutality Support - increases Physical Damage but makes Supported Attacks unable to deal Elemental or Chaos Damage. It's a must-have Gem for this setup, which also has Awakened variant |
 |
Fist of War Support - a mandatory Support Gem for this setup which was introduced in Patch 3.11 - when off-cooldown it makes your next Attack deal massively increased damage |
 |
Impale Support - increases the Chance to Impale on Hit with Supported Attacks. Since you can't pick up all the Impale Passives from Skill Tree, that's the best way to get Impale Chance to 100% |
| [UTILITY] Warcries and other Gems |
 |
Intimidating Cry - Intimidates nearby enemies greatly increasing the damage they take. It also makes Attacks Exerted by it to deal double damage |
 |
Seismic Cry - increases Area, Damage, and Stun Threshold of Exerted Attacks |
|
Dash - recommended mobility Skill used in this build |
 |
Second Wind Support - increases the number of charges of linked Spells and increases their Cooldown Recovery Speed |
 |
Blood Magic Support - will make linked Spells cost Life instead of Mana |
 |
Berserk - grants a very strong DPS buff for a short duration based on your Rage. It's a great way to gain extra burst against Bosses |
| [UTILITY] Ancestral Warchief |
 |
Ancestral Warchief - summons a Totem which increases your Melee Damage |
|
Maim Support - causes your Ancestral Totem to Maim enemies, increasing Physical Damage they take and slowing them down |
| [UTILITY] Immortal Call/Blood Rage |
 |
Cast when Damage Taken Support - auto-cast supported spells after you take a certain amount of damage. Keep this Gem at level 8 in this setup |
 |
Immortal Call - grants a potent defensive buff for a short duration. Keep this Gem at level 10 so that it's triggered automatically |
 |
Blood Rage - generates Frenzy Charges and grants Life Leech. It's a must-have Spell for this build as with the primary Passive setup you won't have any other source of Leech. Keep it at level 12 |
 |
Increased Duration Support |
| [UTILITY] Punishment setup |
|
Cast when Damage Taken Support - auto-cast supported spells after you take a certain amount of damage. In this setup use it at level 11 |
 |
Punishment - keep this Gem at level 14 so that it's triggered by Cast when Damage Taken. Punishment is the best Curse for this build, but you should use it only if you don't have a Vulnerability on Hit Ring equipped. If you have it, then just a level 14 Summon Ice Golem here instead |
| [UTILITY] Auras |
|
Pride - the best Aura for this build which greatly increases Physical Damage taken by enemies in its radius |
|
Precision - a very important Aura that will help you reach 100% Chance to Hit with your Attacks. It also increases your Critical Strike Chance |
 |
Flesh and Stone - you can use it to increase your DPS in Blood Stance or defenses in Sand Stance. It's recommended to use the Sand Stance so that you don't get hit that often |
 |
Enlighten Support - use at least a level 3 Enlighten so that you have enough Mana Pool to use your Spells without interruptions |
|
On Odealo multiple sellers compete for your attention. You are guaranteed to find the Path of Exile's Currency and Orbs at the best price.
|
5. Gear Setup
Below you will find the recommended items for our Earthshatter Pure-Physical Berserker build. This build requires literally zero specific Uniques, and all the items can be replaced with random Rares with similar stats. You should mainly aim to get Thread of Hope, as it's hard to replace the bonuses it offers, but other than that, it's all up to your personal preferences.
Our recommended items will:
- Cap your resistances
- Give you enough DPS/Life to start mapping successfully
|
Stat priorities on items:
- Life
- Elemental Resistances
- Physical Damage
- Accuracy Rating
- Armour Rating
|
 (Helmet) Abyssus - the BiS Helmet for this build. It grants an insane amount of extra DPS, and with high Physical Damage mitigation and Block Chance, you should be able to live through the increased Physical Damage taken modifier it also brings to the board (Helmet) Abyssus - the BiS Helmet for this build. It grants an insane amount of extra DPS, and with high Physical Damage mitigation and Block Chance, you should be able to live through the increased Physical Damage taken modifier it also brings to the board |
+(20-25) to all Attributes
Adds 40 to 60 Physical Damage to Attacks
+(100-125)% to Melee Critical Strike Multiplier
(100-120)% increased Armour
(40-50)% increased Physical Damage taken |
Helmet enchantment:
Earthshatter deals 40% increased Damage
Earthshatter creates +1 fissures |
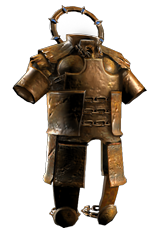
 (Body Armour) Belly of the Beast - a very solid and inexpensive option for Body Armour. It grants very high bonus Life and extra Resistances (Body Armour) Belly of the Beast - a very solid and inexpensive option for Body Armour. It grants very high bonus Life and extra Resistances |
Armour: (685 to 812)
(150-200)% increased Armour
(30-40)% increased maximum Life
+(10-15)% to all Elemental Resistances
50% increased Flask Life Recovery rate
Extra gore |
 (Body Armour) Rare Body Armour - this is possibly the best Armour you can get. Reduced Mana Cost makes this build much smoother, explosions increase your AoE and Increased Attack Crit. Chance is the best modifier in terms of DPS. (Body Armour) Rare Body Armour - this is possibly the best Armour you can get. Reduced Mana Cost makes this build much smoother, explosions increase your AoE and Increased Attack Crit. Chance is the best modifier in terms of DPS. |
Min. requirements:
80 maximum Life
Optional affixes:
Attacks have +(1.1–1.5)% to Critical Strike Chance
Socketed Gems have -15 to Total Mana Cost
Enemies you Kill Explode, dealing 3% of their Life as Physical Damage (Crusader affix)
Maximum Life% |
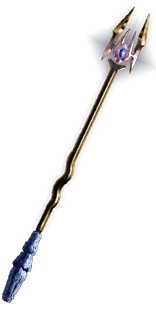 (Weapon) Hegemony's Era - a very decent weapon for this build which grants solid Physical DPS and high Chance to Block (both Spells and Attacks) (Weapon) Hegemony's Era - a very decent weapon for this build which grants solid Physical DPS and high Chance to Block (both Spells and Attacks) |
+20% Chance to Block Spell Damage while wielding a Staff
+6% Chance to Block Attack Damage while wielding a Staff
Adds (135-145) to (160-175) Physical Damage
(12-16)% increased Attack Speed
(10-20)% increased Critical Strike Chance
+1 to Maximum Power Charges
10% chance to gain a Power Charge if you Knock an Enemy Back with Melee Damage |
 (Weapon) Rare Staff - a rare Staff can potentially offer much higher DPS. You can also find a piece with extra Endurance Charge on Melee Stun which will increase your damage and defensive capabilities. Make sure to pick a Staff with Block Attack Chance as implicit modifier (Weapon) Rare Staff - a rare Staff can potentially offer much higher DPS. You can also find a piece with extra Endurance Charge on Melee Stun which will increase your damage and defensive capabilities. Make sure to pick a Staff with Block Attack Chance as implicit modifier |
Min. requirements:
650+ Physical Damage
Optional affixes:
Socketed Gems are Supported by level # Endurance Charge on Melee Stun |
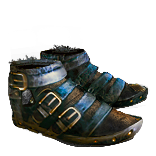
 (Boots) Rare Boots - recommended choice, get pair with the highest maximum Life bonus you can afford and possibly additional bonuses that can grant you Elusive and Tailwind (Boots) Rare Boots - recommended choice, get pair with the highest maximum Life bonus you can afford and possibly additional bonuses that can grant you Elusive and Tailwind |
Min. requirements:
70 maximum Life
25% increased Movement Speed
Min. requirements:
Chance to gain Elusive on Critical Strike
You have Tailwind if you have dealt a Critical Strike Recently
Elemental Resistances |
Boot enchantment:
16% increased Attack and Cast Speed if you've Killed Recently
0.6% of Damage Leeched as Life if you've Killed Recently |
 (Belt) Rare Belt - again, we try to grab one with the highest maximum Life and Elemental Resistances (Belt) Rare Belt - again, we try to grab one with the highest maximum Life and Elemental Resistances |
Min. requirements:
90 maximum Life
75% Total Elemental Resistances
Optional affixes:
increased Physical Damage
Maximum Life% |
 (Belt) Ryslatha's Coil - one of the best Belts in terms of DPS. It also happens to add very high Life bonus, but no Resistances, so make sure to use it if you can comfortably cap Resistances elsewhere (Belt) Ryslatha's Coil - one of the best Belts in terms of DPS. It also happens to add very high Life bonus, but no Resistances, so make sure to use it if you can comfortably cap Resistances elsewhere |
(20-30)% increased Stun Duration on Enemies
+(20-40) to Strength
(30-40)% more Maximum Physical Attack Damage
(40-30)% less Minimum Physical Attack Damage
Adds 1 to (15-20) Physical Damage to Attacks
+(80-100) to maximum Life
Gain 50 Life when you Stun an Enemy |
 (Amulet) Rare Amulet - the best Option for this build. You will need a lot of Attributes for various Gems and Items, and a rare amulet can provide both that and extra Life and DPS bonuses (Amulet) Rare Amulet - the best Option for this build. You will need a lot of Attributes for various Gems and Items, and a rare amulet can provide both that and extra Life and DPS bonuses |
Min. requirements:
30 Dexterity
30 Intelligence
50 Maximum Life
Adds 10 Physical Damage to Attacks
Optional affixes:
Elemental Resistances
Increased Armour |
Recommended Anointments:
Ophidian Aim |
 (Ring) Rare Rings - you should aim to get one Ring with Vulnerability Curse or you will have to use the low-level CwDT setup to apply any Curse (Ring) Rare Rings - you should aim to get one Ring with Vulnerability Curse or you will have to use the low-level CwDT setup to apply any Curse |
Min. requirements:
65 maximum Life
65% Total Elemental Resistances
Adds 10 Physical Damage to Attacks
Optional affixes:
Curse enemies with level 5 Vulnerability on Hit
Attributes |
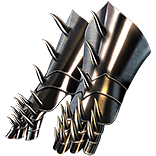 (Gloves) Rare Gloves - aim for the highest defensive stats possible (Gloves) Rare Gloves - aim for the highest defensive stats possible |
Min. requirements:
80 maximum Life
100% Total Elemental Resistances
Optional affixes:
Added Physical Damage to Attacks
increased Melee Damage |
 (Jewels) Thread of Hope - allows you to allocate 4-5 important Passives including Glancing Blow on your Tree without having it connected to the rest of it. It needs to have a "Very Large" Ring modifier on (Jewels) Thread of Hope - allows you to allocate 4-5 important Passives including Glancing Blow on your Tree without having it connected to the rest of it. It needs to have a "Very Large" Ring modifier on |
Only affects Passives in <size> Ring
Passives in Radius can be Allocated without being connected to your tree
-(20-10)% to all Elemental Resistances
Allocates Passives:
Glancing Blows
Tireless
Precision
Steelwood Stance
Retribution |
 (Jewels) Rare Jewels - these should provide extra Life and damage bonuses (Jewels) Rare Jewels - these should provide extra Life and damage bonuses |
Recommended affixes:
increased maximum Life
increased Physical/Area/Damage with Axes
Critical Strike Multiplier
Optional affixes:
Elemental Resistances |
 (Jewels) Rare Abyss Jewel - at least one is recommended, which should grant you a chance to gain the Onslaught buff (Jewels) Rare Abyss Jewel - at least one is recommended, which should grant you a chance to gain the Onslaught buff |
Recommended affixes:
maximum Life
added Physical Damage to Attacks
chance to gain Onslaught for 4 seconds on kill |
 (Flask) Lion's Roar - great defensive and offensive utility Flask that is moderately cheap and offers simply fantastic bonuses (Flask) Lion's Roar - great defensive and offensive utility Flask that is moderately cheap and offers simply fantastic bonuses |
Adds Knockback to Melee Attacks during Flask effect
75% chance to cause Enemies to Flee on use
(20-25)% more Melee Physical Damage during effect
Knocks Back Enemies in an Area when you use a Flask |
 (Flask) Bottled Faith - another very useful Utility Flask which increases your Critical Strike Chance and creates Consecrated Ground for other bonuses and Life Regen. (Flask) Bottled Faith - another very useful Utility Flask which increases your Critical Strike Chance and creates Consecrated Ground for other bonuses and Life Regen. |
|
Other suggested Flasks:
- Bubbling Divine Life Flask of Staunching (Bleed immunity)
- Experimenter's Diamond Flask of Warding (Curse Immunity)
- Experimenter's Basalt Flask of Adrenaline (increased Movement Speed)
|
   |
|
Odealo is one of the biggest Path of Exile marketplaces. It allows regular players to buy, sell, and trade PoE Currency with the use of real cash.
|
If you have any other build requests, please leave that in the comments below.
Pictures used in this article are the intellectual property of Grinding Gear Games.