
Discharge Assassin Build
A simple Discharge build for Assassin ascendancyDischarge
Assassin build
Updated for Patch 3.22
The Best Crafty Guides by Odealo
| Guide notes |
| October 22, 2022 - Build created |
| Build overview | |||
| Tags: [CASTER] [ELEMENTAL] [LIFE] | |||
|
Budget: Defenses: |
|
Boss DPS: AoE: |
|
It's a classic Discharge build for the Assassin. Discharge deals damage based on how many Frenzy, Power, and Endurance Charges it has consumed. In the case of this build, these will be mostly Power and Frenzy Charges resulting in tons of Cold and Lightning Damage. Aim for a lot of Maximum Power Charges, Frenzy Charges will tag along via Badge of the Brotherhood Amulet. You can gain up to 12 Power and Frenzy Charges: three from the Skill Tree, one from the Assassin's Unstable Infusion, two from Void Batteries each, Rings, and a Corrupted Helmet. This flat damage is then increased by Assassin's Deadly Infusion, Opportunistic, and Ambush and Assassinate passives. It nearly guarantees a 100% Crit Chance with a high Critical Strike Multiplier, around 800%. The Damage is also noticeably improved with Pain Attunement Keystone and Surgebinders Gloves.
Your Charges will be consumed each time you Discharge, so it requires a reliable source of these Charges. Power and Frenzy Charges are gained each time you enter Cat's Stealth thanks to Farrul's Fur. Cat's Stealth and Cat's Agility are two parts of the Aspect of the Cat Skill. It oscillates between these two phases every six seconds. That would normally require you to wait 12 seconds each time you want to Cast Discharge, but thankfully you can Reduce this Skill's Effect Duration to a fifth of this value. Allocate Window of Opportunity Notable and its Mastery for reduced Skill Effect Duration, and in the item in which the Aspect is present, socket two Support Gems that reduce Skill Effect Duration. Such a setup creates an opportunity to use Lightning Warp as your main mobility Skill. The build is able to Cast a fully charged Discharge every ~2.5 seconds, which is enough as the base Cooldown of Discharge is 2 seconds. We recommend lowering it to around ~1.75 seconds with Cooldown Recovery Rate modifiers, as it has 0.75 seconds of Cast Time that needs to be accounted for. The build has very high damage, but it's not very tanky, at least not unless you swap your Hatred and Wrath Auras for Grace and Determination. It would lower your damage by around 25%. The build struggles with Physical Damage, without Determination its Armour is very low, but it has a high Life Recovery Rate that is somewhat necessary as the low Cast Rate of Discharge makes Leech not enough of a Recovery tool. Implementing Petrified Blood is a good idea, it's excellent with passive Life Recovery.
You can also check our other Path of Exile builds right over here Odealo's Crafty Guides - Full List
1. Gameplay
Use Discharge to deal very high damage with a huge area of effect. You won't need to use Flasks, Charges will be recovered automatically. To move quickly cast Lightning Warp. For Curses select Elemental Weakness and Frostbite. For a better Life Recovery use Stone Golem. Be sure to activate Righteous Fire during boss fights. For a Guard Spell, we recommend Molten Shell. Your Mana-reserving Spells are Zealotry, Hatred, Wrath, Vitality, Defiance Banner, and Petrified Blood.
|
|
|
|

2. Build's PROS & CONS
| PROS |
|
| CONS |
|
3. Leveling tips
Start as an Assassin Spell Caster - that's a very general lead but there's not much you can do before adjusting your build for Discharge. After completing the first labyrinth you can immediately start specializing in Power Charges scaling and Critical Strikes - get Unstable Infusion and go for Maximum Power Charges on your Skill Tree. We recommend using Arc as your main Spell. You can start specializing in Critical Strikes very early on, around the time you finish the second Lab. Switch to Discharge after allocating all Maximum Power Charges, equipping two Void Batteries, and Farrul's Fur.
Suggested leveling Gem setups:
| Arc setup | |
 |
Arc - A basic Lightning Spell with good enough damage. |
 |
Arcane Surge Support - Grants more Cast Speed and Mana Regeneration Rate. |
 |
Added Lightning Damage Support - Adds Lightning Damage to the Spell. |
 |
Elemental Focus Support - Grants more Elemental Damage, but makes you unable to Shock. |
 |
Lightning Penetration Support - Damage penetrates a big chunk of Lightning Resistance. |
 |
Spell Echo Support - The Arc is being Cast twice with higher Cast Speed. |
| Utility Gems | |
 |
Clarity - Use this Aura for a faster Mana Regeneration Rate. |
 |
Wrath - Your Spells deal more Lightning Damage. |
 |
Flame Dash - A default movement Skill. |
 |
Conductivity - Lowers Lightning Resistance of Cursed enemies. |
Bandits:
When dealing with the bandits, kill all of them for two extra Passive Skill Points.
Leveling Skill Trees:
28 Points Skill Tree
Allocate some Lighting Damage and Maximum Life.
59 Points Skill Tree
Get more Maximum Life, and allocate all the Maximum Power Charge nodes with Disciple of the Forbidden.
Recommended leveling items:
 Le Heup of All - Good Ring for leveling. It grants Attributes and a lot of Elemental Resistances. Le Heup of All - Good Ring for leveling. It grants Attributes and a lot of Elemental Resistances. |
|
| (10-30)% increased Damage +(10-30) to all Attributes (10-30)% increased Rarity of Items found +(10-30)% to all Elemental Resistances |
 Goldrim - It provides you with a lot of Elemental Resistances. Goldrim - It provides you with a lot of Elemental Resistances. |
|
| +(30-50) to Evasion Rating 10% increased Rarity of Items found +(30-40)% to all Elemental Resistances Reflects 4 Physical Damage to Melee Attackers Level Requirement reduced by 100 (Hidden) |
 Tabula Rasa - Has six, linked, white sockets. Tabula Rasa - Has six, linked, white sockets. |
|
| Item has no level requirement and Energy Shield (Hidden) Item has 6 White Sockets and is fully linked (Hidden) |
 Praxis - A good item to combat high Mana Cost of Skills. Praxis - A good item to combat high Mana Cost of Skills. |
|
| +(20-30) to maximum Mana +(30-60) to maximum Mana Regenerate (3-6) Mana per second -(8-4) to Total Mana Cost of Skills 8% of Damage taken Recouped as Mana |
|
 Storm Prison - It's a perfectly suited Wand for Power Charge stackers that you can use before Void Batteries. Storm Prison - It's a perfectly suited Wand for Power Charge stackers that you can use before Void Batteries. |
|
| (11-15)% increased Spell Damage (40-60)% increased Physical Damage Adds 1 to (35-45) Lightning Damage (15-25)% increased Mana Regeneration Rate +1 to Maximum Power Charges (25-35)% chance to gain a Power Charge on Kill |
|
 Atziri's Foible - Use it for a much better Mana Regeneration Rate and more Maximum Mana. Atziri's Foible - Use it for a much better Mana Regeneration Rate and more Maximum Mana. |
|
| (20-30)% increased Mana Regeneration Rate +100 to maximum Mana (16-24)% increased maximum Mana (80-100)% increased Mana Regeneration Rate Items and Gems have 25% reduced Attribute Requirements |
4. Final Skill Tree, Ascendancy Points, and Pantheon
Final Skill Tree:
123 Points Final Skill Tree (doesn't include Unique nor Cluster Jewels)
123 Points Path of Building (PoB) link
Ascendancy points:
Preferably in that order:
- Unstable Infusion
- Deadly Infusion
- Ambush and Assassinate
- Opportunistic
Pantheon:
Major God: Soul of Solaris: 6% additional Physical Damage Reduction while there is only one nearby Enemy; 20% chance to take 50% less Area Damage from Hits
Minor God: Soul of Shakari: You cannot be Poisoned while there are at least 3 Poisons on you; 50% less Duration of Poisons on You
5. Final Gems links
| [DPS] Discharge setup | |
 |
Discharge - It deals a lot of damage around your character and consumes all your Charges. The Phantasmal version is the best one if you can generate Endurance Charges. It will deal mostly Cold and Lightning Damage. |
 |
Empower Support - Increases the Gem Level of Discharge. |
|
Elemental Focus Support - Grants more Elemental Damage, but makes you unable to cause Elemental Ailments like Chill and Shock.  Hypothermia Support is the substitute if you're using Heatshiver. Hypothermia Support is the substitute if you're using Heatshiver. |
 |
Concentrated Effect Support - It grants more Damage but reduces your AoE. Good for bosses, but for clearing swap to Increased  Area of Effect Support. Area of Effect Support. |
 |
Elemental Penetration Support - The build has already high base damage, high increased and more Damage, Crit Chance, and Crit Damage. It only needs Elemental Penetration. |
 |
Increased Critical Damage Support - It increases Critical Strike Damage - your Crit Chance should be 100% to make the best use of it. |
| [MOBILITY] Aspect of the Cat and Lightning Warp setup socketed in an item with the Aspect of the Cat |
|
 |
Lightning Warp - Your Skill Effect Duration is very low, rendering Lightning Warp the best Movement Skill. |
 |
Swift Affliction Support - Reduces Skill Effect Duration again so that you can Warp faster. |
 |
Less Duration Support - Lessens Lightning Warp Duration. It should also affect the Aspect of the Cat Skill - it will switch between Cat's Stealth and Agility faster, granting you Charges more often. |
 |
Inspiration Support - Lowers Mana Cost of Lighting Warp.  Lifetap can be used too to spend no Mana on it at all. Alternatively, socket Lifetap can be used too to spend no Mana on it at all. Alternatively, socket  Faster Casting Support here to Cast Lightning Warp faster. Faster Casting Support here to Cast Lightning Warp faster. |
| [UTILITY] Auras setup | |
 |
Zealotry - Grant you more Spell Damage and Crit Chance. It creates Consecrated Ground which provides you with Life Regeneration and reduces the Effect of Curses on you. The Divergent one is great, it gives you Life Regeneration. |
 |
Hatred - Use it for simply more Cold Damage.  Determination can be used instead to gain more Armour, it's great if you lack defense - your damage should be high enough anyway. Determination can be used instead to gain more Armour, it's great if you lack defense - your damage should be high enough anyway. |
|
Wrath - Wrath adds Lightning Damage to Spells and grants more Lightning Damage. Divergent one increases its Reservation Efficiency. Alternatively, use  Grace for extra Evasion if you don't really need that extra damage. Grace for extra Evasion if you don't really need that extra damage. |
 |
Enlighten Support - Linked Auras reserve less Mana. |
| [UTILITY] Petrified Blood setup | |
 |
Petrified Blood - You're on Low Life to benefit from Pain Attunement. Use Petrified Blood to Reserve half of your Life, and to redirect a portion of incoming damage to be taken as DoT. It's good with Life Regeneration and Life Recoup. It will reduce your durability, but not by a lot. An anomalous quality is better, it prevents more Hit Damage. |
 |
Arrogance Support - Petrified Blood Reserves Life instead of Mana. Anomalous quality increases Life Reservation Efficiency by another 4%. It will Reserve around 57% of your Life, but you can make it 50% with another Enlighten Support. |
| [UTILITY] Curse setup | |
 |
Elemental Weakness - Reduces Fire, Cold, and Lightning Resistance of your enemies. |
 |
Frostbite - Reduces the Cold Resistance of your enemies. An Anomalous one is a bit better. |
 |
Arcanist Brand - Applies two Curses with one button. Be sure you have Whispers of Doom allocated to benefit from both. |
| [UTILITY] Stone Golem | |
 |
Summon Stone Golem - Stone Golem grants you Life Regeneration, even more of it if it's from an Anomalous Skill Gem. |
| [UTILITY] Vitality | |
 |
Vitality - Vitality simply grants you Life Regeneration. |
| [UTILITY] Molten Shell | |
 |
Molten Shell - Set it up as your movement key. It's good if you have somewhat high Armour, it creates a protective barrier that absorbs more damage the more Armour you have. If your Armour is too low to make it useful, choose the  Withering Step instead. Withering Step instead. |
| [UTILITY] Righteous Fire | |
 |
Righteous Fire - It grants you more Spell Damage as it says active. If you can't sustain it, use only the Vaal version that "damages" you only once. The Divergent version grants you more Spell Damage. |
| [UTILITY] Defiance Banner | |
 |
Defiance Banner - Use it for increased Armour and Evasion. It reduces the Critical Strike Chance for nearby enemies. |
|
|
6. Gear Setup
The Required Unique items are Void Batteries, Farrul's Fur, Surgebinders, and Badge of the Brotherhood. On your Rare items, you have to have Aspect of the Cat Skill, and preferably a source of Elusive (found on Boots, but you can also use Withering Step Skill) and Exposure (which can be gained from a Cluster Jewel or Flask). Prioritize high Life Regeneration if you want to sustain Life Drain from regular Righteous Fire. Life Leech or Life Gain on Hit can be useful in this regard. Some Items or modifiers may give you an extra Power Charge or stats tied to the number of your Power Charges such as Life Regeneration - these are particularly good. You don't really need Cast Speed as the Cooldown of Discharge is bottlenecking your Cast Rate. You can obtain Cooldown Recovery from Forbidden Jewels, Tattoos, Belt, and Boots. You will deal mostly Cold and Lightning Damage due to the abundance of Power and Frenzy Charges. Your Crit Chance should be easily capped at 100% due to Assassin's passives, Crit Multiplier will be much more important. After that, seek Elemental Penetration. You don't need any added damage. The build requires 155 Strength for Molten Shell and Petrified Blood. It can be found on Rare Items' Suffixes or Tattoos. You will need to reduce Mana Cost of Skills and get some Reservation Efficiency if you wish to comfortably use all the presented Auras and Spells. These can be found on a Rare Helmet, Jewelry, or Anointed on your Amulet. If you plan to cap your Spell Suppression, you will need to go for the Inveterate notable and gather the remaining 43% from your Rare Items. You can also go for Instinct notable for another 22%.
Our recommended items will:
- Cap your resistances
- Give you enough DPS/Life to start mapping successfully
|
Stat priorities on items:
|
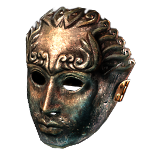 (Helmet) Rare Helmet - The default Life with Resistances will be enough at first, but for an upgrade seek a Corrupted Implicit for extra Power Charge, and some influence mods to deal more damage to nearby Enemies. (Helmet) Rare Helmet - The default Life with Resistances will be enough at first, but for an upgrade seek a Corrupted Implicit for extra Power Charge, and some influence mods to deal more damage to nearby Enemies. |
|
| Min. requirements: +80% Total Elemental Resistances +80 to Maximum Life Optional affixes: Aspect of the Cat Skill +1 to Maximum Power Charges (Corrupted Implicit) Attributes Spell Suppression Chance Nearby Enemies have -#% to Elemental Resistance Nearby Enemies take #% increased Elemental Damage (Shaper's Suffix) |
|
 (Helmet) Heatshiver - You have to Chill and Freeze, so don't use it with Elemental Focus in your Discharge Setup. Use it for more damage. You can also corrupt it for extra Power Charge. (Helmet) Heatshiver - You have to Chill and Freeze, so don't use it with Elemental Focus in your Discharge Setup. Use it for more damage. You can also corrupt it for extra Power Charge. |
|
| (80-100)% increased Evasion Rating 60% increased Mana Regeneration Rate +(20-30)% to Fire Resistance +(20-30)% to Cold Resistance Gain 1% of Cold Damage as Extra Fire Damage per 1% Chill Effect on Enemy Gain 100% of Cold Damage as Extra Fire Damage against Frozen Enemies |
|
| Helmet enchantments: 40% increased Discharge Damage |
|
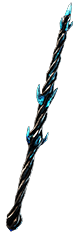
 (Weapon) Void Battery - Two of these will extend your Maximum Power Charge cap and increase your Spell Damage by around 500%. It's the most optimal configuration, but you can also consider wearing a Shield if you lack survivability. (Weapon) Void Battery - Two of these will extend your Maximum Power Charge cap and increase your Spell Damage by around 500%. It's the most optimal configuration, but you can also consider wearing a Shield if you lack survivability. |
|
| (36-40)% increased Spell Damage 80% reduced Spell Damage (10-20)% increased Cast Speed (50-65)% increased Global Critical Strike Chance +(40-50) to maximum Mana +1 to Maximum Power Charges 25% increased Spell Damage per Power Charge |
|
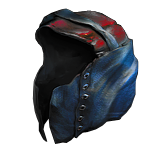
 (Body Armour) Farrul's Fur - It generates all the Charges for you. The Aspect of the Cat is a Skill that you should reduce the duration of to gain Charges with higher frequency. (Body Armour) Farrul's Fur - It generates all the Charges for you. The Aspect of the Cat is a Skill that you should reduce the duration of to gain Charges with higher frequency. |
|
| (100-150)% increased Armour and Evasion +(80-100) to maximum Life Aspect of the Cat has no Reservation +2 seconds to Cat's Stealth Duration Gain up to your maximum number of Frenzy and Power Charges when you gain Cat's Stealth You have Phasing while you have Cat's Stealth |
|
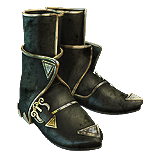 (Boots) Rare Boots - It can be a source of Elusive and Onslaught which are both very beneficial here. Tailwind can enhance your mobility. Other stats worth your attention are Cooldown Recovery, Spell Suppression, Movement Speed, Maximum Life, and Resistances. (Boots) Rare Boots - It can be a source of Elusive and Onslaught which are both very beneficial here. Tailwind can enhance your mobility. Other stats worth your attention are Cooldown Recovery, Spell Suppression, Movement Speed, Maximum Life, and Resistances. |
|
| Min. requirements: 25% Movement Speed +50 to Maximum Life Optional affixes: you have Tailwind if you have dealt a Critical Strike Recently (Hunter's Suffix) chance to gain Onslaught for 4 seconds on Kill (Redeemer's Suffix) chance to gain Elusive on Critical Strike (Redeemer's Prefix) increased Cooldown Recovery Rate (Shaper's Suffix) Resistances Spell Suppression Chance |
|
 (Boots) Replica Inya's Epiphany - Another very good option, given you can become Elusive by using Withering Step, and you don't need Resistances. It grants some damage, a lot of Movement Speed, and Life Regeneration. All of these stats are useful. (Boots) Replica Inya's Epiphany - Another very good option, given you can become Elusive by using Withering Step, and you don't need Resistances. It grants some damage, a lot of Movement Speed, and Life Regeneration. All of these stats are useful. |
|
| +(50-70) to maximum Life Regenerate 0.5% of Life per second per Power Charge (5-8)% increased Intelligence 5% increased Damage per Power Charge 5% increased Movement Speed per Power Charge |
|
 (Gloves) Surgebinders - These Gloves are another source of increased Damage. With 10 Power and Frenzy Charges, it's up to 140% increased Discharge damage. (Gloves) Surgebinders - These Gloves are another source of increased Damage. With 10 Power and Frenzy Charges, it's up to 140% increased Discharge damage. |
|
| (90-110)% increased Armour and Evasion (4-7)% increased Elemental Damage per Frenzy Charge (4-7)% increased Physical Damage per Endurance Charge (4-7)% increased Spell Damage per Power Charge 10% chance to Steal Power, Frenzy, and Endurance Charges on Hit |
|
 (Belt) Rare Belt - The Belt is a great source of Maximum Life, Strength, and Resistances. A Shaper's version may also increase your Cooldown Recovery Rate. (Belt) Rare Belt - The Belt is a great source of Maximum Life, Strength, and Resistances. A Shaper's version may also increase your Cooldown Recovery Rate. |
|
| Min. requirements: +80 to Maximum Life 40 to Strength +70% Total Elemental Resistances Optional affixes: increased Maximum Life increased Cooldown Recovery Rate (Shaper's Suffix) Chaos Resistance Flask modifiers |
|
 (Belt) String of Servitude - "Increased Critical Strike Multiplier During any Flask Effect" is the mod you're looking for in this Belt if you're aiming for a purely DPS-oriented setup. (Belt) String of Servitude - "Increased Critical Strike Multiplier During any Flask Effect" is the mod you're looking for in this Belt if you're aiming for a purely DPS-oriented setup. |
|
| <(1-2) Random corrupted implicit modifiers> Implicit Modifier magnitudes are tripled Level Requirement reduced by 100 (Hidden) Corrupted |
|
 (Amulet) Badge of the Brotherhood - It's the Amulet that allows you to have as many Frenzy Charges as you have Power Charges, which makes it the best-in-slot item. It also increases the effect of Elusive on you by around 100% if you have Frenzy Charges, which should encourage you to get it. (Amulet) Badge of the Brotherhood - It's the Amulet that allows you to have as many Frenzy Charges as you have Power Charges, which makes it the best-in-slot item. It also increases the effect of Elusive on you by around 100% if you have Frenzy Charges, which should encourage you to get it. |
|
| +(16-24) to Dexterity and Intelligence (7-10)% increased Cooldown Recovery Rate of Travel Skills per Frenzy Charge (7-10)% increased Effect of Elusive on you per Power Charge (20-25)% chance to lose a Frenzy Charge when you use a Travel Skill (20-25)% chance to lose a Power Charge when you gain Elusive Your Maximum Frenzy Charges is equal to your Maximum Power Charges |
|
| Recommended Anointments: Throatseeker Champion of the Cause Dreamer |
|
 (Ring) Rare Ring - A Synthesised Ring with +1 to max Power Charges is great but expensive. Look here for Attributes, Resistances, Maximum Life, reduced Mana Cost of Skills, and other, rare modifiers like Life gain on Hit, Crit Multiplier, or Life Regeneration. (Ring) Rare Ring - A Synthesised Ring with +1 to max Power Charges is great but expensive. Look here for Attributes, Resistances, Maximum Life, reduced Mana Cost of Skills, and other, rare modifiers like Life gain on Hit, Crit Multiplier, or Life Regeneration. |
|
| Min. requirements: +70 to Maximum Life +70% Total Resistances Non-Channelling Skills have -7 to Total Mana Cost (Crafted Prefix) Optional affixes: Gain Life per Enemy Hit with Spells (Crusader's Prefix) +1 to Maximum Power Charges (Synthesised Implicit) Global Critical Strike Multiplier Life Regeneration |
|
 (Ring) Precursor's Emblem - These Rings are extremely expensive but can potentially improve your build like no other Rare Ring would. Try to get one with "+1 to Maximum Power Charges". Other useful mods include "+3% to Critical Strike Multiplier per Power Charge", "1% additional Physical Damage Reduction per Charge", "Regenerate 0.3% of Life per second per Charge", "You can apply an additional Curse while at maximum Power Charges". (Ring) Precursor's Emblem - These Rings are extremely expensive but can potentially improve your build like no other Rare Ring would. Try to get one with "+1 to Maximum Power Charges". Other useful mods include "+3% to Critical Strike Multiplier per Power Charge", "1% additional Physical Damage Reduction per Charge", "Regenerate 0.3% of Life per second per Charge", "You can apply an additional Curse while at maximum Power Charges". |
|
| +(12-16)% to Cold and Lightning Resistances 5% increased maximum Energy Shield 5% increased maximum Life +20 to Dexterity and Intelligence <Two Frenzy Charge mods and one Power Charge Mod> or <One Frenzy Charge mod and Two Power Charge Mods> |
|
 (Jewel) Rare Jewels - You can find Jewels with four modifiers for extra Critical Strike Multiplier if you value DPS, but these will be expensive. Try to get some with Maximum Life, Resistances, Reservation Efficiency, or Reduced Mana Cost of Skills. (Jewel) Rare Jewels - You can find Jewels with four modifiers for extra Critical Strike Multiplier if you value DPS, but these will be expensive. Try to get some with Maximum Life, Resistances, Reservation Efficiency, or Reduced Mana Cost of Skills. |
|
| Recommended affixes: Attributes various Critical Stike Multiplier mods increased Maximum Life increased Mana Reservation Efficiency of Skills reduced Mana Cost of Skills |
|
 (Jewel) Large Cluster Jewel - Corrosive Elements can be a source of Exposure, while Doryani's Lesson grants some Leech (which is not very potent in this build, but it's good to have one source of it nonetheless). Look for an Elemental Damage or Spell Damage Cluster Jewel with 8 nodes and 3 Notables. (Jewel) Large Cluster Jewel - Corrosive Elements can be a source of Exposure, while Doryani's Lesson grants some Leech (which is not very potent in this build, but it's good to have one source of it nonetheless). Look for an Elemental Damage or Spell Damage Cluster Jewel with 8 nodes and 3 Notables. |
|
| Recommended affixes: 1 Added Passive Skill is Doryani's Lesson 1 Added Passive Skill is Corrosive Elements 1 Added Passive Skill is Inspired Oppression 1 Added Passive Skill is Widespread Destruction |
|
  (Jewel) Forbidden Flesh & Forbidden Flame - Like Clockwork gives you a 30% increased Cooldown Recovery Rate and you should definitely get it, as the default Cooldown of Discharge i 2 seconds. (Jewel) Forbidden Flesh & Forbidden Flame - Like Clockwork gives you a 30% increased Cooldown Recovery Rate and you should definitely get it, as the default Cooldown of Discharge i 2 seconds. |
|
| Allocates <<Random Ascendancy Notable>> if you have the matching modifiers on Forbidden Flesh Allocates <<Random Ascendancy Notable>> if you have the matching modifiers on Forbidden Flame |
|
 (Jewel) Watcher's Eye - Elemental Penetration with Zealotry, Wrath, or Hatred would be the best. Vitality's pool of modifiers can offer Life on Hit, Life Regeneration, or Life Recovery Rate, all of which are good too. (Jewel) Watcher's Eye - Elemental Penetration with Zealotry, Wrath, or Hatred would be the best. Vitality's pool of modifiers can offer Life on Hit, Life Regeneration, or Life Recovery Rate, all of which are good too. |
|
| (4-6)% increased maximum Energy Shield (4-6)% increased maximum Life (4-6)% increased maximum Mana <Two or Three random aura modifiers> |
|
 (Flask) Atziri's Promise - It grants Chaos Resistance, some Life Leech, and extra Chaos Damage. It can be good if you don't have Leech and low Chaos Resistance. (Flask) Atziri's Promise - It grants Chaos Resistance, some Life Leech, and extra Chaos Damage. It can be good if you don't have Leech and low Chaos Resistance. |
|
| +35% to Chaos Resistance Gain (5-8)% of Elemental Damage as Extra Chaos Damage during effect 2% of Chaos Damage Leeched as Life during Effect Gain (5-8)% of Physical Damage as Extra Chaos Damage during effect |
|
 (Flask) Starlight Chalice - It's a source of Elemental Exposure, which is needed in this build, particularly Cold and Lightning variants. Don't use it if you already have a source of Exposure. (Flask) Starlight Chalice - It's a source of Elemental Exposure, which is needed in this build, particularly Cold and Lightning variants. Don't use it if you already have a source of Exposure. |
|
| +200 to Ward Restores Ward on use (20-30)% increased Charge Recovery Inflict Fire, Cold and Lightning Exposure on nearby Enemies when used (20-30)% increased Effect of Non-Damaging Ailments you inflict during Effect |
|
 (Flask) Progenesis - Progenesis is superb as you already use Petrified Blood and have a high Life Regeneration Rate. It would be better if you could find some Life Recoup on your gear and Skill Tree (Infused Flesh and Vampirism), but it's excellent even without it. (Flask) Progenesis - Progenesis is superb as you already use Petrified Blood and have a high Life Regeneration Rate. It would be better if you could find some Life Recoup on your gear and Skill Tree (Infused Flesh and Vampirism), but it's excellent even without it. |
|
| +35% to Chaos Resistance (20-10)% reduced Charges per use (-35-35)% increased Duration When Hit during effect, 25% of Life loss from Damage taken occurs over 4 seconds instead |
|
|
Other suggested Flasks:
|
|
   |
|
|
If you have any other build requests please leave that in the comments below. We are always open to suggestions and constructive feedback.
Pictures used in this article are the intellectual property of Grinding Gear Games.
