Diablo 4 Season of the Construct Guide
A complete guide for the new Diablo 4 Season of the Construct and all content it introduces.Season of the Construct Guide
Seasonal content in Diablo 4 is a great opportunity to embark on the amazing journey once again. The Season of Constructs introduces a very unique and unprecedented game mechanics, new challenges, new bosses to overcome, and many more! In this comprehensive Guide, we will explain all you need to know to fully engage with it, and why it is worth it!
Overview
During your stay in the world of Sanctuary in the Season of Construct, you can explore the forgotten Vaults of the Zoltun Kulle, a famous Horadrim scientist introduced in Diablo 3. You shall not travel alone, as you will get your private and loyal companion, the Seneschal. It is a construct made with arcane energy, which you can raise to be a powerful and useful ally on the battlefield. You will explore the Vaults where you will face many dangerous traps, which you will have to avoid in order to be rewarded with amazing rewards at the end of the dungeon. Most activities are locked behind the Seasonal Questline, so make sure to complete it first.
Vaults
Vaults are the primary content of the new Season. You will spend most of your time conquering regular Vaults, or their upgraded version, Nightmare Vaults. You can't farm them endlessly - you need to gather specific resources first. Fortunately, they are rather easy to obtain, and you can accumulate them for a long playing session. The first materials you need are the Elemental Core and Shattered Stones. Obtaining Elemental Cores is very easy - you just need to interact with various Voltaic Obelisks scattered inside the region affected by seasonal Arcane Tremor, which you can recognize by the green seasonal Lead icon on the map. Collecting Shattered Stones is even easier, as you get them by defeating Construct Enemies.
The next step is finding the Voltaic Braziers. They also can be found in areas affected by Arcane Tremors, just like the Obelisks. You will need 3 Elemental Cores and 50 Shattered Stones to begin the mini-event, during which you will summon waves of enemies, finishing with a Herald of Malphas mini-boss fight. The Heralds can drop various Stones needed for your companion, as well as the Pearls of Warding. Later in the game, you will find other ways of obtaining those Pearls, but at the beginning, we recommend spending some time accumulating them to avoid interrupting your flow.
But why do you need the Perals of Warding you ask? At the entrance of the Vault, you will find a statue of Zoltun Kulle. You can exchange 1 Pearl to gain 10 stacks of Zoltun's Warding. You will need them to open chests at the end of every Vault, and you lose 1 charge when you are struck by a trap inside the Vault. If you lose too many stacks, you won't be able to get all the rewards. The Wardwoven Chest can be opened by spending up to 10 Zoltun's Warding at World Tier 4. It will drop tons of valuable loot, including Legendary Items, Stones for your Companion, or more Pearls of Warding. You will also be able to open a lesser chest, for a lesser cost. Avoiding the traps can be tedious at first, but you should quickly learn their patterns and be able to easily complete the Vaults without worrying too much about your Warding stacks at all.
The Pearls of Warding can be also used to craft the Nightmare Vault Sigils, which are the Seasonal counterpart of the regular Nightmare Dungeons. You can craft them at the Occultist NPC, just like the usual Nightmare Dungeon Sigil. In those Nightmare Vaults you will face more challenging enemies and more difficult traps, but also get rewarded with more EXP and better loot.
| SEASONAL CONSUMABLES | |||||
 |
 |
 |
 |
||
|---|---|---|---|---|---|
| Pearl of Warding | Elemental Core | Shattered Stone | Igneous Core | ||
Echo of Malphas
The Gatehall is a central hub for all your seasonal adventures. You will find 5 Vault entrances there, and one of them is unlike the others. It is the Vault of the Loom. There you will be challenged with even more traps and enemies to defeat, and at the end of it, you will encounter the Malphas, the main boss of this Season. To enter this Vault you will need 7 Igneous Cores and 250 Shattered Stones. There are 3 ways to obtain the Igneous Cores:
- Defeat the Herald of Malphas Elites, found at the Braziers.
- Defeat Son of Malphas, which can randomly spawn in your regular Vault journeys, or during events in the open world affected by Arcane Tremors.
- You can buy them from other players. You can check out offers at our Diablo 4 Marketplace for quick and safe trades.
You will face this Boss during the Seasonal Questline, we recommend taking your time learning his Attacks there. The Boss himself remains stationary during the entire fight and summons towers that cause corresponding trap effects on the arena. The Uber version is much more challenging, so being accommodated to his Skills will greatly improve your success rate. The Zoltun's Warding mechanic is also present here, we recommend getting at least 50 Stacks before you start the fight to ensure maximum rewards. The fight is not particularly hard, but you can lose some Warding stacks during the final fight too. If you struggle with this fight too much, try to focus on the towers as soon as they appear, or gear up your character through the Uber Duriel farming, which we covered in our Uber Boss Guide.
The rewards coming from this Boss are different than other Bosses, as you will rarely care about Gear pieces that drop there. What you aiming for are the Unique Tuning Stones available only from this encounter, called Evernight and Genesis. You can get them from the Boss, or from the final Chests, so make sure you always have enough Warding to open them. Those Stones are extremely powerful but the drop rate is accordingly low, so you will need to repeat this encounter many times. There is no reason to continue farming this Boss after you get both Stones, you can sell your excessive Igneous Cores to other players.
Seneschal Companion
During your journeys, you will be accompanied by an ancient construct, Seneschal. You can adjust and improve its behavior by using relevant Stones. There are two types of Stones: Governing Stones and Tuning Stones. The Governing Stones affect which abilities your Companion can use, and you can use only 2 of them at once. The Tuning Stones provide a variety of useful modifiers and buffs to selected Skills, it is possible to choose 6 of them. Obtaining the Stones is very simple - you just have to participate in Seasonal content. You can drop them from the Vaults and other events, or kill Construct enemies to obtain Shattering Stones, which you can use to craft specific Stones. Each Stone has up to 10 Ranks, which increases their effect. The Unique Evernight and Genesis Stones have only 1 Rank but are much harder to acquire. To Rank up your Stones you simply have to find or craft their duplicates and fuse them together. Fully unlocking the potential of your Companion used to take a long time, but after the recent Update, it is fairly easy.
There are a total of 12 Governing Stones and 27 Tuning Stones you can obtain, allowing for great customization of your pet. Obviously, some combinations are better than others, but you should adjust them to your preferred playstyle, as swapping them is a matter of a few clicks. At first, it will be quite underwhelming, but as you Rank up your Stones it will become a very powerful ally. There are two major approaches to the Seneschal, you can boost its raw Damage output, or make use of various Buffs he can provide to make you stronger.
The most popular choice is the Flash of Adrenaline Governing Stone. You can use the Duration Support and Tactical Support to make it a Pernament Buff for your Character that increases your total Damage by 20%. If you happen to get the Genesis Support from the Uber Malphas, the Buff will improve your Damage by 50%!
The second best Ability is the Tempest. It doesn't deal much damage, but it has great AoE Coverage. You should further supplement it with Tuning Stones such as Bleeding Support or Burning Support to apply certain debuffs on your Enemies. It won't deal much Damage, but you can make use of certain Passives or Items to deal more Damage by yourself.
List of all Governing Stones Effects
Lastly, we present you a list of all Governing Stones available in the game. Collecting and upgrading all of them might take you some time, but they provide very useful boons for your character, so it is definitely worth the effort.
| Name | Icon | Effect |
|---|---|---|
| Autodefense | 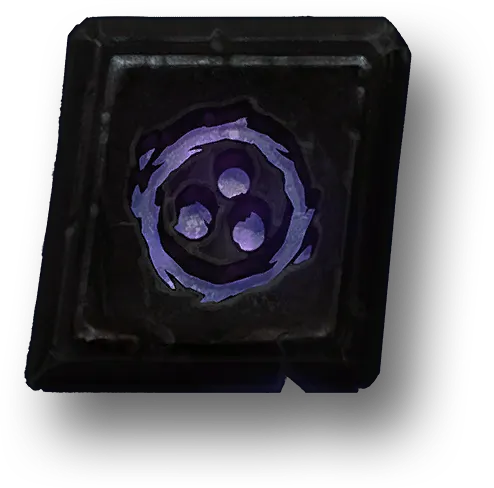 |
The Seneschal Construct activates an antimaterial field around itself, shooting down up to 30 enemy projectiles. Cannot shoot down Boss or Player projectiles. |
| Bushwhack |  |
Quickly ambush up to 2 enemies, dealing damage to each target. May strike the same target multiple times. |
| Firefly |  |
Deploy a small construct that lands on the target and explodes three times, dealing damage. |
| Flash of Adrenaline |  |
Administers a quick flash of adrenaline into the player, increasing damage dealt by 20% for 8 seconds. |
| Focus Fire |  |
The Seneschal Construct channels a ray of fire onto targets, dealing damage to each over time. |
| Gyrate |  |
The Seneschal Construct whirls its legs around quickly, dealing damage to all surrounding enemies. |
| Impale |  |
Perform a line attack to all enemies in front of the Seneschal Construct, dealing damage. |
| Lightning Bolt |  |
Launch a bolt of lightning at the target, dealing damage. Arcs to other targets, dealing a portion of the original damage. |
| Protect |  |
The Seneschal Construct materializes a protective barrier on the player for a portion of their Maximum Life. |
| Reconstruct |  |
The Seneschal Construct channels a reconstruction beam, healing the player for a portion of their Maximum Life over time. |
| Slash |  |
Pummel enemies in front of the Seneschal Construct, dealing damage. |
| Tempest |  |
Electrically charge an enemy, causing it to deal damage to themselves and additional enemies each second over time. If the enemy is killed, Tempest spreads to another enemy, gaining additional time and bonus damage. These bonuses are also applied if Tempest is reapplied to the same enemy. |
List of all Tuning Stones Effects
There are 27 Tuning Stones to choose from. Their effects are rather straightforward, we encourage you to experiment with your setup to find what suits you the most.
| Name | Icon | Effect |
|---|---|---|
| Evernight Support |  |
The supported Skill grants you +4 to all Skills when used for 2.0 seconds. |
| Genesis Support |  |
Increase the effectiveness of supported Skills by 150%. |
| Voluminous Support |  |
The supported skill's effect size is increased. |
| Swift Support |  |
The supported Skill gains an Attack Speed bonus. |
| Breaking Support |  |
Damage from the supported Skill instantly destroys enemy Barrier effects. In addition, there is a chance to make enemies Vulnerable for 2 seconds. |
| Tactical Support |  |
Decrease the cooldown of the supported Skill. |
| Efficiency Support |  |
When the supporting skill deals damage, you gain a Critical Strike Chance to the same target hit. |
| Devastation Support |  |
Supported Skill gains a Critical Strike Damage bonus. |
| Safeguard Support |  |
When used, the supported Skill grants Damage Reduction to you. |
| Frigid Support |  |
A portion of the supported Skill's damage dealt is applied as Cold damage over time and applies Chill. |
| Burning Support |  |
A portion of the supported Skill's damage is applied as Burning damage over time. Burning enemies take bonus Critical Strike Damage from the Seneschal Construct. |
| Electrocution Support |  |
A portion of the supported skill's damage dealt is applied as Lightning damage over time and has a chance to Stun enemies. |
| Bleeding Support |  |
A portion of the supported skill's damage dealt is applied as Bleeding damage over time. Enemies take bonus Bleeding damage from all sources while moving. |
| Poison Support |  |
A portion of the supported skill's damage dealt is applied as Poison damage over time. This poison has a chance each second to spread all Poison damage to an additional enemy. |
| Dusk Support |  |
A portion of the supported Skill's damage dealt is applied as Shadow damage over time. Afflicted enemies who attack have a chance for their attacks to be interrupted. Does not interrupt Bosses. |
| Duration Support |  |
Supported Skills have their durations increased. |
| Fortify Support |  |
When the Seneschal Construct uses the supported Skill, you gain Fortify. Skills with slower attack speeds or skills with cooldowns will increase the amount of Fortify granted. |
| Resource Support |  |
Player gains an amount of Primary Resource when the supporting Skill first deals damage. |
| Initiative Support |  |
The supported Skill will cause the Seneschal Construct to teleport to the target if out of range. Can only occur once every so often seconds. |
| Arcing Support |  |
The supported Skill can hit additional enemies. |
| Multishot Support |  |
Supported Projectile skills launch additional projectiles. |
| Piercing Support |  |
The supported Projectile Skill will pierce multiple enemies. |
| Gripping Support |  |
Damage and effects done by the supporting Skill to Distant enemies pulls them towards the Seneschal Construct. Can only occur once every so often per enemy. |
| Registered Damage Support |  |
Any damage caused from the supported Skill is registered. The registered damage explodes at effectiveness when the target dies as Fire damage. |
| Seeking Support |  |
The supported Projectile Skill will auto-seek enemies for a limited duration. |
| Slowing Support |  |
Damage from the supported Skill Slows enemy movement speed for a limited duration. The closer the enemy is to the Seneschal Construct, the greater the Slow amount. Enemies may be slowed up to a maximum amount. |
| Mockery Support |  |
Damage done by the supporting Skill Taunts enemies hit for a limited duration of time. This can only occur once every so often per enemy. Does not work on bosses. |
|
END NOTE This is our complete Guide on Diablo 4's third Season - Season of the Construct. We hope you find it informative, and if you are interested in more similar content, let us know in the comments below! On the other hand, if you have other Guide or Article requests for Diablo IV, please leave them below as well. We will be happy to cover the most popular topics quicker. Also, we hope that you have found this guide useful and informative. Also, we will be happy to receive constructive criticism that will help us improve our future work, so don't hesitate to give us your feedback. |
Pictures used in this article are the intellectual property of Blizzard Entertainment