
Cospri's CoC Ice Nova/Glacial Cascade Assassin build - Odealo's Crafty Guide
One of the fastest map-clearing builds in Path of Exile based on the powerful Cospri's Malice SwordCospri's CoC
Ice Nova/Frostbolt
Assassin build
Updated for Patch 3.25
The Best Crafty Guides by Odealo
| Guide notes |
| August 31, 2024 -Updated for Patch 3.25 |
| Build overview | |||
| Tags: [ELEMENTAL] [TRIGGER] [ENERGY SHIELD] [CRIT] | |||
|
Budget: Defenses: |
|
Boss DPS: AoE: |
|
This build is focused mainly on triggering Ice Nova and Frostbolt with Cyclone, but it fits all kinds of Cold spells really well, so if you prefer to play Glacial Cascade or Freezing Pulse, you don't need to change anything except the desired Spell Gems. The Ice Nova of Frostbolts can trigger from 4 Frostbolt Projectiles each time it is used. By properly increasing the Area of Novas and being in Melee Range, you will easily Hit your opponents with each of those Novas, making it a very powerful Skill. For the basic, the only required Item in this build is Cospri's Malice, but to push your Damage and survivability via additional Auras you will need the Shavrone Wrappings Armour that allows you to safely Reserve all your Life away.
With Cast on Crit, you don't need any Cast Speed, but you have to balance your Attack Speed properly. If you have at least a 14% increased Cooldown Recovery Rate on your Gear you will need just a bit under the 7.57 Attacks Per Second on your Cyclone. Exceeding this number will result in "empty" Hits that can't trigger the Ice Nova yet. The next breakpoint requires a 52% Cooldown Recovery Rate, which is easy to acquire, but can be costly. The Awakened Cast on Critical Strike Support at level 5, with the Critical Mastery to increase Critical Gem levels by 3, grants you a 31% Cooldown Recovery Rate. To make use of this upgrade you will also need lots of increased Attack Speed modifiers, as now the limit is 10.1 Attacks per second.
The Build can be played as a Life-based and Energy Shield variant. The Life version is simpler and stronger at a low budget, but Energy Shield becomes supreme as you obtain better Items. It can obtain more maximum ES than the Life version could, and it is easier to gain Stun Immunity, Elemental Avoidance, Chaos Resistances, and Leech. Being on Low Life also enables the Paint Attunement Keystone for more Damage.
When dealing with Cast on Critical Strike setups, you have to take care of many different aspects. You need to cap your Hit Chance and Critical Strike Chance for Attacks and Spells and adjust your Attack Speed for the optimal trigger rate. Mana is also quite hard to harness, as you will trigger 7 Spells per Second, which you can push up to 10 Casts with a higher budget. You also will need the usual Resistances, Attributes, and basic defenses on your Gear.
You can also find our other Path of Exile builds right over here: Odealo's Crafty Guides - Full List
1. Gameplay
The gameplay is pretty straightforward - you Cyclone into packs of monsters and trigger all your socketed Cold Spells. It's one of the most satisfying and fastest map-clearing builds in the game, thanks to cold explosions and ice projectiles flying all over the screen. Getting proper Attack Speed is vital versus Bosses, as going over the limit may cause you to lose valuable triggers.
|
|
|
|

2. Build's PROS & CONS
| PROS |
|
| CONS |
|
3. Leveling tips
You should level up using the Ice Novas as a Spell Caster, it will save you a lot of trouble and is decently good on its own. You will need most of your final Gear equipped to solve all problems with reliably triggering Novas at an optimal rate. The unoptimized Life-based version will be good enough to clear easy Maps and level up your Character when you just reached Maps.
Suggested leveling Gem setups:
| Ice Nova of Frostbolts setup | |
 |
Ice Nova of Frostbolts - your primary Skill used in this Build, at the beginning you should Cast it manually. |
 |
Added Cold Damage Support - adds a lot of additional Cold damage for your Spells. |
 |
Arcane Surge Support - improves your Spell Damage, Cast Speed, and Mana Regeneration Rate. |
 |
Faster Casting Support - improves your Cast Speed. |
 |
Spell Echo Support - repeats your Casts, which works very well with the Ice Nova expanding automatically on your Frostbolts. |
 |
Increased Critical Strikes Support - improves your Chance to deal Critical Strike. |
| Frostbolt setup | |
 |
Frostbolt - shots an icy Projectile that can be used by Ice Nova to deal more Damage. |
|
Lesser Multiple Projectiles Support - adds additional Projectiles for your Frostbolt. At level 38 you can upgrade it to a stronger variant. |
|
Faster Casting Support - improves your Cast Speed with this utility setup. |
| Utility Gems | |
 |
Clarity - a necessary Aura to sustain your Spell Casts. |
 |
Herald of Ice - additional Cold Damage and Ice Explosions that shatter whole packs of monsters |
 |
Vitality - very useful defensive Aura that improves your Life Regeneration. |
 |
Flame Dash - your primary mobility skill, allows you to cross all terrain gaps in the game. |
Bandits:
We recommend killing all the Bandits for two additional Passive Points or helping Alira if you prefer additional Critical Strike Multiplier and making it easier to cap Elemental Resistances and sustain Mana Costs.
Leveling Skill Trees:
Energy Shield setups require end-game Items to function, during the campaign you should focus on the Life version.
43 Points Skill Tree
Pick up nearby Life and Mana Notables to have smooth campaign. You can start focusing on Critical Strikes very early.
77 Points Skill Tree
You can start picking up the Power Charge Notables, and all the maximum Life and Critical Strike bonuses on your way there.
Recommended leveling items:
 Wanderlust - very good Boots for Casters, they improve your Mana Regeneration Rate and grant immunity to Freeze. Wanderlust - very good Boots for Casters, they improve your Mana Regeneration Rate and grant immunity to Freeze. |
|
| +5 to Dexterity +(10-20) to maximum Energy Shield (20-40)% increased Mana Regeneration Rate 20% increased Movement Speed Cannot be Frozen |
|
 Karui Charge - a very good Amulet for leveling purposes. It grants useful Attributes and Movement Speed, which is very hard to obtain outside your boots. Karui Charge - a very good Amulet for leveling purposes. It grants useful Attributes and Movement Speed, which is very hard to obtain outside your boots. |
|
| +(20-30) to Dexterity +(20-30) to Strength (5-10)% increased Attack Speed +100 to Accuracy Rating 30% increased Projectile Speed 10% increased Movement Speed 30% increased Projectile Damage |
|
 Goldrim - the best Helmet for leveling, it makes capping your Resistances much easier Goldrim - the best Helmet for leveling, it makes capping your Resistances much easier |
|
| +(30-50) to Evasion Rating 10% increased Rarity of Items found +(30-40)% to all Elemental Resistances Reflects 4 Physical Damage to Melee Attackers Level Requirement reduced by 100 (Hidden) |
|
 Tabula Rasa - very powerful Armour that lets you use a Six-link setup very early. Tabula Rasa - very powerful Armour that lets you use a Six-link setup very early. |
|
| Item has no level requirement and Energy Shield (Hidden) Item has 6 White Sockets and is fully linked (Hidden) |
4. Final Skill Tree, Ascendancy Points, and Pantheon
Final Skill Tree:
Life version for early-game:
118 Points Skill Tree (does not include Cluster Jewels nor Thread of Hope)
118 Points Path of Building (PoB) link
Low-life version for end-game:
120 Points Skill Tree (does not include Cluster Jewels nor Thread of Hope)
120 Points Path of Building (PoB) link
Ascendancy points:
Preferably in that order:
- Unstable Infusion
- Deadly Infusion
- Opportunistic
- Mistwalker
Pantheon:
Major God: Soul of Arakaali: 10% reduced Damage taken from Damage Over Time; +40% Chaos Resistance against Damage Over Time
Minor God: Soul of Ralakesh: 25% reduced Physical Damage over Time taken while moving; Moving while Bleeding doesn't cause you to take extra Damage
5. Final Gems links
| [DPS] Cyclone/Ice Nova setup | |
 |
Cyclone - this is our main skill gem, that will cast linked Sells and Spells socketed in Cospri's Malice on Critical Strikes. |
|
Ice Nova of Frostbolts - this is our main Damage-dealing Spell. It has great both single target and AoE damage. You need the Transfigured variant to expand on your Frostbolts for additional Damage. |
 |
Cold Penetration Support - allows you to penetrate the Cold Resistances of your foes, significantly improving your Damage against durable Enemies. |
| Cast on Critical Strike Support - the most important gem in this setup. It will cast linked spells on Critical Strikes dealt by Cyclone. The Awakened Version has higher potential but requires higher investments to be effective. | |
 |
Added Cold Damage Support - adds high base Cold Damage to linked Spells. It's best to use an Awakened version of this Gem as it increases the Ice Nova Level by 1. |
 |
Inspiration Support - reduces the Mana Cost of Cyclone and grants a high DPS bonus by increasing Elemental Damage and Critical Strike Chance. |
| [DPS] Frostbolt setup (Cospri's Malice) |
|
 |
Frostbolt - you will greatly improve your Damage of Ice Novas if you use them on Frostbolts. Use the Cospri Malice to automate this process. |
 |
Greater Multiple Projectiles Support - adds additional Projectiles for better area cover. |
|
Inspiration Support - lowers the Mana Cost of this Setup. You can also use the Life Leech Support if you are using the Life variant. |
| {UTILITY] Auras setup (Prism Guardian) |
|
 |
Hatred - a very strong offensive Aura that increases Cold Damage you deal with Cold Spells. You will need at least 2% global Reservation Efficiency on your Gear to use all 3 Auras. |
 |
Purity of Elements - grants Elemental Resistances and makes you immune to Elemental Ailments. If you have enough Resistance on your Gear, you can use Zealotry for more Damage. |
 |
Grace - the main defensive layer of this Build is Evasion, which this Aura boosts. |
| {UTILITY] Auras setup | |
 |
Herald of Ice - adds a bit of Cold Damage and creates ice explosions when you Shatter an Enemy. Skip this Skill if you don't have dual Enlighten Supports. |
 |
Precision - improves your Accuracy Rating and Critical Strike Chance. |
 |
Discipline - grants a lot of Energy Shield, and makes it faster to Recharge. Use the Vaal Version to make Recharge uninterruptible. |
 |
Enlighten Support - lowers the Mana Reservation of all linked Auras. |
| {UTILITY] Auras setup | |
|
Clarity - a mandatory Aura to boost your Mana Regeneration Rate. You won't trigger Ice Novas if you can't pay their Mana Cost. |
 |
Summon Skitterbots - creates 2 Minions that apply Chill and Shock to nearby Enemies. |
| Bonechill Support - Enemies Chilled by your Skitterbots will take increased Cold Damage based on the amount of Chill. | |
 |
Unbound Ailments Support - if you don't use Herald of Ice, you can boost the Chill and Shock effect of your Skitterbots with this Gem. |
|
Enlighten Support - lowers the Mana Reservation of all linked Auras. |
| [UTILITY] Mark setup | |
 |
Assassin's Mark - a Mark that greatly improves your Critical Strike Chance and Damage against Rare and Unique Enemies. |
 |
Mark on Hit Support - applies linked Mark to Enemies you Hit with any Attack, but at reduced effectiveness. |
| [UTILITY] Other Utility setup | |
 |
Frostbite - Curse that lowers the Cold Resistance of your Opponents. You will need to anoint Whispers of Doom on your Amulet to use it. |
 |
Frostblink - this Movement Skill can be used without interrupting your Cyclone and will deal plenty of Damage on its own. |
|
|
5. Gear Setup
Most Unique Items used in this Build are rather cheap, but you can aim for certain Corrupted Implicit that will greatly increase their power as well as their price. On your Rare Gear, you will need a lot of Elemental Resistances, Attributes, and Accuracy Ratings just to get started. To improve your Damage you will also need Critical Strike Chance and Multiplier, Spell Damage, Cooldown Recovery Rate, and Attack Speed. The Life variant will require you to have maximum Life bonuses and a way to Avoid Ailments, and a bit of Energy Shield to cast your Spells using the Eldritch Battery. The Low-Life version requires a higher Energy Shield and Mana Regeneration on your Items. The Life modifiers are also useful since you Convert part of it into an Energy Shield.
|
Stat priorities on items:
|
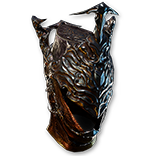 (Helmet) Crown of the Inward Eye - improves your Energy Shield, and your bonuses to Mana and Energy Shield are applied to your Spell Damage at 30% Effectiveness. Try to get a Corrupted version with an additional Power Charge. (Helmet) Crown of the Inward Eye - improves your Energy Shield, and your bonuses to Mana and Energy Shield are applied to your Spell Damage at 30% Effectiveness. Try to get a Corrupted version with an additional Power Charge. |
|
| 333% increased Armour and Energy Shield (9-21)% increased maximum Life, Mana and Global Energy Shield Transfiguration of Soul Transfiguration of Body Transfiguration of Mind |
|
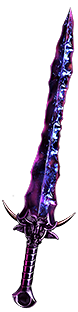 (Weapon) Cospri's Malice - Mandatory item for this build. Try to get the highest Attack Speed and flat Cold Damage to Spells as possible. It is used to automate Frostbolt Setup. You can Corrupt it to gain even more Attack Speed or Penetrate Elemental Resistance. (Weapon) Cospri's Malice - Mandatory item for this build. Try to get the highest Attack Speed and flat Cold Damage to Spells as possible. It is used to automate Frostbolt Setup. You can Corrupt it to gain even more Attack Speed or Penetrate Elemental Resistance. |
|
| +25% to Global Critical Strike Multiplier Trigger a Socketed Cold Spell on Melee Critical Strike, with a 0.25 second Cooldown No Physical Damage Adds (80-100) to (160-200) Cold Damage Adds (40-60) to (90-110) Cold Damage to Spells (8-14)% increased Attack Speed +257 Intelligence Requirement 60% increased Critical Strike Chance against Chilled Enemies |
|
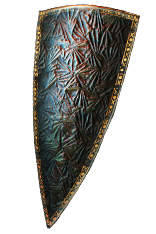 (Weapon) Prism Guardian - use this Shield so that you can use an additional three Auras at the cost of your Life - the build is ES-focused so that won't be an issue. If you have enough Resistances, you can get one that redirects a portion of the Physical Damage to be taken as Elemental. (Weapon) Prism Guardian - use this Shield so that you can use an additional three Auras at the cost of your Life - the build is ES-focused so that won't be an issue. If you have enough Resistances, you can get one that redirects a portion of the Physical Damage to be taken as Elemental. |
|
| +12% to all Elemental Resistances +2 to Level of Socketed Aura Gems Socketed Gems Cost and Reserve Life instead of Mana Socketed Gems have 30% increased Reservation Efficiency +(20-30) to Dexterity +25% to all Elemental Resistances |
|
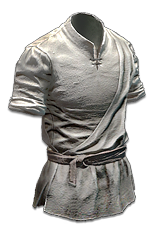
 (Body Armour) Shavronne's Wrappings - it is a necessary Item to Reserve your Life without the worry about Chaos damage. You should get one with +2 levels to socketed AoE Gems and link it using Tainted Currency. (Body Armour) Shavronne's Wrappings - it is a necessary Item to Reserve your Life without the worry about Chaos damage. You should get one with +2 levels to socketed AoE Gems and link it using Tainted Currency. |
|
| (3-10)% increased Spell Damage (100-150)% increased Energy Shield 10% faster start of Energy Shield Recharge +(30-40)% to Lightning Resistance Reflects 1 to 250 Lightning Damage to Melee Attackers Chaos Damage does not bypass Energy Shield |
|
 (Body Armour) Carcass Jack - if you want to level up using a Life-based version, you can use this Armour to get lots of Area Damage and Radius. It also can be corrupted for +2 Gem Levels. (Body Armour) Carcass Jack - if you want to level up using a Life-based version, you can use this Armour to get lots of Area Damage and Radius. It also can be corrupted for +2 Gem Levels. |
|
| (120-150)% increased Evasion and Energy Shield +(50-70) to maximum Life +(9-12)% to all Elemental Resistances (40-50)% increased Area of Effect (40-50)% increased Area Damage Extra gore |
|
 (Boots) Rare Boots - Movement Speed, Energy Shield, Elemental Resistances, and Dexterity are commonly found here. You can easily obtain a bit of Cooldown Recovery Rate using Eldritch Implicits, or use Crusader or Shaper Influence to gain higher values of that modifier. (Boots) Rare Boots - Movement Speed, Energy Shield, Elemental Resistances, and Dexterity are commonly found here. You can easily obtain a bit of Cooldown Recovery Rate using Eldritch Implicits, or use Crusader or Shaper Influence to gain higher values of that modifier. |
|
| Min. requirements: 150+ total Energy Shield 80% Total Elemental Resistances 25% increased Movement Speed Optional affixes: % chance to gain Onslaught for 4 seconds on Kill % increased Cooldown Recovery Rate Dexterity |
|
 (Belt) Rare Belt - Stygian Vise grants Abyss socket and allows you to use one more jewel, while Crystal Belt grants more Energy Shield. You can craft up to 12% Cooldown Recovery Rate on any Belt using a Crafting Bench. Going over 14% total Cooldown Recovery Rate has no effect until you reach the 52% threshold. (Belt) Rare Belt - Stygian Vise grants Abyss socket and allows you to use one more jewel, while Crystal Belt grants more Energy Shield. You can craft up to 12% Cooldown Recovery Rate on any Belt using a Crafting Bench. Going over 14% total Cooldown Recovery Rate has no effect until you reach the 52% threshold. |
|
| Min. requirements: +40 to maximum Energy Shield 80% Total Elemental Resistances +40 to Strength Optional affixes: Attributes % increased Cooldown Recovery Rate |
|
 (Belt) Abyss Jewel - you will need at least one Corrupted Jewel with 2% Reservation Efficiency, and this Jewel is the best one to sacrifice. You can get a bit of Life, a Critical Strike Multiplier, lacking Resistances and Attributes, or Attack Speed here. It can also provide a little bit of Cooldown Recovery Rate. (Belt) Abyss Jewel - you will need at least one Corrupted Jewel with 2% Reservation Efficiency, and this Jewel is the best one to sacrifice. You can get a bit of Life, a Critical Strike Multiplier, lacking Resistances and Attributes, or Attack Speed here. It can also provide a little bit of Cooldown Recovery Rate. |
|
| Min. requirements: +30 to maximum Energy Shield 2% increased Reservation Efficiency of Skills Optional affixes: Attributes % increased Attack Speed if you've dealt a Critical Strike Recently Resistances Regenerate # Mana per second % increased Cooldown Recovery Rate Critical Strike Multiplier |
|
 (Amulet) Presence of Chayula - You won't need your Life as it's an ES build, this Amulet suits such builds the best - it increases your ES, Attributes, Chaos Resistance, and grants Stun immunity. You can use Catalysts to boost either Chaos Resistance or Life conversion. (Amulet) Presence of Chayula - You won't need your Life as it's an ES build, this Amulet suits such builds the best - it increases your ES, Attributes, Chaos Resistance, and grants Stun immunity. You can use Catalysts to boost either Chaos Resistance or Life conversion. |
|
| +(10-16) to all Attributes 30% increased Rarity of Items found +60% to Chaos Resistance Cannot be Stunned 20% of Maximum Life Converted to Energy Shield |
|
| Recommended Anointments: Whispers of Doom |
|
 (Ring) Rare Ring - there are many valuable modifiers obtainable on your Ring. You can get missing Attributes, Resistances, Accuracy Rating, Critical Strike Chance and Multiplier, as well as some Energy Shield or minimum Frenzy and Endurance Charges. It should have one open Prefix so you add Mana Cost reduction with your Crafting Bench. (Ring) Rare Ring - there are many valuable modifiers obtainable on your Ring. You can get missing Attributes, Resistances, Accuracy Rating, Critical Strike Chance and Multiplier, as well as some Energy Shield or minimum Frenzy and Endurance Charges. It should have one open Prefix so you add Mana Cost reduction with your Crafting Bench. |
|
| Min. requirements: Non-Channelling Skills have -7 to Total Mana Cost +50% total Elemental Resistance +40 to Dexterity or Strength Optional affixes: Attributes % increased Attack Speed % increased Mana Regeneration Rate % to Global Critical Strike Multiplier +# to maximum Energy Shield Accuracy Rating |
|
 (Ring) Circle of Fear - it is a very strong Ring to boost your Damage, but it is worth giving up on the Rare Ring only if you get a very good Synthesis Implicit here. (Ring) Circle of Fear - it is a very strong Ring to boost your Damage, but it is worth giving up on the Rare Ring only if you get a very good Synthesis Implicit here. |
|
| +(20-30)% to Cold Resistance +(20-30) to Dexterity Adds (20-25) to (26-35) Cold Damage +(20-30)% to Cold Resistance <Random Herald of Ice modifier> (40-60)% increased Cold Damage while affected by Herald of Ice Herald of Ice has (40-60)% increased Buff Effect |
|
 (Gloves) Rare Gloves - here you can find many powerful offensive modifiers that increase your Damage under certain conditions. Those should also provide you with a high amount of Attack Speed, Resistance, and Energy Shield. (Gloves) Rare Gloves - here you can find many powerful offensive modifiers that increase your Damage under certain conditions. Those should also provide you with a high amount of Attack Speed, Resistance, and Energy Shield. |
|
| Min. requirements: 150+ total Energy Shield 50% Total Elemental Resistances 14% increased Attack Speed Optional affixes: Accuracy Rating Attributes % increased Damage while Leeching % increased Damage with Hits against Chilled Enemies % increased Damage during any Flask Effect % increased Elemental Damage if you've dealt a Critical Strike Recently |
|
 (Jewel) Militant Faith - This allows you to benefit from Inner Conviction that greatly boosts your Spell damage for each active Power Charge. Transform The Agnostic Keystone on the left side of the Skill Tree. You can still use Frenzy Charges if you have sources of Minimum Charges. (Jewel) Militant Faith - This allows you to benefit from Inner Conviction that greatly boosts your Spell damage for each active Power Charge. Transform The Agnostic Keystone on the left side of the Skill Tree. You can still use Frenzy Charges if you have sources of Minimum Charges. |
|
| Carved to glorify (2000-10000) new faithful converted by High Templar (Avarius-Dominus-Maxarius) Passives in radius are Conquered by the Templars Historic <two random mods of devotion> |
|
 (Jewel) Watcher's Eye - a very good Jewel that grants you bonuses based on the Auras you use. In this Build we use many Auras, so you should look for at least 2 useful modifiers, but 3 of them should be approachable too. (Jewel) Watcher's Eye - a very good Jewel that grants you bonuses based on the Auras you use. In this Build we use many Auras, so you should look for at least 2 useful modifiers, but 3 of them should be approachable too. |
|
| (4-6)% increased maximum Energy Shield (4-6)% increased maximum Life (4-6)% increased maximum Mana <Two or Three random aura modifiers> Recommended Aura modifiers: +(1.2-1.8)% to Critical Strike Chance while affected by Hatred Adds (58-70) to (88-104) Cold Damage while affected by Hatred (10-15)% increased Attack Speed while affected by Precision Gain (20-30) Energy Shield per Enemy Hit while affected by Discipline +(20-30)% to Critical Strike Multiplier while affected by Precision Gain a Flask Charge when you deal a Critical Strike while affected by Precision |
|
 (Jewel) Thread of Hope - use one with a Large Ring and put it next to Instability so that you can allocate Heart of Ice, Arcane Focus, Essence Surge, and Blast Radius. (Jewel) Thread of Hope - use one with a Large Ring and put it next to Instability so that you can allocate Heart of Ice, Arcane Focus, Essence Surge, and Blast Radius. |
|
| Only affects Passives in Large Ring Passives in Radius can be Allocated without being connected to your tree -(20-10)% to all Elemental Resistances |
|
 (Jewel) Rare Jewels - all Jewels should provide extra Energy Shield and at least one Critical Strike Multiplier amplification mod. You can also get an Accuracy Rating, missing Resistances and Attributes, Bleed Avoidance, or Spell Damage. The Mana Reservation Efficiency doesn't affect the Auras you Reserve with your Life, but you can get global Reservation Efficiency via Corruption. (Jewel) Rare Jewels - all Jewels should provide extra Energy Shield and at least one Critical Strike Multiplier amplification mod. You can also get an Accuracy Rating, missing Resistances and Attributes, Bleed Avoidance, or Spell Damage. The Mana Reservation Efficiency doesn't affect the Auras you Reserve with your Life, but you can get global Reservation Efficiency via Corruption. |
|
| Recommended affixes: maximum Energy Shield Critical Strike Multiplier for Spells or Cold/Elemental Skills Global Critical Strike Multiplier Attributes Elemental Resistances |
|
 (Jewel) Large Cluster Jewels - get yourself a couple of Cold-related Cluster Jewels or general Elemental Damage or Resistances with eight Passives. The Blast-Freeze is very useful Notable for improving your survivability during Mapping. (Jewel) Large Cluster Jewels - get yourself a couple of Cold-related Cluster Jewels or general Elemental Damage or Resistances with eight Passives. The Blast-Freeze is very useful Notable for improving your survivability during Mapping. |
|
| Recommended Notables: 1 Added Passive Skill is Blanketed Snow 1 Added Passive Skill is Widespread Destruction 1 Added Passive Skill is Prismatic Heart 1 Added Passive Skill is Blast-Freeze 1 Added Passive Skill is Disorienting Display |
|
 (Jewel) Medium Cluster Jewels - prioritize Critical Strike Chance, Damage, and Area of Effect. The Quick Getaway reliably improves your Movement Speed and Attack Speed, which are vital for smooth gameplay. (Jewel) Medium Cluster Jewels - prioritize Critical Strike Chance, Damage, and Area of Effect. The Quick Getaway reliably improves your Movement Speed and Attack Speed, which are vital for smooth gameplay. |
|
| Recommended Notables: 1 Added Passive Skill is Vast Power 1 Added Passive Skill is Quick Getaway 1 Added Passive Skill is Pressure Points 1 Added Passive Skill is Basics of Pain |
|
 (Flask) Bottled Faith - Bottled Faith keeps the title of one of the best and most versatile Flasks for all Builds, especially the ones that rely on Critical Strikes. (Flask) Bottled Faith - Bottled Faith keeps the title of one of the best and most versatile Flasks for all Builds, especially the ones that rely on Critical Strikes. |
|
| 40% increased Damage Creates Consecrated Ground on Use (30-15)% reduced Duration Consecrated Ground created by this Flask has Tripled Radius Consecrated Ground created during Effect applies (7-10)% increased Damage taken to Enemies (100-150)% increased Critical Strike Chance against Enemies on Consecrated Ground during Flask effect |
|
Other suggested Flasks:
|
|
    |
|
|
If you have any other build requests please leave that in the comments below.
Pictures used in this article are the intellectual property of Grinding Gear Games.
