Corrupting Fever Tornado Shot Gladiator Build
Gladiator Build that deals Damage over Time via Corrupting Fever that its applies stacks via Tornado ShotCorrupting Fever Tornado Shot
Gladiator Build
Updated for Patch 3.21
The Best Crafty Guides by Odealo
| Guide notes | |||
| November 10, 2021 -Build created April 7, 2023 -Updated for Patch 3.21 |
|||
| Build overview | |||
| Tags: [RANGED] [PHYSICAL] [DOT] [LIFE] [STARTER] | |||
|
Budget: Defenses: |
|
Boss DPS: AoE: |
|
It's a build very similar to the one we've already covered, it was a Corrupting Fever Scion Ascendant Build. The premise of the build is strikingly similar so if you played id before, you will have no problem adjusting to this version. Most players switched from Ascendant to Gladiator due to much more potent and accessible DoT Passives and mods, Iron Will, and no need for Unique Items. Gladiator is a class specialized in among other things - Bleeding and Physical Damage over Time. Corrupting Fever causes enemies to take Physical DoT by applying stacks, one with each Hit, of Corrupted Blood on them, ten of these being the maximum number of debuffs. To apply as many hits as quickly as you can on a large number of foes consistently use Tornado Shot - Ball Lighting and Sire of Shards would be better at this, but by equipping a Rare Bow you can get a lot more Damage over Time, Physical Damage, and Attack Speed.
The most important for your DPS is the Level of the Corrupting Fever Gem - you can increase it by starting with a level 21 Gem, and then increasing the level by the mods on your Amulet and Bow, and Empower Support. Your amulet will play another very important role - it needs a mod that makes your Skills cost no Mana while Focused, otherwise you won't be able to activate Corrupting Fever at all. The build has a moderately high Maximum Life - 5 to 7k, Armour to prevent over half of the incoming Physical Damage, Unwavering Stance, and the Resolute Technique. Your Damage is high enough to deal with all the content in the game, and Gratoitouas Violence helps with clear speed immensely. The build is expensive - although it doesn't need any specific Unique Items, the Rare ones are costly.
You can also check our other Path of Exile builds right over here Odealo's Crafty Guides - Full List
1. Gameplay
As you enter a map, use your Focus ability to take no damage from Corrupting Fever, and activate it - it should last indefinitely for the rest of the map. The build plays like a regular Tornado Shot build - try to stay at a safe distance, away from your foes, and shoot them until they die. Use Flame Dash to dodge and move faster, Enduring Cry to regenerate your Life in times of need, and Blood Rage for Life Leech, Faster Attacks, and Frenzy Charges. Your Guard Spell is Molten Shell as it scales well with Armour, use it as frequently as you can. Have a ring with Vulnerability Curse on Hit and use Auras such as Pride, Malevolence, Herald of Purity, and War Banner. Most of the Skills you will end up using shouldn't cost any Mana due to Lifetap Support.
|
This video was recorded on a level 93 Gladiator with a total level of 28 on the Corrupting Fever game and approximately 2kk DPS at 10 stacks according to PoB. In terms of clear speed, it was simply amazing, but we will be looking into ways to increase the single-target DPS (this shouldn't be considered a Boss-killer build so it's not the top priority at this point though) |
|
|
2. Build's PROS & CONS
| PROS |
|
| CONS |
|
3. Leveling tips
Start with a Physical Attack that's preferably ranged because with your First Ascendancy you will pick Blood in the Eyes Keystone. Splitting Steel is a great candidate for an Attack to start with, it requires a Sword or an Axe. You will Swap to a Bow much later after you already have a decent one with an increased Gem Level or Physical DoT. Keep your Elemental Resistances High and the early stages should be a breeze. You can use Essences of Contempt for added Physical Damage, or Essences of Zeal for Attack Speed.
Suggested leveling Gem setups:
| Totem setup | |
 |
Splitting Steel - Splitting Steel is a great Attack to start with, it has good damage and can hit multiple enemies |
 |
Chance to Bleed Support - you will start dealing Bleed damage early on so it's a good choice |
 |
Maim Support - to Maim your opponents and deal more damage |
 |
Melee Physical Damage Support - increases your Melee Physical Damage |
| Aura setup | |
 |
Pride - enemies receive more Physical Damage from you |
| Curse and Leap Slam setup | |
 |
Vulnerability - Curse to make enemies take more damage and cause Bleed to be more efficient |
 |
Leap Slam - Leap Slam is used to enhance your mobility |
 |
Lifetap Support - spend Life instead of Mana on linked Skills |
Bandits:
Kill all three bandits and be rewarded with two additional Skill Points
Leveling Skill Trees:
36 Points Passive Tree
Allocate Unwavering Stance and Resolute Technique, Bleed, and Life Cluster on the way
62 Points Passive Tree
Take Iron Will after you start using Corrupting Fever, more Maximum Life, and Physical Damage, especially Physical DoT
Recommended leveling items:
 Le Heup of All - adds a lot of Elemental Resistances and damage Le Heup of All - adds a lot of Elemental Resistances and damage |
|
| Adds 1 to 4 Physical Damage to Attacks +(10-30) to all Attributes (10-30)% increased Damage (10-30)% increased Rarity of Items found +(10-30)% to all Elemental Resistances |
|
 The Magnate - increases your Strength, Physical Damage and Resistance if you have 200 Strength The Magnate - increases your Strength, Physical Damage and Resistance if you have 200 Strength |
|
| (20-30)% increased Stun Duration on Enemies +(40-50) to Strength (25-40)% increased Global Physical Damage 50% increased Flask Charges gained +(20-25)% to all Elemental Resistances while you have at least 200 Strength |
|
 Goldrim - another great source for Elemental Resistance Goldrim - another great source for Elemental Resistance |
|
| +(30-50) to Evasion Rating 10% increased Rarity of Items found +(30-40)% to all Elemental Resistances Reflects 4 Physical Damage to Melee Attackers Level Requirement reduced by 100 (Hidden) |
 Tabula Rasa - allows you to link any six gems and has no level restriction Tabula Rasa - allows you to link any six gems and has no level restriction |
|
| Item has no level requirement and Energy Shield (Hidden) Item has 6 White Sockets and is fully linked (Hidden) |
|
4. Final Skill Tree, Ascendancy Points, and Pantheon
Final Skill Tree:
108 Points Final Passive Tree (doesn't include Cluster Jewels)
123 Points Path of Building (PoB) link
Ascendancy points:
Preferably in that order:
- Blood in the Eyes
- Gratuitous Violence
- Outmatch and Outlast
- Arena Challenger
Pantheon:
Major God: Soul of Arakaali: 10% reduced Damage taken from Damage Over Time
Minor God: Soul of Ryslatha: Life Flasks gain 3 Charges every 3 seconds if you haven't used a Life Flask Recently
5. Final Gems links
| [UTILITY] Tornado Shot setup | |
 |
Tornado Shot - a Bow Attack that fires the most projectiles, it will not be used to deal damage, but only to apply Corrupting Blood |
 |
Greater Multiple Projectiles Support - you fire more Projectiles to cause more debuffs |
 |
Lifetap Support - Switch to Life instead of Mana to use this attack since you will use it a lot. It will additionally keep your Corrupting Fever duration constantly refreshed and ensure that Lifetap Buff is up at all times |
 |
Faster Projectiles Support - basically lets you stack Corrupting Fever faster, but this Gem is far from being mandatory here |
 |
Chain Support - Projectiles that chain hit more enemies resulting in faster clear speed |
 |
Life Gain on Hit Support - as you will hit a lot of enemies constantly, Life on Hit has a huge potential to be the best Life recovery mechanic |
| [DPS] Corrupting Fever setup | |
 |
Corrupting Fever - You can activate it only after Focusing and it will stay active as long as you spend Life on Tornado Shot. While this buff is active, your hits will cause Corrupting Fever debuff dealing Physical DoT. |
 |
Brutality Support - You will deal more Physical damage, but you won't be able to deal any other type of damage |
 |
Efficacy Support - more DoT and more Duration for Corrupting Blood |
 |
Swift Affliction Support - you will deal more DoT, but the duration of linked skills are reduced |
 |
Empower Support - increases the level of Corrupting fever, which is extremely important |
 |
Lifetap Support - Lifetap grants you a buff of the same name as you spend your Life on linked Skills. It also has a very high Cost Multiplier, so if your Life is too low, just use Increased Duration instead (or boost your Life somehow) |
| [UTILITY] Auras setup | |
 |
Pride - nearby enemies receive more Physical Damage, and if you stay for over four seconds near them, this effect is magnified |
 |
Herald of Purity - Herald skill which increases your Physical Damage and adds some minor effects |
 |
Determination - an Aura that boosts your Armour Rating which is one of your primary defensive layers |
 |
Enlighten Support - lowers the Mana Reservation cost for all linked Spells |
| [UTILITY] Movement and Warcry setup | |
 |
Malevolence - the best DPS Aura for this build, but in this particular setup it will be used in form of a temporary Blessing. Make sure to recast it whenever it expires |
 |
Divine Blessing Support - allows you to use Malevolence as a temporary Aura paying a higher cost than you normally would |
 |
Lifetap Support - use a level 1 Gem here so that you can actually use the Blessing without paying the Mana cost. It can also keep up the Lifetap buff easily that way |
 |
Enduring Cry - recovers your Life in a fashion similar to instant Life Flask. Can be linked here to also benefit from Lifetap Support |
| [UTILITY] Various skills w/o links | |
 |
War Banner - it's used mainly to increase Physical Damage taken by nearby enemies. You do not need to plant it anywhere so just keep it on the alt bar |
 |
Flesh and Stone - you can Maim nearby enemies to make them take more Physical Damage or cause Blind and take less damage from Attacks |
 |
Molten Shell - the recommended Guard Spell for this build that boosts your Armour Rating and grants a protective shield |
 |
Flame Dash - movement Spell to instantly teleport and leave a trail of burning ground |
|
|
6. Gear Setup
Ther are no Unique Items mandatory for the build, it does, however, require a lot of investment to run - a good Bow with an increased Gem Level for Corrupting Fever and Damage over Time, and an Amulet with a Veiled Suffix to pay no cost for using Skills during the effect of Focus, and increased Physical and Strength Gem Level. The rest of your gear should provide Armour, Maximum Life, cap the Resistances, and Physical Damage over Time. The build's requirements for Dexterity are depending on the Bow you're using, usually, it's around 200. With Resolute Technique You won't need Critical Strike Chance, Added Physical Damage, or Accuracy Rating, just the increased Physical Damage, and Damage over Time.
Our recommended items will:
- Cap your resistances at 75%
- Provide you with enough DPS and Life to start mapping
|
Stat priorities on items:
|
 (Helmet) Rare Helmet - Helmet with high Maximum Life, Elemental Resistances, and one causing enemies to take more Damage is good (Helmet) Rare Helmet - Helmet with high Maximum Life, Elemental Resistances, and one causing enemies to take more Damage is good |
|
| Min. requirements: 80 Maximum Life +60% Total Elemental Resistances Nearby Enemies take 9% increases Physical Damage Optional affixes: Chaos Resistance Armour increased Mana Reservation Efficiency of Skills |
|
| Helmet enchantments: Tornado Shot enchantment mods |
|
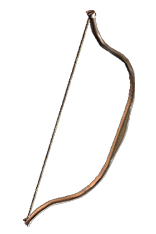
 (Weapon) Rare Bow - the best way to obtain a bow such as this is to craft it yourself with meta-craft mods on a Warlord-influenced rare base with already two or three good affixes, but you can also buy it since it's a popular build (Weapon) Rare Bow - the best way to obtain a bow such as this is to craft it yourself with meta-craft mods on a Warlord-influenced rare base with already two or three good affixes, but you can also buy it since it's a popular build |
|
| Min. requirements: + 2 to Level of Socketed Support Gems +20 % To Physical Damage over Time Multiplier +1 to Level of Socketed Gems Optional affixes: increased Physical Damage over Time increased Damage over Time |
|
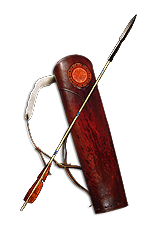
 (Weapon) Rare Quiver - Get a Penetrating or a Sharktooth Quiver with Maximum Life, increased Damage over Time, and an additional projectile or Elemental Resistances (Weapon) Rare Quiver - Get a Penetrating or a Sharktooth Quiver with Maximum Life, increased Damage over Time, and an additional projectile or Elemental Resistances |
|
| Min. requirements: +70 to maximum Life Damage over Time Multiplier with Attack Skills Bow Attacks fire an Additional Arrow Optional affixes: increased Attack Speed Elemental Resistances chance to gain a Frenzy Charge when you Hit a Rare or Unique Enemy |
|
 (Body Armour) Rare Body Armour - regular Body Armour with a lot of Resistances and Maximum Life will be an optimal choice (Body Armour) Rare Body Armour - regular Body Armour with a lot of Resistances and Maximum Life will be an optimal choice |
|
| Min. requirements: +100 to maximum Life +100% Total Elemental Resistances Optional affixes: Attributes increased Maximum Life High Armour |
|
 (Boots) Rare Boots - get a lot of Maximum Life, Elemental Resistances, and increased Movement Speed (Boots) Rare Boots - get a lot of Maximum Life, Elemental Resistances, and increased Movement Speed |
|
| Min. requirements: +50 to maximum Life +60% Total Elemental Resistances 25% increased Movement Speed Optional affixes: increased Armour Intelligence |
|
 (Gloves) Rare Gloves - Gloves can provide a lot of Maximum Life, Elemental Resistances, and Physical Damage over Time. Apothecary Gloves are probably the best base. (Gloves) Rare Gloves - Gloves can provide a lot of Maximum Life, Elemental Resistances, and Physical Damage over Time. Apothecary Gloves are probably the best base. |
|
| Min. requirements: +60 to Maximum Life +60% to Elemental Resistances +15% to Physical Damage over Time Multiplier Optional affixes: Dexterity Armour Culling Strike |
|
 (Belt) Rare Belt - get a Blet with increased Maximum Life, Elemental Resistances, and increased Global Physical Damage (Belt) Rare Belt - get a Blet with increased Maximum Life, Elemental Resistances, and increased Global Physical Damage |
|
| Min. requirements: +60 to Maximum Life +70% to Elemental Resistances 20% increased Global Physical Damage Optional affixes: Flasks applied to you have increased Effect increased Maximum Life increased Damage |
|
 (Amulet) Rare Amulet - mainly aim to increase the level of your Corrupting Fever Gem with the Amulet if you want to push this build to end-game. Other than that, just look for defensive stats and Attributes (Amulet) Rare Amulet - mainly aim to increase the level of your Corrupting Fever Gem with the Amulet if you want to push this build to end-game. Other than that, just look for defensive stats and Attributes |
|
| Min. requirements: +1 to Level of all Physical Skill Gems +1 to Level of all Strength Skill Gems Optional affixes: Physical Damage over Time Multiplier Attributes Maximum Life Resistances |
|
| Recommended Anointments: Acrimony |
|
 (Ring) Rare Ring - A Ring with increased Maximum Life, Elemental Resistances, and a Vulnerability Curse on Hit will meet all your needs, you could additionally aim for other affixes that'd suit the build (Ring) Rare Ring - A Ring with increased Maximum Life, Elemental Resistances, and a Vulnerability Curse on Hit will meet all your needs, you could additionally aim for other affixes that'd suit the build |
|
| Min. requirements: 90 Maximum Life +90% Total Elemental Resistances Curse Enemies with Vulnerability on Hit Optional affixes: Chaos Resistance Dexterity Attack Speed increased Armour increased Damage |
|
 (Ring) Circle of Guilt - one of the best Rings for this build when it comes to raw DPS. Make sure to get one with increased Herald of Purity's buff effect, and increased Physical Damage while you have it (Ring) Circle of Guilt - one of the best Rings for this build when it comes to raw DPS. Make sure to get one with increased Herald of Purity's buff effect, and increased Physical Damage while you have it |
|
| <One to three random Synthesis implicit modifiers> +(10-20) to all Attributes Adds (8-10) to (13-15) Physical Damage +(350-400) to Armour <Two Random Herald of Purity modifiers> |
|
 (Jewel) Rare Jewels - you will need some Jewels with Increased Maximum Life, missing Attributes, and a fair amount of Physical DoT mods (Jewel) Rare Jewels - you will need some Jewels with Increased Maximum Life, missing Attributes, and a fair amount of Physical DoT mods |
|
|
Recommended affixes: |
|
 (Jewel) Watcher's Eye - Your Auras are Pride and Malevolence, look for Damage over Time Multiplier while affected by Malevolence which will be the best modifier that you can get here (Jewel) Watcher's Eye - Your Auras are Pride and Malevolence, look for Damage over Time Multiplier while affected by Malevolence which will be the best modifier that you can get here |
|
| (4-6)% increased maximum Energy Shield (4-6)% increased maximum Life (4-6)% increased maximum Mana <Two or Three random aura modifiers> |
|
 (Jewel) Large Cluster Jewels - you won't need any of Large Cluster Jewels, but you will be able to fit one or two later on; look for Physical Damage increase (Jewel) Large Cluster Jewels - you won't need any of Large Cluster Jewels, but you will be able to fit one or two later on; look for Physical Damage increase |
|
| Recommended affixes: 1 Added Passive Skill is Battle-Hardened 1 Added Passive Skill is Furious Assault 1 Added Passive Skill is Master the Fundamentals |
|
 (Jewel) Medium Cluster Jewels - look for Damage over Time Notables, these can be found on Medium Cluster Jewels with the Physical Damage over Time base (Jewel) Medium Cluster Jewels - look for Damage over Time Notables, these can be found on Medium Cluster Jewels with the Physical Damage over Time base |
|
| Recommended affixes: 1 Added Passive Skill is Brush with Death 1 Added Passive Skill is Wasting Affliction 1 Added Passive Skill is Flow of Life 1 Added Passive Skill is Student of Decay |
|
 (Flask) Rumi's Concoction - one of the best defensive Flasks, it grants Armour and Block Chance (Flask) Rumi's Concoction - one of the best defensive Flasks, it grants Armour and Block Chance |
|
| +1500 to Armour +(8-12)% Chance to Block Attack Damage during Flask effect +(4-6)% Chance to Block Spell Damage during Flask effect |
|
|
Other suggested Flasks:
|
|
     |
|
|
If you have any other build requests please leave that in the comments below. We are always open to suggestions and constructive feedback.
Pictures used in this article are the intellectual property of Grinding Gear Games.


