
Corrupting Fever Scion Ascendant Build
Ascendant build that uses Corrupting Fever applied via Ball Lightning cast automatically by channeling CycloneCorrupting Fever
Scion Build
Updated for Patch 3.21
The Best Crafty Guides by Odealo
| Guide notes |
| September 24, 2021 -Build created May 17, 2023 -Updated for Patch 3.21 |
| Build overview | |||
| Tags: [TRIGGER] [PHYSICAL] [DOT] [LIFE] | |||
|
Budget: Defenses: |
|
Boss DPS: AoE: |
|
It's a very simple gameplay-wise build, but there are a lot of components necessary to make it work properly. You will deal Damage with Corrupting Fever - it's a Spell that makes your Hits apply Corrupting Blood on enemies which will deal Physical Damage over Time, but as you activate it, it removes a portion of your Life. The more Damage you want to deal with Corrupting Blood, the more Damage will you deal to yourself, you can even link it with Lifetap Support to further increase the DPS. The best way to scale the damage of this Spell is to increase the Gem Level, increase your Physical Damage, and Damage over Time, Spell Damage will have no effect. As your Gem Level is high and the Skill Gem properly linked, a single case would kill you instantly if you'd be able to use it - to avoid that you will cast Corrupting Fever for free.
One stack of Corrupting fever lasts only one second, an enemy can be imbued with up to ten stacks of it. To apply as many hits as possible in the shortest span of time use Cyclone combined with Ball Lightning and Cast While Channeling - Cyclone itself hits really fast and so do the lightning balls which are ranged, it's the best combination of Skills. Sire of Shards is the mandatory Staff that makes your Projectiles fire in all directions from you, without it you will severely lack AoE. Your build is Life-based and the best-performing class is Ascendant - Gladiator's Ascendancy gives you a lot of Damage, Chance to Blind, and Chance to Block Attacks and Spell Hits. With Occultist's Ascendancy, you're able to apply an additional Curse, increase effects of them, and be immune to Stuns.
You can also check our other Path of Exile builds right over here Odealo's Crafty Guides - Full List
1. Gameplay
The gameplay is very simple - you use Cyclone and enemies around you die. Use Flame Dash of Frostblink as your Movement Spell. Corrupting Fever can last for a very long time - the Duration of it is refreshed as you spend Life and you will spend a lot of it with another six-linked setup consisting of Cyclone and Ball Lightning. The Curses you should use are Vulnerability and Poacher's Mark, preferably as Ring mods. Your Auras are Pride, Malevolence, Flesh and Stone, Vitality, and if you have some space left - Herald of Purity. Additionally, use Blood Rage to generate Frenzy Charges and move faster.
|
|
|
|

2. Build's PROS & CONS
| PROS |
|
| CONS |
|
3. Leveling tips
Start as a Physical Damage Cyclone. You can use Corrupting Fever early on, you will be easily able to sustain the damage. To transition to purely Physical Damage over Time from the standard Physical Damage a few adjustments have to be done - you will need Sire of Shards, an Amulet with the Crafted Mod "Skills Cost no Mana or Life while Focused", and your DoT already increased by Passive Skills such as Acrimony and the ones found on Cluster Jewels. It should be easily done after the third Lab. Use Vendor Recipes and Essences of Contempt on your gear for more Physical Damage with Attacks as you level up.
Suggested leveling Gem setups:
| Cyclone setup | |
 |
Cyclone - deal physical damage by channeling this Attack |
 |
Melee Physical Damage Support - increases your Melee Physical Damage |
 |
Fortify Support - increases your Damage while granting you a Fortified Buff |
 |
Chance to Bleed Support - Bleeding is a Physical DoT and it's good for leveling |
| Leap Slam setup | |
 |
Leap Slam - you will lack Intelligence early on, use Leap Slam |
 |
Faster Attacks Support - increases the rate at which you can use Leap Slam |
| Auras and Curse setup | |
 |
Pride - increases your Physical Damage, as you stand close to the enemies for a long time this effect is increased |
 |
Herald of Purity - Herald which increases your Physical Damage and creates Minions |
 |
Vulnerability - Curse that makes enemies more vulnerable to Physical Damage and increases your chance to inflict Bleeding on them |
| Corrupting Fever setup | |
 |
Corrupting Fever - use it as a supplementary way to increase your damage at first |
 |
Efficacy Support - increases your Damage over Time and the Duration of Skill |
 |
Swift Affliction Support - it grants you much more Damage over Time but decreases the Skill Effect Duration |
Bandits:
Killing all three Bandits for two Passive Skill Points is the best option, but consider helping Alira for Mana Regen, Crit Multiplier, and Elemental Resistances
Leveling Skill Trees:
34 Points Skill Tree
choose the path of the Warrior, pick up Maximum Life, Physical Damage, and Damage over Time
75 Points Skill Tree
look for more Maximum Life, allocate Cannibalistic Rite and Acrimony
Recommended leveling items:
 Le Heup of All - Ring that's great for increasing your Damage and Elemental Resistances Le Heup of All - Ring that's great for increasing your Damage and Elemental Resistances |
|
| Adds 1 to 4 Physical Damage to Attacks +(10-30) to all Attributes (10-30)% increased Damage (10-30)% increased Rarity of Items found +(10-30)% to all Elemental Resistances |
 Goldrim - Goldrim provides you with a lot of Elemental Resistances Goldrim - Goldrim provides you with a lot of Elemental Resistances |
|
| +(30-50) to Evasion Rating 10% increased Rarity of Items found +(30-40)% to all Elemental Resistances Reflects 4 Physical Damage to Melee Attackers Level Requirement reduced by 100 (Hidden) |
 Tabula Rasa - it has six, linked, white sockets, great for leveling Tabula Rasa - it has six, linked, white sockets, great for leveling |
|
| Item has no level requirement and Energy Shield (Hidden) Item has 6 White Sockets and is fully linked (Hidden) |
 Daresso's Salute - this amulet grants a lot of Elemental Resistances and some Melee Damage enhancements Daresso's Salute - this amulet grants a lot of Elemental Resistances and some Melee Damage enhancements |
|
| +(16-24) to Strength and Dexterity 50% reduced maximum Energy Shield +(30-40)% to Fire Resistance +(30-40)% to Cold Resistance 10% increased Movement Speed when on Full Life +2 to Melee Strike Range 60% increased Melee Damage when on Full Life |
4. Final Skill Tree, Ascendancy Points, and Pantheon
Final Skill Tree:
111 Points Final Skill Tree (doesn't include Cluster Jewels nor any Unique Jewels)
128 Points Path of Building(PoB) link
Ascendancy points:
Preferably in that order:
- Occultist Ascendancy
- Gladiator Ascendancy
- Path of the Duelist or Witch
Pantheon:
Major God: Soul of the Brine King You cannot be Stunned if you've been Stunned or Blocked a Stunning Hit in the past 2 seconds
Minor God: Soul of Garukhan 60% reduced Effect of Shock on you
5. Final Gems links
| [DPS] Corrupting Fever setup | |
|
Corrupting Fever - It's the only source of damage in this build, it deals Physical DoT by stacking up to 10 Corrupting Blood on enemies, these don't count as Bleeding and are not affected by Bleed or Spell Damage increases |
|
Efficacy Support - increases your Damage over Time and increases the Skill Effect Duration |
 |
Empower Support - Corrupting Fever damage is greatly increased alongside the Gem Level, for that use Empower Support |
|
Swift Affliction Support - increases your Damage over Time but decreases the Skill Effect Duration |
 |
Lifetap Support - increases the Damage while you have Lifetap, you will have it at all times. Use  Less Duration Support if the Life Cost is too high. Less Duration Support if the Life Cost is too high. |
 |
Brutality Support - it's the best-in-slot Gem to increase your Physical Damage at a cost of all other types of damage |
| [UTILITY] Cyclone setup | |
|
Cyclone - Cyclone is used to apply Hits on enemies and launch Ball Lightning via Cast while Channelling |
 |
Ball Lightning - don't level it past level 1 to keep the Skill Mana Cost low, you won't need the damage of this Skill, just the effect it will apply by Hitting opponents |
 |
Cast while Channelling - it enables you to cast Ball Lightning when Channeling Cyclone every fraction of a second |
|
Fortify Support - Fortify Buff reduces the damage you take from Hits, it's a very useful Buff |
 |
Infused Channeling Support - you take less damage while Channeling |
|
Lifetap Support - keep it at level 1, the requirements for a Lifetap Buff are much lower along with Gem Level, and the Lifetap Effect is shared among all the Skills that use Lifetap Support |
| [UTILITY] Aura setup | |
|
Pride - increases the Physical Damage your enemies take, after 4 seconds of standing close to them the effect is doubled |
 |
Malevolence - Aura that makes you deal more Damage over Time and increases Skill Effect Duration |
 |
Flesh and Stone - you can Maim nearby enemies to deal more damage, or Blind them to receive less |
|
Herald of Purity - It creates minions to distract opponents and increases your overall Physical Damage |
| [UTILITY] Second Auras setup | |
 |
Vitality - keep it at level 1 if you have Watcher's Eye that grants your Life from Hits while under the effect of this Aura, it will reserve only 40 Mana. If you have all the recommended gear, you should be able to use it at a higher level for better Life Regeneration |
 |
War Banner - War Banner increases Physical Damage taken by nearby enemies, boosting your DPS at the cost of less than 10% Mana |
 |
Enlighten Support - if you are struggling with keeping all the Auras up, you can use Enlighten here, if not use  Portal or Portal or  Increased Duration Increased Duration |
| [MOBILITY] Dash and Blood Rage setup | |
 |
Dash - the recommended movement Skill for this build, but you can also use Frostblink or Flame Dash depending on your preferences |
|
Lifetap Support - link it so that you won't have to spend Mana on Dash and it will also occasionally grant you a Lifetap buff. You can use this support at level 1 |
 |
Blood Rage - increases your Attack and Life Leech while draining your Life, but most importantly it generates Frenzy Charges which increase your DPS |
 |
Enhance Support - Enhances the Quality of all linked Skills |
| [UTILITY] Steelskin setup | |
 |
Molten Shell - the recommended Guard Skill which will prevent a portion of incoming damage when cast from damaging you |
|
|
5. Gear Setup
Sire of Shards Unique Staff and increased Gem Level for Corrupting Fever are key components of the build. This modifier can be found on a Body Armour and Amulet. Allocate Charisma via Annoimtment, and if you're using The Stampede You will be able to allocate another Notable, for example, Growth and Decay. Cluster Jewels are one of the best sources of Damage - Small, Medium, and Large Cluster Jewels have some Notables that suit this build nicely. The only stats that increase your damage are Damage over Time and Physical Damage. Look for Dexterity - Blood Rage at level 20 requires 155 Dex, but it's not really important to level it up that much.
Our recommended items will:
- Cap your resistances at 75%
- Provide you with enough DPS, Life, and ES to start mapping
|
Stat priorities on items:
|
 (Helmet) Rare Helmet - Rare Helmet is the best option if you Prioritize maximum Life and Elemental Resistances, look for a mod that makes you deal more Physical Damage (Helmet) Rare Helmet - Rare Helmet is the best option if you Prioritize maximum Life and Elemental Resistances, look for a mod that makes you deal more Physical Damage |
|
| Min. requirements: 80 Maximum Life +60% Total Elemental Resistances Nearby Enemies take 9% increases Physical Damage Optional affixes: Chaos Resistance Reduced Reservation of Skills Dexterity |
|
 (Helmet) The Devouring Diadem - It's a great choice to allocate your Auras here for reduced Mana Reservation, it grants you Eldritch Battery which ensures you won't run out of Mana, but your Life Pool is now reduced. Feast of Flesh restores your Life, Mana, and ES (Helmet) The Devouring Diadem - It's a great choice to allocate your Auras here for reduced Mana Reservation, it grants you Eldritch Battery which ensures you won't run out of Mana, but your Life Pool is now reduced. Feast of Flesh restores your Life, Mana, and ES |
|
| +1 to Level of Socketed Gems Socketed Gems have 20% reduced Mana Reservation Trigger Level 15 Feast of Flesh every 5 seconds (180-220)% increased Energy Shield 10% chance for Energy Shield Recharge to start when you use a Skill Eldritch Battery Veiled Suffix |
|
 (Helmet) Alpha's Howl - this Helmet Reduces the Mana that's Reserved, it grants you Freeze Immunity and Cold Resistance, more Evasion Rating, and +2 to Level of Aura Gems socketed in it (Helmet) Alpha's Howl - this Helmet Reduces the Mana that's Reserved, it grants you Freeze Immunity and Cold Resistance, more Evasion Rating, and +2 to Level of Aura Gems socketed in it |
|
| +2 to Level of Socketed Aura Gems (80-100)% increased Evasion Rating +(20-30)% to Cold Resistance 25% chance to Avoid being Chilled Cannot be Frozen 8% reduced Mana Reserved |
|
| Helmet enchantments: Corrupting Fever enchantments |
|
 (Weapon) Sire of Shards - the stats here are not that great, but it makes you fire Projectiles in a radiating fashion covering the screen and ensuring smooth gameplay (Weapon) Sire of Shards - the stats here are not that great, but it makes you fire Projectiles in a radiating fashion covering the screen and ensuring smooth gameplay |
|
| +20% Chance to Block Attack Damage while wielding a Staff Socketed Gems fire 4 additional Projectiles Socketed Gems fire Projectiles in a circle +(15-20) to all Attributes +(5-7)% to all Elemental Resistances (60-100)% increased Projectile Damage 20% increased Light Radius |
|
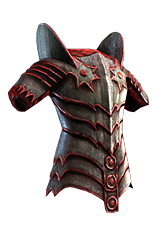 (Body Armour) Rare Body Armour - Body Armour and the Amulet are by far the most expensive parts of the gear but the additional Gem Levels have a really big impact on your DPS (Body Armour) Rare Body Armour - Body Armour and the Amulet are by far the most expensive parts of the gear but the additional Gem Levels have a really big impact on your DPS |
|
| Min. requirements: +1 to Level of Socketed Strength Gems +1 to Level of Socketed Active Skill Gems +60 to maximum Life Optional affixes: +1 to Level of Socketed Support Gems Elemental Resistances |
|
 (Boots) The Stampede - this pair of boots allows you to Anoint an additional Notable and has some great mods to help you with Mana sustain, mobility, and defenses (Boots) The Stampede - this pair of boots allows you to Anoint an additional Notable and has some great mods to help you with Mana sustain, mobility, and defenses |
|
| (100-150)% increased Evasion and Energy Shield (30-40)% increased Stun and Block Recovery (50-80)% increased Cooldown Recovery Rate of Travel Skills (30-40)% increased Mana Regeneration Rate while moving Your Movement Speed is 150% of its base value |
|
| Recommended Anointments: Growth and Decay Charisma (if you need more Mana) Mark the Prey (if you're using Mark-type Curse) |
|
 (Gloves) Rare Gloves - look for the default defense mods such as Maximum Life and Elemental Resistances, and one of the few mods to uplift your damage - Physical Damage over Time Multiplier (Gloves) Rare Gloves - look for the default defense mods such as Maximum Life and Elemental Resistances, and one of the few mods to uplift your damage - Physical Damage over Time Multiplier |
|
| Min. requirements: 70 Maximum Life +70% Total Elemental Resistances 15% to Physical Damage over Time Multiplier Optional affixes: Dexterity Chaos Resistance |
|
 (Belt) Rare Belt - there isn't much to choose from, aim for the highest Maximum Life and Elemental Resistances (Belt) Rare Belt - there isn't much to choose from, aim for the highest Maximum Life and Elemental Resistances |
|
| Min. requirements: 100 Maximum Life +100% Total Elemental Resistances Optional affixes: Dexterity increased Maximum Life increased Damage |
|
 (Amulet) Rare Amulet - Look for an Amulet that would increase the Gem Level of your Corrupting Fever - there are two mods for that. It's expensive. (Amulet) Rare Amulet - Look for an Amulet that would increase the Gem Level of your Corrupting Fever - there are two mods for that. It's expensive. |
|
| Min. requirements: +1 to Level of all Physical Skill Gems +1 to Level of all Strength Skill Gems Optional affixes: Physical Damage over Time Multiplier Pride has reduced Reservation Maximum Life |
|
| Recommended Anointments: Growth and Decay Charisma (if you need more Mana) Mark the Prey (if you're using Mark-type Curse) |
|
 (Ring) Rare Ring - With Occultist's Ascendancy you're able to apply Two Curses, one of your Ring Should apply Vulnerability and the other - Poacher's Mark. Besides that aim for Maximum Life and Elemental Resistances. (Ring) Rare Ring - With Occultist's Ascendancy you're able to apply Two Curses, one of your Ring Should apply Vulnerability and the other - Poacher's Mark. Besides that aim for Maximum Life and Elemental Resistances. |
|
| Min. requirements: 90 Maximum Life +90% Total Elemental Resistances Curse Enemies with Vulnerability on Hit Trigger Level 12 Poacher's Mark when you Hit a Rare or Unique Enemy Optional affixes: Chaos Resistance Dexterity Life gained for each Enemy hit by your Spells |
|
 (Jewel) Rare Jewels - Look for Increased Maximum Life, Dexterity, or Resistances. If you need damage look for Physical Damage over Time. (Jewel) Rare Jewels - Look for Increased Maximum Life, Dexterity, or Resistances. If you need damage look for Physical Damage over Time. |
|
|
Recommended affixes: |
|
 (Jewel) Watcher's Eye - get a Watcher's Eye that increases your DoT while affected by Malevolence, the Vitality Mod for Life with each Hit is next in line to strive for (Jewel) Watcher's Eye - get a Watcher's Eye that increases your DoT while affected by Malevolence, the Vitality Mod for Life with each Hit is next in line to strive for |
|
| (4-6)% increased maximum Energy Shield (4-6)% increased maximum Life (4-6)% increased maximum Mana <Two or Three random aura modifiers> Recommended Aura modifiers: Damage over Time Multiplier while affected my Malevolence Life gained for each Enemy Hit while affected by Vitality |
|
 (Jewel) Transcendent Mind - put it in the Jewel Socket next to the Instability for increased Damage over Time (Jewel) Transcendent Mind - put it in the Jewel Socket next to the Instability for increased Damage over Time |
|
| -1 Intelligence per 1 Intelligence on Allocated Passives in Radius +3% to Damage over Time Multiplier per 10 Intelligence on Unallocated Passives in Radius 3% increased Mana Recovery Rate per 10 Intelligence on Allocated Passives in Radius 2% reduced Mana Recovery Rate per 10 Intelligence on Unallocated Passives in Radius |
|
 (Jewel) Glorious Vanity - The Doryani version will provide you with ES based on your Maximum Life, put in near the Pain Attunement Keystone to transform it into Corrupted Soul (Jewel) Glorious Vanity - The Doryani version will provide you with ES based on your Maximum Life, put in near the Pain Attunement Keystone to transform it into Corrupted Soul |
|
| Bathed in the blood of (100-8000) sacrificed in the name of (Ahuana-Doryani-Xibaqua) Passives in radius are Conquered by the Vaal Historic |
|
 (Jewel) Large Cluster Jewels - Get the Nodes that would increase your Physical Damage such as the ones listed here (Jewel) Large Cluster Jewels - Get the Nodes that would increase your Physical Damage such as the ones listed here |
|
| Recommended affixes: 1 Added Passive Skill is Furious Assault 1 Added Passive Skill is Iron Breaker 1 Added Passive Skill is Master the Fundamentals 1 Added Passive Skill is Master Battle-Hardened |
|
 (Jewel) Medium Cluster Jewels - Look for Medium Cluster Jewels with nodes that increase your Damage over Time (Jewel) Medium Cluster Jewels - Look for Medium Cluster Jewels with nodes that increase your Damage over Time |
|
| Recommended affixes: 1 Added Passive Skill is Brush with Death 1 Added Passive Skill is Exposure Therapy 1 Added Passive Skill is Student of Decay 1 Added Passive Skill is Flow of Life |
|
 (Jewel) Small Cluster Jewels - Small Cluster Jewels provides yet more options to increase your DoT (Jewel) Small Cluster Jewels - Small Cluster Jewels provides yet more options to increase your DoT |
|
| Recommended affixes: 1 Added Passive Skill is Exposure Therapy 1 Added Passive Skill is Student of Decay |
|
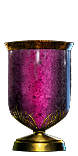 (Flask) The Overflowing Chalice - it improves your DPS and increases the Charge generation rate for the rest of your Flasks (Flask) The Overflowing Chalice - it improves your DPS and increases the Charge generation rate for the rest of your Flasks |
|
| 40% increased Damage Creates Consecrated Ground on Use 100% increased Charge Recovery (10-20)% increased Duration Gains no Charges during Effect of any Overflowing Chalice Flask 100% increased Charges gained by Other Flasks during Flask Effect |
|
 (Flask) Elixir of the Unbroken Circle - it grants you Ward which is nice to have, but the main reason to use it is to generate Endurance Charges, these will reduce Physical Damage you take and add some Elemental Resistances (Flask) Elixir of the Unbroken Circle - it grants you Ward which is nice to have, but the main reason to use it is to generate Endurance Charges, these will reduce Physical Damage you take and add some Elemental Resistances |
|
| +200 to Ward Restores Ward on use (20–40)% increased Duration Recover 4% of Life per Endurance Charge on use Lose all Endurance Charges on use Gain 1 Endurance Charge per Second during Flask Effect |
|
 (Flask) Rumi's Concoction - Additional Block Chance for Spell and Attack Hits and Armour (Flask) Rumi's Concoction - Additional Block Chance for Spell and Attack Hits and Armour |
|
| +1500 to Armour +(8-12)% Chance to Block Attack Damage during Flask effect +(4-6)% Chance to Block Spell Damage during Flask effect |
|
|
Other suggested Flasks:
|
|
  |
|
|
If you have any other build requests please leave that in the comments below. We are always open to suggestions and constructive feedback.
Pictures used in this article are the intellectual property of Grinding Gear Games.
