CoC Ice Spear Deadeye Build
Powerful Cast on Critical build which unleashes a torment of icy projectiles to obliterate your foesCoC Ice Spear
Deadeye build
Updated for Patch 3.16
The Best Crafty Guides by Odealo
Estimated budget: medium

| Guide notes |
| November 16, 2020 -Build created January 14, 2022 -Updated for Patch 3.16 |
Deadeye hasn't been a popular class in quite some time now. Even though it's basically the primary choice when you want to play a Bow character. Your standard Attack/Bow Build will be simply too expensive, and it's not easy to scale enough damage for casual players to deal with the end-game content. At the same time, you need to think about your defenses, which are reliant on Dodge/Evasion rolls - not something you want to be dependant on when on a low budget - where you get one-shotted when they fail. Still, we set up a goal to make an enjoyable Deadeye character that doesn't require you to spend tons of currency on and will allow you to efficiently farm most of the content. We ended up making this Cast on Critical Strike Ice Spear Deadeye, who relies on several triggering mechanics to simultaneously cast tons of Skills including two instances of Ice Spear, Freezing Pulse, Ensnaring Arrows, and Frenzy. We may have been lucky when buying equipment (Lvl. 20 CoC + 110% Spell Damage Sniper Bow for 20 Chaos Orbs and 110 Life, 10% Life as Extra ES, and flat Attack Crit Chance for 50 Chaos Orbs, without links, may have been a bargain) but still, it's way cheaper then your typical Bow/Attack builds. In this build, you will be dealing Cold Spell Damage mainly from several Projectile Spells, so picking up Deadeye which grants an extra Projectile, Pierce, Crit. Chance and Tailwind is a great option.
Please note that you can also play this build as an Assassin (more Critical Multiplier/Damage) Pathfinder (Flask sustain).
You can also find our other Path of Exile builds right over here: Odealo's Crafty Guides - Full List
1. Gameplay
This feels like your typical Attack/Bow Ranger build, however, you will be dealing mainly Spell Damage with Spells triggered by your Bow. You are going to use Barrage linked with Cast on Critical Strike Support, which will fire several projectiles simultaneously and Crit multiple times with each Attack, triggering Freezing Pulse and Ice Spear. At the same time, equipping Asenath's Chant Helmet will trigger another instance of Ice Spear via its unique property, which will deal less damage but will offer Energy Shield Leech. If you are going to use Maloney's Mechanism, you can also socket additional Bow Attacks there - Ensnaring Arrow and Frenzy, which will slow down enemies, increase projectile damage taken by them, and generate Frenzy Charges for your character.
This build also offers very unique defensive mechanisms. Unlike your typical Deadeye build, you will not benefit from Dodge (unless you get it from Elusive buff or affixes on Rare equipment) and your Evasion Rating won't be high either, however, you should have approximately 8,000 to 9,000 combined Life and Energy Shield, and by utilizing Corrupted Soul, you will be able to benefit from both types of Leech simultaneously - Energy Shield Leech from Helmet's Ice Spear setup, and Life Leech from Doryani's Lesson on a Cluster Jewel.
|
|

2. Build's PROS & CONS
| PROS |
|
| CONS |
|
3. Leveling tips
You won't be able to level up this build with CoC support, and even after it becomes available it won't be efficient enough to carry you through the campaign. We recommend leveling up as a standard Bow/Attack character using Rain of Arrows - you can also use two instances via Lioneye's Paws Unique Boots which will offer amazing bonus DPS and clearing potential. Until level 12 when you can start using Rain of Arrows, it's best to use Split Arrow. It has a high base DPS and fires multiple projectiles.
It's recommended to respec at around level 70. You should be able to get a CoC Bow by then, which will give you the 7th link, and you should already have a reasonable Critical Strike Chance. Below you will find the recommended leveling Skills and several useful Unique Items that may come in handy on lower levels.
Suggested leveling Gem setups:
| Rain of Arrows setup | |
 |
Rain of Arrows - fires multiple projectiles that deal a moderate amount of damage in an area, making it one of the best leveling Bow Attacks in the game |
 |
Vicious Projectiles Support - increases Physical Damage dealt by Rain of Arrow's projectiles |
 |
Mirage Archer Support - a mandatory Support Gem for leveling, which creates a Spectral Archer on your back that will use the linked Attacks for you |
 |
Added Cold Damage Support - adds high flat Cold Damage to linked Spells, and you are going to use this Gem in your end-game setup, so it's good to level it up early |
| Barrage setup | |
 |
Barrage - you may also want to use Barrage to get some extra single-target DPS against Bosses. It's also one of the core Gems used so it's worth leveling it up while doing the campaign |
|
Added Cold Damage Support |
 |
Greater Multiple Projectiles Support - increases the number of Barrage's Projectiles |
 |
Hypothermia Support - grants very high bonus damage against Chilled enemies |
| Utility Gems | |
 |
Precision - great Aura Spell which increases your Accuracy Rating and Critical Strike Chance |
 |
Flame Wall - grants high added Fire Damage to your Attacks if the projectiles fired by them fly through the Wall |
 |
Herald of Ice - grants additional Cold Damage and causes Icy Explosions that shatter whole packs of monsters |
 |
Dash - the mobility skill used in this build |
Bandits:
We recommend helping Alira for extra Crit. Multiplier and Elemental Resistances
Leveling Skill Trees:
34 Points Skill Tree
Priorities: 1) Aspect of the Eagle 2) Herbalism 3) Master Fletcher/King of the Hill 4) Lethality
63 Points Skill Tree
Priorities: 1) Trickery 2) Resourcefulness 3) Written in Blood 4) Heartseeker
Level 70+ Skill Tree (level 70+ - the moment of respecc to COC Ice Spear)
Priorities: 1) Throatseeker 2) Cruel Preparation 3) Heart and Soul 4) Melding
Level 70+ Skill Tree (level 70+ - when you start using Barrage + CoC + Ice Spear)
Recommended leveling items:
 Hyrri's Bite - an amazing leveling Quiver which adds a ton of flat added damage and additional Attributes so that you can easily use all the Items and Gems Hyrri's Bite - an amazing leveling Quiver which adds a ton of flat added damage and additional Attributes so that you can easily use all the Items and Gems |
|
| +(3-4) Life gained for each Enemy hit by your Attacks +(15-25) to Strength +(35-45) to Dexterity +(15-25) to Intelligence Adds 10 to 20 Cold Damage to Attacks (7-10)% increased Attack Speed +(2-3) Life gained for each Enemy hit by your Attacks 10% increased Area of Effect |
|
 Karui Charge - amazing Amulet, that increases your Damage, Attack Speed, and Movement Speed Karui Charge - amazing Amulet, that increases your Damage, Attack Speed, and Movement Speed |
|
| +(20-30) to Dexterity +(20-30) to Strength (5-10)% increased Attack Speed +100 to Accuracy Rating 30% increased Projectile Speed 10% increased Movement Speed 30% increased Projectile Damage |
|
 Goldrim - amazing leveling Helmet which grants very high Elemental Resistances bonuses Goldrim - amazing leveling Helmet which grants very high Elemental Resistances bonuses |
|
| +(30-50) to Evasion Rating 10% increased Rarity of Items found +(30-40)% to all Elemental Resistances Reflects 4 Physical Damage to Melee Attackers Level Requirement reduced by 100 (Hidden) |
|
 Lioneye's Paws - an amazing leveling pair of Boots that grants you an extra triggered Rain of Arrows. It also basically grants you a cheap 5-links on it Lioneye's Paws - an amazing leveling pair of Boots that grants you an extra triggered Rain of Arrows. It also basically grants you a cheap 5-links on it |
|
| Trigger Level 5 Rain of Arrows when you Attack with a Bow +(40-60) to Strength +(40-60) to Dexterity Adds 12 to 24 Fire Damage to Attacks 20% increased Movement Speed 40% reduced Movement Speed when on Low Life |
|
4. Final Skill Tree, Ascendancy Points, and Pantheon
Final Skill Tree:
112 Points Skill Tree (doesn't include Cluster Jewel)
119 Points Path of Building (PoB) link
Ascendancy points:
Preferably in that order:
- Far Shot
- Endless Munitions
- Powerful Precision (if you decide to run CoC+Ice Spear earlier, you will need to prioritize this Passive the extra Pierce)
- Gathering Winds
Pantheon:
Major God: Soul of Solaris 6% Physical Damage Reduction if there is only one nearby Enemy; 20% chance to take 50% less Area Damage from Hits
Minor God: Soul of Garukhan 60% reduced Effect of Shock on you
5. Final Gems links
| [DPS] Barrage/Ice Spear/Freezing Pulse setup (Shaper Bow) |
|
|
Barrage - the recommended Attack to trigger linked Spells. It fires tons of extra projectiles in quick succession making it very easy to Crit constantly. You can get Divergent Barrage for extra Attack Speed |
| Ice Spear - the main damage dealing ability in this build. Ice Spear has greatly increased Critical Strike Chance in its second form, making it the best DPS Spell when you are fighting from a distance | |
 |
Freezing Pulse - a second Spell triggered by this setup. It's also a Cold/Projectile Spell which deals tons of damage to enemies it passes through |
 |
Inspiration Support - grants very high bonus Critical Strike Chance and Elemental Damage, while reducing the Mana Cost of linked Skils (Barrage in this case) |
|
Added Cold Damage Support - adds a ton of extra Cold Damage. You can try getting an Awakened variant which will increase the level of your linked Cold Skill Gems |
 |
Greater Multiple Projectiles Support - increases the number of Projectiles of all three supported skills. It also has an Awakened variant which grants +1 Projectile |
| Gems granted by Shaper Bow: | |
| Cast on Critical Strike Support - the most important Gem in this setup. It will cause Barrage trigger linked Spells (Ice Spear and Freezing Pulse) | |
| [UTILITY] Arcanist Brand setup | |
 |
Arcanist Brand - a Brand skill that in this build is used to apply debuffs and buff your character. It will trigger all linked Spells. You don't need to force yourself to get six links here, as most of the Gems in this setup are optional. You should prioritize Frost Bomb + Bonechill here |
 |
Frost Bomb - applies Cold Exposure to enemies, reducing their Cold Resistance |
 |
Cold Snap - chills enemies and allows you to generate Frenzy Charges when you kill them. If you are using Maloney's Mechanism with Frenzy, this isn't that useful anymore |
| Bonechill Support - increases Cold Damage taken by enemies affected by Chill from linked Spell. Divergent Bonechill even further increases this effect | |
 |
Innervate Support - grants added Lightning Damage to linked Spells, and occasionally it will grant you the Innervation buff which grants extra Lightning Damage |
 |
Summon Ice Golem - the recommended Golem Minion which will increase your Accuracy Rating and Critical Strike Chance |
| [UTILITY] Dash/RF/Flame Wall setup | |
|
Dash - the recommended Movement Skill which increases your mobility |
|
Flame Wall - adds high bonus Fire Damage to projectiles that fire through the Wall |
 |
Vaal Righteous Fire - grants increased Spell Damage for a short duration when you use the Vaal part of this skill. Don't use the regular Righteous Fire or you will most likely die in the process |
 |
Second Wind Support - grants extra Dash charge and reduces the cooldowns of all linked abilities |
| [UTILITY] Herald/Auras setup | |
 |
Hatred - greatly increases your Cold Damage |
 |
Herald of Ice - grants added Cold Damage and causes frozen enemies to explode dealing AoE damage |
|
Precision - increases your Accuracy Rating and Critical Strike Chance. It's extremely important in this build as it defines the rate at which you trigger all your Spells |
 |
Enlighten Support - reduces the amount of Mana Reserved by Supported Spells |
| [DPS] Ice Spear setup (in Asenath's Chant) |
|
| Ice Spear - in this setup, Ice Spear will be triggered whenever you Attack with your Bow, and it will Leech Energy Shield | |
 |
Energy Leech Support - increases the damage of linked Skills and gives you Energy Shield Leech which is mandatory for this Hybrid/Corrupted Soul build |
|
Greater Multiple Projectiles Support |
|
Hypothermia Support - grants high bonus damage against Chilled enemies |
| [UTILITY] Ensnaring Arrow/Frenzy setup (in Maloney's Mechanism) |
|
 |
Ensnaring Arrow - increases the projectile damage taken by affected enemies and slows them down. If you get the Divergent version of this Gem, it will also increase Spell Damage taken per point of Quality on it |
 |
Frenzy - will generate Frenzy Charges which increase your DPS |
 |
Enhance Support - increases the effectiveness of Ensnaring Arrow. It's even more important if you have the Divergent Ensnaring Arrow |
|
|
5. Gear Setup
Below you will find all the recommended gear for our CoC Ice Spear Deadeye. This build requires several Uniques and specific Crafted Rares so it's not the best pick for a League Starter or a budget-build, but still, it should perform exceptionally well for a Deadeye in this budget.
At this point, we would love to invite you to visit our Path of Exile Marketplace where you can buy cheap PoE Currency with real cash, allowing you to easily complete this or any other desired build.
Our recommended items will:
- Cap your resistances
- Give you enough DPS/Life to start mapping successfully
|
Stat priorities on items:
|
 (Helmet) Asenath's Chant - a must-have item for this build. It will trigger linked Spells whenever you attack with your bow. In our case, it's a secondary Ice Spear setup which will Leech Energy Shield and deal substantial damage (Helmet) Asenath's Chant - a must-have item for this build. It will trigger linked Spells whenever you attack with your bow. In our case, it's a secondary Ice Spear setup which will Leech Energy Shield and deal substantial damage |
|
| Trigger a Socketed Spell when you Attack with a Bow (10-15)% increased Attack Speed (10-15)% increased Cast Speed +(100-120) to maximum Energy Shield (30-40)% increased Stun and Block Recovery 30% increased Mana Regeneration Rate 5% increased Movement Speed |
|
| Helmet enchantments: Ice Spear fires an additional Projectile |
|
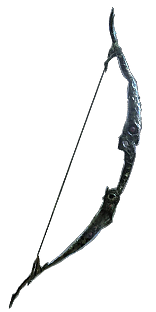 (Weapon) Crafted Shaper Bow - another mandatory and BiS item that gives you an extra 7th link. If you can't get/afford one, just make sure to get a random Bow with Elemental Damage Penetration/Spell Damage bonuses and build up currency to get the "right" one (Weapon) Crafted Shaper Bow - another mandatory and BiS item that gives you an extra 7th link. If you can't get/afford one, just make sure to get a random Bow with Elemental Damage Penetration/Spell Damage bonuses and build up currency to get the "right" one |
|
| Min. requirements: Socketed Gems are Supported by level # Cast on Critical Strike Support 100% Increased Spell Damage Optional affixes: Critical Strike Multiplier Elemental Damage Penetrates #% Cold Resistance |
|
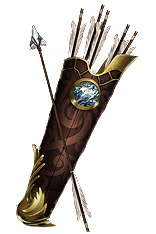
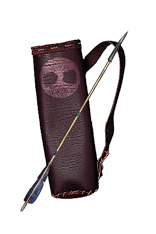
 (Quiver) Maloney's Mechanism - the BiS item which allows you to use two useful Utility Spells that greatly increase your damage and slow down enemies (Quiver) Maloney's Mechanism - the BiS item which allows you to use two useful Utility Spells that greatly increase your damage and slow down enemies |
|
| Has 1 Socket Has 2 Sockets Trigger a Socketed Bow Skill when you Attack with a Bow (7-12)% increased Attack Speed +(50-70) to maximum Life 5% chance to Blind Enemies on Hit with Attacks |
|
 (Quiver) Rare Quiver - if you can't get Maloney's just aim to get high defensive stats here and possibly a chance to generate Frenzy Charge on a kill from it (Quiver) Rare Quiver - if you can't get Maloney's just aim to get high defensive stats here and possibly a chance to generate Frenzy Charge on a kill from it |
|
| Min. requirements: 80 Maximum Life 30% Critical Strike Multiplier Chance to gain Frenzy Charge on Kill Optional affixes: Elemental Resistances Physical Attack Damage Leeched as Mana |
|
 (Body Armour) Rare Body Armor - Body Armour with Maximum Life and % of Maximum Life gained as Extra Maximum Energy Shield is the best option. You should also aim to get (Body Armour) Rare Body Armor - Body Armour with Maximum Life and % of Maximum Life gained as Extra Maximum Energy Shield is the best option. You should also aim to get |
|
| Min. requirements: 110 Maximum Life Gain 10% of Maximum Life as Extra Maximum Energy Shield Optional affixes: Energy Shield Elemental Resistances |
|
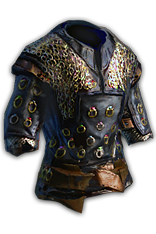 (Body Armour) Replica Loreweave - a very strong option for Body Armour. It doesn't grant as much Energy Shield as the Rare piece, and reduces your Maximum Elemental Resistances, but offers a good DPS bonus and very high bonus Life/Mana/Crit/Attributes (Body Armour) Replica Loreweave - a very strong option for Body Armour. It doesn't grant as much Energy Shield as the Rare piece, and reduces your Maximum Elemental Resistances, but offers a good DPS bonus and very high bonus Life/Mana/Crit/Attributes |
|
| Has 6 Sockets Adds (4–10) to (14–36) Physical Damage to Attacks +(8–24) to all Attributes (Attributes are Strength, Dexterity, and Intelligence) (120–160)% increased Global Critical Strike Chance +(150–200) to maximum Energy Shield +(120–160) to maximum Life +(120–160) to maximum Mana (6–30)% increased Rarity of Items found (15–50)% increased Elemental Damage Your Maximum Resistances are (70–72)% |
|
 (Boots) Rare Boots - again, stack Life/Energy Shield, Movement Speed, and possibly Elemental Resistances (Boots) Rare Boots - again, stack Life/Energy Shield, Movement Speed, and possibly Elemental Resistances |
|
| Min. requirements: 100 Energy Shield 60 Maximum Life 60% Total Elemental Resistances 30% Increased Movement Speed Optional affixes: Chance to gain Elusive on Critical Strike |
|
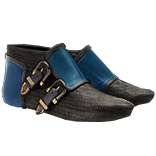 (Boots) Sin Trek - offers very high Movement Speed, Energy Shield, and extra Attributes which can come in handy to use all the required Items and Gems (Boots) Sin Trek - offers very high Movement Speed, Energy Shield, and extra Attributes which can come in handy to use all the required Items and Gems |
|
| +(20-30) to Dexterity +(20-30) to Intelligence (80-100)% increased Evasion Rating +(100-150) to maximum Energy Shield 30% increased Movement Speed Enemies Cannot Leech Life From you |
|
| Boot enchantment: Adds 45 to 68 Cold Damage if you've been Hit Recently |
|
 (Belt) Rare Belt - you can use Stygian Vise for Abyssal Socket, or Crystal Belt for much higher Energy Shield bonuses (Belt) Rare Belt - you can use Stygian Vise for Abyssal Socket, or Crystal Belt for much higher Energy Shield bonuses |
|
| Min. requirements: 90 Maximum Life 110% Total Elemental Resistances Optional affixes: Elemental/Cold Damage Maximum Life% |
|
 (Amulet) The Pandemonius - one of the best Amulets you can use in this build. It offers very high bonus damage, and at the same time, powerful defensive utility (Amulet) The Pandemonius - one of the best Amulets you can use in this build. It offers very high bonus damage, and at the same time, powerful defensive utility |
|
| +(20-30) to Dexterity (20-30)% increased Cold Damage +(35-40)% to Cold Resistance Chill Enemy for 1 second when Hit, reducing their Action Speed by 30% Blind Chilled Enemies on Hit Damage Penetrates 20% Cold Resistance against Chilled Enemies |
|
Recommended Anointments:
|
|
 (Ring) Rare Rings - use two Rare Rings for Mana Cost Reduction and possibly Assassin's Mark on hit affix (Ring) Rare Rings - use two Rare Rings for Mana Cost Reduction and possibly Assassin's Mark on hit affix |
|
|
Min. requirements: |
|
 (Gloves) Rare Gloves - just aim for high defensive stats and possible extra damage while Leeching or against Chilled enemies (Gloves) Rare Gloves - just aim for high defensive stats and possible extra damage while Leeching or against Chilled enemies |
|
| Min. requirements: 80 Maximum Life Optional affixes: Elemental Resistances Attributes Increased Damage while Leeching/against Chilled enemies |
|
 (Jewel) Glorious Vanity - a mandatory Jewel for this build which grants you the Corrupted Soul Passive. We had a "Bathed in the blood of 43xx sacrificed in the name of Doryani" which replaced the Perfect Agony Passive and granted extra Cold Damage instead of Ballistic Mastery. You can also try replacing Pain Attunement for the Corrupted Soul, so just make sure to find out which has better smaller nodes on it (Jewel) Glorious Vanity - a mandatory Jewel for this build which grants you the Corrupted Soul Passive. We had a "Bathed in the blood of 43xx sacrificed in the name of Doryani" which replaced the Perfect Agony Passive and granted extra Cold Damage instead of Ballistic Mastery. You can also try replacing Pain Attunement for the Corrupted Soul, so just make sure to find out which has better smaller nodes on it |
|
| Bathed in the blood of (100-8000) sacrificed in the name of (Ahuana-Doryani-Xibaqua) Passives in radius are Conquered by the Vaal Historic |
|
 (Jewel) Watcher's Eye - a Watcher's Eye with Hatred's flat Critical Strike or Cold Damage Penetration and Flask Charges gained on Crit. with Precision is the best Jewel you can get (Jewel) Watcher's Eye - a Watcher's Eye with Hatred's flat Critical Strike or Cold Damage Penetration and Flask Charges gained on Crit. with Precision is the best Jewel you can get |
|
| (4-6)% increased maximum Energy Shield (4-6)% increased maximum Life (4-6)% increased maximum Mana <Two or Three random aura modifiers> Recommended Aura modifiers: +(1.2-1.8)% to Critical Strike Chance while affected by Hatred Damage Penetrates (10-15)% Cold Resistance while affected by Hatred Adds (58-70) to (88-104) Cold Damage while affected by Hatred Gain a Flask Charge when you deal a Critical Strike while affected by Precision +(20-30)% to Critical Strike Multiplier while affected by Precision |
|
 (Jewel) Volley Fire - increases the number of Barrage's projectiles making it Crit. more consistently. It's quite cheap so you can try getting a corrupted one with "Corrupted Blood cannot be inflicted on you" Implicit modifier (Jewel) Volley Fire - increases the number of Barrage's projectiles making it Crit. more consistently. It's quite cheap so you can try getting a corrupted one with "Corrupted Blood cannot be inflicted on you" Implicit modifier |
|
| (7-10)% increased Projectile Damage With at least 40 Dexterity in Radius, Barrage fires an additional 6 projectiles simultaneously on the first and final attacks |
|
 (Jewel) Rare Jewels - aim for extra Life and Crit. Multiplier - both Global and with Elemental Skills will work (Jewel) Rare Jewels - aim for extra Life and Crit. Multiplier - both Global and with Elemental Skills will work |
|
| Recommended affixes: maximum Life Critical Strike Multiplier with Elemental Skills Optional affixes: Elemental Resistances Attributes |
|
 (Jewel) Abyss Jewels - same as above. You can also try to get one with the chance to Hinder on Spell Hits (Jewel) Abyss Jewels - same as above. You can also try to get one with the chance to Hinder on Spell Hits |
|
| Recommended affixes: maximum Life increased Critical Strike Multiplier Optional affixes: Added Cold Damage to Spells Chance to Hinder enemies on Spell Hits |
|
 (Jewel) Large Cluster Jewel - you need one Large Cluster Jewel with Dorayni's Lesson Passive which is mandatory in this setup. It provides Life Leech on which you rely for your defenses. The other two Passives should just increase Elemental Damage/Cold Damage depending on what type of Jewel you got (Jewel) Large Cluster Jewel - you need one Large Cluster Jewel with Dorayni's Lesson Passive which is mandatory in this setup. It provides Life Leech on which you rely for your defenses. The other two Passives should just increase Elemental Damage/Cold Damage depending on what type of Jewel you got |
|
| Recommended affixes: 1 Added Passive Skill is Doryani's Lesson 1 Added Passive Skill is Prismatic Heart 1 Added Passive Skill is Sadist |
|
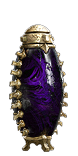 (Flask) Cinderswallow Urn - one of the best Utility Flasks for this build. It recovers a % of your Life and Energy Shield on kill and grants Onslaught buff. It's also recommended to get extra Stun avoidance as the Veiled mod (Flask) Cinderswallow Urn - one of the best Utility Flasks for this build. It recovers a % of your Life and Energy Shield on kill and grants Onslaught buff. It's also recommended to get extra Stun avoidance as the Veiled mod |
|
| Onslaught Recharges 1 Charge when you Consume an Ignited corpse Enemies Ignited by you during Flask Effect take 10% increased Damage Recover (1-3)% of Life when you Kill an Enemy during Flask Effect Recover (1-3)% of Mana when you Kill an Enemy during Flask Effect Recover (1-3)% of Energy Shield when you Kill an Enemy during Flask Effect <One Veiled Mod> |
|
| 40% increased Damage Creates Consecrated Ground on Use (30-50)% increased Duration Consecrated Ground created by this Flask has Tripled Radius +(1-2)% to Critical Strike Chance against Enemies on Consecrated Ground during Effect Consecrated Ground created during Effect applies (7-10)% increased Damage taken to Enemies |
|
Other suggested Flasks:
|
|
   |
|
|
If you have any other build requests please leave that in the comments below.
Pictures used in this article are the intellectual property of Grinding Gear Games.
