
CoC Comet Stormweaver POE2 Build
One of the most well-established CoC builds for a StormweaverCoC Comet
Stormweaver Build
Updated for Path of Exile 2 Early Access
The Best Crafty Guides by Odealo
| Guide notes |
| October 18, 2025 - Created for Early Access. June 14, 2025 - Updated for patch 0.5 |
| Build Overview | |||
| Tags: [TRIGGER] [ELEMENTAL] [ENERGY SHIELD] | |||
|
Budget: Defenses: |
|
Boss DPS: AoE: |
|
It's a simple CoC build. Cast on Critical is a Meta Skill that Triggers a linked Spell for you once you accumulate enough Energy by Hitting enemies Critically. The Spell in question is Comet, as it's one of the most powerful Spells in the game. To gather Energy, we use the Spark with Elemental and Firestorms. These can hit many times per cast, generating lots of Energy and Infusion Remnants, later employed to empower other Spells, Comet included. All these Spells can inflict Elemental Ailments, so we'll add the Cast on Elemental Ailment meta Skill with one more Comet and Living Bomb to create more Infusions. Adonia's Ego becomes a mandatory Wand for effectively inflicting Ailments. We'll add some extra Fire Damage sourced from base damage, thus inflicting Ignite, and by that generating all types of Infusions. If you can't inflict Ignite, just allocate the Elemental Equilibrium Keystone. To deal more damage against bosses, we can use Mana Tempest and Sigil of Power.
CoC Builds naturally need a high Critical Hit Chance. Most of it comes from the Skill Tree, and it will be doable, if not easy, to reach 100% for Spells with 13% base Crit Chance. Then, we may shift focus to Cast Speed. Constant Gale grants Arcane Surge, and Force of Will increases its effect the less Mana we have. It also shifts 20% of Life to be taken from Mana first. These Stormweavers' passives put a lot of pressure on Mana Recovery. We'll have to invest heavily in Mana Regeneration, maybe search for Mana on Kill, and activate Mana Remnants for 30 Spirit. This high Mana consumption creates a great opportunity to benefit from the Sigil of Power. We won't need any Critical Damage with Maligaro's Virtuosity. It basically fixes our damage at 3.5 of its value (regular Crits are two times the regular damage). The defences are basic - just lots and lots of Energy Shield with Chaos Inoculation. Maximum Mana will also soak up a portion of incoming damage, underlining the importance of Mana Recovery.
You can also check our other Path of Exile 2 builds right over here Odealo's Crafty Guides - Full List
1. Gameplay
Spark and Firestorms are the bread and butter; they generate Energy for both Meta Skills. Frost Bomb will improve your single-target damage with powerful Cold Exposure. Sigil of Power and Elemental Weakness will also enhance your DPS, but these are deployed once per boss fight, and only against the toughest ones. Comet and Living Bomb are Triggered with Meta Skills. Convalescence (optional) and Mana Remnants are your passive buffs, but reserve a button for the former to begin recharging Energy Shield when in trouble.
|
|
|
|

2. Build's PROS & CONS
| PROS |
|
| CONS |
|
3. Leveling tips
You can start with any Elemental Spell you're comfortable with. Lightning-infused Spark with Flame Wall is one of the most popular routes. To specialize in Critical Hits, you'll need a high character level with lots of Passive Points allocated there. Not to mention the CoC Gem that requires 100 Spirit. Focus on regular Elemental Damage with Cast Speed and Penetration first. The same goes for Chaos Inoculation - it's a late-game commitment. You can always check our Cold Spellcaster Stormweaver build to see how to assemble a similar, albeit more cold-damage-focused build.
4. Final Skill Tree, Ascendancy Points, and Pantheon
Final Skill Tree:
 |
|
Click on the image to open the Passive Tree preview in a new window Or import the build into PoB: |
Ascendancy points:
Preferably in this order:
- Constant Gale
- Tempest Caller
- Refracted Infusion
- Storm's Recollection
- swap Constant Gale for Multiplying Squalls
5. Final Gems links
| [DPS] Elemental Storm setup | |
 |
Elemental Storm - An Ascendancy Skill that Triggers on Critical Hit. In this setup, it should Ignite to inflict Fire Exposure and grant Elemental Archon, which is critical for this build to work. |
 |
Magnified Area |
 |
Arbiter's Ignition |
 |
Cooldown Recovery |
 |
Fire Exposure |
 |
Ignite |
| [DPS] Cast on Critical setup | |
 |
Cast on Critical - Linked Spell is cast once you accumulate enough Energy by Hitting Critically. |
 |
Comet - Comet is one of the most powerful Spells in the game. It deals Cold Damage and has a high base Crit Chance. It can be infused with Fire to deal additional damage. |
 |
Pinpoint Critical |
 |
Efficiency |
 |
Boundless Energy |
 |
Concentrated Area |
| [DPS] Cast on Elemental Ailment setup | |
 |
Cast on Elemental Ailment - Casts linked Spells once you've Ignited, Shocked, and Frozen enough enemies. |
|
Comet |
 |
Living Bomb - Targets one enemy and deals Fire Damage after a while. Leaves a Fire Remnant after doing so. |
|
Efficiency |
|
Pinpoint Critical |
 |
Spell Cascade |
| [DPS] Spark setup | |
 |
Spark - Spark is the Spell you'll use the most. It releases many fast-moving Projectiles whose role is to generate Energy for your Meta Skills. |
|
Pinpoint Critical |
 |
Pierce |
 |
Zenith |
 |
Rapid Casting |
|
Efficiency or Vilenta's Propulsion |
| [UTILITY] Frost Bomb setup | |
 |
Frost Bomb - A Cold Spell. Its role is to create Remnants and apply Cold Exposure. |
 |
Short Fuse |
|
Cooldown Recovery |
|
Spell Cascade |
 |
Lifetap |
 |
Overabundance |
| [UTILITY] Firestorm setup | |
 |
Firestorm - Firestorm can be Infused with Cold and Lightning to deal all three types of Elemental Damage, which is required to generate more Energy. |
 |
Morgana's Tempest |
|
Rapid Casting |
 |
Unleash |
|
Pinpoint Critical |
|
Lifetap |
| [UTILITY] Siphon Elements setup | |
 |
Siphon Elements - A passive Buff that generates Infusion Remnants when you Freeze, Shock, or Ignite. |
 |
Harmonic Remnants |
 |
Khatal's Rejuvenation |
| [UTILITY] Sigil of Power setup | |
 |
Sigil of Power - Grants up to around 60% more Spell Damage while you spend Mana in it. It encourages spending lots of Mana and requires good Mana Recovery. |
|
Cooldown Recovery |
 |
Second Wind |
|
Magnified Area |
 |
Prolonged Duration |
| [UTILITY] Elemental Weakness setup | |
 |
Elemental Weakness - Lowers Elemental Resistances of the affected enemy. |
 |
Heightened Curse |
 |
Cursed Ground |
|
Magnified Area |
|
Prolonged Duration |
 |
Focused Curse |
| [UTILITY] Mana Remnants setup | |
 |
Mana Remnants - A buff that creates Mana Remnants upon killing and Critically Hitting enemies affected by Elemental Ailments. |
|
Harmonic Remnants |
 |
Remnant Potency |
 |
Mysticism |
| [UTILITY] Mana Tempest setup | |
 |
Mana Tempest - Creates a Mana-draining Storm that empowers your Spells, especially Spark. It grants extra Damage and Splits Projectiles. |
|
Cooldown Recovery |
 |
Arcane Surge |
|
Efficiency |
 |
Lightning Mastery |
| [UTILITY] Pinnacle of Power setup | |
 |
Pinnacle of Power - Consumes Power Charges to grant you a buff. It grants more Elemental Damage and causes all your Damage to contribute to Shock, Freeze, and Ignite buildup. It comes from Adonia's Ego. |
|
Prolonged Duration |
 |
Heightened Charges |
|
Efficiency |
 |
Cold Mastery |
|
|
6. Gear Setup
The only defensive layer is Energy Shield and Maximum Mana (from Force of Will). These are the only Prefixes to seek on most Rare Items. Mana Regeneration Rate and Intelligence are also useful. If your Mana Recovery is still not enough, try relying more on Mana Remnants and the Mana Flask. Almost all damage is sourced from the Weapon, Focus, and Jewelry. There, you should aim for the Gem Level of all Cold Spells, Cast Speed, Critical Strike Chance, and extra damage sourced from other types of Damage. It's important to note that the Critical Damage bonus will not be needed at all with Maligaro's Virtuosity. Some additional Spirit will be required; at least 200. Increased Energy Gained and ES Recharge Rate are very scarce. Chaos Resistance is not needed at all.
|
Stat priorities on items:
|
 (Helmet) Rare Helmet - A Helmet will get you Maximum Energy Shield, Resistances, and various other stats from the pool listed here. Prioritize the basics. (Helmet) Rare Helmet - A Helmet will get you Maximum Energy Shield, Resistances, and various other stats from the pool listed here. Prioritize the basics. |
|
| Min. requirements: +350 to Energy Shield +40% total Elemental Resistance Optional affixes: Maximum Mana increased Critical Hit Chance increased Energy Shield Recharge Rate increased effect of Arcane Surge on you (Desecrated Suffix) Attributes |
|
 (Helmet) Alpha's Howl - It grants a lot of Spirit, which is extremely in-demand for this build, as it uses over 300 of it. Socket Idol of Eeshta here for Reservation Efficiency. (Helmet) Alpha's Howl - It grants a lot of Spirit, which is extremely in-demand for this build, as it uses over 300 of it. Socket Idol of Eeshta here for Reservation Efficiency. |
|
| (80-100)% increased Evasion Rating +100 to Spirit +(50-75)% to Cold Resistance Presence Radius is doubled |
|
 (Weapon) Rare Wand - Wand must have some Cast Speed, Gem Level of Cold Spells, Crit Chance, and as much damage as extra damage of some other type as you can afford. (Weapon) Rare Wand - Wand must have some Cast Speed, Gem Level of Cold Spells, Crit Chance, and as much damage as extra damage of some other type as you can afford. |
|
| Min. requirements: +4 to Level of all Cold Spell Skills 20% increased Cast Speed increased Critical Hit Chance for Spells Gain #% of Damage as Extra Lightning, Cold, or Fire Damage Optional affixes: Gain #% of Damage as Extra Lightning, Cold, or Fire Damage increased Spell Damage increased Cold or Elemental Damage |
|
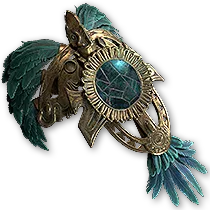
 (Weapon) Adonia's Ego - Not outstanding by any means with its stats, but by granting the Pinnacle of Power Skill it opens up a lot of possibilities not only to gain more Energy for CoEA, but for other Ailment-related mechanics. It will become mandatory at some point. (Weapon) Adonia's Ego - Not outstanding by any means with its stats, but by granting the Pinnacle of Power Skill it opens up a lot of possibilities not only to gain more Energy for CoEA, but for other Ailment-related mechanics. It will become mandatory at some point. |
|
| Grants Skill: Level (15-20) Power Siphon Grants Skill: Level 20 Pinnacle of Power +(100-150) to maximum Mana +3 to Level of all Spell Skills (15-30)% increased Cast Speed -10% to all Elemental Resistances per Power Charge +(-1-1) to Maximum Power Charges |
|
 (Off-hand) Rare Focus - Foci are plentiful with all kinds of modifiers suited this build. For Damage, prioritize +2 to Gem Level. Maximum Energy Shield and Mana will enhance your defences. Mana Regeneration Rate can be found as well; it might be useful. (Off-hand) Rare Focus - Foci are plentiful with all kinds of modifiers suited this build. For Damage, prioritize +2 to Gem Level. Maximum Energy Shield and Mana will enhance your defences. Mana Regeneration Rate can be found as well; it might be useful. |
|
| Min. requirements: increased Spell or Cold Damage increased Critical Hit Chance for Spells +2 Level of all Spell Skills Optional affixes: increased Cast Speed Maximum Energy Shield increased Mana Regeneration Rate Maximum Mana |
|
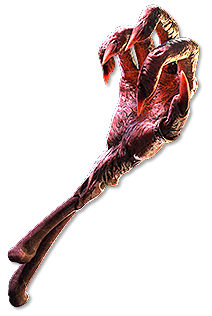 (Off-hand) Sacred Flame - Sacred Flame grants tons of Spirit and Extra Fire Damage. This build lacks such a source of damage, making it very efficient. Purity of Fire is for Fire Resistance. Socket the Rabbit Idol here for more Spirit. (Off-hand) Sacred Flame - Sacred Flame grants tons of Spirit and Extra Fire Damage. This build lacks such a source of damage, making it very efficient. Purity of Fire is for Fire Resistance. Socket the Rabbit Idol here for more Spirit. |
|
| Grants Skill: Level (18-20) Purity of Fire Gain (40-60)% of Damage as Extra Fire Damage Allies in your Presence Gain (20-30)% of Damage as Extra Fire Damage Allies in your Presence Regenerate (2-3)% of their Maximum Life per second Enemies in your Presence Resist Elemental Damage based on their Lowest Resistance |
|
 (Gloves) Maligaro's Virtuosity - Critical Strike Bonus is fixed at 250%, which alleviates pressure put on the Skill Tree, where you'll need to allocate Energy Passives for Meta and Triggered Spells. (Gloves) Maligaro's Virtuosity - Critical Strike Bonus is fixed at 250%, which alleviates pressure put on the Skill Tree, where you'll need to allocate Energy Passives for Meta and Triggered Spells. |
|
| (60–80)% increased Evasion Rating (20–30)% increased Critical Hit Chance 5% increased Attack Speed +(10–20) to Dexterity Your Critical Damage Bonus is 250% |
|
 (Boots) Rare Boots - On Boots, you will need Movement Speed, some Resistances, and Energy Shield. Then, try to get even more Resistances. (Boots) Rare Boots - On Boots, you will need Movement Speed, some Resistances, and Energy Shield. Then, try to get even more Resistances. |
|
| Min. requirements: +30% increased Movement Speed +40% total Elemental Resistance Optional affixes: reduced Freeze Duration on you Maximum Energy Shield increased Energy Shield Recharge Rate 100% increased effect of Socketed Items (Essence Suffix) Attributes |
|
 (Amulet) Rare Amulet - An Amulet may add and increase your global Energy Shield, so go for that on Prefixes, but Suffixes shall grant Spirit, Resistances, and other listed here mods. +3 to the Level of all Spell Skills is also important. (Amulet) Rare Amulet - An Amulet may add and increase your global Energy Shield, so go for that on Prefixes, but Suffixes shall grant Spirit, Resistances, and other listed here mods. +3 to the Level of all Spell Skills is also important. |
|
| Min. requirements: Spirit +3 to Level of all Spell Skills Optional affixes: Elemental Resistance Energy Shield increased Critical Hit Chance increased Cast Speed increased Mana Regeneration Rate Anointment: Arcane Intensity Evocational Practitioner |
|
 (Ring) Rare Ring - Rings are great for Resistances and Attributes, as well as Maximum Mana and increased Cold Damage. Mana on Kill and Mana Regeneration will undoubtedly be useful. (Ring) Rare Ring - Rings are great for Resistances and Attributes, as well as Maximum Mana and increased Cold Damage. Mana on Kill and Mana Regeneration will undoubtedly be useful. |
|
| Min. requirements: +80% total Elemental Resistance Attributes Optional affixes: increased Mana Regeneration Rate Maximum Mana increased Cold Damage Gain # Mana per Enemy Killed |
|
 (Belt) Rare Belt - Belt, besides Resistances, can roll Strength, so it's a great place to get it. The only Prefix that stands out is Maximum Mana, so try to acquire it too. (Belt) Rare Belt - Belt, besides Resistances, can roll Strength, so it's a great place to get it. The only Prefix that stands out is Maximum Mana, so try to acquire it too. |
|
| Min. requirements: +80% total Elemental Resistance Strength Optional affixes: Charm slots Maximum Mana increased Mana Regeneration Rate (Desecrated Suffix) |
|
 (Belt) Darkness Enthroned - Darkness Enthroned may be used to take advantage of The Greatwolf's Rune of Willpower and redirect more damage to be taken from Mana, Thane Grannell's Rune of Mastery to increase the effect of Shock, and so on. (Belt) Darkness Enthroned - Darkness Enthroned may be used to take advantage of The Greatwolf's Rune of Willpower and redirect more damage to be taken from Mana, Thane Grannell's Rune of Mastery to increase the effect of Shock, and so on. |
|
| Flasks gain 0.17 charges per Second Has (1-3) Charm Slots This item gains bonuses from Socketed Items as though it was <Random socketable equipment type> +(50-100)% increased effect of Socketed Items Has 2 Rune Sockets (Hidden) |
|
 (Body Armour) Rare Body Armour - On Body Armour, try to accumulate as much Energy Shield as possible. Add some Spirit and Resistances if needed, but don't prioritize them over ES here. (Body Armour) Rare Body Armour - On Body Armour, try to accumulate as much Energy Shield as possible. Add some Spirit and Resistances if needed, but don't prioritize them over ES here. |
|
| Min. requirements: 500 Energy Shield +60% total Elemental Resistance Spirit Optional affixes: faster start of Energy Shield Recharge #% of Damage taken Recouped as Mana (Desecrated Suffix) |
|
 (Jewel) Rare Jewels - Look for Jewels that will help you gain or retain Energy and affect the Triggered Spells, as it's your main source of damage. (Jewel) Rare Jewels - Look for Jewels that will help you gain or retain Energy and affect the Triggered Spells, as it's your main source of damage. |
|
| Optional affixes: Damage Penetrated #% Cold Resistance increased Cold/Elemental Damage Meta Skills gain #% increased Energy Triggered Spells deal #% increased Spell Damage Recover #% of Mana on Kill |
|
 (Jewel) Prism of Belief - Prism of Belief with Gem Levels of Comet will increase your Damage. It can be good, but be careful - Comet is one of the most popular Spells, so it'll be expensive. (Jewel) Prism of Belief - Prism of Belief with Gem Levels of Comet will increase your Damage. It can be good, but be careful - Comet is one of the most popular Spells, so it'll be expensive. |
|
| +(1–3) to Level of all Specific Skill Skills |
|
|
If you have any other build requests please leave that in the comments below. We are always open to suggestions and constructive feedback.
Pictures used in this article are the intellectual property of Grinding Gear Games.