
Cold Spellcaster Stormweaver POE 2 Build
A complex and engaging Setup for Stormweaver that combines almost every Cold Spell into the ultimate Spellcaster BuildCold Spellcaster
Stormweaver Build
Updated for Path of Exile 2 Early Access
The Best Crafty Guides by Odealo
| Guide notes |
| June 8, 2025 - Created for Early Access. |
| Build Overview | |||
| Tags: [CASTER] [COLD] [ES] [CRIT] | |||
|
Budget: Defenses: |
|
Boss DPS: AoE: |
|
The Cold Spellcaster archetype is fairly unique among other Builds, as it is very inconvenient to use just one Spell, you will want to use and mix most of them at once. There are no inherent combos or interactions, but their individual features require a specific use case.
The strongest of them all is the Comet, but its lengthy Cast Time which also locks you in place makes it unrealistic to use manually, you will have to Trigger it with Cast on Freeze/Critical. Its damage is followed by the Cold Snap, but it can only be used on Frozen Enemies. The Frost Bomb and Frost Wall can deal a decent amount of Damage but are limited by a short Cooldown, which leaves you with just two Cold Spells to use freely: Ice Nova and Frostbolt.
The Ice Nova deals slightly less Damage but can cover great AoE, and has a massive bonus for Freezing Enemies, which is very beneficial for both Comet and Cold Snap. The Frostbolt features a Projectile-based playstyle but becomes competitive only once you acquire the quite expensive Snakepit Ring. You could also use Eye of Winter, but its base Damage is too low to justify it right now, although it might change in future versions.
The long list of Skills might sound intimidating, but the natural flow of Spells makes it quite easy to adapt. Your gameplay will definitely be more challenging than the average Build, but it makes it more engaging and satisfying once executed properly.
The Ascendency choice is also flexible. The default recommendation is Stormweaver, which grants you double Shock, extra Exposure effect, permanent Arcane Surge, and can use the Chaos Innoculation Keystone for total immunity against Chaos Damage. The Blood Mage offers an easy solution for all your Mana management with Blood Magic and Life Leech and provides a bit of extra Crit. The Lich can achieve much better survivability at the cost of Damage, but it also requires extra investments into ES Recharge Rate and Chaos Resistance.
You can also check our other Path of Exile 2 builds right over here Odealo's Crafty Guides - Full List
1. Gameplay
Use Ice Nova to kill or Freeze weaker Enemies, which will automatically summon Comet or allow you to use Cold Snap. For tougher Enemies, you will place down Frost Bomb which removes almost 60% Cold Resistance and explodes twice after a short delay. While waiting for the explosion you should surround enemies with Frost Walls, which will shatter when damaged by the Frost Bomb or your Enemies. For maximum burst, you should also place down Sigil of Power, Hypothermia, and Mana Tempest.
|
|
|
|

2. Build's PROS & CONS
| PROS |
|
| CONS |
|
3. Leveling tips
You will gradually unlock more Cold Spells as you level up, which will help familiarise yourself with their combos. Freezing Enemies will be hard at first, but the Cold Snap can be used to immediately detonate your Frostbolts, which will be your main source of Damage. A Rare Staff with Freezing Shards Spell with great help as this Skill costs no Mana or Cooldown, but its Damage is too low for the endgame.
4. Final Skill Tree, Ascendancy Points, and Pantheon
Final Skill Tree:
 |
|
Click on the image to open the Passive Tree preview in a new window, or use the Path of Building (PoB) tool. |
Ascendancy points:
Preferably in this order:
- Constant Gale
- Strike Twice
- Shaper of Storms
- Scouring Winds
5. Final Gems links
| [DPS] Ice Nova setup Weapon set 1 |
|
 |
Ice Nova - deals a moderate amount of Cold Damage in large areas with a massive bonus to Freeze Buildup. |
 |
Ambush - it is great Support for Mapping but should be replaced with Blind Support against Pinnacle Bosses. |
 |
Spell Cascade |
 |
Astral Projection |
 |
Magnified Effect |
 |
Arcane Tempo |
| [DPS] Frost Wall setup Weapon set 1 |
|
 |
Frost Wall - conjures multiple Ice Crystals that block movement. Once destroyed by monsters or yourself the Crystals explode dealing Cold Damage. |
 |
Verglas |
 |
Deliberation |
 |
Blindside |
 |
Glaciation |
 |
Ingenuity |
| [DPS] Frost Bomb setup Weapon set 1 |
|
 |
Frost Bomb - places an icy Bomb that explodes after a short delay, dealing a large amount of Damage. It is limited by a Cooldown and inflicts Cold Exposure on all Enemies. |
 |
Spell Echo |
 |
Fast Forward |
 |
Strip Away |
 |
Considered Casting |
 |
Cold Mastery |
| [DPS] Comet setup Weapon set 1 |
|
 |
Comet - deals an immense amount of Damage, but the very long Cast Time makes it very hard to use it manually. You should Trigger it with a Meta Gem. |
 |
Cast on Freeze - during regular Mapping, you will easily Freeze a lot of monsters, which grants you Energy. Freezing Bosses takes a lot more time, you should switch to Cast on Crit instead. |
 |
Impetus |
 |
Energy Retention |
 |
Pinpoint Critical |
 |
Inspiration |
| [DPS] Cold Snap setup Weapon set 1 |
|
 |
Cold Snap - consumes Freeze on Enemies to deal large amounts of Cold Damage, but has no effect if monsters are not Frozen. It can also be used on Frostbolts to detonate them instantly. |
 |
Concentrated Effect |
 |
Inevitable Critical |
 |
Excise |
 |
Elemental Focus |
 |
Leverage |
| [UTILITY] Arctic Armour setup Weapon set 1 |
|
 |
Arctic Armour - Melee Attacks against you trigger an icy burst of Damage to the Attacker. You will have to disable it against Pinnacle Bosses to enable the Cast on Crit Setup. |
 |
Clarity |
| [UTILITY] Blink setup Weapon set 2 |
|
 |
Blink - replaces your Dodge Roll with a teleport. You should use it on your second Weapon Set to save Spirit. |
| [UTILITY] Hypothermia setup Weapon set 2 |
|
 |
Hypothermia - an Elemental Curse that massively lowers the Cold Resistance of your Enemies. It costs a lot of Mana to use, so you might need to use a lower level at first if it stops you from Casting your main Spells. |
 |
Ritualistic Curse |
 |
Heightened Curse |
|
Focused Curse |
 |
Cursed Ground |
| [UTILITY] Mana Tempest | |
 |
Mana Tempest - empowers your Spells, but quickly drains your Mana. Try to synchronize it with your burst. |
 |
Premeditation |
|
Lightning Mastery |
| [UTILITY] Sigil of Power setup | |
 |
Sigil of Power - this Spell is granted by your Second Weapon. It massively empowers the Damage of your Spells if you stand in the circle and spend Mana. |
|
Persistence |
|
|
6. Gear Setup
The Gearing is very straightforward. To improve your Damage you shall seek increases to Spell Damage, bonuses to Gem Levels, Cast Speed, and Critical Strike Chance. Spell Gem Levels are very important, but you shouldn't give up on other modifiers just to get one more Level. You will also need Mana and Mana Regeneration. Defensively, you only need to cap your Elemental Resistance and get as much Energy Shield as possible. The Attributes are not a big problem for this Build, you will only need a bit of Dexterity and Intelligence.
|
Stat priorities on items:
|
 (Weapon) Rare Wand - on your Wand you should prioritize Spell Gem Levels, Critical Strike Chance, and increases to Spell Damage. Cast Speed, Mana Regeneration, or Freeze Buildup can also be found here, but they are not as important. (Weapon) Rare Wand - on your Wand you should prioritize Spell Gem Levels, Critical Strike Chance, and increases to Spell Damage. Cast Speed, Mana Regeneration, or Freeze Buildup can also be found here, but they are not as important. |
|
| Min. requirements: 80% increased Cold Spell Damage +4 to Level of all Chaos Spell Skills 70% increased Critical Hit Chance for Spells Optional affixes: increased Cast Speed increased Mana Regeneration Rate |
|
 (Focus) Rare Focus - the Focus is quite similar to your Wand, but it doesn't grant as many Gem Levels. Instead, you can get defensive modifiers such as Energy Shield or Elemental Resistance. (Focus) Rare Focus - the Focus is quite similar to your Wand, but it doesn't grant as many Gem Levels. Instead, you can get defensive modifiers such as Energy Shield or Elemental Resistance. |
|
| Min. requirements: +2 to Level of all Spell Skills 50% increased Critical Hit Chance for Spells 40% increased Cold/Spell Damage Optional affixes: % increased Cast Speed % total Elemental Resistance |
|
 (Staff) Rare Staff - the Sigil of Power Spell is obtainable only through Staves. Its modifiers do not matter that much, but extra Cast Speed or Spell Levels are quite useful for Hypothermia and smoother gameplay. (Staff) Rare Staff - the Sigil of Power Spell is obtainable only through Staves. Its modifiers do not matter that much, but extra Cast Speed or Spell Levels are quite useful for Hypothermia and smoother gameplay. |
|
| Min. requirements: Grants Skill: Level 15 Sigil of Power 50% increased Cast Speed Optional affixes: +# to Level of Cold Spell Skills |
|
 (Amulet) Rare Amulet - the final source of Spell Gem Levels. You should also get some bonuses for Energy Shield, Critical Strikes, Resistance, or Attributes here. You can also get extra Spirit to use more Cast on Freeze or Crit Setups, but it is very expensive. (Amulet) Rare Amulet - the final source of Spell Gem Levels. You should also get some bonuses for Energy Shield, Critical Strikes, Resistance, or Attributes here. You can also get extra Spirit to use more Cast on Freeze or Crit Setups, but it is very expensive. |
|
| Min. requirements: 40% increased maximum Energy Shield +2 to Level of all Projectile/Spell Skills Optional affixes: +# to Spirit % increased Critical Hit Chance % increased Mana Regeneration Rate % increased Cast Speed Resistance |
|
 (Gloves) Maligaro's Virtuosity - with those Gloves you can pick up a lot of powerful Notables or Support Gems that grant Critical Hit Chance at the cost of Critical Damage Bonus, as it will be always at 300%. (Gloves) Maligaro's Virtuosity - with those Gloves you can pick up a lot of powerful Notables or Support Gems that grant Critical Hit Chance at the cost of Critical Damage Bonus, as it will be always at 300%. |
|
| (60–80)% increased Evasion Rating (20–30)% increased Critical Hit Chance 5% increased Attack Speed +(10–20) to Dexterity Your Critical Damage Bonus is 300% |
|
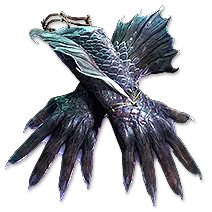 (Gloves) Nightscale - those Gloves provide an absurd amount of Mana Regeneration, but you will have to pick up a lot of Critical Damage Bonus on Items and Passive Tree to compensate. (Gloves) Nightscale - those Gloves provide an absurd amount of Mana Regeneration, but you will have to pick up a lot of Critical Damage Bonus on Items and Passive Tree to compensate. |
|
| (60–100)% increased Energy Shield (30–50)% increased Critical Hit Chance +(10–20) to Intelligence +(20–30)% to Cold Resistance 150% increased Mana Regeneration Rate if you've dealt a Critical Hit Recently Cannot Regenerate Mana if you haven't dealt a Critical Hit Recently |
|
 (Ring) Rare Ring - the Rings can increase your Cold Damage a bit, but it is a much better idea to get tons of Cast Speed to smooth out your gameplay a lot. You will also need the usual Resistances, Mana Regeneration, or Attributes. (Ring) Rare Ring - the Rings can increase your Cold Damage a bit, but it is a much better idea to get tons of Cast Speed to smooth out your gameplay a lot. You will also need the usual Resistances, Mana Regeneration, or Attributes. |
|
| Min. requirements: 20% increased Cast Speed +80% total Elemental Resistance Optional affixes: % increased Mana Regeneration Rate % increased Cold Damage |
|
 (Belt) Rare Belt - your Belt is a great source of Resistance, allowing you to pick up more offensive modifiers on your remaining Gear Pieces. It can also grant you Charms to deal with annoying Ailments. (Belt) Rare Belt - your Belt is a great source of Resistance, allowing you to pick up more offensive modifiers on your remaining Gear Pieces. It can also grant you Charms to deal with annoying Ailments. |
|
| Min. requirements: +80% total Elemental Resistance Optional affixes: +# to maximum Mana % increased Flask Mana Recovery rate +# Charm slots |
|
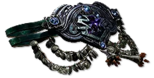 (Belt) Shavronne's Satchel - this Belt allows you to recover Energy Shield without waiting for the Recharge to start or having to pick up the Eternal Youth Keystone. However, it is hard to get enough Resistances without a Rare Belt. (Belt) Shavronne's Satchel - this Belt allows you to recover Energy Shield without waiting for the Recharge to start or having to pick up the Eternal Youth Keystone. However, it is hard to get enough Resistances without a Rare Belt. |
|
| Has (1–3) Charm Slot Flasks gain 0.17 charges per Second (20–30)% reduced Flask Life Recovery rate +(20–30) to Intelligence (20–30)% increased Flask Charges gained Life Recovery from Flasks also applies to Energy Shield |
|
 (Helmet) Rare Helmet - The Helmet is a great source of Energy Shield, but it also can boost your Critical Strike Chance. It should also grant Resistance or Attributes. (Helmet) Rare Helmet - The Helmet is a great source of Energy Shield, but it also can boost your Critical Strike Chance. It should also grant Resistance or Attributes. |
|
| Min. requirements: +300 to Energy Shield 25% increased Critical Hit Chance Optional affixes: +% total Elemental Resistance |
|
 (Body Armour) Rare Armour - the Body Armour provides the majority of your Energy Shield, make sure to get a lot of it here. It can also speed up your Recharge or grant extra Spirit. (Body Armour) Rare Armour - the Body Armour provides the majority of your Energy Shield, make sure to get a lot of it here. It can also speed up your Recharge or grant extra Spirit. |
|
| Min. requirements: +800 to Energy Shield Optional affixes: +% total Elemental Resistance +# to Spirit % faster start of Energy Shield Recharge % increased Mana Regeneration Rate |
|
 (Boots) Rare Boots - the Movement Speed on your Boots is a mandatory modifier, make sure to get at least 30% here. Other than that it should provide the usual defensive modifiers. (Boots) Rare Boots - the Movement Speed on your Boots is a mandatory modifier, make sure to get at least 30% here. Other than that it should provide the usual defensive modifiers. |
|
| Min. requirements: 30% Movement Speed +100 to Energy Shield +30% total Elemental Resistance Optional affixes: Attributes % reduced Freeze Duration on you |
|
 (Jewel) Rare Jewel - your Jewels should improve your Energy Shield, increase Critical Strike Chance or Spell Damage, and raise the Energy gains. It is recommended to have at least one Jewel that Recovers Mana on Kill. (Jewel) Rare Jewel - your Jewels should improve your Energy Shield, increase Critical Strike Chance or Spell Damage, and raise the Energy gains. It is recommended to have at least one Jewel that Recovers Mana on Kill. |
|
| Recommended modifiers: #% increased maximum Energy Shield Recover #% of maximum Mana on Kill #% increased Critical Hit Chance Meta Skills gain #% increased Energy #% increased Mana Regeneration Rate Gain additional Stun Threshold equal to #% of maximum Energy Shield #% increased Spell Damage |
|
|
If you have any other build requests please leave that in the comments below. We are always open to suggestions and constructive feedback.
Pictures used in this article are the intellectual property of Grinding Gear Games.