
Cobra Lash Trickster
A chain and ward-stacking build that uses niche Uniques and Passives to massively boost your damageChain-stacking Cobra Lash
Trickster Build
Updated for Patch 3.25
The Best Crafty Guides by Odealo
| Guide notes | |||
| September 11, 2024 -Build created |
|||
| Build overview | |||
| Tags: [RANGED] [CHAOS] [LIFE] | |||
|
Budget: Defenses: |
|
Boss DPS: AoE: |
|
Chaining is a property of a Projectile that allows it to bounce after hitting an opponent and let it automatically target the nearest one after that. There are ways to scale up your damage with the remaining Chain, meaning that the first enemy to be hit with a projectile that Chains multiple times will receive increased damage. These are "Follow-Through" notables and the Quality of Cobra Lash. Nightgrip, Ynda's Stand, Faithguard, and a good Rare Body Armour should grant you 2000 added Chaos Damage, and that's as much as 4 Covenants. Cobra Lash is the only viable skill for this build as it has built-in Chains and damage scaling similar to that of Follow-Through. Due to the potency of "Follow-Through" notables, which are found only in Medium Cluster Jewels, we are incentivized to use The Voices Large Cluster Jewel, preferably 3 of them, and that makes the build extremely expensive.
Pick Trickster for the generic defensive and offensive stats. Escape Artist will grant you Energy Shield, Soul Drinker combined with Energy Leech Support is used to Overleech and get more damage while Leeching, which is always. Polymath and One Step Ahead will get you quite a lot of damage and recovery, but not much else. Your other defenses are around 3k of Maximum Life, a lot of Evasion Rating, some Armour, Block Chance, and the ranged nature of the build. There are two versions of this build, one that uses Svalinn, and the other one that implements The Squire. The Svalinn one aims to cap Block Chance, which combined with high Evasion provides an extremely reliable and powerful defensive barrier. The Squire version lets you make a 9-link and it's a glass-canon option. We will focus more on The Squire option, but we will mention the differences where it's appropriate.
You can also find our other Path of Exile builds right over here Odealo's Crafty Guides - Full List
1. Gameplay
Use Cobra Lash is a great tool for clear speed due to the multiple Chains, but here it's also great against single targets, as long as they're one of the first targets of your Attacks. 14 stacks of Withered are applied with Withering Step, so stay close to the opponents. You also have Point Blank with Flesh and Stone, and that's another reason to stay close. Against Bosses, deeply Arcanist Brand which will trigger Tornado and Despair. Your other Curse is Snipier's Mark. Vaal Haste, or Hate hosted by Dark Marionettes, is another source of damage to be used occasionally. Steelskin is triggered automatically. Your Auras are Grace, and depending on your preferences, Skitterbots, Purity of Elements, Flesh and Strone, Arctic Armour, or Tempest Shield.
|
|
|
|
2. Build's PROS & CONS
| PROS |
|
| CONS |
|
3. Leveling tips
Cobra Lash is a great leveling Skill, and it's available since level 1. At first, build a general Attack Damage character dealing a combined Poison and Attack Damage, and at level 60, when you'll be able to socket your first Large Cluster Jewel, do so and start stacking the Follow-Through Notables. We recommend leveling with Tabula Rasa, there are a lot of great Support Gems you can use, but keep in mind that you might run out of Mana without Clarity. Update your Claw frequently for one with a higher Physical or Chaos Damage, it will be progressively more important as you level up.
Suggested leveling Gem setups:
| Cleave setup | |
 |
Cobra Lash - Cobra Lash is great for leveling, but it can be replaced with a similar attack. |
 |
Chance to Poison Support - Use for Added Chaos Damage and increased Chance to Poison on Hit. |
 |
Void Manipulation Support - Use only after converting all of your damage to Chaos via Chaos Mastery, it makes you deal more Chaos Damage at the cost of Elemental Damage. |
 |
Vicious Projectiles Support - You deal more Chaos Damage, Physical Damage, and Chaos DoT, but have less Attack Speed. One of the best Gems you can link here. |
 |
Chain Support - Extra Chain for better damage and clear speed. |
| various Gems | |
 |
Precision - Increases your Critical Strike Chance and Accuracy Rating. |
 |
Clarity - Increased Mana Recovery Rate. |
 |
Herald of Agony - Increased Chance of Poisoning and more Poison Damage, The Agony Crawler is a nice addition. |
 |
Despair - A Curse to make enemies receive additional Chaos Damage and take more Chaos Damage. |
 |
Dash - Dash is a simple mobility Spell that allows you to Dash. |
Bandits:
We recommend killing all the Bandits for two additional Passive Points.
Leveling Skill Trees:
31 Points Skill Tree
Allocate Life and Mana Leech for better resource sustain, some damage, and Maximum Life
85 Points Skill Tree
Get more Poison Damage, reduce the Mana Cost of your Skills, get Mana Reservation Efficiency, some Masteries for Polymath damage, and Claw or Dagger Damage, depending on your weapon. At this point, you will start allocating the outer Jewel Socket for Follow-Through notables
Recommended leveling items:
 Blackheart - Adds Physical and Chaos damage and grants Maximum Life with a bit of Life Regeneration, a great Ring overall. Blackheart - Adds Physical and Chaos damage and grants Maximum Life with a bit of Life Regeneration, a great Ring overall. |
|
| Adds 1 to 4 Physical Damage to Attacks Adds (10-15) to (20-25) Chaos Damage to Attacks Regenerate (10-15) Life per second 10% chance to Cause Monsters to Flee |
|
 Mark of Submission - You can socket the Despair Curse here so that it's easily applied to all enemies you Hit. Mark of Submission - You can socket the Despair Curse here so that it's easily applied to all enemies you Hit. |
|
| Has 1 Socket Curse Enemies with Socketed Hex Curse Gem on Hit |
 Meginord's Girdle - Provides you with the necessary Strenght adds Physical Damage to Attacks, grants Cold Resistance, and Maximum Life. Meginord's Girdle - Provides you with the necessary Strenght adds Physical Damage to Attacks, grants Cold Resistance, and Maximum Life. |
|
| +(25-35) to Strength +25 to Strength Adds 10 to 20 Physical Damage to Attacks 10% increased maximum Life +(10-20)% to Cold Resistance 25% increased Flask Life Recovery rate |
|
|
|
| +(30-50) to Evasion Rating 10% increased Rarity of Items found +(30-40)% to all Elemental Resistances Reflects 4 Physical Damage to Melee Attackers Level Requirement reduced by 100 (Hidden) |
|
 Snakebite - With Claw Mastery it's very easy to generate Frenzy Charges, combined with the Poison Mechanics it results in it being a decent leveling item. Snakebite - With Claw Mastery it's very easy to generate Frenzy Charges, combined with the Poison Mechanics it results in it being a decent leveling item. |
|
| (150-180)% increased Evasion Rating +(60-70) to maximum Life 2% increased Attack Speed per Frenzy Charge 6% increased Accuracy Rating per Frenzy Charge 10% reduced Frenzy Charge Duration per Frenzy Charge Attacks have 60% chance to Poison while at maximum Frenzy Charges +5% to Damage over Time Multiplier for Poison per Frenzy Charge |
|
 The Wasp Nest - It has all the good stats that you will need, but it can be easily outclassed by a Rare Item after level 80. The Wasp Nest - It has all the good stats that you will need, but it can be easily outclassed by a Rare Item after level 80. |
|
| +40 Life gained for each Enemy hit by Attacks (150-170)% increased Physical Damage (20-25)% increased Attack Speed (20-25)% increased Critical Strike Chance +(330-350) to Accuracy Rating 20% chance to Poison on Hit Attacks with this Weapon deal 80-120 added Chaos Damage against Enemies affected by at least 5 Poisons |
4. Final Skill Tree, Ascendancy Points, and Pantheon
Final Skill Tree:
75 Points Final Skill Tree (doesn't include Unique or Cluster Jewels)
123 Points Path of Building (PoB) link
Ascendancy points:
Preferably in that order:
- Polymath
- Escape Artist
- Soul Drinker
- One Step Ahead
Pantheon:
Major God: Soul of Lunaris: 1% additional Physical Damage Reduction for each nearby Enemy, up to 8%; 1% increased Movement Speed for each nearby Enemy, up to 8%
Minor God: Soul of Shakari: You cannot be Poisoned while there are at least 3 Poisons on you, 50% less Duration of Poisons on You
5. Final Gems links
| [DPS] Cobra Lash setup combined with a Weapon's Support Gem and The Squire |
|
 |
Cobra Lash - Chains 12 times in total, dealing more and increased damage per each remaining Chain. |
 |
Enhance Support - Level 4 Enahnce grants 2 extra Chains. If your enemies are always Chilled (via Skitterbots, added Cold Damage, or Arctic Armour), replace it with  Hypothermia Support. Hypothermia Support. |
 |
Chain Support - Makes your Projectile Chain additional times; use the Awakened version for the three extra Chains. |
 |
Void Manipulation Support - Provides you with more Chaos Damage. Use the Awakened Version as it will increase the Gem level of Cobra Lash. |
 |
Energy Leech Support - Extra ES Leech and more Damage on full ES and when Leeching ES. Great with overleech from Soul Drinker. |
 |
Nightblade Support - Use for the Elusive buff on Critical Strikes, extra base Crit Chance, and tons of Crit Multiplier. It can be bad as it conflicts with the Withering Step, so if you can't see your Withering Step working (it can't Trigger if you're already Elusive), replace it with  Hypothermia or Hypothermia or  Cruelty Support. Cruelty Support. |
| Provided by a Rare Dagger: | |
 |
Increased Critical Strikes Support - Increased Critical Strike Chance. |
 |
Increased Critical Damage Support - Increased Critical Damage, as you're close to 100% Crit Chance. |
 |
Faster Attacks Support - Attack Faster to reach higher DPS. |
| [UTILITY] Mana Reservation setup | |
 |
Grace - Grace grants you an increased and additional Evasion Rating. |
 |
Purity of Elements - Adds tons of Elemental Resistances and immunity to all Elemental Ailments. You could replace it with  Summon Skitterbots, Summon Skitterbots,  Tempest Shield, Tempest Shield,  Arctic Armour, or Arctic Armour, or  Flesh and Stone if you've already sorted out all the Resistances. If you have enough Mana, you can add them to the build. Flesh and Stone if you've already sorted out all the Resistances. If you have enough Mana, you can add them to the build. |
 |
Enlighten Support - Increases Mana Reservation Efficiency for linked Skills. |
| [UTILITY] Wither/Steelskin setup | |
 |
Withering Step - Grant Phasing, Elusive, and applies Withered Debuffs on nearby enemies. |
 |
Steelskin - A protective barrier that absorbs some damage and stops Bleeding. |
 |
Automation - Linked Skills are triggered automatically. |
 |
Enhance Support - Increases Cooldown Recovery Rate for Steelskin, and, at Gem level 4, causes Withering Step to apply 14 stacks of Withered at once. |
| [UTILITY] Arcanist Brand setup | |
 |
Arcanist Brand - Triggers both Spells at once while attached to an enemy. |
 |
Despair - Lowers Chaos Resistance of the enemy. |
 |
Tornado - Chases down enemies and deals quite significant damage to them. |
| [MOBILITY] Whirling Blades | |
 |
Whirling Blades - Movement Skill that should make you insanely fast as you have a lot of Attack Speed. |
| [UTILITY] Blood Rage | |
 |
Blood Rage - Massively increases Attack Speed, grants Life Leech, and Frenzy Charges on Kill. |
| [UTILITY] Vaal Haste | |
 |
Vaal Haste - A brief boost to Attack and Movement Speed. If you have spare sockets, use  Raise Spectre and Raise Spectre and  Guardian's Blessing Support in here, combined with a regular Haste. The Spectres that are reassembled after death are Dark Marionettes from Ritual. Guardian's Blessing Support in here, combined with a regular Haste. The Spectres that are reassembled after death are Dark Marionettes from Ritual. |
| [UTILITY] Sniper's Mark | |
 |
Sniper's Mark - Your second Curse, it increases Projectile's Damage and causes them to Split on impact. |
 |
Mark on Hit Support - Sniper's Mark is being applied automatically against tough enemies. |
| [UTILITY] Clarity | |
 |
Clarity - Level-1 Clarit can be used to lower the Mana Cost of Skills when combined with a specific Watcher's Eye. |
|
|
5. Gear Setup
Your goal here is to accumulate as much Ward as possible. It's done via Armour and Evasion on a Body Armour (Ynda's Stand), and increased Maximum Energy Shield (Faithguard). The former is much more impactful. This Ward won't protect you fully, but give you flat damage instead, courtesy of Nightgrip. You don't have many points to invest in Critical Strikes, but you can reach 100% Crit Chance with a Rosethorn Tincture and a Flask for increased Crit Chance. That will let you reap the benefits of Crit Multiplier which is found commonly on Jewels, and you do have a lot of Jewel Sockets to spare. Capping Elemental Resistances is trivial if you have Purity of Elements - with that you can equip more Unique Items such as Ralakesh's Impatience. Attributes are somewhat needed, but that's not a big issue. The most expensive parts of this build are definitely Jewels and the Rare Body Armour - check the prices before you start, these are usually very high.
|
Stat priorities on items:
|
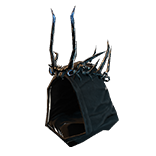 (Helmet) Faithguard - Grants a lot of extra Ward that's sourced from global increases to Maximum Energy Shield. It's required. (Helmet) Faithguard - Grants a lot of extra Ward that's sourced from global increases to Maximum Energy Shield. It's required. |
|
| +(20-30) to Intelligence (25-35)% increased Ward (40-60)% faster Restoration of Ward (15-25)% increased Light Radius Increases and Reductions to Maximum Energy Shield instead apply to Ward |
|
 (Weapon) Rare Dagger - You actually don't need damage here, just built-in Support Gems. If you're using Svalinn, look for Attack Speed, Critical Strike mods, and Chaos Penetration instead. Craft the "Hits can't be Evaded" Prefix, you can't be bothered by Accuracy. (Weapon) Rare Dagger - You actually don't need damage here, just built-in Support Gems. If you're using Svalinn, look for Attack Speed, Critical Strike mods, and Chaos Penetration instead. Craft the "Hits can't be Evaded" Prefix, you can't be bothered by Accuracy. |
|
| Min. requirements: Socketed Gems are Supported by Increased Critical Strikes Socketed Gems are Supported by Increased Critical Damage Socketed Gems are Supported by Faster Attacks Hits Can't be Evaded (crafted) Optional affixes: increased Attack Speed increased Critical Strike Chance increased Critical Strike Multiplier Attacks with this Weapon Penetrate #% Chaos Resistance Added Chaos Damage |
|
 (Off-hand) Svalinn - This build is very different with Svalinn, and we don't plan to cover all the changes it introduces - just be on the lookout for extra Block Chance from Replica Reckless Defense. (Off-hand) Svalinn - This build is very different with Svalinn, and we don't plan to cover all the changes it introduces - just be on the lookout for extra Block Chance from Replica Reckless Defense. |
|
| +(10-20) to maximum Life (10-15)% Chance to Block Spell Damage +(100-150) to Ward -10% to maximum Chance to Block Attack Damage -10% to maximum Chance to Block Spell Damage Chance to Block is Lucky Trigger a Socketed Elemental Spell on Block, with a 0.25 second Cooldown |
|
 (Off-hand) The Squire - Socket the Support Gems for your Cobra Lash setup here. (Off-hand) The Squire - Socket the Support Gems for your Cobra Lash setup here. |
|
| 120% increased Block Recovery Has 3 Sockets All Sockets are White +(5-8)% to Quality of Socketed Support Gems Socketed Support Gems can also Support Skills from your Main Hand (100-150)% increased Armour and Evasion +(3-5)% Chance to Block |
|
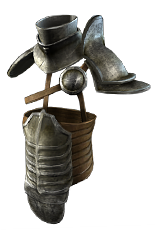 (Body Armour) Rare Body Armour - Conquest Lamellar with high Armour and Evasion is required - as much of both as you can afford. For Suffixes seek basic Resistances. (Body Armour) Rare Body Armour - Conquest Lamellar with high Armour and Evasion is required - as much of both as you can afford. For Suffixes seek basic Resistances. |
|
| Min. requirements: 3800 Armour 3800 Evasion Optional affixes: Resistances Additional Physical Damage Reduction |
|
 (Boots) Ralakesh's Impatience - All the Charges are great, but you can only generate Frenzy Charges, and that's on kill only, so if you don't mind the lack of Life and low Resistances, put these boots on. (Boots) Ralakesh's Impatience - All the Charges are great, but you can only generate Frenzy Charges, and that's on kill only, so if you don't mind the lack of Life and low Resistances, put these boots on. |
|
| +(15-25)% to Cold Resistance +(15-25)% to Chaos Resistance Count as having maximum number of Endurance Charges Count as having maximum number of Frenzy Charges Count as having maximum number of Power Charges |
|
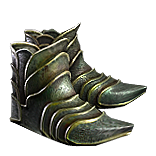 (Boots) Rare Boots - On Boots, you will need Movement Speed, Maximum Life, Resistances, and Evasion. For the Eldritch mods seek Action Speed and increased Elusive Effect. (Boots) Rare Boots - On Boots, you will need Movement Speed, Maximum Life, Resistances, and Evasion. For the Eldritch mods seek Action Speed and increased Elusive Effect. |
|
| Min. requirements: +100 to maximum Life +80% to Elemental Resistances 30% increased Movement Speed Optional affixes: Chaos Resistance Attributes Evasion Rating |
|
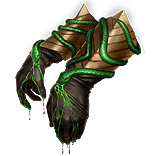
 (Gloves) Nightgrip - A cornerstone of the build. Adds tons of Chaos Damage to Attacks, but makes it rather bad for mitigating damage. Still, it's 25% less damage taken if you have Ward. (Gloves) Nightgrip - A cornerstone of the build. Adds tons of Chaos Damage to Attacks, but makes it rather bad for mitigating damage. Still, it's 25% less damage taken if you have Ward. |
|
| (33-48)% increased Ward +(17-23)% to Chaos Resistance Gain Added Chaos Damage equal to 10% of Ward 75% of Damage taken bypasses Ward |
|
 (Belt) Ynda's Stand - Another key item. It transforms half of the Armour and Evasion from your Body Armour into a Ward. Boost it up with Catalysts to make it 60%. (Belt) Ynda's Stand - Another key item. It transforms half of the Armour and Evasion from your Body Armour into a Ward. Boost it up with Catalysts to make it 60%. |
|
| (20-30)% increased Stun Duration on Enemies Regenerate (30-50) Life per second +(20-30)% to Fire Resistance +(20-30)% to Cold Resistance Gain Ward instead of 50% of Armour and Evasion Rating from Equipped Body Armour |
|
 (Amulet) Ashes of the Stars - Increases Quality of all Skill Gems. For Cobra Lash, that's 3 extra Chains at 30% roll. (Amulet) Ashes of the Stars - Increases Quality of all Skill Gems. For Cobra Lash, that's 3 extra Chains at 30% roll. |
|
| +(10-16) to all Attributes (5-10)% increased Experience Gain of Gems +1 to Level of all Skill Gems +(20-30)% to Quality of all Skill Gems |
|
| Recommended Anointments: Force of Darkness |
|
 (Ring) Rare Rings - Rings need to have the Crafter Prefix for Reduced Mana Cost of Skills and any Evasion modifier to benefit from Evasion and Es Mastery that increases your Energy Shield if you meet these specific conditions. Then, gather Maximum Life, Resistances, and Attributes. (Ring) Rare Rings - Rings need to have the Crafter Prefix for Reduced Mana Cost of Skills and any Evasion modifier to benefit from Evasion and Es Mastery that increases your Energy Shield if you meet these specific conditions. Then, gather Maximum Life, Resistances, and Attributes. |
|
| Min. requirements: +40% to Elemental Resistances +90 to Maximum Life Attributes Non-Channelling Skills have -7 to Total Mana Cost (crafted) Evasion Optional affixes: increased Attack Speed |
|
 (Jewel) Watcher's Eye - The Auras you're using are Grace, Purity of Elements, Haste, or Clarity. Get the rescued Mana Cost of Skills if using Grace, Chaos Resistance if using Purity of Elements, and some kind of defensive mod from the Grace pool. (Jewel) Watcher's Eye - The Auras you're using are Grace, Purity of Elements, Haste, or Clarity. Get the rescued Mana Cost of Skills if using Grace, Chaos Resistance if using Purity of Elements, and some kind of defensive mod from the Grace pool. |
|
| (4-6)% increased maximum Energy Shield (4-6)% increased maximum Life (4-6)% increased maximum Mana <Two or Three random aura modifiers> |
|
 (Jewel) The Light of Meaning - Extra Energy Shield will increase your Ward instead. Socket it near Ghost Dance. (Jewel) The Light of Meaning - Extra Energy Shield will increase your Ward instead. Socket it near Ghost Dance. |
|
| Passive Skills in Radius also grant 3% increased Energy Shield | |
 (Jewel) Lethal Pride - Used mainly for Strength, but you may find some useful notable upgrades too. Socket it nearFervour notable. (Jewel) Lethal Pride - Used mainly for Strength, but you may find some useful notable upgrades too. Socket it nearFervour notable. |
|
| Commanded leadership over (10000-18000) warriors under (Akoya-Kaom-Rakiata) Passives in radius are Conquered by the Karui Historic |
|
 (Jewel) Impossible Escape - You're looking for the Perfect Agony version. With it, you will allocate Multishot, From the Shadows, and Mark the Prey. (Jewel) Impossible Escape - You're looking for the Perfect Agony version. With it, you will allocate Multishot, From the Shadows, and Mark the Prey. |
|
| Passive in Radius of <Keystone> can be Allocated without being connected to your tree | |
  (Jewel) Forbidden Flame & Forbidden Flesh - Born in the Shadows, Mistwalker, Opportunistic, Ambush and Assassinate, Deadly Infusion, and Unstable Infusion are good choices, but none of them are mandatory. (Jewel) Forbidden Flame & Forbidden Flesh - Born in the Shadows, Mistwalker, Opportunistic, Ambush and Assassinate, Deadly Infusion, and Unstable Infusion are good choices, but none of them are mandatory. |
|
| Requires Class <<Random Character Class>> Allocates <<Random Ascendancy Notable>> if you have the matching modifiers on Forbidden Flame/Forbidden Flesh |
|
 (Jewel) Rare Jewels - If you're looking for damage, increased Maximum Energy Shield and Critical Strike Multiplier are the best mods on a Jewel. One of them has to have the Corrupted Blood immunity corrupted Implicit. (Jewel) Rare Jewels - If you're looking for damage, increased Maximum Energy Shield and Critical Strike Multiplier are the best mods on a Jewel. One of them has to have the Corrupted Blood immunity corrupted Implicit. |
|
| Recommended affixes: increased Maximum Life increased Maximum Energy Shield Attributes reduced Mana Cost of Skills Critical Strike Multiplier increased Attack Speed |
|
 (Jewel) Rational Doctrine - With a clever use of Tattoos, it should not be hard to balance out your Strength and Intelligence. Permanent Consecrated and Profane ground will be worth the hassle. (Jewel) Rational Doctrine - With a clever use of Tattoos, it should not be hard to balance out your Strength and Intelligence. Permanent Consecrated and Profane ground will be worth the hassle. |
|
| <Three random synthesis implicit modifiers> You have Consecrated Ground around you while stationary if Strength is your highest Attribute 25% chance to create Profane Ground on Critical Strike if Intelligence is your highest Attribute Effects of Consecrated Ground you create Linger for 4 seconds Effects of Profane Ground you create Linger for 4 seconds |
|
 (Jewel) Voices - Having three of these would be perfect, but the best ones are too expensive, you can settle on the 5, or 3 extra passives that grant nothing. The most expensive ones waste only 3 points, second-grade - 6 points, and third-grade - 12 points in total. (Jewel) Voices - Having three of these would be perfect, but the best ones are too expensive, you can settle on the 5, or 3 extra passives that grant nothing. The most expensive ones waste only 3 points, second-grade - 6 points, and third-grade - 12 points in total. |
|
| Adds 3 Jewel Socket Passive Skills <Random empty passive skill node mod> |
|
 (Jewel) Medium Cluster Jewel - Follow-Through is the core element of the build, you can get up to 9 of these notables in total if using three Voices. Repeater increases your Attack Speed, thus damage. (Jewel) Medium Cluster Jewel - Follow-Through is the core element of the build, you can get up to 9 of these notables in total if using three Voices. Repeater increases your Attack Speed, thus damage. |
|
| Recommended affixes: 1 Added Passive Skill is Follow-Through 1 Added Passive Skill is Repeater |
|
 (Jewel) Megalomaniac - Megalomaniac is recommended, you will probably need something that cannot be found on regular Medium Jewels, such as Reservation efficiency from Sublime Form or Block Chance with Endurance Charges from Enduring Ward. Follow=Through is, of course, mandatory. (Jewel) Megalomaniac - Megalomaniac is recommended, you will probably need something that cannot be found on regular Medium Jewels, such as Reservation efficiency from Sublime Form or Block Chance with Endurance Charges from Enduring Ward. Follow=Through is, of course, mandatory. |
|
| Recommended affixes: 1 Added Passive Skill is Follow-Through 1 Added Passive Skill is Sublime Form 1 Added Passive Skill is Hound's Mark 1 Added Passive Skill is Enduring Ward 1 Added Passive Skill is Disease Vector 1 Added Passive Skill is Fan of Blades |
|
|
Other suggested Flasks:
|
|
     |
|
|
If you have any other build requests, please leave that in the comments below.
Pictures used in this article are the intellectual property of Grinding Gear Games.


 Goldrim - Offers a lot of useful Elemental Resistances.