Buy/Sell
 Log in

Cluster Grenades Warbringer POE2 Build
A Warbringer Ballista Totem build that summons multiple Mortars, each firing Cluster Grenades, rendering an entire screen uninhabitableMortar Cannon
Warbringer Build
Updated for Path of Exile 2 Early Access
The Best Crafty Guides by Odealo
| Guide notes |
| October 10, 2026 - Created for Early Access. |
| Build Overview | |||
| Tags: [TOTEM] [PHYSICAL] [FIRE] [RANGED] | |||
|
Budget: Defenses: |
|
Boss DPS: AoE: |
|


Mortar Cannon is a Meta Skill that can be linked with a Grenade Skill to create a Ballista Totem, continuously firing its Grenades. These constructs, of course, are still restricted by the Grenade's Cooldown and use limits just like the character is, so the build remains very similar to any other Grenade build, albeit with a few important twists. Mortars fire at halved Attack Speed and deal half the damage of a Grenade fired manually, so to compensate, we have to extend the Totem limit, which is inherently one. With Warbringer's Answered Call, Artillery Strike notable, and a specific Rare Crossbow, this number goes up to five. The Skill Tree is abundant in passives that would enhance Grenades in various ways, such as reducing Detonation Time, adding one Cooldown use, and increasing their chance to Detonate a second time. You'll also find many Totem passives in the same area, mostly to increase their Placement Speed, Damage, and Range.
Our choice of Grenade is the Cluster Grenade because it has the highest damage once its AoE is high enough to allow its small explosions to overlap. We're firing four of them per shot, multiplied by five Mortars, resulting in 360 small explosions per salvo. Each one can fire two times, with each Grenade having a 65% chance to detonate twice. You can also summon a fresh Mortar instead of waiting 5 seconds for it to conjure a new Grenade. It's a very resource-intensive build in both senses: it heats up the GPU and drains tons of Mana. To battle the latter, we recommend combining Blood Magic with Life Regeneration, Time of Need, Life on Kill, or Life on Hit. The output damage is a mix of Physical and Fire Damage. We will break Enemies' armour very easily with Warbringer's Anvil's Weight and apply this effect to Fire with The Molten One's Gift. Still, reducing and Penetrating Fire Resistance is a big damage boost.
The build relies solely on Maximum Life, with, hopefully, good Recovery and Armour. Armour should also reduce a big portion of Elemental Damage with specific Item and Skill Tree passives. It's overall good against most Hits and DoTs if they won't catch you off-guard; your Skills can cost quite a lot of Life after all. Clear speed is downright bad as the Mortars are not particularly responsive.
You can also check our other Path of Exile 2 builds right over here Odealo's Crafty Guides - Full List
1. Gameplay
There are two buttons: one summons Mortar Cannons and the other fires Voltaic Grenades. You will place Mortars in front of you and push forward. By the time you pass them, they'll fire at the enemies all around and hopefully slay everything on the screen. Voltaic Grenades' role is to inflict Shock, so they're used against bosses. Don't forget to summon new Mortars every two shots in boss arenas, and stay close to them to benefit from Ancestral Spirit; they tend to stay still. Your passive skills are Encased in Jade, Time of Need, and Eternal Rage.
|
|


2. Build's PROS & CONS
| PROS |
|
| CONS |
|
3. Leveling tips
Crossbow-wielding is seldom a Warriors' activity, especially at the very beginning, but we can make it work. We have access to the most important passives much like Mercenary; it just takes a few extra levels to get to them. Obviously, we won't start with a Mortar Cannon because it requires Gem Tier 11, and even then it will be bad until we can summon 4 or more of them. Thus, the build takes its final shape at around character level 80 or even 90: there are plenty of other builds that will carry you there on a 0-dollar budget. We recommend starting with Explosive Grenades or Permafrost Bolts. These are the two best early-game league-start Crossbow builds out there.
4. Final Skill Tree, Ascendancy Points, and Pantheon
Final Skill Tree:
 |
|
Click on the image to open the Passive Tree preview in a new window Or import the build into PoB: |
Ascendancy points:
Preferably in this order:
- Answered Call
- Anvil's Weight
- Wooden Wall
- Jade Heritage
5. Final Gems links
| [DPS] Cluster Grenade setup | |
 |
Cluster Grenade - Grenades within Grenades that deal partially converted Fire Damage |
 |
Mortar Cannon - Grenades are fired from Ballista Totems but deal less damage. You can have up to five of them at the same time. |
 |
Multishot II |
 |
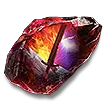
Fire Attunement or Rigwald's Ferocity in slot II |
 |
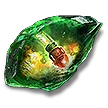
Elemental Armament II |
 |
Payload |
| [UTILITY] Voltaic Grenade setup | |
 |
Voltaic Grenade - Their role is to inflict Shock, which requires high Lightning Damage. Use them after Mortars are set up. |
|
Payload |
 |
Shock |
 |
Lightning Attunement |
|
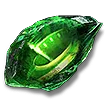
Elemental Armament II |
 |
Cooldown Recovery II or Exploit Weakness |
| [UTILITY] Ancestral Spirits setup | |
 |
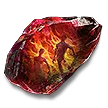
Ancestral Spirits - This Skill comes with the Answered Call ascendancy passive. These are Totem-bound Minions summoned alongside them, granting various offensive and defensive buffs. In this setup, they'll inflict Fire Exposure, and if that doesn't suit you, use Oil Grenades instead. |
 |
Fire Exposure |
 |
Potent Exposure |
 |
Infernal Legion II |
 |
Meat Shield II |
 |
Maim or Magnified Area II |
| [UTILITY] Encased in Jade setup | |
 |
Encased in Jade - This Skill comes with the Jade Heritage ascendancy passive. Don't use it unless absolutely necessary; the passive buff grants 1% additional Physical Damage Reduction per stack, up to 10%. |
 |
Prolonged Duration II |
| [UTILITY] Time of Need | |
 |
Time of Need - Removes Curses, Elemental Ailments, and Regenerates Life every few seconds. |
|
Cooldown recovery II |
| [UTILITY] Eternal Rage setup | |
 |
Eternal Rage - Regenerates Rage every second for a permanent Attack Damage boost. |
|
|
6. Gear Setup
There's only one uniquely good unique item, and that's Fireflower. All other items should be Rare, granting basic Maximum Life with Strength to expand Life Pool, with Armour and Resistances to reduce damage taken, and maybe Life Regeneration. Life Recovery is crucial if you manage to get a high Skill Level for Cluster Grenades because all Skills cost Life with Blood Magic. Life on Kill or on Hit is usually the preferable option. If you have equipment high in Evasion, allocate Iron Reflexes to gain even more Armour. The damage comes from Added Physical Damage and the Skill Level of Cluster Grenades, which has Fire and Physical tags. Attack Speed is irrelevant; the Grenades' attack rate is restricted by their Cooldown. Some Spirit may be good to include Herbalism, Vitality, Cannibalism, or Precision Support Gems, but 130 will do.
|
Stat priorities on items:
|
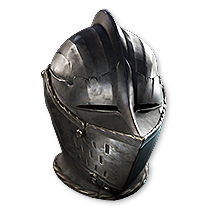 (Helmet) Rare Helmet - A Helmet should provide mostly Armour, Maximum Life, and Resistances or Attributes. You can socket a Soul Core here for Maximum Rage. |
|
| Min. requirements: 1000 Armour +150 to Maximum Life Optional affixes: Attributes Resistance Armour also applies to Elemental Damage |
|
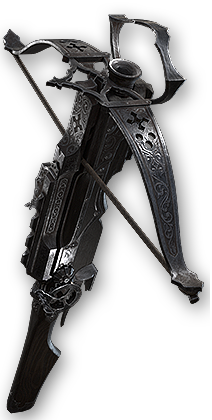 (Weapon) Rare Crossbow - Use the Runebinder's Alloy to get a valuable +2 max Ballista Suffix on a Siege Crossbow for extra Grenades per shot. Then, try to get Skill Levels and as much Physical Damage as you can afford. Add Jiquani's Soul Core of Munitions and Perfect Iron Rune. |
|
| Min. requirements: +2 to maximum number of Summoned Ballista Totems (crafted) +4 to Level of all Projectile Skills High Physical Damage Optional affixes: Attributes Increased Elemental Damage with Attacks Life on Kill Life on Hit |
|
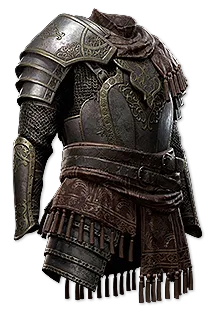 (Body Armour) Rare Body Armour - On a chest, aim mainly for high Armour, a Spirit mod of any tier, and Resistances with Armour applying to Elemental Damage. Socket Iron Runes for increased Armour. |
|
| Min. requirements: 1500 Armour Spirit Optional affixes: Maximum Life Resistance Armour also applies to Elemental Damage |
|
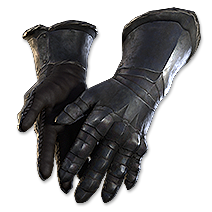 (Gloves) Rare Gloves - Gloves with Kolr's Hunt Rune can roll Projectile Skill Level, so try to get one. Then, just aim for Added Physical Damage, Maximum Life, and Resistances. |
|
| Min. requirements: +2 to Level of all Projectile Skills (Kolr's Hunt Suffix) +100 to Maximum Life +80% total Resistance Optional affixes: Attributes Adds Physical Damage to Attacks Adds Fire Damage to Attacks |
|
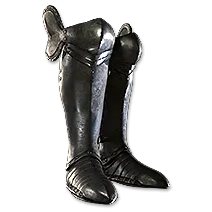 (Boots) Rare Boots - Boots will provide you with Movement Speed, Maximum Life, and Resistances. Other mods are less important. |
|
| Min. requirements: 30% increased Movement Speed +130 to Maximum Life +80% total Resistance Optional affixes: Attributes Armour |
|
 (Amulet) Fireflower - Fireflower is the best choice as it grants 4 (up to 5 when Corrupted) Levels of Fire Skills. The downsides are mostly irrelevant, as Fire Damage taken is affected by Armour to some extent. |
|
| +(10-15) to Spirit (10-15)% increased Rarity of Items found (30-40)% increased Mana Regeneration Rate Take 100 Fire Damage when you Ignite an Enemy +(1-4) to Level of all Fire Skills Anointment: Grenadier Cremation |
|
 (Ring) Rare Ring - Rings are similar to Gloves: aim for Added Damage, Resistances, and Maximum Life. Life on Kill, Life Regeneration, Accuracy, and Attributes are also very useful. |
|
| Min. requirements: +80% total Resistance Accuracy +80 to Maximum Life Optional affixes: Attributes Adds Physical Damage to Attacks Adds Fire Damage to Attacks |
|
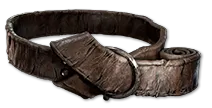 (Belt) Rare Belt - Use a Belt with Maximum Life, Resistances, Strength, and Armour. Not much else here is as important. Mageblood would be a preferable choice. |
|
| Min. requirements: +80% total Resistance Strength +140 to Maximum Life Optional affixes: Life Regeneration Armour |
|
 (Jewel) Rare Jewels - Rare Jewels are rather bad. We recommend Emeralds with increases to Accuracy and various Shock modifiers. |
|
| Optional affixes: increased Projectile Damage increased Attack Damage increased Damage with Crossbows increased Accuracy Rating increased chance to Shock increased Shock Duration increased Shock Magnitude |
|
 (Jewel) From Nothing - Look for the Blood Magic variant of From Nothing and allocate nearly all notables in its radius. |
|
| Passives in Radius of <Keystone> can be Allocated without being connected to your tree | |
 (Jewel) Prism of Belief - A "+3" to Cluster Grenade Prism of Belief is one of the best Jewels out there, |
|
| +(1-3) to Level of all <Random skill> Skills | |
 (Jewel) Heart of the Well - Here, the best mods are "gain damage as extra Fire Damage", "increased Armour from Equipped Body Armour", "Maximum Elemental Resistances", and "Life Recovery on Kill". |
|
| <Custom Desecrated prefix> <Custom Desecrated prefix> <Custom Desecrated suffix> <Custom Desecrated suffix> |
|
|
If you have any other build requests please leave that in the comments below. We are always open to suggestions and constructive feedback.
Pictures used in this article are the intellectual property of Grinding Gear Games.