Cleave of Rage Berserker
An insanely fast setup for the Berserk using the new Cleave of Rage and The Saviour to overpower your enemiesCleave of Rage
Berserker build
Updated for Patch 3.25
The Best Crafty Guides by Odealo
| Guide notes |
| July 27, 2024 -Reworked Passive Tree to match changed made in Patch 3.25, gaining massive DPS and improving Quality of Life |
| Build overview | |||
| Tags: [MELEE] [PHYSICAL] [LIFE] [CRIT] | |||
|
Budget: Defenses: |
|
Boss DPS: AoE: |
|
The new Transfigured Cleave of Rage is a very powerful Attack. It quickly generates your Rage with every Hit and grants immense bonuses to its radius for every 5 Rage you have, which allows you to cover the entire screen with your swings. To use this Skill you have to dual-wield a Sword and Axe. It greatly rewards you for scaling maximum Rage, so the Berserk Ascendency is the obvious choice, as it is the only Ascendency that gains Attack Speed from Rage, and improves all Rage bonuses by 50%. You will also want to use certain Unique Items to boost your Rage, for a total of 78 Rage. Ramping up from the start takes a bit of time, but once you accumulate all your Rage you will become unstoppable.
The Dual-wielding requirement might be annoying, but you would want to use the Rigwald's Savagery Axe anyway since it grants 10 to maximum Rage if you wield a Sword in the other Hand. There are plenty of options to choose from for the Sword, but The Saviour is undoubtedly the best choice here. It is an insanely strong Sword that creates 2 Clones when you land a Critical Hit, which more than doubles your Damage output. Another vital Item for this Build is the Bear's Girdle which simply adds 10 Rage and improves your Physical Damage.
The Berserk is definitely not famous for its durability, but to combat that you will have a lot of tools at your disposal. You can have a lot of Spell Suppression, a bit of Armour and Evasion Rating, up to 20 stacks of Fortify, and excellent Life Leech. The greatest defense comes from insane mobility and long range of your Cleave.
You can also check our other Path of Exile builds right over here Odealo's Crafty Guides - Full List
1. Gameplay
The Cleave of Rage is your main Skill to use. It will be a bit slow without Rage, but will quickly catch up as you repeatedly Hit your opponents. Your Leap Slam will be an insanely quick way of travel thanks to your vast Attack Speed. The Assassin's Mak will be used automatically, but other buffs like Ancestral Totems or optional Vulnerability Curse have to be used manually.
|
|
|
|

2. Build's PROS & CONS
| PROS |
|
| CONS |
|
3. Leveling tips
You can start using Cleave of Rage right from the start. The Rage generation will be a great boost at that level. Use any Weapons with the highest Physical DPS for your level. Scaling Crit at first will be quite hard, so you should reach for the Precise Technique to gain more Damage. You can also opt for the One With Nothing Jewel and level up using Hollow Palm, which is historically the fastest way to level up any character.
Suggested leveling Gem setups:
| Cleave of Rage setup | |
 |
Cleave of Rage - you can start using your final Skill Gem at level 1. It requires dual-wielding an Axe and Sword. |
 |
Maim Support - grants you a chance to Maim your enemies, Slowing their Movement Speed and increasing the Damage they take. |
 |
Chance to Bleed Support - adds flat Physical Damage and grants a decent amount of Bleed. |
 |
Faster Attacks Support - improves your Attack Speed. Replace it with the Multistrike Support later. |
 |
Melee Physical Damage Support - improves your Physical Damage. |
 |
Rage Support - further improves your Rage generation, and adds flat Physical Damage. |
| Utility Gems | |
 |
Leap Slam - your main Movement Skill that allows you to move faster and skip terrain gaps. |
 |
Herald of Purity - a Herald that increases the Physical Damage you deal. |
 |
War Banner - this Banner greatly increases your Physical Damage. |
 |
Precision - grants a lot of Accuracy Rating and increases your Critical Strike Chance. |
 |
Vulnerability - a curse Skill that increases the Physical Damage you deal to your Enemies. You can also use the Poacher's Mark instead. |
Bandits:
You should kill all the Bandits and take two more Passive Skill Points.
Leveling Skill Trees:
To improve your Leveling experience you should take nearby useful Notables. You should refund them when you are ready to transition into the Endgame Crit version.
38 Points Skill Tree
You should pick Notables that boost your maximum Life, Damage with One-handed Weapons, or grant additional Resistance for easier leveling.
74 Points Skill Tree
Head towards the Rage Notables. You will also need maximum Life, Accuracy, Mana, or extra Resistances to ease the campaign.
Recommended leveling items:
 Thief's Torment - a very strong Ring for Attack Builds, it grants insane sustain for both Life and Mana, as well as boosts your Resistances and Item Quantity. You can use only one Ring. Thief's Torment - a very strong Ring for Attack Builds, it grants insane sustain for both Life and Mana, as well as boosts your Resistances and Item Quantity. You can use only one Ring. |
|
| +(8-10)% to all Elemental Resistances (10-16)% increased Quantity of Items found Can't use other Rings +(25-40)% to all Elemental Resistances Gain (40-60) Life per Enemy Hit with Attacks Gain 30 Mana per Enemy Hit with Attacks 50% reduced Effect of Curses on you |
|
 Rigwald's Crest - Wolves summoned by this Ring deal decent Damage and grant you flat Physical Damage for your Attacks. You can have up to 10 Wolves. Rigwald's Crest - Wolves summoned by this Ring deal decent Damage and grant you flat Physical Damage for your Attacks. You can have up to 10 Wolves. |
|
| +(12-16)% to Fire and Cold Resistances Trigger Level 10 Summon Spectral Wolf on Kill (20-30)% increased Mana Regeneration Rate |
|
 The Screaming Eagle - a very strong Axe for a few first levels. You can dual-wield them in the off-hand for 20% increased Movement Speed when you travel between Areas. The Screaming Eagle - a very strong Axe for a few first levels. You can dual-wield them in the off-hand for 20% increased Movement Speed when you travel between Areas. |
|
| Socketed Gems are supported by Level 2 Chance to Flee Adds (10-15) to (25-30) Physical Damage +(10-15) to maximum Life Gain (5-7) Life per Enemy Killed 10% increased Movement Speed |
|
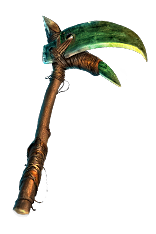
 Redbeak - a good Sword to use at first. Later you should use a Rare Weapon matching your level. Redbeak - a good Sword to use at first. Later you should use a Rare Weapon matching your level. |
|
| 40% increased Global Accuracy Rating 100% increased Damage when on Low Life 50% increased Physical Damage Adds 2 to 6 Physical Damage 10% increased Attack Speed +(20-30) to maximum Life Grants 2 Life per Enemy Hit |
|
 Goldrim - grants all Elemental Resistance which is the main defense you should have during the Campaign. Goldrim - grants all Elemental Resistance which is the main defense you should have during the Campaign. |
|
| +(30-50) to Evasion Rating 10% increased Rarity of Items found +(30-40)% to all Elemental Resistances Reflects 4 Physical Damage to Melee Attackers Level Requirement reduced by 100 (Hidden) |
|
 Tabula Rasa - grants access to a 6-link setup very early on, and you can freely change your Support Gems. Tabula Rasa - grants access to a 6-link setup very early on, and you can freely change your Support Gems. |
|
| Item has no level requirement and Energy Shield (Hidden) Item has 6 White Sockets and is fully linked (Hidden) |
|
 Wanderlust - grant you immunity to Freeze, which is very dangerous during the campaign. Wanderlust - grant you immunity to Freeze, which is very dangerous during the campaign. |
|
| +5 to Dexterity +(10-20) to maximum Energy Shield (20-40)% increased Mana Regeneration Rate 20% increased Movement Speed Cannot be Frozen |
|
4. Final Skill Tree, Ascendancy Points, and Pantheon
Final Skill Tree:
120 Points Final Skill Tree (doesn't include Unique or Cluster Jewels)
120 Points Path of Building(PoB) link
Ascendancy points:
Preferably in the order:
- Crave the Slaughter
- Rite of Ruin
- Aspect of Carnage
- Flawless Savagery
Pantheon:
Major God: Soul of the Brine King: You cannot be Stunned if you've been Stunned or Blocked a Stunning Hit in the past 2 seconds; 100% chance to Avoid being Frozen
Minor God: Soul of Shakari: 50% less Duration of Poisons on You; 5% reduced Chaos Damage taken
5. Final Gems links
| [DPS] Cleave of Rage setup | |
|
Cleave of Rage - a transfigured version of Cleave, it generates Rage with every Hit and improves its radius based on the amount of Rage you have. It requires a dual-wielding Axe and Sword. |
 |
Brutality Support - greatly improves your Physical Damage, but disables other Damage types. |
 |
Multistrike Support - repeats your Attacks, granting heavy Attack Speed and Damage bonus. |
 |
Impale Support - the Impale is a powerful Damage Multiplier for any Physical Attack Build that ramps up as you Attack the same target. |
 |
Melee Physical Damage Support - improves your Physical Damage with Melee Attacks. The Awakened Version also grants a chance to Intimidate Enemies. |
 |
Pulverise Support - improves your Critical Strike Multiplier. You can also swap it for Increased Critical Strikes Support or Impale Support. |
| [UTILITY] Auras setup | |
 |
Pride - increases the Physical Damage Taken by nearby Enemies. The effect starts low and rises over 4 seconds. |
 |
Flesh and Stone - the Sand Stance grants you Damage reduction while the Blood Stance offers a lot of Damage. |
 |
Blood and Sand - change your Stance and grant AoE Damage or Radius depending on your Stance. |
|
Precision - grants plenty of Critical Strike Chance and Accuracy Rating. You can keep it at a low Gem Level or link it with the Arrogance Support if it reserves too much Mana. |
 |
Enlighten Support - link your most Mana-reserving Aura with this Support to reduce their Reservation. |
| [MOBILITY] Movement setup | |
|
Leap Slam - a fast jump to the targeted location. It has no Cooldown, but the first use is faster. |
|
Faster Attacks Support - improves the Speed of your Leap Slam. |
 |
Lifetap Support - you will pay the Mana Costs with your Life instead. You don't need this Support if you have Jewellery with a Reduced Mana Cost of Skills modifier. |
| [UTILITY] Mark setup | |
 |
Assassin's Mark - improves your Critical Strike Chance and Damage against Marked Enemy. It also generates Power Charges with Hits. |
 |
Mark on Hit Support - automatically applies linked Mark when you Hit with any Attack. It also reduces the effectiveness of that Mark by 25%. |
|
Lifetap Support - your Mark costs a lot of Mana, so you might need to use this Support to be able to use it. |
| [UTILITY] Various Utility Skills | |
|
Vulnerability - if you have a source of Additional Curse, you can use the Vulnerability to further increase the Physical Damage Enemies Take from your Attacks. |
 |
Molten Shell - a very strong Guard Skill that creates a protective barrier based on the amount of Armour you have. It also increases your Armour during the duration. |
|
War Banner - places a Banner on the ground that boosts your Damage by up to 44%. You will need to generate Valor stacks first by Killing or Hitting Rare Enemies. |
 |
Berserk - you can use this Buff to gain an insane burst of Damage for a short duration, but you will have to build up your Rage again once it ends. |
 |
Blood Rage - increases your Attack Speed and grants Life Leech. It deals Physical Damage over Time to you, so use it with caution. |
 |
Enduring Cry - you can use this Warcry to generate Endurance Charges when fighting Bosses for additional defense. |
|
|
5. Gear Setup
You will have to use Rigwald's Savagery and Bear's Girdle to increase your maximum Rage. You will also want to use The Saviour, which is simply the best One-handed Weapon in the Game. The remaining Uniques are also very strong, but optional. The rest of your Gear will be simple Rare Items. You should look for Critical Strike Multiplier, Accuracy Rating, Attack Speed, or added Physical Damage to your Attacks. To bolster your defenses you will need a lot of maximum Life, Spell Suppression, Resistance, and a bit of Attributes. Only Items with an Evasion Rating can grant you Spell Suppression, so you should use hybrid pieces with Evasion and Armour Ratings.
|
Stat priorities on items:
|
 (Helmet) Rare Helmet - you should obtain lots of Mana Reservation Efficiency here. It should also have Spell Suppression Chance, maximum Life, and Resistance or Attributes. (Helmet) Rare Helmet - you should obtain lots of Mana Reservation Efficiency here. It should also have Spell Suppression Chance, maximum Life, and Resistance or Attributes. |
|
| Min. requirements: 70 to maximum Life #% increased Mana Reservation Efficiency of Skills (Essence of Loathing + Eldritch Implicit) 10% chance to Suppress Spell Damage 40% Total Elemental Resistances Optional affixes: #% of Physical Damage from Hits taken as Fire Damage Accuracy Rating Attributes |
|
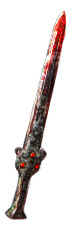
 (Weapon) Rigwald's Savagery - this Axe deals decent Damage and grants you 10 maximum Rage while wielding a Sword. You should get one with Corrupted Implicit that grants you a chance to Fortify on Hit. (Weapon) Rigwald's Savagery - this Axe deals decent Damage and grants you 10 maximum Rage while wielding a Sword. You should get one with Corrupted Implicit that grants you a chance to Fortify on Hit. |
|
| Adds (50-70) to (135-165) Physical Damage 40% increased Physical Attack Damage while Dual Wielding (10-15)% increased Attack Speed +10 to Maximum Rage while wielding a Sword |
|
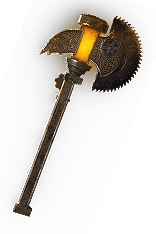 (Weapon) Rare Psychotic Axe - a special Heist-only base that generates 5 Rage per Hit, which will make your Berserk uptime much longer. It will be very expensive to Craft one that grants more Damage than the Rigwald's Savagery. (Weapon) Rare Psychotic Axe - a special Heist-only base that generates 5 Rage per Hit, which will make your Berserk uptime much longer. It will be very expensive to Craft one that grants more Damage than the Rigwald's Savagery. |
|
| Min. requirements: 400+ Physical DPS 6% Critical Strike Chance Optional affixes: Chance to Impale Chance to deal Double Damage Attack Speed |
|
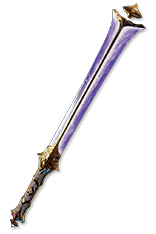 (Weapon) The Saviour - the Reflection Skill granted by this Sword causes you to summon 2 Mirage Warriors on Critical Strikes, which will double your Single-target Damage and improve the Clear Speed. (Weapon) The Saviour - the Reflection Skill granted by this Sword causes you to summon 2 Mirage Warriors on Critical Strikes, which will double your Single-target Damage and improve the Clear Speed. |
|
| 40% increased Global Accuracy Rating Triggers Level 20 Reflection when Equipped (130-150)% increased Physical Damage Adds (16-22) to (40-45) Physical Damage (8-12)% increased Attack Speed (8-12)% increased Critical Strike Chance |
|
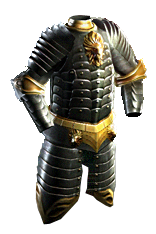 (Body Armour) Rare Armour - look for Hunter-influenced Armour with additional Critical Strike Chance for your Attacks, Spell Suppression, and potentially additional Curse. You can skip the Life modifiers and use the Life Mastery to save some Currency. (Body Armour) Rare Armour - look for Hunter-influenced Armour with additional Critical Strike Chance for your Attacks, Spell Suppression, and potentially additional Curse. You can skip the Life modifiers and use the Life Mastery to save some Currency. |
|
| Min. requirements: Attacks have +1.1% to Critical Strike Chance +20% chance to Suppress Spell Damage 12% of Physical Damage from Hits taken as Elemental Damage Optional affixes: # to maximum Life % increased maximum Life Resistance You can apply an additional Curse |
|
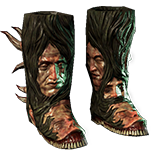 (Boots) Ralakesh's Impatience - a very useful pair of Boots that grant you the effect of all your Charges, as well as some Resistance and Movement Speed. You can easily generate Charges with Assassin's Mark, Mark Mastery, and Enduring Cry, but those Boots make it easier. (Boots) Ralakesh's Impatience - a very useful pair of Boots that grant you the effect of all your Charges, as well as some Resistance and Movement Speed. You can easily generate Charges with Assassin's Mark, Mark Mastery, and Enduring Cry, but those Boots make it easier. |
|
| +(15-25)% to Cold Resistance +(15-25)% to Chaos Resistance 30% increased Movement Speed Count as having maximum number of Endurance Charges Count as having maximum number of Frenzy Charges Count as having maximum number of Power Charges |
|
 (Boots) Rare Boots - on a pair of Rare Boots you can get a lot of maximum Life, Spell Suppression Chance, and Resistances or Attributes. You can also get the chance to gain Onslaught on Kill, which will further improve your Clear Speed. Movement Speed is not that important as you will use the Leap Slam most of the time. (Boots) Rare Boots - on a pair of Rare Boots you can get a lot of maximum Life, Spell Suppression Chance, and Resistances or Attributes. You can also get the chance to gain Onslaught on Kill, which will further improve your Clear Speed. Movement Speed is not that important as you will use the Leap Slam most of the time. |
|
| Min. requirements: 20% Movement Speed +60 to maximum Life 10% chance to Suppress Spell Damage 60% Total Elemental Resistances Optional affixes: Chaos Resistance % chance to gain Onslaught for 4 seconds on Kill % chance to Avoid Elemental Ailments |
|
 (Gloves) Rare Gloves - on your Gloves, you should seek maximum Life, Spell Suppression, Attack Speed, and lacking Resistance or Accuracy Rating. It is also a good place to get the Mana Leech. (Gloves) Rare Gloves - on your Gloves, you should seek maximum Life, Spell Suppression, Attack Speed, and lacking Resistance or Accuracy Rating. It is also a good place to get the Mana Leech. |
|
| Min. requirements: 70 maximum Life 40% Total Elemental Resistances 10% chance to Suppress Spell Damage 15% increased Attack Speed Optional affixes: % increased Damage during any Flask Effect % of Physical Attack Damage Leeched as Mana Chaos Resistance Attribute % chance to Impale Enemies on Hit with Attacks (Eater) |
|
 (Belt) Bear's Girdle - this Belt grants you a lot of Damage in the form of 20 maximum Rage and bonus Physical Damage per Rage. The Crush is also useful, but not very impactful. You can look for one with Corrupted Implicit for extra Damage and Resistance. (Belt) Bear's Girdle - this Belt grants you a lot of Damage in the form of 20 maximum Rage and bonus Physical Damage per Rage. The Crush is also useful, but not very impactful. You can look for one with Corrupted Implicit for extra Damage and Resistance. |
|
| +(25-40) to maximum Life Adds (5-7) to (11-12) Physical Damage to Attacks (20-30)% increased Stun Duration on Enemies Nearby Enemies are Crushed while you have at least 25 Rage +10 to Maximum Rage |
|
 (Amulet) Rare Amulet - the Amulet is a great source of Critical Strike Multiplier, added Physical Damage, and maximum Life. It should also have bonus Resistance or Accuracy Ratings. It should have 1 empty Prefix so you can craft Mana Cost Reduction for your Skills. (Amulet) Rare Amulet - the Amulet is a great source of Critical Strike Multiplier, added Physical Damage, and maximum Life. It should also have bonus Resistance or Accuracy Ratings. It should have 1 empty Prefix so you can craft Mana Cost Reduction for your Skills. |
|
| Min. requirements: 50 to maximum Life Adds 15-20 Physical Damage to Attacks +35% to Global Critical Strike Multiplier Non-Channelling Skills have -7 to Total Mana Cost Optional affixes: Attribute Accuracy Rating Chaos Resistance |
|
 (Ring) Rare Ring - look for Critical Strike Multiplier, maximum Life, and lacking Resistance, Attribute, or Accuracy Rating. They can also grant you flat Physical Damage for your Attacks. You can Craft them using the Essence of Scorn on a Fractured Base. (Ring) Rare Ring - look for Critical Strike Multiplier, maximum Life, and lacking Resistance, Attribute, or Accuracy Rating. They can also grant you flat Physical Damage for your Attacks. You can Craft them using the Essence of Scorn on a Fractured Base. |
|
| Min. requirements: 50 to maximum Life 50% Total Elemental Resistances +20% to Global Critical Strike Multiplier Non-Channelling Skills have -7 to Total Mana Cost Optional affixes: Adds # Physical Damage to Attacks Attribute Accuracy Rating |
|
 (Jewel) Rare Jewels - you can use your Jewel to improve your maximum Life, Critical Strike Multiplier, Attack Speed, or fix your Resistance and Attribute. It can also add a bit of Mana Reservation Efficiency or grant Mana Leech. (Jewel) Rare Jewels - you can use your Jewel to improve your maximum Life, Critical Strike Multiplier, Attack Speed, or fix your Resistance and Attribute. It can also add a bit of Mana Reservation Efficiency or grant Mana Leech. |
|
| Recommended affixes: increased Critical Strike Multiplier increased Maximum Life % of Physical Attack Damage Leeched as Mana Elemental Resistances Accuracy Rating Attributes |
|
 (Jewel) Watcher's Eye - a very strong Jewel that grants you bonuses based on the Auras you use. The most Damage would come from the additional Imaples you can inflict while using Pride, but additional Spell Suppression or Flask Sustain is also good. (Jewel) Watcher's Eye - a very strong Jewel that grants you bonuses based on the Auras you use. The most Damage would come from the additional Imaples you can inflict while using Pride, but additional Spell Suppression or Flask Sustain is also good. |
|
| (4-6)% increased maximum Energy Shield (4-6)% increased maximum Life (4-6)% increased maximum Mana <Two or Three random aura modifiers> Recommended modifiers: Impales you inflict last 2 additional Hits while using Pride (12-15)% chance to Suppress Spell Damage while affected by Grace (8-12)% chance to deal Double Damage while using Pride Gain a Flask Charge when you deal a Critical Strike while affected by Precision |
|
 (Flask) Bottled Faith - a very powerful offensive Flask for this Build. It drastically improves your Critical Strike Chance and Damage against Enemies standing in the Consecrated Ground it creates upon use. (Flask) Bottled Faith - a very powerful offensive Flask for this Build. It drastically improves your Critical Strike Chance and Damage against Enemies standing in the Consecrated Ground it creates upon use. |
|
| Creates Consecrated Ground on Use (30-15)% reduced Duration Consecrated Ground created by this Flask has Tripled Radius Consecrated Ground created during Effect applies (7-10)% increased Damage taken to Enemies (100-150)% increased Critical Strike Chance against Enemies on Consecrated Ground during Effect |
|
|
Other suggested Flasks:
|
|
    |
|
|
If you have any other build requests please leave that in the comments below. We are always open to suggestions and constructive feedback.
Pictures used in this article are the intellectual property of Grinding Gear Games.
