
Charged Dash Raider
A very quick setup for the Raider that uses Charged Dash to defeat enemies.Charged Dash
Raider Build
Created for Patch 3.22
The Best Crafty Guides by Odealo
| Guide notes |
| October 26, 2023 -Build created |
| Build Overview | |||
| Tags: [ELEMENTAL] [ATTACK] [LIFE] [CRIT] | |||
|
Budget: Defenses: |
|
Boss DPS: AoE: |
|
Charged Dash is a Movement Skill unlike any other. While Channeling this Skill you release an illusion of yourself that follows your cursor, emits damaging pulses, and accumulates stages. After it reaches the maximum distance the Damage of released waves is significantly improved. When you stop the Channel you will teleport to the location of the illusion and deal additional Damage based on the amount of stages. It converts half of the Physical Damage into Lightning, but it doesn't matter that much in this setup as you will want to use the Voidforge Sword anyway. Unfortunately, the pulses cannot overlap, so the single-target Damage potential is rather limited.
With the Charged Dash, you will constantly be on the move thanks to the teleportation when you stop the Channeling. The illusion travels at 130% of your Movement Speed, but it can't exceed a certain range from your character. While Channeling you are considered Stationary, so you can use popular Ralakesh's Impatience Boots to have all your Charges active at all times, although the Build provides enough ways to reliably generate Frenzy and Power Charges anyway.
The Raider Ascendency provides you with exceptional amounts of Attack and Movement Speed by enhancing the effectiveness of your Frenzy Charges. The defensive side of this Ascendency grants you a lot of Spell Suppression and Elemental Ailment Avoidances, which can be then capped up to 100% with just a few Passive Tree Notables and modifiers on your Items.
You can also check our other Path of Exile builds right over here Odealo's Crafty Guides - Full List
1. Gameplay
Use Charged Dash to travel across the Map and kill enemies by passing through them. Against tanky Rare and Unique Enemies, you should hold the Channeling to release empowered pulses. The final pulse has greater Damage, but the maximum Stages are rather small due to high Movement Speed, so it is not worth releasing without the need to reposition. Your Curse will be applied automatically, but you have to cast your Damage-buffing Totems manually. Using Leap Slam can be slightly faster than moving with the Charged Dash, depending on your Attack and Movement Speed balance.
|
|
|
|

2. Build's PROS & CONS
| PROS |
|
| CONS |
|
3. Leveling tips
The leveling process is straightforward, as you will have lots of useful Notables ready at your disposal fairly early into the game. You can start using any Elemental Attack to your liking, such as Molten Strike or Frost Blades, and transition to the Charged Dash once you unlock that skill at level 28. As with most Attack Builds, having good leveling gear greatly helps with the progression.
Suggested leveling Gem setups:
| Molten Strike setup | |
 |
Molten Strike - hitting an Enemy creates an outburst of fiery Projectiles that hit the ground, and all Enemies in their proximity. |
 |
Added Cold Damage Support - adds a flat amount of Cold Damage to your Attacks. |
 |
Added Lightning Damage Support - adds a flat amount of Lightning Damage to your Attacks. |
 |
Elemental Damage with Attacks Support - improves your Damage with Elemental Attacks. |
 |
Inspiration Support - improves your Elemental Damage, raises your Critical Strike Chances, and lowers the Mana Costs. |
 |
Trinity Support - grants you a ton of Damage and Elemental Penetration if you deal various types of Elemental Damage. |
| Aura setup | |
 |
Grace - grants you tons of Evasion Rating which will help you survive incoming Attacks of all types. |
 |
Vitality - this Aura grants you Life Regeneration, which is very helpful at lower levels. |
| Utility setup | |
 |
Flame Dash - a short teleport used to cross terrain gaps. |
 |
Elemental Weakness - lowers all Elemental Resistance of affected Enemies. |
 |
Steelskin - a very strong Guard Skill that absorbs part of the incoming Damage and disables Bleedings on you. |
Bandits:
Kill all Bandits to get an additional 2 Passive Tree Skill Points.
Leveling Skill Trees:
39 Points Passive Tree
1) Forces of Nature 2) Revenge of the Hunted 3) Clever Thief 4) Blood Drinker 5) Inveterate 6) Herbalism 7) Thick Skin
69 Points Passive Tree
Allocate:
1) Fatal Blade 2) Heartseeker 3) Golem's Blood 4) Dismembering 5) Blade of Cunning 6) Champion of the Cause
Recommended leveling items:
 Tasalio's Sign - a very powerful Ring that grants you tons of Cold Damage for your Attacks. You can use a Replica version that grants even more Damage, but disables Freezing. Tasalio's Sign - a very powerful Ring that grants you tons of Cold Damage for your Attacks. You can use a Replica version that grants even more Damage, but disables Freezing. |
|
| Adds (7-10) to (15-20) Cold Damage to Spells and Attacks +(200-300) to Evasion Rating 50% chance to Avoid being Chilled 10% chance to Freeze Adds 40 to 60 Cold Damage against Chilled Enemies |
|
 Ewar's Mirage - a very powerful Sword that improves your Damage and grants additional Chains and Projectiles, which are useful if you use Molten Strike to level up. Ewar's Mirage - a very powerful Sword that improves your Damage and grants additional Chains and Projectiles, which are useful if you use Molten Strike to level up. |
|
| +25% to Global Critical Strike Multiplier Adds 1 to (45-55) Lightning Damage (16-22)% increased Attack Speed Attacks Chain an additional time when in Main Hand Attacks fire an additional Projectile when in Off Hand (40-55)% increased Elemental Damage with Attack Skills |
|
 Tabula Rasa - great body Armour which you can use since level 1, it allows you to use a six-link setup right from the start. Tabula Rasa - great body Armour which you can use since level 1, it allows you to use a six-link setup right from the start. |
|
| Item has no level requirement and Energy Shield (Hidden) Item has 6 White Sockets and is fully linked (Hidden) |
|
 Goldrim - this Helmet provides you with tons of Elemental Resistances, which are very important to keep you alive. Goldrim - this Helmet provides you with tons of Elemental Resistances, which are very important to keep you alive. |
|
| +(30-50) to Evasion Rating 10% increased Rarity of Items found +(30-40)% to all Elemental Resistances Reflects 4 Physical Damage to Melee Attackers Level Requirement reduced by 100 (Hidden) |
|
 Prismweave - grants tons of Elemental Damage for your Attacks, and even more Damage if you use your Flasks often. Prismweave - grants tons of Elemental Damage for your Attacks, and even more Damage if you use your Flasks often. |
|
| (12-24)% increased Global Physical Damage Adds (14-16) to (30-32) Fire Damage to Attacks Adds (10-12) to (24-28) Cold Damage to Attacks Adds 1 to (60-68) Lightning Damage to Attacks +(6-15)% to all Elemental Resistances 30% increased Elemental Damage with Attack Skills during any Flask Effect |
|
 Seven-League Step - the most important Item if you want to quickly and efficiently progress through the Campaign. Seven-League Step - the most important Item if you want to quickly and efficiently progress through the Campaign. |
|
| 50% increased Movement Speed Level Requirement reduced by 100 (Hidden) |
|
4. Final Skill Tree, Ascendancy Points, and Pantheon
Final Skill Tree:
119 Points Final Passive Tree (doesn't include Cluster or Unique Jewels)
119 Points Path of Building (PoB) link
Ascendancy points:
Preferably in this order:
- Way of the Poacher
- Avatar of Slaughter
- Quartz Infusion
- Avatar of the Veil
Pantheon:
Major God: Soul of Arakaali: 10% reduced Damage taken from Damage Over Time; Debuffs on you expire 20% faster; +40% Chaos Resistance against Damage Over Time
Minor God: Soul of Ralakesh: 25% reduced Physical Damage over Time taken while moving; Moving while Bleeding doesn't cause you to take extra Damage
5. Final Gems links
| [DPS] Charged Dash setup | |
 |
Charged Dash - a Channeling Attack that releases an illusion that you can control. While Channeling it releases damaging pulses. Ending the Channel releases a final wave of Damage and teleports you to the illusion location. |
|
Trinity Support - the best Support Gem for Builds that deal mixed types of Elemental Damage. |
 |
Pulverise Support - grants tons of AoE and Area Damage, but lowers your pulse frequency. Use the Anomalous Quality for even more AoE. |
 |
Melee Physical Damage Support - grants tons of Physical Damage, which is then converted into Elemental Damage. The Awakened version also grants you a chance to Intimidate your Enemies, which increases the Attack Damage they take. |
|
Elemental Damage with Attacks Support - improves your converted Elemental Damage with Attacks. Use the Awakened version to become immune to Elemental Reflect. |
 |
Increased Critical Strikes Support - improves your Critical Strike Chance. You need this Gem as the Voidforge has a very low base chance. |
| [UTILITY] Aura setup | |
|
Grace - a defensive Aura that grants you a lot of flat Evasion Rating and helps improve it further. |
 |
Determination - a second defensive Aura, it is very similar to the Grace but provides Armour Rating instead. |
 |
Arctic Armour - reduces the Physical Damage you take while Stationary, and applies Chill to your Enemies when they Attack you. You can also use the Blood and Sand Aura to improve your Damage instead. |
 |
Herald of Purity - improves your Physical Damage and summons helpful Minions that take the attention of your Enemies. |
 |
Precision - a very useful Aura that grants lots of Accuracy Rating and improves your Critical Strike Chance. |
 |
Enlighten Support - an important Support Gem to be able to use all mentioned Auras, as it reduces their Reservation. |
| [UTILITY] Curse setup | |
 |
Assassin's Mark - improves your Critical Strike Chance, and grants additional Critical Strike Multiplier against Marked Enemies. It also generates Power Charges for you. |
 |
Mark on Hit Support - thanks to this Support you will automatically apply linked Mark upon Hitting Enemies with any of your Attacks. |
 |
Lifetap Support - with most of your Mana being Reserved by your Auras, you will need this Support to be able to trigger the Mark by paying its cost with Life instead of Mana. |
| [UTILITY] Movement setup | |
 |
Leap Slam - performs a quick jump toward the targeted location. Struck monsters are Stunned and pushed back. |
 |
Faster Attacks Support - improves the Attack Speed of the Leap Slam. |
 |
Lifetap Support - allows you to freely spam the Leap Slam without the worry about Mana Costs. |
| [UTILITY] Ancestral Totem setup | |
 |
Ancestral Protector - summons a Totem that activates only if you are in relatively close range to it. When active, it significantly improves your Attack Speed. |
 |
Vaal Ancestral Warchief - the summoned Totem grants you a buff that improves your Melee Damage. The Vaal version grants even more Damage. |
 |
Multiple Totems Support - linked Totems can bypass the Totem limit. It also causes you to summon 2 Totems instead of 1, but it doesn't double the buff effect |
| [UTILITY] Other utility Skills | |
 |
Blood Rage - a buff that improves your Attack Speed, but consumes your Life as Physical Damage over Time effect. |
 |
Molten Shell - a powerful Guard Skill that absorbs part of the incoming Damage based on the amount of Armour Rating you have. |
|
|
6. Gear Setup
The most important part of the Build is the Voidforge Sword. It grants you tons of Elemental Damage based on the additional flat Physical Damage sourced from other Items. To make the most of this Sword you can use the Abbysus Helmet, which grants absurd amounts of Physical Damage and Critical Strike Multiplier but makes you vulnerable to Physical Damage. Your Rings and Amulet is the second most important piece regarding your Damage. Look for flat Physical Damage, increased Elemental Damage, and Critical Strike Multiplier. Attack Speed is also useful to have. The Damage bonuses are often found on the Suffixes, making it very hard to cap your Resistances. Thanks to the Traitor Keystone provided by the Brutal Restraint you can use 3 Elemental Flasks to get tons of Elemental Resistances as well as further reduce Elemental Damage you take. Defensively, you should look for maximum Life, Elemental and Chaos Resistance, Spell Suppression, or Elemental Ailment Avoidance. Sources of Physical Damage taken as Elemental are also extremely useful.
|
Stat priorities on items:
|
 (Weapon) Voidforge - grants 700% of your Physical Damage as Extra Elemental Damage of random type. It also causes all Elemental Damage to inflict Shock and improves your AoE. (Weapon) Voidforge - grants 700% of your Physical Damage as Extra Elemental Damage of random type. It also causes all Elemental Damage to inflict Shock and improves your AoE. |
|
| (5-8)% increased Attack Speed +(90-100) to maximum Life Your Elemental Damage can Shock Gain 700% of Weapon Physical Damage as Extra Damage of a random Element 20% increased Area of Effect for Attacks Deal no Non-Elemental Damage |
|
|
|
|
| +(20-25) to all Attributes Adds 40 to 60 Physical Damage to Attacks +(100-125)% to Melee Critical Strike Multiplier (100-120)% increased Armour (40-50)% increased Physical Damage taken |
|
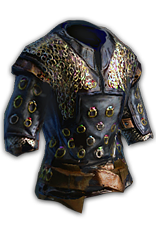 (Body Armour) Loreweave - an offensive-focused Armour, it grants a lot of flat Physical Damage, increases your Elemental Damage, and improves your Critical Strike Chance. It also sets your Maximum Resistance to a certain value, which cannot be lowered by other sources such as Map modifiers. (Body Armour) Loreweave - an offensive-focused Armour, it grants a lot of flat Physical Damage, increases your Elemental Damage, and improves your Critical Strike Chance. It also sets your Maximum Resistance to a certain value, which cannot be lowered by other sources such as Map modifiers. |
|
| Has 6 Sockets +(8-24) to all Attributes Adds (4-10) to (14-36) Physical Damage to Attacks (20-60)% increased Global Critical Strike Chance +(15-50) to maximum Energy Shield +(20-60) to maximum Life +(20-50) to maximum Mana (6-30)% increased Rarity of Items found (15-50)% increased Elemental Damage Your Maximum Resistances are (76-78)% |
|
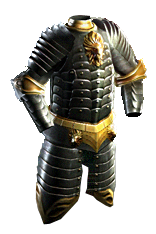 (Body Armour) Rare Armour - you can use a Hunter or Elder Influenced Rare Armour that improves the Critical Strike Chance of your Attacks and provides various defensive modifiers such as maximum Life, Spell Suppression Chance, or large quantities of Resistance. (Body Armour) Rare Armour - you can use a Hunter or Elder Influenced Rare Armour that improves the Critical Strike Chance of your Attacks and provides various defensive modifiers such as maximum Life, Spell Suppression Chance, or large quantities of Resistance. |
|
| Min. requirements: +#% to Attack Critical Strike Chance +110 to maximum Life Optional affixes: 10% increased maximum Life Elemental and Chaos Resistance You can apply one additional Curse % of Physical Damage from Hits taken as Elemental Damage |
|
 (Amulet) Rare Amulet - look for an Amulet that grants you lots of added Physical Damage, increases your Elemental Damage with Attacks, or improves your Critical Strikes. It should also grant you maximum Life and some Attributes or Resistances. You can Craft it using the Essence of Contempt on an Amulet with the Fractured Elemental Damage modifier. (Amulet) Rare Amulet - look for an Amulet that grants you lots of added Physical Damage, increases your Elemental Damage with Attacks, or improves your Critical Strikes. It should also grant you maximum Life and some Attributes or Resistances. You can Craft it using the Essence of Contempt on an Amulet with the Fractured Elemental Damage modifier. |
|
| Min. requirements: +60 to maximum Life Adds 10 to 20 Physical Damage to Attacks Optional affixes: increased Elemental Damage with Attack Skills Global Critical Strike Multiplier Elemental and Chaos Resistance Attributes % increased Damage while Leeching |
|
| Recommended anointment: Blade Master |
|
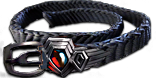
 (Boots) Ralakesh's Impatience - it is an easy way to gain all your Charges, as while Channeling you are considered to be Stationary. Remember to not rely on Endurance Charges to cap your Elemental Resistances, as it can be very unreliable. (Boots) Ralakesh's Impatience - it is an easy way to gain all your Charges, as while Channeling you are considered to be Stationary. Remember to not rely on Endurance Charges to cap your Elemental Resistances, as it can be very unreliable. |
|
| +(15-25)% to Cold Resistance +(15-25)% to Chaos Resistance 30% increased Movement Speed Lose all Frenzy, Endurance, and Power Charges when you Move Minimum Endurance Charges equal to Maximum while stationary Minimum Frenzy Charges equal to Maximum while stationary Minimum Power Charges equal to Maximum while stationary |
|
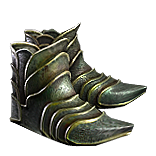 (Boots) Rare Boots - since you can easily generate Frenzy and Power Charges, you can also use a pair of Rare Boots that grant you a lot of maximum Life, Movement Speed, and Resistance. They should also provide at least 30% Elemental Ailment Avoidance, so you can become fully Immune to those Effects. (Boots) Rare Boots - since you can easily generate Frenzy and Power Charges, you can also use a pair of Rare Boots that grant you a lot of maximum Life, Movement Speed, and Resistance. They should also provide at least 30% Elemental Ailment Avoidance, so you can become fully Immune to those Effects. |
|
| Min. requirements: +70 to maximum Life 30% increased Movement Speed 30% chance to Avoid Elemental Ailments (Suffix + Eldritch Implicit) +60% to Elemental Resistance Optional affixes: Onslaught on Kill Action Speed Attributes |
|
 (Gloves) Rare Gloves - here you can find lots of useful modifiers. Look for Attack Speed, flat Physical Damage, and various increases to your Damage. They should also provide maximum Life and some Resistance or Spell Suppression Chance. (Gloves) Rare Gloves - here you can find lots of useful modifiers. Look for Attack Speed, flat Physical Damage, and various increases to your Damage. They should also provide maximum Life and some Resistance or Spell Suppression Chance. |
|
| Min. requirements: +80 to maximum Life +60% to Elemental Resistance Optional affixes: increased Attack Speed % increased Damage while Leeching % increased Damage during any Flask Effect Gain 1 Rage on Hit with Attacks, no more than once every 1.2 seconds Accuracy Rating |
|
 (Belt) Rare Belt - you can greatly improve your Flask sustain with your Belt, even more so when using the Traitor Keystone. It can also grant plenty of Damage, or improve your maximum Life and Resistance. Use the Stygian Vise to be able to use one additional Abyss Jewel. (Belt) Rare Belt - you can greatly improve your Flask sustain with your Belt, even more so when using the Traitor Keystone. It can also grant plenty of Damage, or improve your maximum Life and Resistance. Use the Stygian Vise to be able to use one additional Abyss Jewel. |
|
| Min. requirements: +70 to maximum Life +60% to Elemental Resistance +30% Flask Charges gained Optional affixes: % increased Life increased Elemental Damage with Attacks Reduced Flask Charges used |
|
 (Jewel) Rare Abyss Jewel - here you can get a lot of flat Physical Damage for your Sword Attacks, as well as some maximum Life, lacking Resistances and Attributes, or Critical Strike Multiplier. You should also get immunity to Corrupted Blood. (Jewel) Rare Abyss Jewel - here you can get a lot of flat Physical Damage for your Sword Attacks, as well as some maximum Life, lacking Resistances and Attributes, or Critical Strike Multiplier. You should also get immunity to Corrupted Blood. |
|
| Min. requirements: +30 to maximum Life Corrupted Blood cannot be inflicted on you Recommended affixes: Added Physical Damage with Sword Attacks increased Attack Speed if you've dealt a Critical Strike Recently Resistances Attributes Critical Strike Multiplier |
|
 (Ring) Rare Ring - similarly to your Amulet, you should look for bonuses to your Physical and Elemental Damage. It should also provide you with maximum Life, Resistance, and Attributes. You can craft a special modifier that lowers your Mana Costs of Channeling Skills. (Ring) Rare Ring - similarly to your Amulet, you should look for bonuses to your Physical and Elemental Damage. It should also provide you with maximum Life, Resistance, and Attributes. You can craft a special modifier that lowers your Mana Costs of Channeling Skills. |
|
| Min. requirements: +60 to maximum Life +50% to Elemental Resistance Optional affixes: Attributes increased Elemental Damage with Attack Skills Adds Physical Damage to Attacks Chaos Resistance #% to Critical Strike Multiplier |
|
 (Jewel) Rare Jewels - the best use of your Rare Jewels would be to get a lot of Critical Strike Multiplier and boost your maximum Life. It can also improve your Mana Reservation Efficiency, increase your Attack Speed, or grant immunity to Corrupted Blood. (Jewel) Rare Jewels - the best use of your Rare Jewels would be to get a lot of Critical Strike Multiplier and boost your maximum Life. It can also improve your Mana Reservation Efficiency, increase your Attack Speed, or grant immunity to Corrupted Blood. |
|
| Min. requirements: increased maximum Life Recommended affixes: Resistances % to Critical Strike Multiplier with Two-Handed Melee Weapons % to Global Critical Strike Multiplier % to Melee Critical Strike Multiplier Mana Reservation Efficiency increased Attack Speed |
|
 (Jewel) Brutal Restraint - this Jewel converts nearby Keystones into a special one, with the Balbala version it grants the Traitor, which generates you Flask Charges based on the amount of empty Flask slots. That way you can easily sustain 3 Flasks without killing Enemies. (Jewel) Brutal Restraint - this Jewel converts nearby Keystones into a special one, with the Balbala version it grants the Traitor, which generates you Flask Charges based on the amount of empty Flask slots. That way you can easily sustain 3 Flasks without killing Enemies. |
|
| Denoted service of (500-8000) dekhara in the akhara of Balbala Passives in radius are Conquered by the Maraketh Historic |
|
 (Jewel) Watcher's Eye - this Jewel can greatly improve your Damage and Flask sustain if you use relevant Precision Aura modifiers. It can also boost your defenses when you use Determination and Grace. (Jewel) Watcher's Eye - this Jewel can greatly improve your Damage and Flask sustain if you use relevant Precision Aura modifiers. It can also boost your defenses when you use Determination and Grace. |
|
| (4-6)% increased maximum Energy Shield (4-6)% increased maximum Life (4-6)% increased maximum Mana <Two or Three random aura modifiers> Recommended Aura mods: Gain a Flask Charge when you deal a Critical Strike while affected by Precision (40-60)% increased Attack Damage while affected by Precision +(20-30)% to Critical Strike Multiplier while affected by Precision +(12-15)% chance to Suppress Spell Damage while affected by Grace |
|
 (Flask) Taste of Hate - this Flask greatly reduces your Physical Damage taken by converting it to Cold Damage. It also grants you a bit of extra Damage. (Flask) Taste of Hate - this Flask greatly reduces your Physical Damage taken by converting it to Cold Damage. It also grants you a bit of extra Damage. |
|
| (10-15)% of Physical Damage from Hits taken as Cold Damage during Effect Gain (10-15)% of Physical Damage as Extra Cold Damage during effect 30% chance to Avoid being Chilled during Effect 30% chance to Avoid being Frozen during Effect |
|
|
Suggested Flasks:
|
|
   |
 (Helmet) Abyssus - a very strong Helmet for this Build, it grants unmatched amounts of Physical Damage as well as Critical Strike Multiplier. It also significantly increases the Physical Damage you take from all sources.
 |
|
If you have any other build requests please leave that in the comments below. We are always open to suggestions and constructive feedback.
Pictures used in this article are the intellectual property of Grinding Gear Games.
