Chaos Cyclone Occultist Build
A Strength-stacking Cyclone build for Occultists that deals massive Chaos DamageCyclone
Occultist Build
Updated for Patch 3.23
The Best Crafty Guides by Odealo
| Guide notes |
| January 22, 2024 -Updated for Patch 3.23 |
| Build overview | |||
| Tags: [MELEE] [CHAOS] [LIFE] | |||
|
Budget: Defenses: |
|
Boss DPS: AoE: |
|
It's a Cyclone build for Occultist which uses a Unique Weapon - Replica Frostbreath. With this weapon, you deal double damage to Chilled enemies. To make it easier, the weapon also allows your Chaos Damage to inflict Chill, so it's clear now why Occultist is the recommended Ascendancy. Your Chaos Damage and clear speed are significantly improved thanks to the Keystones you can allocate. It's also a strength-stacking build that uses Replica Alberon's Warpath. After you allocate Iron Will and equip Crown of Eyes your Spell Damage from Strength, and Spell Damage in general at 150% of its value applies to the Attack Damage of Cyclone. Additionally, you can use Battlemage's Cry for a temporary Buff of the same type. Strength-stacking build often uses many other Unique Items, granting you more Life and Attack Damage.
You can easily reach 7 to 8k of Maximum Life with a lot of Armour, Fortify, and Block Chance at 75% - the build can withstand some of the most devastating Hits. It's a common practice to take Resolute Technique as getting Accuracy Rating is too costly for a build like this, but there is an option to get the necessary Accuracy from a Rare Helmet with a mod that grants you as much Accuracy as you have Strength. This hoverer would be a very expensive upgrade. It's a simple-to-play Cyclone build that most of the players are familiar with, however, this one requires a more specific setup.
You can also check our other Path of Exile builds right over here Odealo's Crafty Guides - Full List
1. Gameplay
It plays like a regular Cyclone with Dash, a big part of it is Shockwave Support which makes clearing substantially faster. As is often the case with Melee Attacks, use both Ancestral Totems and Blood Rage to increase your Attack Speed and Damage. As an Occultist you will be able to use two Curses, Assassin's Mark and Despair are ones you will use. Wither Debuff is to be applied via your Ancestral Totems with Withering Touch Support. For a Guard Spell use Molten Shell, combined with Determination it's very efficient. For other Mana-reserving Spells, you can use Skitterbots, Defiance Banner, Purity of Elements, Vitality, Blood and Sand, or Precision if you plan not to take Resolute Technique. Finally - the Warcries. Pick Enduring Cry for Life Regeneration or Battlemage's Cry for increased Damage.
|
Full gameplay video:
This video was recorded on level 95 Occultist with around 2500 Strength in total - the POB link included in this Guide shows the exact equipment used and detailed stats for this character |
|
|

2. Build's PROS & CONS
| PROS |
|
| CONS |
|
3. Leveling tips
Occultists usually don't use Attacks as all the Attack nodes are on the opposite side of the Skill Tree from their starting location. The build can be completed with Replica Frostbreath, it requires level 50, and at this point, you can start allocating skill points as you would in the final version. Start with Combra Lash and at level 12 get Poisonous Concoction - it's a Chaos Attack you can use until level 50 and it's great to level with. The Iron Fortress requires level 59, Crown of Eyes - 69, after equipping these items your build should start dealing a lot of damage.
Suggested leveling Gem setups:
| Cyclone setup | |
 |
Cyclone - Channeling Attack you should start using after level 50 |
 |
Fortify Support - Fortifiers you and increases your damage |
 |
Infused Channelling Support - increases your damage and decreases the damage you take while Channeling |
 |
Void Manipulation Support - more Chaos Damage, but you con;t deal Elemental Damage |
| Utility skills | |
 |
Despair - Curse that lower Chaos Resistance of the enemies |
 |
Dash - a Spell that allows you to dash |
 |
Clarity - use to regenerate your Mana at a faster rate |
 |
Herald of Agony - grants you increased Poison Damage and Poison Chance, it's great with Cobra Lash and Poisonous Concoction |
Bandits:
Two Additional Passive Skill Points seem like the best option for this build
Leveling Skill Trees:
34 Points Skill Tree
to increase your damage you will have to invest in Acrimony and Heart of Darkness, Poisonous Concoction doesn't require Accuracy, and Cobra Lash doesn't require too much of it during the first 12 levels
68 Points Skill Tree
Take Resolute Technique if you're already using Cyclone or any Attack that can easily be evaded, Iron Will - after you equip Crown of Eyes or have Battlemage's Cry, and Utmost Might - at this point, you should start stacking Strength and have Meginord's Vise and The Iron Fortress on, swap to Replica Frostbreath at level 50 and use any Attack, preferably Cyclone. There are a lot of useful Attack Damage nodes near the Duelist's starting location, you should go for these.
Recommended leveling items:
 Karui Ward - it grants you some Dexterity and Projectile Damage Karui Ward - it grants you some Dexterity and Projectile Damage |
| +(20-30) to Dexterity +(20-30) to Strength +100 to Accuracy Rating 30% increased Projectile Speed 10% increased Movement Speed 30% increased Projectile Damage |
 Le Heup of All - it's a well-balanced Ring suitable for most builds during leveling phase Le Heup of All - it's a well-balanced Ring suitable for most builds during leveling phase |
| Adds 1 to 4 Physical Damage to Attacks +(10-30) to all Attributes (10-30)% increased Damage (10-30)% increased Rarity of Items found +(10-30)% to all Elemental Resistances |
 Goldrim - one of the best unique leveling Helmets - it grants a lot of Resistances Goldrim - one of the best unique leveling Helmets - it grants a lot of Resistances |
|
| +(30-50) to Evasion Rating 10% increased Rarity of Items found +(30-40)% to all Elemental Resistances Reflects 4 Physical Damage to Melee Attackers Level Requirement reduced by 100 (Hidden) |
 Tabula Rasa - allows you to create a six-linked Gem setup at level 1 Tabula Rasa - allows you to create a six-linked Gem setup at level 1 |
|
| Item has no level requirement and Energy Shield (Hidden) Item has 6 White Sockets and is fully linked (Hidden) |
|
4. Final Skill Tree, Ascendancy Points, and Pantheon
Final Skill Tree:
101 Points Final Skill Tree (doesn't include Cluster Jewels)
116 Points Path of Building (PoB) link
Ascendancy points:
Preferably in that order:
- Void Beacon
- Withering Presence
- Profane Bloom
- Malediction
Pantheon:
Major God: Soul of Lunaris: 1% additional Physical Damage Reduction for each nearby Enemy, up to 8%; 1% increased Movement Speed for each nearby Enemy, up to 8%
Minor God: Soul of Gruthkul: 1% additional Physical Damage Reduction for each Hit you've taken Recently up to a maximum of 5%
5. Final Gems links
| [DPS] Cyclone setup | |
|
Cyclone - The main source of damage. It's a Channeling Attack that combined with Profane Bloom and Shockwave has an amazing clear speed. |
|
Void Manipulation Support - allows you to deal more Chaos Damage, but no Elemental Damage |
 |
Pulverise Support - increased AoE and Melee Area Damage, reduced Attack Speed |
 |
Shockwave Support - your Melee Hits create Shockwaves that deal a lot of Area Damage |
 |
Cruelty Support - Cruelty grants you damage and Cruelty Buff - you deal more Damage over Time with your Cyclone Hits. Swap it for Fortify Support if you don't have a Cluster Jewel with Overlord. |
 |
Hypothermia Support - you deal more Damage against Chilled enemies, and you're more likely to cause Freeze on Hit against Chilled enemies. Swap it for Infused Channeling Support if you value your defenses more |
| [UTILITY] Auras setup | |
 |
Determination - Armour is extremely valuable, use Determination for additional and increased Armour |
 |
Purity of Elements - provides you with a lot of Resistances and immunity to all Elemental Ailments |
 |
Summon Skitterbots - Skitterbots Chill and Shock enemies with increased Effect, you can swap it for  Blood and Sand for more damage or AoE Blood and Sand for more damage or AoE |
 |
Enlighten Support - Linked Spells Reserve less Mana |
| [UTILITY] Defiance Banner | |
 |
Defiance Banner - it's more Armour and Evasion Rating which is useful, it also reduces nearby enemies' Critical Strike Chance |
| [UTILITY] Warcry | |
 |
Battlemage's Cry - it's useful if you have increased the Warcry Buff Effect - it can Increase the "Spell Damage also apply to Attacks" effect to over 200% of its original value, which is more than Crown of Eyes. Use it if you have a Rare Helmet granting you Accuracy that's sourced from your Strength. |
 |
Enduring Cry - It's a Warcry granting you Life Regeneration, much like a Life Flask. Use only one Warcry if you have Call to Arms. |
| [MOBILITY] Dash | |
|
Dash - a basic Travel Skill used to move faster and avoid damage |
| [UTILITY] Blood Rage | |
 |
Blood Rage - a Buff that stays on as long as you kill enemies. It provides you with Attack Speed, Life Leech, and Frenzy Charges while draining your Life. |
| [UTILITY] CwDT setup | |
 |
Cast when Damage Taken - It will activate linked Spells automatically as you take a specific amount of damage. All the Gems should be kept at level 20. |
 |
Molten Shell - A Guard Spell. You can have it cast automatically and put the Warcry as your movement key bind if you need to constantly use Battlemage's Cry, or you can use this Spell there instead without linking it to CwDT. |
| [UTILITY] Mark setup | |
 |
Assassin's Mark - Increases Crit Chance and Crit Damage against the marked enemy. |
 |
Mark on Hit Support - Mark is applied on Hit against Rare and Unique enemies. |
 |
Lifetap Support - Linked Skill costs Life instead of Mana. |
| [UTILITY] Ancestral Totems setup | |
 |
Ancestral Protector - Totem granting you 20% more Attack Speed |
 |
Ancestral Warchief - Totem granting you 18% more Melee Attack Damage |
 |
Multiple Totems Support - you can have two of the linked Totems up at once |
 |
Withering Touch Support - Totem's Hits apply Withering Debuff which can be stacked up to 15, each stack makes an enemy take 6% increased Chaos Damage |
| [UTILITY] Curse setup | |
|
Despair - Despair can be found as an Implicit on Corrupted Gloves or as a Ring Affix. If you're using cheap Uniques like Meginord's Vise it can be easily achieved. The Curse lowers Chaos Resistance and adds Chaos Damage to your Hits against Cursed enemies. |
|
|
6. Gear Setup
There are quite a few Uniques that are mandatory - the weapon is obviously one of them, but depending on the type of build you're playing - Crit or non-Crit, the items will slightly differ. Crit variant must have a Rare Helmet with a "Gain Accuracy Rating equal to your Strength" or an elevated version of it, making you unable to wear Crown of Eyes and forcing you to use Battlemage's Cry. To make it then more efficient you will have to use the Redblade Banner. Strength-stacking build should also use The Iron Fortress, Replica Alberon's Warpath, Astramentis, and for Jewels - Efficient Training, Split Personality times two, Lethal Pride, and as many Brawns as you can. Your Rings and Belts should be Rare, it's where you can get Elemental Resistances and other stats.
Our recommended items will:
- Cap your resistances at 75%
- Provide you with enough DPS and Life to start mapping
|
Stat priorities on items:
|
 (Helmet) Rare Helmet - Rare Helmet with the Elevated Warlord's mod for Accuracy allows you to give up the Resolute Technique, it's an upgrade worth looking for later in the game. (Helmet) Rare Helmet - Rare Helmet with the Elevated Warlord's mod for Accuracy allows you to give up the Resolute Technique, it's an upgrade worth looking for later in the game. |
|
| Min. requirements: +60 to maximum Life +50% to Elemental Resistances Gain Accuracy Rating equal to your Strength Optional affixes: 1% increased Critical Strike Chance per 10 Strength (elevated) Armour Strength Nearby Enemies have -#% to Chaos Resistance Global Critical Strike Multiplier |
|
 (Helmet) Crown of Eyes - It's the commonly-used Helmet. The Strength Damage normally affects your melee physical damage, with Iron Will it also applies to Spell Damage, and with this Helmet, the Spell Damage applies to Attacks at 150% of the original value. It can be later replaced with Battlemage's Cry Skill. (Helmet) Crown of Eyes - It's the commonly-used Helmet. The Strength Damage normally affects your melee physical damage, with Iron Will it also applies to Spell Damage, and with this Helmet, the Spell Damage applies to Attacks at 150% of the original value. It can be later replaced with Battlemage's Cry Skill. |
|
| +(300-350) to Accuracy Rating (120-150)% increased Energy Shield -30% to Fire Resistance (0.4-0.8)% of Attack Damage Leeched as Life (0.2-0.4)% of Attack Damage Leeched as Mana Increases and Reductions to Spell Damage also apply to Attacks at 150% of their value |
|
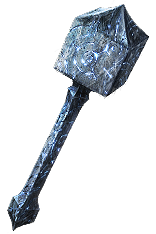 (Weapon) Replica Frostbreath - it's the core element of the build, it basically deals double damage at all times while increasing your basic Attack stats (Weapon) Replica Frostbreath - it's the core element of the build, it basically deals double damage at all times while increasing your basic Attack stats |
|
| 15% reduced Enemy Stun Threshold Adds (53-67) to (71-89) Chaos Damage (8-14)% increased Attack Speed +(23-31)% to Chaos Resistance Your Chaos Damage can Chill Attacks with this Weapon deal Double Damage to Chilled Enemies |
|
 (Weapon) Rare Shield - Rare Shield is good if you don't really on Battlemage's Cry. It should provide basic defensive stats and increased Reservation Efficiency for socketed Gems. (Weapon) Rare Shield - Rare Shield is good if you don't really on Battlemage's Cry. It should provide basic defensive stats and increased Reservation Efficiency for socketed Gems. |
|
| Min. requirements: +50% to Elemental Resistances +70 to maximum Life Strength Optional affixes: Chance to Block Socketed Gems have #% increased Reservation Efficiency Armour |
|
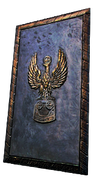
 (Weapon) Redblade Banner - it's an optional Shield to be used with Battlemage's Cry as it increases its effectiveness and Recovery Rate (Weapon) Redblade Banner - it's an optional Shield to be used with Battlemage's Cry as it increases its effectiveness and Recovery Rate |
|
| +(20-30) to maximum Life (80-100)% increased Armour +(50-60) to maximum Life 20% increased Taunt Duration +5% Chance to Block 50% increased Warcry Cooldown Recovery Rate Warcries have infinite Power |
|
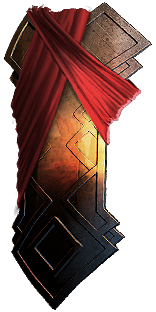
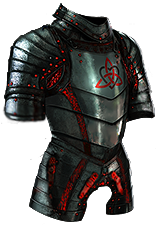 (Body Armour) The Iron Fortress - It not only grants you a lot of Strength but also scales up your Damage and Chance to Block with this Attribute (Body Armour) The Iron Fortress - It not only grants you a lot of Strength but also scales up your Damage and Chance to Block with this Attribute |
|
| +1% Chance to Block Attack Damage per 50 Strength Chance to Block Spell Damage is Unlucky +(60-120) to Strength (80-100)% increased Armour 10% reduced Movement Speed Strength's Damage Bonus instead grants 3% increased Melee Physical Damage per 10 Strength |
|
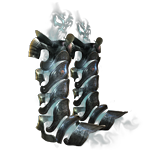 (Boots) Replica Alberon's Warpath - increases your Strength and adds Chaos Damage to Attacks that scale up with Strength - a must-have (Boots) Replica Alberon's Warpath - increases your Strength and adds Chaos Damage to Attacks that scale up with Strength - a must-have |
|
| (15-18)% increased Strength +(180-220) to Armour +(13-19)% to Chaos Resistance 25% increased Movement Speed Cannot deal non-Chaos Damage Adds 1 to 80 Chaos Damage to Attacks per 80 Strength |
|
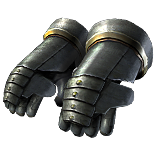 (Gloves) Rare Gloves - can't compare the Strength bonus you can get to Meginord's Vise, but if you get high Resistances here you should be able to cap them without extra Auras and excessive investments in Jewels (Gloves) Rare Gloves - can't compare the Strength bonus you can get to Meginord's Vise, but if you get high Resistances here you should be able to cap them without extra Auras and excessive investments in Jewels |
|
| Min. requirements: +70 Maximum Life +50 Strength 80% Total Elemental Resistances Optional affixes: Damage while Leeching Chaos Resistance |
|
 (Belt) Rare Belt - there's an Implicit mod you can get on Synthesised Belts that increases your Strength - you should get one of these with added Strength and Maximum Life (Belt) Rare Belt - there's an Implicit mod you can get on Synthesised Belts that increases your Strength - you should get one of these with added Strength and Maximum Life |
|
| Min. requirements: +70 Maximum Life +60 Strength 15% increased Strength (Synthesised Implicit) Optional affixes: increased Damage increased Maximum Life Elemental Resistances |
|
 (Amulet) Astramentis - It grants you a lot of Strength and other Attributes that you will need anyway, increase the Attributes Quality of this Amulet with Intrinsic Catalysts (Amulet) Astramentis - It grants you a lot of Strength and other Attributes that you will need anyway, increase the Attributes Quality of this Amulet with Intrinsic Catalysts |
|
| +(10-16) to all Attributes +(80-100) to all Attributes -4 Physical Damage taken from Attack Hits |
|
| Recommended Anointments: Charisma Heart of Darkness |
|
 (Ring) Rare Rings - as was the case with the Belt, look for a Synthesised version with increased Strength and some added Strength on top of that (Ring) Rare Rings - as was the case with the Belt, look for a Synthesised version with increased Strength and some added Strength on top of that |
|
| Min. requirements: +60 to Maximum Life +60% to Elemental Resistances +60 Strength 5% increased Strength (Synthesised Implicit) Optional affixes: Non-channeling Skills have -7 to Total Mana Cost (crafted) Chaos Resistance |
|
 (Jewel) Efficient Training - it transforms Intelligence in radius to Strength, you should put it near your starting location where Intelligence is abundant (Jewel) Efficient Training - it transforms Intelligence in radius to Strength, you should put it near your starting location where Intelligence is abundant |
|
| +(16-24) to Strength Intelligence from Passives in Radius is Transformed to Strength |
|
 (Jewel) Lethal Pride - it grants you more Strenght, put it in the proximity of allocated Notables, the socket between Vigour and Savagery is your best pick (Jewel) Lethal Pride - it grants you more Strenght, put it in the proximity of allocated Notables, the socket between Vigour and Savagery is your best pick |
|
| Commanded leadership over (10000-18000) warriors under (Akoya-Kaom-Rakiata) Passives in radius are Conquered by the Karui Historic |
|
 (Jewel) Split Personality - if you have followed the Skill Tree, it can provide you with 100 Strength and 100 Maximum Life, and you can have up to two of these (Jewel) Split Personality - if you have followed the Skill Tree, it can provide you with 100 Strength and 100 Maximum Life, and you can have up to two of these |
|
| This Jewel's Socket has 25% increased effect per Allocated Passive Skill between it and your Class' starting location +5 to Strength +5 to maximum Life |
|
 (Jewel) Unnatural Instinct - above Sentinel Notable is a great spot for this Jewel, however, it's optional (Jewel) Unnatural Instinct - above Sentinel Notable is a great spot for this Jewel, however, it's optional |
|
| Allocated Small Passive Skills in Radius grant nothing Grants all bonuses of Unallocated Small Passive Skills in Radius |
|
 (Jewel) Watcher's Eye - Determination or Purity of Elements mods can be great, especially Chaos Resistance - one of the Purity of Elements modifiers. (Jewel) Watcher's Eye - Determination or Purity of Elements mods can be great, especially Chaos Resistance - one of the Purity of Elements modifiers. |
|
| (4-6)% increased maximum Energy Shield (4-6)% increased maximum Life (4-6)% increased maximum Mana <Two or Three random aura modifiers> |
|
 (Jewel) Large Cluster Jewel - Overlord is really good as it saves you a Support Gem Slot - it grants you Fortify, other Notables are not as important, but beneficial nonetheless (Jewel) Large Cluster Jewel - Overlord is really good as it saves you a Support Gem Slot - it grants you Fortify, other Notables are not as important, but beneficial nonetheless |
|
| Recommended affixes: 1 Added Passive Skill is Martial Prowess 1 Added Passive Skill is Overlord 1 Added Passive Skill is Drive the Destruction 1 Added Passive Skill is Fuel the Fight |
|
| 40% increased Damage Creates Consecrated Ground on Use (30-15)% reduced Duration Consecrated Ground created by this Flask has Tripled Radius Consecrated Ground created during Effect applies (7-10)% increased Damage taken to Enemies (100-150)% increased Critical Strike Chance against Enemies on Consecrated Ground during Effect |
|
|
Other suggested Flasks:
|
|
     |
|
|
If you have any other build requests please leave that in the comments below. We are always open to suggestions and constructive feedback.
Pictures used in this article are the intellectual property of Grinding Gear Games.
