Bleeding Split Arrow/Puncture Gladiator Build
The Best and most popular Bleeding build in Path of Exile for Patch 3.16 based on the Gladiator ClassBleed
Split Arrow/Puncture
Gladiator build
Updated for Patch 3.23
The Best Crafty Guides by Odealo
| Guide notes | |||
| December 9, 2023 -Updated for Patch 3.23 |
|||
| Build overview | |||
| Tags: [RANGED] [PHYSICAL] [BLEED] [LIFE] | |||
|
Budget: Defenses: |
|
Boss DPS: AoE: |
|
Split Arrow/Puncture is currently the best combination of Bleed Skills in Path of Exile. It offers very high single-target damage, but also an insane Clear Speed with entire screens of monsters falling down to Split Arrow's Chaining Projectiles. The Bows are unquestionable kings of Bleed Build for one simple reason: the Ensnaring Arrow makes Enemies always count as Moving, which is a critical condition for Damage of your Bleeds. You can also opt for the Crimson Dance Keystone, but maintaining maximum amounts of Stacks is very hard. The Snipe is a necessary tool to make your Puncture so powerful. You can obtain it via Support Gem or Unique Assailum Helmet. As the name suggests, after Channeling for a few seconds you can "snipe" your Enemies with incredibly improved Damage, based on the amount of Stages you gained during the Channel. For Clear Speed, you will use the Split Arrow, or any other Physical Bow Attack to your liking, as only the AoE Coverage is important for that Setup. Killing Bleeding Enemies will cause them to Explode, dealing Physical Damage to all nearby Enemies, which is great for clearing dense packs of monsters.
The Gladiator Ascendency provides many useful perks for this Build. It grants the explosions, guarantees Maim and Blind, and improves your Action Speed. It also enhances your Damage with Bleeds. Unfortunately, the Charge generation only works on Killing the Enemy, so you have to use the Call to Arms Keystone to make your Enduring Warcry Instant, as well as link Frenzy Gem with the Manaforged Arrow Support in order to make them somewhat reliable on Boss Encounters.
The Defensive aspect of this Build is great. You will have tons of Armour and Evasion Ratings, very high amounts of maximum Life, plenty of Life Regeneration, and Endurance Charges. It is easy to cap your Spell Suppression, and the slow from Maim and optional Chill will make your Enemies very easy to avoid.
The Buil is very cheap to get started. The Gear is very simple to craft, and it doesn't require any particular Uniques. You can also start using Bleeds as your main source of Damage very early on.
You can also find our other Path of Exile builds right over here Odealo's Crafty Guides - Full List
1. Gameplay
This is a Ranged build based on Bleeding Damage over Time. However, with how fast your Bleeding DoT is applied to enemies, it feels like you would do all the damage with your initial Hits, making it a very enjoyable build to play. Split Arrow, thanks to Chain or Split can take down entire screens of enemies within seconds, and Puncture is used to apply a much more potent Bleed effect against Bosses. You are also going to use Ensnaring Arrow and Frenzy with Manaforged Arrow setup, making it entirely automatic. For mobility, you can use Dash or Frostblink, the Bow-specific Skills are quite ineffective in this case.
|
|
|
|

2. Build's PROS & CONS
| PROS |
|
| CONS |
|
3. Leveling tips
Leveling with Bows is quite easy and fast. Surprisingly, the Bleed Ailment is very powerful right from the start, so you can use it as your main source of Damage as soon as you obtain the Puncture Skill Gem. You should be using the same skills during leveling as later on, not only they are quite good for that purpose, but they will also help you master them while you are progressing through the campaign - the transition into Maps should be very smooth. Below you will find the basic Gem links for the leveling part, as well as, some very useful Unique Items that you can try to obtain to fasten the process. If you have access to the Tabula Rasa Armour, you should consider using a double 5-link setup.
Suggested leveling Gem setups:
| Split Arrow setup | |
 |
Split Arrow - one of the first Bow Attacks that shoots several Arrows by default, offering good clear speed and high added Base Physical Damage |
 |
Chance to Bleed Support - adds high bonus Physical Damage to Supported Attacks |
 |
Vicious Projectiles Support - increases the Physical Damage of your Projectiles and the Bleeding it inflict at the cost of your Attack Speed |
 |
Maim Support - increases the damage of your Split Arrow and inflicts Maim on enemies, increasing the Physical Damage they take and slowing them down. |
| Puncture setup | |
 |
Puncture - this is the primary single-target Skill used in this build which deals greatly increased damage with Bleeding. |
 |
Deadly Ailments Support - improves your Bleeding but reduces the initial Hit Damage. |
|
Vicious Projectiles Support - increases the Physical Damage of your Projectiles and the Bleeding it inflict at the cost of your Attack Speed |
 |
Brutality Support - greatly increases Physical Damage dealt by Supported Skills |
| Utility Gems | |
 |
Vulnerability - the best Curse for this build which increases your Physical and Bleeding Damage |
 |
Ensnaring Arrow - enemies affected by this Arrow always count as Moving, drastically improving your Bleed Damage against them. |
 |
Herald of Purity - improves the Physical Damage of your Attacks, and Reserves only a small amount of your Mana. |
 |
Precision - Used for more Accuracy, it's good until you pick up the Resolute Technique. |
 |
Dash - A movement Skill, particularly useful during Labirynth trials. |
Bandits:
We recommend killing all the Bandits for two additional Passive Points.
Leveling Skill Trees:
You should pick all notables in Bleed Clusters to get the Bleeding Chance and refund them once you obtain it from other sources, like your Ascendency.
34 Points Skill Tree
Pick Bravery, Bloodletting, Deadly Draw, Avatar of the Hunt, small Leech node, Golem's Blood, and Cloth and Chain.
70 Points Skill Tree
Allocate Farsight, Savage Wounds, Vanquisher, and all maximum Life Notables on the way.
Recommended leveling items:
 Blackheart - grants a lot of Chaos Damage to your Attacks, which is not the preferred type, but at that level, it doesn't matter that much. Blackheart - grants a lot of Chaos Damage to your Attacks, which is not the preferred type, but at that level, it doesn't matter that much. |
|
| Adds 1 to 4 Physical Damage to Attacks Adds (10-15) to (20-25) Chaos Damage to Attacks Regenerate (10-15) Life per second 10% chance to Cause Monsters to Flee |
 Meginord's Girdle - an excellent Belt that grants high DPS and Life bonuses. Meginord's Girdle - an excellent Belt that grants high DPS and Life bonuses. |
|
| +(25-35) to Strength +25 to Strength Adds 10 to 20 Physical Damage to Attacks 10% increased maximum Life +(10-20)% to Cold Resistance 25% increased Flask Life Recovery rate |
|
|
|
| +(30-50) to Evasion Rating 10% increased Rarity of Items found +(30-40)% to all Elemental Resistances Reflects 4 Physical Damage to Melee Attackers Level Requirement reduced by 100 (Hidden) |
|
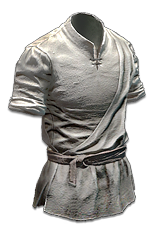 Tabula Rasa - the universal best Leveling Item in the game. 6-linked White Sockets allow you to easily swap your Gem setups. Tabula Rasa - the universal best Leveling Item in the game. 6-linked White Sockets allow you to easily swap your Gem setups. |
|
| Item has no level requirement and Energy Shield (Hidden) Item has 6 White Sockets and is fully linked (Hidden) |
|
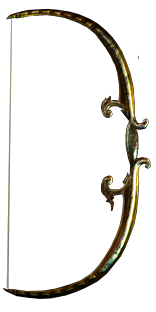
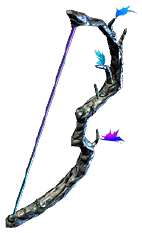 Silverbranch - a very powerful Bow that is available as early as level 1. Later replace it with Rare Bow that simply has higher Physical DPS. Silverbranch - a very powerful Bow that is available as early as level 1. Later replace it with Rare Bow that simply has higher Physical DPS. |
|
| 40% increased Global Accuracy Rating 100% increased Damage when on Low Life 50% increased Physical Damage Adds 2 to 6 Physical Damage 10% increased Attack Speed +(20-30) to maximum Life +2 Life gained for each Enemy hit by Attacks |
 Goldrim - it is a very powerful Helmet for low-level characters that need Elemental Resistance.
4. Final Skill Tree, Ascendancy Points, and Pantheon
Final Skill Tree:
119 Points Final Skill Tree (doesn't include Unique or Cluster Jewels)
119 Points Path of Building (PoB) link
Ascendancy points:
Preferably in that order:
- Blood in the Eyes
- Gratuitous Violence
- Arena Challenger
- Outmatch and Outlast
Pantheon:
Major God: Soul of Solaris: 6% Physical Damage Reduction if there is only one nearby Enemy; 20% chance to take 50% less Area Damage from Hits
Minor God: Soul of Gruthkul: 1% additional Physical Damage Reduction for each Hit you've taken Recently up to a maximum of 5%
5. Final Gems links
| [DPS] Split Arrow setup | |
|
Split Arrow - One of the primary Skills used in this build. It fires several piercing projectiles that will obliterate most regular and Rare enemies on your screen. |
 |
Vicious Projectiles Support - One of the most powerful Support Gems for this setup. It increases both the Initial Hit damage and also DoT caused by Split Arrow. |
 |
Lifetap Support - It's better to spend Life than Mana on a setup that overkills most of the enemies it's supposed to deal with anyway. |
 |
Brutality Support - increases the Physical Damage you deal, but disables Chaos and Elemental types, which are irrelevant anyway. |
 |
Cruelty Support - increases your Damage over Time based on the Hit Damage you deal. Since it is a Clearing Skill only, it will be easy to get maximum effect. |
 |
Chain Support - improves your Clear Speed. You can also use Fork or Pierce Supports. |
| [DPS] Puncture setup | |
|
Puncture - This skill offers the highest Bleeding Damage out of all skills that can be used with Bows. It's used solely for taking down Bosses so you will be fine with it firing just one projectile. |
|
Vicious Projectiles Support - again, greatly improves your Damage with Bleeding. |
 |
Snipe Support - a Channeling Skill that triggers the linked Bow Skill when released. It adds insane amounts of Damage per stage you gain during the Channeling. |
|
Brutality Support - improves your Physical Damage with the Puncture. |
|
Deadly Ailments Support - lowers your Hit Damage but significantly improves the Damage over Time aspect. |
 |
Volatility Support - gives a chance to deal greatly improved Damage, but you can also low-roll and deal Less Damage. If you want more consistency, you can use the Swift Affliction Support instead. |
| [UTILITY] Aura setup | |
 |
Determination - grants you a lot of base Armour Rating and allows you to scale it further. |
 |
Pride - increases the Physical Damage nearby Enemies take. You need to stand close for a few seconds to get maximum effect. |
 |
War Banner - increases the Physical Damage nearby Enemies take by a small amount. You can place it to gain the Adrenaline Buff. |
 |
Flesh and Stone - you need the Sand Stance to gain Challenger Charges from non-Rare Enemies. You can also use the Blood and Sand Aura, which has a lower Reservation but provides no benefits for this Build. |
| [UTILITY] Manaforged Arrow setup | |
 |
Frenzy - releases a Projectile that grants you a Frenzy Charge when it hits any Enemy. |
|
Ensnaring Arrow - applies a Debuff that slows your Enemies, and makes them count as Moving. It only affects the last Enemy it Hits, so you can't have any global source of Pierce. |
 |
Manaforged Arrows Support - triggers linked Bow Attacks when you spend enough Mana with your other Skills. |
| [UTILITY] Other Utility Skills | |
 |
Molten Shell - Guard Spell that reduces the damage you take from hits for a short time, it scales up with your Armour. |
 |
Enduring Cry - A Warcry that regenerates a large amount of Life and generates Endurance Charges. |
|
Vulnerability - Increases Physical Damage and DoT you deal to Cursed enemies making it the best Curse for this build. |
 |
Molten Shell - Grants increased Armour and a protective shield based on your total Armour Rating. |
|
Dash - the recommended Mobility Skill. It gives you a quick way to avoid Attacks and Spells and progress through areas faster. |
|
|
5. Gear Setup
Most of your Gear can be Crafted using Fractured Bases and Essences. More advanced Items will obviously need higher investments, but just the basic ones will allow you to cruise through the Atlas. On the Bow, you should look for as high Physical Damage as you can find. The Attack Speed doesn't affect your Bleed Damage, but it reduces the time you need to spend on Channeling and makes your overall gameplay smoother. At first, Added Physical Damage found on your Jewellery or Quiver is impactful, but it quickly loses its efficiency. You should always look for Physical or generic Damage over Time Multiplier. To bolster your defenses you should look for high maximum Life, Resistance, and Spell Suppression Chance. Ideally, they should also provide an Armour and Evasion Rating, but it is of less importance. Chaos Resistance and Life Regeneration is a great addition if you can fit it in. The Dexterity and Intelligence requirements are quite easy to meet, but you still have to keep them in mind when looking for the Gear.
|
Stat priorities on items:
|
 (Weapon) Lioneye's Glare - a very good budget Bow. It has high Physical Damage, but no bonuses for the DoT Multiplier. (Weapon) Lioneye's Glare - a very good budget Bow. It has high Physical Damage, but no bonuses for the DoT Multiplier. |
|
| (180-200)% increased Physical Damage Adds (7-14) to (24-34) Physical Damage (10-20)% increased Attack Speed +(80-100) to maximum Mana Hits can't be Evaded Far Shot |
|
 (Weapon) Rare Bow - the Citadel Bow has the highest Base Physical Damage, but we recommend getting a Base with higher Attack Speed, as the Damage is not a problem in this Build anyway. Look for the Fractured Hybrid Physical and Accuracy Rating bonus, and use Essence of Contempt until you get High Physical Damage and empty Suffix for DoT Multiplier. (Weapon) Rare Bow - the Citadel Bow has the highest Base Physical Damage, but we recommend getting a Base with higher Attack Speed, as the Damage is not a problem in this Build anyway. Look for the Fractured Hybrid Physical and Accuracy Rating bonus, and use Essence of Contempt until you get High Physical Damage and empty Suffix for DoT Multiplier. |
|
| Min. requirements: +600 Physical DPS +20% to DoT Multiplier Optional affixes: Physical Damage over Time Multiplier Attack Speed |
|
 (Weapon) Rare Quiver - here you should look for Attack Speed, increased Damage with Bows, maximum Life, and DoT Multiplier. Remember that it can't have any Pierce, or it will disable your Ensnaring Arrow debuff. (Weapon) Rare Quiver - here you should look for Attack Speed, increased Damage with Bows, maximum Life, and DoT Multiplier. Remember that it can't have any Pierce, or it will disable your Ensnaring Arrow debuff. |
|
| Min. requirements: +15% Attack Speed +20% to DoT Multiplier Optional affixes: % increased Damage with Bow Skills Adds # to # Physical Damage to Attacks Physical Damage over Time Multiplier maximum Life Resistance |
|
 (Helmet) Rare Helmet - here look for maximum Life, Spell Suppression, Resistances, or Attributes. The Mana Reservation Efficiency from Essences and Eldritch Implicit allows you to skip using the Enlighten Support, which is quite expensive. (Helmet) Rare Helmet - here look for maximum Life, Spell Suppression, Resistances, or Attributes. The Mana Reservation Efficiency from Essences and Eldritch Implicit allows you to skip using the Enlighten Support, which is quite expensive. |
|
| Min. requirements: +70 to maximum Life +50% total Elemental Resistance Optional affixes: Attribute Life Regeneration Physical Damage taken as Elemental Chance to Suppress Spell Damage Mana Reservation Efficiency |
|
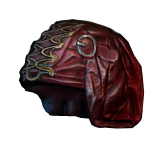
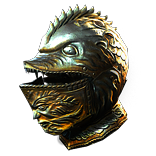
 (Helmet) Assailum - it is a great starting Helmet that grants you an improved Snipe setup, but you lose out on one potential Support Gem. Later you should replace it with a Rare Helmet. (Helmet) Assailum - it is a great starting Helmet that grants you an improved Snipe setup, but you lose out on one potential Support Gem. Later you should replace it with a Rare Helmet. |
|
| Grants Level 30 Snipe Skill Socketed Non-Channelling Bow Skills are Triggered by Snipe Socketed Triggered Bow Skills gain a 0.05 second Cooldown +(350-500) to Accuracy Rating +(350-500) to Evasion Rating +2 to maximum Snipe Stages +(14-20)% chance to Suppress Spell Damage while Channelling |
|
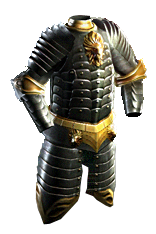 (Body Armour) Rare Body Armour - here you should look mainly for defenses, but Eldritch Implicits that boost your Aura Effect improve your Damage by quite a lot too. You can also get some Mana Reservation Efficiency here if your Helmet is quite lacking. (Body Armour) Rare Body Armour - here you should look mainly for defenses, but Eldritch Implicits that boost your Aura Effect improve your Damage by quite a lot too. You can also get some Mana Reservation Efficiency here if your Helmet is quite lacking. |
|
| Min. requirements: +20% chance to Suppress Spell Damage +70% to Elemental Resistances Optional affixes: % of Physical Damage from Hits taken as Elemental Damage Physical Damage Reduction Mana Reservation Efficiency % increased effect of Non-Curse Auras from your Skills Pride has #% increased Aura Effect |
|
 (Boots) Rare Boots - here you should look for maximum Life, Movement Speed, and lacking Resistances or Attributes. It can also grant you a chance to gain Onslaught on Kill, Life Regeneration, or Ailment Avoidance. (Boots) Rare Boots - here you should look for maximum Life, Movement Speed, and lacking Resistances or Attributes. It can also grant you a chance to gain Onslaught on Kill, Life Regeneration, or Ailment Avoidance. |
|
| Min. requirements: +70 to Maximum Life 25% increased Movement Speed +10% chance to Suppress Spell Damage +50% to Elemental Resistances Optional affixes: 100% chance to Avoid being Frozen % chance to gain Onslaught for 4 seconds on Kill 5% increased Action Speed Life Regeneration |
|
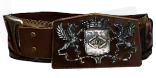
 (Belt) Ryslatha's Coil - it greatly boosts your Damage range, favoring the maximum Damage if rolled properly, the more Maximum Damage should be rolled high, and the less Minimum should be as low as possible. You can further enhance it with Catalysts. (Belt) Ryslatha's Coil - it greatly boosts your Damage range, favoring the maximum Damage if rolled properly, the more Maximum Damage should be rolled high, and the less Minimum should be as low as possible. You can further enhance it with Catalysts. |
|
| +(20-40) to Strength (30-40)% more Maximum Physical Attack Damage (40-30)% less Minimum Physical Attack Damage Adds 1 to (15-20) Physical Damage to Attacks +(80-100) to maximum Life Gain 50 Life when you Stun an Enemy |
|
 (Belt) Rare Belt - if you prefer a more consistent option, just use a regular Rare Belt with bonuses to maximum Life, Resistances, Attributes, or Flask Effects. (Belt) Rare Belt - if you prefer a more consistent option, just use a regular Rare Belt with bonuses to maximum Life, Resistances, Attributes, or Flask Effects. |
|
| Min. requirements: +100 maximum Life +70% to Total Elemental Resistances Optional affixes: increased Damage Armour % increased Flask Charges gained increased Maximum Life |
|
 (Amulet) Rare Amulet - it is a great source of Damage over Time Multiplier, but only Influenced ones can grant both generic and Physical DoT Multiplier. Other than that, look for maximum Life, Physical Damage for Attacks, and Resistances or Attributes. It should also reduce your Mana Cost of Skills. (Amulet) Rare Amulet - it is a great source of Damage over Time Multiplier, but only Influenced ones can grant both generic and Physical DoT Multiplier. Other than that, look for maximum Life, Physical Damage for Attacks, and Resistances or Attributes. It should also reduce your Mana Cost of Skills. |
|
| Min. requirements: +50 to maximum Life +15% to Damage over Time Multiplier Optional affixes: Physical Damage over Time Multiplier Added Physical Damage to Attacks Elemental Resistances Attributes Channelling Skills have -3 to Total Mana Cost (Snipe) Non-Channelling Skills have -7 to Total Mana Cost (Utility) |
|
| Recommended Anointments: Dirty Techniques |
|
 (Ring) Venopuncture - it is a great budget Ring that boosts your Damage with Bleeding and Chills your Enemies when you inflict Bleeding on them. The additional chance to cause Bleeding is also useful for your Split Arrow. (Ring) Venopuncture - it is a great budget Ring that boosts your Damage with Bleeding and Chills your Enemies when you inflict Bleeding on them. The additional chance to cause Bleeding is also useful for your Split Arrow. |
|
| +(20-30) to Strength Attacks have 25% chance to cause Bleeding (40-60)% increased Damage with Bleeding You are Chilled while you are Bleeding Non-Chilled Enemies you inflict Bleeding on are Chilled Bleeding Enemies you Kill with Hits Shatter |
|
 (Ring) Rare Rings - on the regular Rare Ring you should look for maximum Life, Resistances, Attributes, and lowered Mana Costs of your Skills. You can Craft the DoT Multiplier using the Essence of Delirium. (Ring) Rare Rings - on the regular Rare Ring you should look for maximum Life, Resistances, Attributes, and lowered Mana Costs of your Skills. You can Craft the DoT Multiplier using the Essence of Delirium. |
|
| Min. requirements: +70 maximum Life +70% to Total Elemental Resistances Optional affixes: Life Recoup % to Damage over Time Multiplier increased Attack Speed Added Physical Damage to Attacks Attributes |
|
 (Gloves) Rare Gloves - here you should focus on maximum Life, Spell Suppression Chance, and Resistance. For Damage, you should take a look at Attack Speed or DoT Multiplier. (Gloves) Rare Gloves - here you should focus on maximum Life, Spell Suppression Chance, and Resistance. For Damage, you should take a look at Attack Speed or DoT Multiplier. |
|
| Min. requirements: +70 maximum Life 15% increased Attack Speed +10% chance to Suppress Spell Damage +50% to Total Elemental Resistances Optional affixes: Chaos Resistance Attributes % to Physical Damage over Time Multiplier (Exarch) |
|
 (Jewel) Watcher's Eye - it can grant you tons of Damage and should be quite cheap compared to other variants as the Pride is rarely used Aura. It can also boost your defenses. (Jewel) Watcher's Eye - it can grant you tons of Damage and should be quite cheap compared to other variants as the Pride is rarely used Aura. It can also boost your defenses. |
|
| (4-6)% increased maximum Energy Shield (4-6)% increased maximum Life (4-6)% increased maximum Mana <Two or Three random aura modifiers> Recommended modifiers: (40-60)% increased Physical Damage while using Pride (5-8)% additional Physical Damage Reduction while affected by Determination Unaffected by Vulnerability while affected by Determination |
|
 (Jewel) Brutal Restraint - it grants you tons of Dexterity and can provide useful bonuses to already picked up Notables, such as increased Flask Charges gained, Onslaught on Kill, maximum Life, or Movement Speed. (Jewel) Brutal Restraint - it grants you tons of Dexterity and can provide useful bonuses to already picked up Notables, such as increased Flask Charges gained, Onslaught on Kill, maximum Life, or Movement Speed. |
|
| Denoted service of (500-8000) dekhara in the akhara of (Asenath-Balbala-Nasima) Passives in radius are Conquered by the Maraketh Historic |
|
 (Jewel) Rare Jewels - in the regular setup there are not many Jewel Sockets left, but if you have any available, you should look for Jewels that boost your maximum Life, Damage with Bleeding, DoT Multiplier, Mana Reservation Efficiency, or grant lacking Resistances and Attributes. (Jewel) Rare Jewels - in the regular setup there are not many Jewel Sockets left, but if you have any available, you should look for Jewels that boost your maximum Life, Damage with Bleeding, DoT Multiplier, Mana Reservation Efficiency, or grant lacking Resistances and Attributes. |
|
| Recommended affixes: increased maximum Life Increased Mana Reservation Efficiency % to Physical Damage over Time Multiplier % increased Damage with Bleeding Attributes Resistances % increased Attack Speed with Bows |
|
  (Jewel) Forbidden Flame & Flesh - the Duelist has many amazing options for this combination of Jewels. It is not necessary but can provide very powerful bonuses like permanent Fortify, Aura Effect, Adrenaline, or Damage Reductions. (Jewel) Forbidden Flame & Flesh - the Duelist has many amazing options for this combination of Jewels. It is not necessary but can provide very powerful bonuses like permanent Fortify, Aura Effect, Adrenaline, or Damage Reductions. |
|
| Allocates <Random Ascendancy Notable> if you have the matching modifiers on Forbidden Flesh Allocates <Random Ascendancy Notable> if you have the matching modifiers on Forbidden Flame |
|
 (Jewel) Large Cluster Jewel - it is an optional Setup. Cluster Jewels will provide you with tons of Physical or DoT Damage bonuses, but you will lose many maximum Life Notables to pick them up. (Jewel) Large Cluster Jewel - it is an optional Setup. Cluster Jewels will provide you with tons of Physical or DoT Damage bonuses, but you will lose many maximum Life Notables to pick them up. |
|
| Recommended affixes: 1 Added Passive Skill is Battle-Hardened 1 Added Passive Skill is Furious Assault 1 Added Passive Skill is Master the Fundamentals |
|
 (Jewel) Medium Cluster Jewel - this combination of modifiers grants you a lot of Damage, but also some maximum Life and Regeneration. (Jewel) Medium Cluster Jewel - this combination of modifiers grants you a lot of Damage, but also some maximum Life and Regeneration. |
|
| 1 Added Passive Skill is Flow of Life 1 Added Passive Skill is Wasting Affliction |
|
|
Other suggested Flasks:
|
|
     |
|
|
If you have any other build requests, please leave that in the comments below.
Pictures used in this article are the intellectual property of Grinding Gear Games.
