Blazing Salvo Inquisitor Build
A very tanky self-cast version of Blazing Salvo build for the Inquisitor classBlazing Salvo
Inquisitor Build
Updated for Patch 3.24
The Best Crafty Guides by Odealo
| Guide notes | |||
| May 3, 2024 -Updated for Patch 3.24 |
|||
| Build overview | |||
| Tags: [CASTER] [ELEMENTAL] [HYBRID] [STARTER] | |||
|
Budget: Defenses: |
|
Boss DPS: AoE: |
|
Blazing Salvo is a relatively new Skill that's also very simple, this Spell fires up to 7 Projectiles dealing Fire Damage on contact with the ground or an enemy. The only uniqueness of his Skill is the Area of Effect that increases along with the distance the Projectile has traveled. The Skill has been significantly buffed in path 3.17 to match the current build standards. In this version, we've picked an Inquisitor Ascendancy with Sancturay, Pious Path, Augury of Penitence, and Righteous Providence. With these Keystones, it can be easily made a hybrid build with noticeable Energy Shield, quickly recovered at the same rate as Life. Righteous Providence grants a lot of Critical Strike Chance, given that the Character has a lot of Strength and Intelligence. If you can manage to make these two Attributes equally high, you can reap the benefits of Leadership's Price Unique Amulet. It's a build that doesn't require any specific Unique Items, but it works exceptionally well with Snakepit Ring.
It's a build where the main goal is to accumulate enough Attributes and stats to increase your Damage, while also gathering a significant amount of defensives. With Corrupted Soul and close to 10k of combined Life and Energy Shield the build can be deemed to be very tanky. It has also tons of Armour, very high Maximum Elemental Resistances, over 60% Block Chance against Attack and Spells with Glancing Blows, and rapid Life, ES, and Mana Regeneration. Inquisitor's Ascendancy is a go-to option for the more sturdy builds, and it's almost mandatory when you want to create a hybrid build, as is the case here. It uses rather cheap items and it's definitely good for its price, it can be even played as a starter.
You can also check our other Path of Exile builds right over here Odealo's Crafty Guides - Full List
1. Gameplay
Standing far away from a group of enemies wields the best results as the area of effect for Blazing Salvo grows significantly with distance, but for a single enemy there will be no difference - a singular opponent can be damaged only once per projectile from one cast. To apply Combustion and Flammability Curse all at once it's recommended to use Armageddon Brand, it has an inherent chance to Ignite enemies. For Mana-reserving Spells we've used Anger, Determination, Herald of Ash, Defiance Banner, and Tempest Shield. Zealotry is to be linked with Divine Blessing and Lifetap to activate it only for 10 or so seconds. To further boost your damage for a short time you can use Vaal Righteous Fire, it grants more Spell Damage. Molten Shell and Flame Dash are suitable additions to the build.
|
In this video was recorded on a level 94 Inquisitor with a level 26 Blazing Salvo Gem after "upgrades" and Snakepit Ring equipped |
|
|

2. Build's PROS & CONS
| PROS |
|
| CONS |
|
3. Leveling tips
When leveling an Inquisitor it is common to use an Elemental Spell. Fire Damage or Lightning Damage can be easily reached at the start. We recommend beginning with Rolling Magma, it's the skill most similar to Blazing Salvo which is available only after level 12. On your Skill Tree follow a general Spellcaster route while keeping your Maximum Life and Resistances high. Don't bother with Critical Strike at first, these will be sourced from Righteous Providence after your last ascension. After allocating Pious Path you can start looking for Glorious Vanity. The final stage of assembling the build is to gather as much Strength and Intelligence as you can.
Suggested leveling Gem setups:
| Rolling Magma setup | |
 |
Rolling Magma - a default Fire Spell requiring no conversion, can be switched with other similar Spells depending on your preferences and level |
 |
Inspiration Support - the cost of linked Skills is lower while Elemental Damage and Crit. Chance gets increased |
 |
Arcane Surge Support - increases the Spell Damage and mana Regeneration Rate by granting you a buff |
Combustion Support - can be switched with  Elemental Focus Support only after being able to cause Ignite with Combustion via other Spell Elemental Focus Support only after being able to cause Ignite with Combustion via other Spell |
|
| various Gems | |
 |
Molten Shell - a Guard Spell that negates some of the damage you take from Hits |
 |
Flammability - lowers the Fire Resistance of cursed enemies |
 |
Flame Dash - increases your mobility by allowing dashing |
 |
Anger - use for additional Fire Damage with Spells and Attacks |
 |
Herald of Ash - grants more Fire Spell Damage and increases it, it also improves clear speed as the enemies you kill "explode" |
 |
Clarity - higher Mana Regeneration Rate |
Bandits:
KIlling all Bandits for two additional Passive Points is the best option
Leveling Skill Trees:
25 Points Skill Tree
Start with general Elemental Damage and Maximum Life
73 Points Skill Tree
Allocate Sovereignty for increased Mana Reservation Efficiency, and go for the Heart of Flame by picking up the important nodes on your way, such as more maximum Life and Cast Speed. Tireless, Barbarism, and Purity of Flesh are your sources of Maximum Life
Recommended leveling items:
 Dream Fragments - use it for increased Maximum Mana, Mana Regeneration Rate, Cold Resistance, and Cold Ailments immunity Dream Fragments - use it for increased Maximum Mana, Mana Regeneration Rate, Cold Resistance, and Cold Ailments immunity |
|
| +(20-30)% to Cold Resistance 20% increased maximum Mana 50% increased Mana Regeneration Rate +(30-40)% to Cold Resistance Cannot be Chilled Cannot be Frozen |
|
 Praxis - another great leveling Ring that grants you a better Mana sustain Praxis - another great leveling Ring that grants you a better Mana sustain |
|
| +(20-30) to maximum Mana +(30-60) to maximum Mana Regenerate (3-6) Mana per second -(8-4) to Total Mana Cost of Skills 8% of Damage taken gained as Mana over 4 seconds when Hit |
|
 Abberath's Horn - a great low-cost weapon for Fire Damage builds which don't really on Ignite Damage Abberath's Horn - a great low-cost weapon for Fire Damage builds which don't really on Ignite Damage |
|
| (10-14)% increased Spell Damage (20-30)% increased Fire Damage Adds (4-6) to (8-12) Fire Damage to Spells (40-60)% increased Global Critical Strike Chance +10 Life gained on Killing Ignited Enemies 25% reduced Ignite Duration on Enemies |
 Goldrim - A helmet that's good for leveling most of the builds due to the abundance of Elemental Resistances Goldrim - A helmet that's good for leveling most of the builds due to the abundance of Elemental Resistances |
|
| +(30-50) to Evasion Rating 10% increased Rarity of Items found +(30-40)% to all Elemental Resistances Reflects 4 Physical Damage to Melee Attackers Level Requirement reduced by 100 (Hidden) |
 Tabula Rasa - allows you to link any six Gems Tabula Rasa - allows you to link any six Gems |
|
| Item has no level requirement and Energy Shield (Hidden) Item has 6 White Sockets and is fully linked (Hidden) |
4. Final Skill Tree, Ascendancy Points, and Pantheon
Final Skill Tree:
112 Points Final Skill Tree (doesn't include Unique or Cluster Jewels)
123 Points Path of Building (PoB) link
Ascendancy points:
Preferably in that order:
- Sanctuary
- Pious Path
- Augury of Penitence
- Righteous Providence
Pantheon:
Major God: Soul of Solaris: 6% additional Physical Damage Reduction while there is only one nearby Enemy; 20% chance to take 50% less Area Damage from Hits
Minor God: Soul of Gruthkul: 1% additional Physical Damage Reduction for each Hit you've taken Recently up to a maximum of 5%
5. Final Gems links
| [DPS] Blazing Salvo setup | |
 |
Blazing Salvo - basic Fire Spell that fires up to seven Projectiles, the further away from the target, the larger the area of effect of the explosion |
 |
Pinpoint Support - Pinpoint grants you more damage per Intensify by up to 60% under certain conditions, you have to stay still and cast the linked Spell three times, and your number of projectiles will drop. The base number of Projectiles is increased. |
 |
Intensify Support - It's similar to Pinpoint Support, but instead of gaining Projectile Damage you gain Area Damage, and lose Area of Effect as you gain Intensify. The base Area of Effect is increased. |
 |
Spell Echo Support - the Spell you cast is repeated with more Cast Speed, but it deals slightly less damage |
|
Inspiration Support - increased Critical Strike Chance, more Elemental Damage, reduced mana Cost of Skills |
 |
Fire Penetration Support - Damage Penetrated a portion of Fire Resistance your opponent has. Try to get the awakened version as it also grants Exposure on Hit. |
| [UTILITY] Armageddon Brand setup | |
 |
Armageddon Brand - A Brand that attaches to an enemy and periodically Hits it to apply a linked Curse and cause Ignite |
| Combustion Support - Combustion reduces the Fire Resistance of the enemy Ignited by the linked Skill while increasing its Chance to Ignite. That's the only purpose it has in this setup. | |
 |
Hextouch Support - Linked Curse is applied on Hit with the Linked Skill |
|
Flammability - Reduces Fire Resistance of the Cursed opponent. The interaction of Blazing Salvo and Snakepit enables  Sniper's Mark's Split mechanics to be combined with Fork. Explosive Projectiles from Blazing Salvo can collide with the ground or an enemy. Fork and Split are applied only after hitting an enemy, but the explosion from hitting the ground will also affect the same target. Sniper's Mark's Split mechanics to be combined with Fork. Explosive Projectiles from Blazing Salvo can collide with the ground or an enemy. Fork and Split are applied only after hitting an enemy, but the explosion from hitting the ground will also affect the same target. |
| [MOBILITY] Flame Dash and Vaal RF setup | |
|
Flame Dash - a mobility Skill that teleports you over a short distance, extremely useful |
|
Arcane Surge Support - keep it at a low enough level so that a single cast of Flame Dash will activate it, it grants you Spell Damage and Mana Regeneration Rate |
 |
Increased Duration Support - Arcane Surge and Vaal RF last longer |
 |
Vaal Righteous Fire - use only the Vaal component of this Spell, it grants you more Spell Damage, but costs you some of your Maximum Life |
| [UTILITY] Auras setup | |
|
Anger - an Aura you should use to add extra Fire Damage to your Spells |
 |
Determination - massively increases your Armour, an obligatory Aura |
 |
Tempest Shield - here it is used for Shock Immunity and massively increased Spell Block Chance |
 |
Enlighten Support - the above-mentioned three Auras are the most expensive ones, link them to Enlighten for increased Mana Reservation Efficiency |
| [UTILITY] more Auras | |
|
Herald of Ash - More Fire Damage and increased Fire Damage. Enemies you kill burn enemies around them for a quarter of the overkill damage, resulting in much better clear speed. |
 |
Zealotry - it's one of the most expensive Auras that increases your Critical Strike Chance for Spells and grants more Spell Damage. It will last 10 or so seconds but it's only important to activate it when fighting bosses. |
|
Enlighten Support |
| [UTILITY] Molten Shell | |
|
Molten Shell - Guard Spell that scales well with Armour to absorb more Hit Damage |
|
|
6. Gear Setup
It's a hybrid build, but all of your Energy Shield is sourced from Maximum Life so you don't have to bother with looking for this specific stat. Your Critical Strike Chance is mainly derived from Strength and Intelligence, whichever is lower. The most commonly found stats you will gather from your gear is Maximum Life and Elemental Resistances. Added Damage is generally accessible via Weapons, Rings, and Amulets. As for Unique Items, we can recommend a few that works nicely with the build, but none of them is obligatory. The only item that you are required to have is Glorious Vanity granting you Corrupted Soul, but it can also be sourced from Replica Soul Tether.
Our recommended items will:
- Cap your resistances at 75%
- Provide you with enough DPS and Life to start mapping
|
Stat priorities on items:
|
 (Helmet) Rare Helmet - Get more Life and Resistances. "Nearby Enemies have -9% to Fire Resistance" is a more expensive mod, that is not necessarily mandatory, as it only affects nearby enemies. You will probably need some extra Reservation Efficiency from Eldritch Orbs instead. (Helmet) Rare Helmet - Get more Life and Resistances. "Nearby Enemies have -9% to Fire Resistance" is a more expensive mod, that is not necessarily mandatory, as it only affects nearby enemies. You will probably need some extra Reservation Efficiency from Eldritch Orbs instead. |
|
| Min. requirements: +60 to Maximum Life +60% to Elemental Resistances Optional affixes: Nearby Enemies have -#% to Fire Resistance Strength Intelligence Chaos Resistance |
|
 (Helmet) Crown of the Inward Eye - As you rely heavily on Armour and Energy Shield, this is one of the best Helmets for you, just be sure your Resistances are high for his helmets grant you none. (Helmet) Crown of the Inward Eye - As you rely heavily on Armour and Energy Shield, this is one of the best Helmets for you, just be sure your Resistances are high for his helmets grant you none. |
|
| 333% increased Armour and Energy Shield (9-21)% increased maximum Life, Mana and Global Energy Shield Transfiguration of Soul Transfiguration of Body Transfiguration of Mind |
|
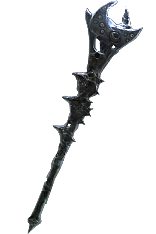 (Weapon) Rare Sceptre - The most important are increased Spell Fire Damage and level of your Blazing Salvo Skill Gem, remember that you can craft Cast Speed which is really good. (Weapon) Rare Sceptre - The most important are increased Spell Fire Damage and level of your Blazing Salvo Skill Gem, remember that you can craft Cast Speed which is really good. |
|
| Min. requirements: 80% Increased Fire Damage +1 to Level of all Fire/Spell Skill Gems Optional affixes: +1 to Level of all Fire/Spell Skill Gems Elemental Damage Global Critical Strike Multiplier increased Critical Strike Chance for Spells Adds Fire Damage to Spells increased Cast Speed |
|
 (Off-hand) Rare Shield - Shields may offer offensive and defensive improvements alike. Intelligence-based ones are more offensively oriented, granting you Spell Damage and Critical Strike mods, but the Strength ones are better suited for when you need some Maximum Life. (Off-hand) Rare Shield - Shields may offer offensive and defensive improvements alike. Intelligence-based ones are more offensively oriented, granting you Spell Damage and Critical Strike mods, but the Strength ones are better suited for when you need some Maximum Life. |
|
| Min. requirements: +80 to maximum Life +60% to Elemental Resistances Optional affixes: Armour Socketed Gems have 30% increased Reservation Efficiency Attributes increased Spell Damage increased Critical Strike Chance for Spells |
|
 (Body Armour) The Brass Dome - Brass Dome grants tons of Armour, Maximum Resistances, and complete Critical Damage mitigation. Definitely a good Armour if you don't mind the downside. (Body Armour) The Brass Dome - Brass Dome grants tons of Armour, Maximum Resistances, and complete Critical Damage mitigation. Definitely a good Armour if you don't mind the downside. |
|
| (350-400)% increased Armour +(1-5)% to all maximum Elemental Resistances Strength provides no bonus to Maximum Life Take no Extra Damage from Critical Strikes |
|
 (Body Armour) Rare Body Armour - A good Rare Body Armour provides you with much more Resistances, Maximum Life, and Energy Shield than The Brass Dome. Remember to implement the Energy Shield from Maximum Life mod. (Body Armour) Rare Body Armour - A good Rare Body Armour provides you with much more Resistances, Maximum Life, and Energy Shield than The Brass Dome. Remember to implement the Energy Shield from Maximum Life mod. |
|
| Min. requirements: +90 to maximum Life +60% to Elemental Resistances Optional affixes: +#% to Spell Critical Strike Chance Armour Chaos Resistance increased maximum Life |
|
 (Boots) Rare Boots - Life, Resistances, and Movement Speed are all good, but the best combination of mods will also grant you nearly-permanent Onslaught, Tailwind, and Elusive. (Boots) Rare Boots - Life, Resistances, and Movement Speed are all good, but the best combination of mods will also grant you nearly-permanent Onslaught, Tailwind, and Elusive. |
|
| Min. requirements: +60 to maximum Life 25% increased Movement Speed +60% to Elemental Resistances Optional affixes: Chaos Resistance chance to gain Onslaught for 4 seconds on Kill You have Tailwind if you have dealt a Critical Strike Recently chance to gain Elusive on Critical Strike Cannot be Frozen (crafted) |
|
| Min. requirements: +60 to maximum Life +60% to Elemental Resistances Optional affixes: increased Global Critical Strike Chance Attributes increased Cast Speed |
|
 (Belt) Rare Belt - Strength, Maximum Life, and Resistances can be abundant on a Belt, otherwise, there's not much else to look for. (Belt) Rare Belt - Strength, Maximum Life, and Resistances can be abundant on a Belt, otherwise, there's not much else to look for. |
|
| Min. requirements: +80 to Maximum Life +80% to Elemental Resistances 50 Strength Optional affixes: Maximum Energy Shield increased Damage increased Maximum Life |
|
 (Belt) Replica Soul Tether - That's the belt you can use to get Corrupted Soul instead of using Glorious Vanity. It's worth considering, but keep in mind that you already have a pretty good setup for the Jewel. (Belt) Replica Soul Tether - That's the belt you can use to get Corrupted Soul instead of using Glorious Vanity. It's worth considering, but keep in mind that you already have a pretty good setup for the Jewel. |
|
| (15-25)% increased Stun and Block Recovery +(20-40) to Strength Gain (4-6)% of Maximum Life as Extra Maximum Energy Shield Corrupted Soul |
|
 (Amulet) Rare Amulet - Amulets are a great source of Damage and better defense. Besides the obvious Maximum Life and Resistances, seek Strength, Intelligence, and lower Mana cost of Skills. You can also increase the Gem level of Blazing Salvo by up to two. (Amulet) Rare Amulet - Amulets are a great source of Damage and better defense. Besides the obvious Maximum Life and Resistances, seek Strength, Intelligence, and lower Mana cost of Skills. You can also increase the Gem level of Blazing Salvo by up to two. |
|
| Min. requirements: +50 to maximum Life +40% to Elemental Resistances Global Critical Strike Multiplier Optional affixes: +1 to Level of all Intelligence Skill Gems +1 to Level of all Fire Skill Gems Attributes Non-Channelling Skills have -7 to Total Mana Cost (crafted) |
|
 (Amulet) Leadership's Price - An Amulet that drops from a Unique Contract and it's always Corrupted. If your Strength and Intelligence are equally high it grants alternative Elemental Ailments, most of which are much better. It's very similar to Secrets of Suffering. It can get you an additional Maximum Elemental Resistances. (Amulet) Leadership's Price - An Amulet that drops from a Unique Contract and it's always Corrupted. If your Strength and Intelligence are equally high it grants alternative Elemental Ailments, most of which are much better. It's very similar to Secrets of Suffering. It can get you an additional Maximum Elemental Resistances. |
|
| +(10-16) to all Attributes +(-3-3)% to maximum Fire Resistance +(-3-3)% to maximum Cold Resistance +(-3-3)% to maximum Lightning Resistance You have Scorching Conflux, Brittle Conflux and Sapping Conflux while your two highest Attributes are equal Cannot Ignite, Chill, Freeze or Shock Corrupted |
|
 (Amulet) Replica Dragonfang's Flight - It may increase the Gem Level of Blazing Salvo by 3 while providing you with Reservation Efficiency and Eesistances. (Amulet) Replica Dragonfang's Flight - It may increase the Gem Level of Blazing Salvo by 3 while providing you with Reservation Efficiency and Eesistances. |
|
| +(10-16) to all Attributes +3 to Level of all <Random Skill> Gems +(10-15)% to all Elemental Resistances (10-15)% increased Reservation Efficiency of Skills Items and Gems have (15-10)% reduced Attribute Requirements |
|
| Recommended Anointments: Charisma Heartseeker |
|
 (Ring) Rare Ring - Maximum Life, Elemental Resistances, and Attributes are very easy to get on a Ring, try to get yourself one with as many of these as you can afford. (Ring) Rare Ring - Maximum Life, Elemental Resistances, and Attributes are very easy to get on a Ring, try to get yourself one with as many of these as you can afford. |
|
| Min. requirements: +70 to maximum Life +60% to Elemental Resistances Strength and Intelligence Optional affixes: increased Global Critical Strike Multiplier Non-channeling Skills have -7 to Total Mana Cost (crafted) Added Fire Damage to Spells increased Spell Damage |
|
 (Ring) Snakepit - You can put it in your Left Ring Slot to make the Projectiles Fork - it's a massive boost to your clear speed. It also grants decent Spell Damage and Cast Speed bonuses (Ring) Snakepit - You can put it in your Left Ring Slot to make the Projectiles Fork - it's a massive boost to your clear speed. It also grants decent Spell Damage and Cast Speed bonuses |
|
| +(20-30)% to Cold Resistance (20-40)% increased Spell Damage (5-10)% increased Cast Speed Left ring slot: Projectiles from Spells cannot Chain Left ring slot: Projectiles from Spells Fork Right ring slot: Projectiles from Spells Chain +1 times Right ring slot: Projectiles from Spells cannot Fork Projectiles from Spells cannot Pierce |
|
 (Jewel) Rare Jewels - These should provide extra Life and some other various stats like Resistances or Immunity to Corrupted Blood. (Jewel) Rare Jewels - These should provide extra Life and some other various stats like Resistances or Immunity to Corrupted Blood. |
|
|
Recommended affixes: |
|
 (Jewel) Unnatural Instinct - We've put one of these Jewels near Instability for some minor improvements such as Herald Buff Effect, Reservation Efficiency, Spell Damage, and Maximum Mana. (Jewel) Unnatural Instinct - We've put one of these Jewels near Instability for some minor improvements such as Herald Buff Effect, Reservation Efficiency, Spell Damage, and Maximum Mana. |
|
| Allocated Small Passive Skills in Radius grant nothing Grants all bonuses of Unallocated Small Passive Skills in Radius |
|
 (Jewel) Glorious Vanity - Eternal Youth can be transformed into a Corrupted Soul by putting this Jewel near it. It has to be Doryani's variant. (Jewel) Glorious Vanity - Eternal Youth can be transformed into a Corrupted Soul by putting this Jewel near it. It has to be Doryani's variant. |
|
| Bathed in the blood of (100-8000) sacrificed in the name of Doryani Passives in radius are Conquered by the Vaal Historic |
|
 (Jewel) Watcher's Eye - The Auras you're using are Determination, Anger, and Zealotry that's liked with Divine Blessing. Determination mods are usually granting you some defensives, while Anger ones are more offensively oriented. (Jewel) Watcher's Eye - The Auras you're using are Determination, Anger, and Zealotry that's liked with Divine Blessing. Determination mods are usually granting you some defensives, while Anger ones are more offensively oriented. |
|
| (4-6)% increased maximum Energy Shield (4-6)% increased maximum Life (4-6)% increased maximum Mana <Two or Three random aura modifiers> |
|
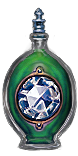
| 40% increased Damage Creates Consecrated Ground on Use (30-15)% reduced Duration Consecrated Ground created by this Flask has Tripled Radius Consecrated Ground created during Effect applies (7-10)% increased Damage taken to Enemies (100-150)% increased Critical Strike Chance against Enemies on Consecrated Ground during Flask effect |
|
|
Other suggested Flasks:
|
|
     |
|
|
If you have any other build requests please leave that in the comments below. We are always open to suggestions and constructive feedback.
Pictures used in this article are the intellectual property of Grinding Gear Games.
