
Blade Vortex Occultist Build
Physical to Cold Conversion Build for an Occultist that uses Power Charges and an unusual Bow/Quiver setupBlade Vortex
Occultist Build
Updated for Patch 3.24
The Best Crafty Guides by Odealo
| Guide notes |
| June 14, 2024 -Updated for Patch 3.24 |
| Build Overview | |||
| Tags: [CASTER] [ELEMENTAL] [LIFE] | |||
|
Budget: Defenses: |
|
Boss DPS: AoE: |
|
Blade Vortex is one of the most popular Physical Spells in the game, it's a very basic skill that creates orbiting blades around the character. These blades - vortexes, deal damage at such a rapid pace that they can be compared to a Spell version of Cyclone. You can stack up this damaging effect up to 10 times, each time it grows in damage and size. Normally it would require you to stop and cast it a few times before reaching the threshold of usefulness and continue mapping, but not in this case. It can be linked to the Unleash Support Gem and cast 5 of them all at once, which is more than enough to map comfortably. These vortexes last for 5 seconds. Blade Vortex, due to being a Physical Spell, creates a great opportunity for a conversion build, as physical damage is the easiest one to convert. Occultist, among many other virtues, is very good at dealing short-range Cold Spell Damage, and so this skill suits this ascendancy perfectly. For defenses, the build utilizes a medium-sized Life Pool, Life Leech, and around 20 to 40k of Armour.
To convert Physical Damage to Cold Damage you can combine the Cold mastery with a special pair of Rare Gloves, or use Hrimsorrow Unique Gloves. On top of that, you will be able to add a lot of Cold Damage sourced from Physical Damage (from before it is converted). The build is capable of reaching a 100% Critical Strike Chance by using Passives, Power Charges, Flasks, and Assasin's Mark. In this guide, we will go with a version that uses a Rare Bow and the Asphyxia's Wrath Quiver instead of Void Batteries. The Quiver/Bow combination grants a lot of damage due to the local Bow modifiers, the Frostbite Curse from Quiver, and it also provides you with a higher chance to Freeze enemies, making it particularly good with Herald of Ice, you won't need the Profane Bloom Keystone for your clear speed is already excellent.
You can also check our other Path of Exile builds right over here Odealo's Crafty Guides - Full List
1. Gameplay
Cast the Blade Vortex every 5 seconds, it will grant you 5 stacks of vortexes, as each seal is granted every 0.7 or-so seconds. With Herald of Ice and 100% Chance to Freeze mapping goes very smoothly. Implement the regular Vortex skill to the build, it should be used as often as the cooldown allows you to. It will apply a powerful Chill effect and grant an Arcane Surge. For more damage use the Vaal version of Blade Vortex, you can cast up to two of the independently-moving vortexes that deal much more damage. With Malediction, you're able to apply two Curses - one Frostbite from the Unique Quiver, and Assassin's Mark, cast via Arcanist's Brand, which also casts Frost Bomb to apply Exposure and reduce life Regeneration. For a movement skill use Flame Dash, and for a Guard Spell - an automatically-triggered Molten Shell. The Auras you should be using are Determination, Hatred, Herald of ice, Herald of Purity, and if you still have some Mana left - the Defiance Banner or Zealotry.
|
|
|
|

2. Build's PROS & CONS
| PROS |
|
| CONS |
|
3. Leveling tips
As an Occultist, we recommend starting with a Spell that has a high base Critical Strike Chane, then immediately start investing in Power Charges, and getting items or skills related to this game's mechanics. As your starting location is close to a lot of Elemental/Lighting Damage nodes, we recommend picking up a purely Lighting Spell, such as Arc. It's available at level 12, so pick up the Stormblast Mine first. Later, you will be able to incorporate/switch to Ball Lightning to deal with bosses, as Arc is not very good at it unless you have it six-linked with Tabula Rasa and have a good source of Mana Regeneration. Vaal Blade Vortex becomes really good at higher levels, Gem Levels that is. Level 21 Vaal Blade Vortex is very Expensive, so we recommend leveling it up by yourself under a switched weapon (x), and vaaling it as it reaches the maximum Gem Level. After your second or third ascension, you'll take the Void Beacon Keystone - very useful for Cold and Chaos Damage setups, but useless for Lighting Damage ones. That's the point you might want to start using Cold Damage Spells. You should switch to Blade Vortex later in the game, as the Lightning/Cold Damage setup grows weaker, it's around yellow or red maps, or perhaps even sooner. We prepared the leveling skill tree in such a way as to not make it cost a lot of Regret Orbs, it's, for the most part, a general Power Charge setup with specific nodes for Lightning Damage sprinkled here and there. You can also get the Large and Medium Cluster Jewels early on if you have a budget, and start using them at level 54, these offer a lot of Damage.
Suggested leveling Gem setups:
| Stormblast Mine setup | |
 |
Stormblast Mine - A mine that deals Lightning Damage, it's particularly good during the first 12 levels when you're not yet specialized in Mines. |
 |
Arcane Surge Support - After spending some Mana on the linked Skills it grants an Arcane Surge buff for more Spell Damage and Mana Regeneration Rate. |
 |
Added Lightning Damage Support - Adds Lightning Damage to your Skills. |
| Arc setup | |
 |
Arc - A Chaining Spell that can very quickly kill a lot of enemies present within its range, very efficient for leveling, but lacks single-target damage. |
|
Arcane Surge Support |
|
Added Lightning Damage Support |
 |
Elemental Focus Support - Makes you unable to cause Shock by using Arc, but rewards you with more Spell Damage. |
 |
Power Charge On Critical Support - Grants Power Charges on Critical Strike, and more Damage per Power Charge. |
 |
Lightning Penetration Support - Damage Penetrates a big chunk of Lightning Resistance. |
| Glacial Cascade setup | |
 |
Glacial Cascade - After you've switched to Cold Damage, use a Cold Spell, such as Glacial Cascade. It's pretty basic, you might find other Skills to be more suitable replacements. You can also use the Physical Damage Spell if you can easily convert Damage to Cold. use it after you've allocated Void Beacon. |
 |
Spell Echo Support - Spell repeat an additional time but deal less damage. |
 |
Added Cold Damage Support |
|
Elemental Focus Support |
 |
Cold Penetration Support |
|
Power Charge On Critical Support |
| Mana Reservation setup | |
 |
Wrath - Wrath grants more Lightning Spell Damage, replace it later with  Hatred to suit your Cold Damage setup. Hatred to suit your Cold Damage setup. |
 |
Purity of Elements - Grants Elemental Resistances and protects you from any Elemental Ailments. |
 |
Clarity - Regenerates your Mana rapidly. |
| Utility Gems | |
 |
Conductivity - Lowers Lightning Resistance of affected enemies. Later, switch to  Frostbite or Frostbite or  Assassin's Mark. Assassin's Mark. |
 |
Wave of Conviction - Applies Elemental Exposure to lower Elemental Resistances. |
 |
Flame Dash - A simple movement Spell. |
Bandits:
you should kill all three Bandits for two additional Skill Points
Leveling Skill Trees:
25 Points Skill Tree
Start with Spell / Lighting Damage and some Maximum Life.
62 Points Skill Tree
Allocate all the nodes for an Extra Maximum Power Charge, some more Maximum Life, and Cast Speed.
94 Points Skill Tree
At this point, you should've switched to Cold Damage. Get more maximum Life, Mana Reservation Efficiency, and Critical Strike nodes.
Recommended leveling items:
 Le Heup of All - Use it for Attributes, Damage, and Resistances - these are all useful. Le Heup of All - Use it for Attributes, Damage, and Resistances - these are all useful. |
| Adds 1 to 4 Physical Damage to Attacks +(10-30) to all Attributes (10-30)% increased Damage (10-30)% increased Rarity of Items found +(10-30)% to all Elemental Resistances |
 Goldrim - Offers a lot of Elemental Resistances which are very important. Goldrim - Offers a lot of Elemental Resistances which are very important. |
| +(30-50) to Evasion Rating 10% increased Rarity of Items found +(30-40)% to all Elemental Resistances Reflects 4 Physical Damage to Melee Attackers Level Requirement reduced by 100 (Hidden) |
 Praxis - One of the best leveling Rings for Spell-casters. Praxis - One of the best leveling Rings for Spell-casters. |
| +(20-30) to maximum Mana +(30-60) to maximum Mana Regenerate (3-6) Mana per second -(8-4) to Total Mana Cost of Skills 8% of Damage taken Recouped as Mana |
 Atziri's Foible - If you're suing Tabula Rasa you probably also struggle with Mana sustain. If that's the case, use this Amulet. Atziri's Foible - If you're suing Tabula Rasa you probably also struggle with Mana sustain. If that's the case, use this Amulet. |
| (20-30)% increased Mana Regeneration Rate +100 to maximum Mana (16-24)% increased maximum Mana (80-100)% increased Mana Regeneration Rate Items and Gems have 25% reduced Attribute Requirements |
 Lifesprig - It's great to start with but at level 12 switch to Storm Prison. Lifesprig - It's great to start with but at level 12 switch to Storm Prison. |
| (8-12)% increased Spell Damage +1 to Level of Socketed Spell Gems (20-28)% increased Spell Damage (5-8)% increased Cast Speed +(15-20) to maximum Life +(15-20) to maximum Mana Regenerate (6-8) Life over 1 second when you Cast a Spell |
 Storm Prison - It grows stronger the more Power Charges you have, it's especially good with Lightning Spells. Storm Prison - It grows stronger the more Power Charges you have, it's especially good with Lightning Spells. |
| (11-15)% increased Spell Damage (40-60)% increased Physical Damage Adds 1 to (35-45) Lightning Damage (15-25)% increased Mana Regeneration Rate +1 to Maximum Power Charges (25-35)% chance to gain a Power Charge on Kill |
 Hrimsorrow - These are great if you're using a Spell that deals Physical Damage and you want to convert it to Cold. You can also use them in the final version of the build, so you can read more about them in section 6. Hrimsorrow - These are great if you're using a Spell that deals Physical Damage and you want to convert it to Cold. You can also use them in the final version of the build, so you can read more about them in section 6. |
| +(20-30) to Strength +(40-50) to Evasion Rating +(20-30)% to Cold Resistance 100% of Physical Damage Converted to Cold Damage Reflects 100 Cold Damage to Melee Attackers |
 Tabula Rasa - Use Tabula for the six, white, linked sockets. Tabula Rasa - Use Tabula for the six, white, linked sockets. |
|
| Item has no level requirement and Energy Shield (Hidden) Item has 6 White Sockets and is fully linked (Hidden) |
|
4. Final Skill Tree, Ascendancy Points, and Pantheon
Final Skill Tree:
105 Points Final Skill Tree (doesn't include Cluster or Unique Jewels)
123 Points Path of Building (PoB) link
Ascendancy points:
Preferably in that order:
- Forbidden Power
- Void Beacon
- Frigid Wake
- Malediction
Pantheon:
Major God: Soul of Solaris: 6% additional Physical Damage Reduction while there is only one nearby Enemy; 20% chance to take 50% less Area Damage from Hits
Minor God: Soul of Ralakesh: Moving while Bleeding doesn't cause you to take extra Damage; 25% reduced Physical Damage over Time taken while moving
5. Final Gems links
| [DPS] Blade Vortex setup | |
 |
Vaal Blade Vortex - Creates a damaging vortex of blades around the character, it stacks up to 10 times. It's obligatory to have the Vaal version to use during boss fights. Try to get a level 21 Gem. |
 |
Unleash Support - It allows you to store up casts as seals that you gain over time, you can then cast the linked Spell four to five times at once with a single cast. |
|
Power Charge on Critical Support - Generates Power Charges on Critical Hit, and grants more Damage per Power Charge. |
|
Cold Penetration Support - Blade Vortex Penetrates over 40% of enemies' Cold Resistance, the awakened version also applies Exposure. |
 |
Empower Support - Increases the Gem Level of Blade Vortex, which is the most efficient way to gain more damage. |
 |
Increased Critical Damage Support - It simply increases Critical Strike Multiplier. You'd probably be better off with  Inspiration Support, as it reduces the Mana Cost of Skills and increases Damage too. Inspiration Support, as it reduces the Mana Cost of Skills and increases Damage too. |
| [UTILITY] Mana-reserving setup | |
 |
Determination - An Aura that adds more and increases your Armour. |
|
Hatred - Grants Physical Damage as Cold Damage, and makes your Blade Vortex deal more Cold Damage, it is the most important Aura in this build. |
 |
Herald of Ice - Shatters Frozen enemies on death causing an explosion, increases Cold Damage, and adds Cold Damage to Spells and Attacks. |
 |
Herald of Purity - It summons Sentinel Minions, but what's more important - it grants more Physical Damage, later converted. |
 |
Defiance Banner - Increases Evasion Rating and Armour while also reducing Critical Strike Chance for nearby opponents. If you managed to gain enough Mana to use some higher-cost Skill, use  Zealotry instead. Zealotry instead. |
 |
Enlighten Support - Mana Reservation is more efficient with this Gem. |
| [UTILITY] Arcanist Brand setup | |
 |
Arcanist Brand - A Brand Skill that attaches to an enemy, triggering all linked Spells every second. |
 |
Frost Bomb - Frost Bomb drastically reduces Life Regeneration and applies Exposure, reducing Cold Resistance. |
|
Assassin's Mark - A Curse that increases your Critical Strike Chance and Multiplier against the marked opponent. |
 |
Lifetap Support - Arcanist Brand costs Life instead of Mana. |
| [UTILITY] Vortex setup | |
 |
Vortex - Vortex is used to create a powerful Chill Effect, it creates a Chilling area dealing Cold Damage right underneath your character. |
|
Arcane Surge Support - After spending a certain amount of mana on Vortex you gain an Arcane Surge buff which grants more Spell Damage and an increased Mana Regeneration Rate. |
| Bonechill Support - Increases the effect of Vortex's Chill, and makes the enemies in its area take more Cold Damage, depending on how powerful the effect of Chill is. | |
 |
Unbound Ailments Support - The effect of Chill caused by Vortex is much more powerful. |
| [UTILITY] Flame Dash/Molten Shell setup | |
|
Flame Dash - Flame Dash is a simple movement Skill. It has to be level 21 so as not to be triggered automatically by Cast when Damage Taken. |
 |
Molten Shell - Molten Shell creates a protective barrier that mitigates incoming Hit Damage, it's capable of absorbing more damage the more Armour you have. |
 |
Cast when Damage Taken - It should trigger Molten Shell after you take Damage, keep both of these Gems at level 20. |
|
Lifetap Support |
| [UTILITY] Vaal Righteous Fire | |
 |
Vaal Righteous Fire - If you have space for an additional Skill, use the Divergent version of Vaal Righteous Fire to gain a temporary, but powerful bonus to Spell Damage at the cost of your Life. |
| [UTILITY] Frostbite | |
|
Frostbite - This Curse is gained from Asphyxia's Wrath Quiver. This Hex-type Curse spreads on one's death to nearby enemies. It lowers the Cold Resistance of your opponents. |
|
|
6. Gear Setup
The build has a lot of ways to gain more damage, the most efficient way, however, is to increase the Gem level of the Vaal Blade Vortex. It can be done by equipping a Bow with local modifiers, and a Body Armour or Amulet with global modifiers. Try to reach 100% Critical Strike Chance, Critical Strike modifiers can be found quite easily in a majority of rare items. Added Cold and Physical Damage, or better yet - the Physical Damage as Extra Cold Damage, is also very helpful. For defenses seek the usual Maximum Life, Resistances of any kind, and Spell Suppression Chance with some Armour. The build needs some extra Strenght and Dexterity to make it work. It also would be extremely difficult to fit all the necessary Auras with no additional Mana Reservation Efficiency from a rare Amulet, Helmet, or Small Cluster Jewels. The only mandatory Unique Item here is Asphyxia's Wrath, it doesn't have any overly-unique build-enabling quality, but it's just the best-in-slot Quiver, better than any Rare one.
Our recommended items will:
- Cap your resistances at 75%
- Provide you with enough DPS and Life to start mapping
|
Stat priorities on items:
|
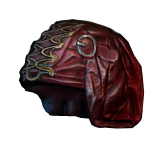
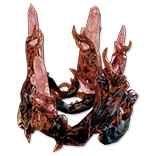 (Helmet) Rare Helmet - Blizzard Crown would be the best base, it adds Cold Damage to each of your numerous Hits, making it particularly good. There are a lot of great modifiers, most of them gained via Redeemer or Warlord influence, so a good headgear might be very expensive. (Helmet) Rare Helmet - Blizzard Crown would be the best base, it adds Cold Damage to each of your numerous Hits, making it particularly good. There are a lot of great modifiers, most of them gained via Redeemer or Warlord influence, so a good headgear might be very expensive. |
|
| Min. requirements: Nearby Enemies have -9% to Cold Resistance +60 to maximum Life Optional affixes: increased Mana Reservation Efficiency of Skills Skills supported by Unleash have +1 to maximum number of Seal Adds Cold / Physical Damage to Spells +1 to Maximum Power Charges Elemental Resistances |
|
| Helmet enchantments: Blade Vortex enchantment |
|
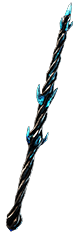
 (Weapon) Rare Bow - You won't deal damage by Attacking, so the local Damage modifiers are completely useless on a Bow. Get one that increases the level of socketed Gems, it's where you will put your Blade Vortex setup, supported by Empower, or/and up to two Awakened Support Gems. (Weapon) Rare Bow - You won't deal damage by Attacking, so the local Damage modifiers are completely useless on a Bow. Get one that increases the level of socketed Gems, it's where you will put your Blade Vortex setup, supported by Empower, or/and up to two Awakened Support Gems. |
|
| Min. requirements: +1 to Level of Socketed Gems 100% increased Spell Damage +2 to Level of Socketed Support Gems Optional affixes: Global Critical Strike Modifiers chance to deal Double Damage |
|
 (Off-Hand) Asphyxia's Wrath - This Quiver grants 20% of Physical Damage as Extra Cold Damage, which is a lot. You can additionally use its Frostbite Curse that will spread on death to other nearby opponents. (Off-Hand) Asphyxia's Wrath - This Quiver grants 20% of Physical Damage as Extra Cold Damage, which is a lot. You can additionally use its Frostbite Curse that will spread on death to other nearby opponents. |
|
| (20–30)% increased Projectile Speed Grants Level 5 Frostbite Skill (8–12)% increased Attack Speed +(30–40)% to Cold Resistance (30–40)% increased Chill Duration on Enemies Gain 20% of Physical Damage as Extra Cold Damage (7–10)% chance to Freeze Hexes on Slain Enemies are transferred to a nearby Enemy |
|
 (Body Armour) Rare Body Armour - Sacrificial Garb would be great, it grants an extra level to all Vaal Gem, including Blade Vortex. Besides the regular Life and Resistances, you can find other exotic mods like extra Spell Critical Strike Chance or increased effect of Auras. (Body Armour) Rare Body Armour - Sacrificial Garb would be great, it grants an extra level to all Vaal Gem, including Blade Vortex. Besides the regular Life and Resistances, you can find other exotic mods like extra Spell Critical Strike Chance or increased effect of Auras. |
|
| Min. requirements: +90 to maximum Life +90% to Elemental Resistances Optional affixes: Attributes increased effect of Non-Curse Auras from your Skills +#% to Spell Critical Strike Chance Enemies you Kill have a chance to Explode, dealing a tenth of their maximum Life as Physical Damage |
|
 (Boots) Rare Boots - Life, Resistances, and Movement Speed are enough for a start, but for an upgrade, you might be interested in an Onslaught, Elusive, or Tailwind mods. Perhaps all at once. (Boots) Rare Boots - Life, Resistances, and Movement Speed are enough for a start, but for an upgrade, you might be interested in an Onslaught, Elusive, or Tailwind mods. Perhaps all at once. |
|
| Min. requirements: +50% to Elemental Resistances +50 to Maximum Life 25% increased Movement Speed Optional affixes: chance to gain Onslaught for 4 seconds on Kill You have Tailwind if you have dealt a Critical Strike Recently chance to gain Elusive on Critical Strike Attributes Spell Suppression Chance |
|
| Min. requirements: +70 to Maximum Life +50% to Elemental Resistances 60% of Physical Damage Converted to Cold Damage (in total) Optional affixes: Attributes Spell Suppression Chance |
|
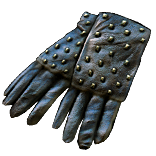
| (Gloves) Hrimsorrow - If you can't bother with an expensive pair of rare gloves, use this very cheap unique one. It grants Strength, Cold Resistance, and saves you one Skill Point. Vaal Implicits might be of use. |
|
| +(20-30) to Strength +(40-50) to Evasion Rating +(20-30)% to Cold Resistance 100% of Physical Damage Converted to Cold Damage Reflects 100 Cold Damage to Melee Attackers |
|
 (Belt) Rare Belt - There are not many modifiers beyond the simple ones, for Maximum Life, Resistances, and Strength. (Belt) Rare Belt - There are not many modifiers beyond the simple ones, for Maximum Life, Resistances, and Strength. |
|
| Min. requirements: +90 to Maximum Life +90% to Elemental Resistances Strength Optional affixes: increased Damage Maximum Life increased Attributes Attributes |
|
 (Amulet) Rare Amulet - The Amulet should be a source of Maximum Life, Dexterity, and a rare modifier that increases the level of all Physical Skill Gems. It can get quite expensive, moreover, there are many more useful modifiers you can get from this jewelry. (Amulet) Rare Amulet - The Amulet should be a source of Maximum Life, Dexterity, and a rare modifier that increases the level of all Physical Skill Gems. It can get quite expensive, moreover, there are many more useful modifiers you can get from this jewelry. |
|
| Min. requirements: +50 to Maximum Life Dexterity +1 to Level of all Physical Skill Gems Non-Channelling Skills have -6 to Total Mana Cost (crafted) Optional affixes: increased Global Critical Strike Chance +#% to Global Critical Strike Multiplier Elemental Resistances |
|
 (Amulet) Ashes of the Stars - Ashes of the Stars really fixes the most crucial problems with the build. It's expensive, but all the modifiers it provides are extremely valuable. (Amulet) Ashes of the Stars - Ashes of the Stars really fixes the most crucial problems with the build. It's expensive, but all the modifiers it provides are extremely valuable. |
|
| +(10-16) to all Attributes (5-10)% increased Experience Gain of Gems (10-20)% increased Reservation Efficiency of Skills +1 to Level of all Skill Gems +(20-30)% to Quality of all Skill Gems |
|
 (Amulet) Replica Dragonfang's Flight - It's similar to Ashes, and for the purposes of this build equally good, if not better. It provides you with a lot of damage by increasing the Gem Level of Blade Vortex, (Amulet) Replica Dragonfang's Flight - It's similar to Ashes, and for the purposes of this build equally good, if not better. It provides you with a lot of damage by increasing the Gem Level of Blade Vortex, |
|
| +(10-16) to all Attributes +3 to Level of all <Random Skill> Gems +(10-15)% to all Elemental Resistances (10-15)% increased Reservation Efficiency of Skills Items and Gems have (15-10)% reduced Attribute Requirements |
|
| Recommended Anointments: Charisma Breath of Rime Winter Spirit Dreamer |
|
 (Ring) Circle of Guilt - This Unique Ring is associated with the Herald of Purity. It's able to lower the Reservation Cost and increase the buff effect, meaning more Physical Damage. It might be very advantageous to have such a Ring. (Ring) Circle of Guilt - This Unique Ring is associated with the Herald of Purity. It's able to lower the Reservation Cost and increase the buff effect, meaning more Physical Damage. It might be very advantageous to have such a Ring. |
|
| <One to three random Synthesis implicit modifiers> +(10-20) to all Attributes Adds (8-10) to (13-15) Physical Damage +(350-400) to Armour <Two Random Herald of Purity modifiers> |
|
 (Ring) Rare Rings - Rings can get you more Life, Resistances, Attributes, and lower the mana Cost of Skills. These are the main stats to be looked for, but if you don't want to cast your Frostbite Manually, it can be found here too as a Redeemer's Suffix. (Ring) Rare Rings - Rings can get you more Life, Resistances, Attributes, and lower the mana Cost of Skills. These are the main stats to be looked for, but if you don't want to cast your Frostbite Manually, it can be found here too as a Redeemer's Suffix. |
|
| Min. requirements: +60 to Maximum Life Attributes Optional affixes: Non-Channelling Skills have -# to Total Mana Cost (crafted) Curse Enemies with Frostbite on Hit Extra Power Charge Chaos Resistance Elemental Resistances |
|
 (Jewel) Rare Jewels - Jewels contain basic modifiers for Maximum Life, Attributes, Resistances, and perhaps the most influential - Added Cold Damage and Critical Strike mods. (Jewel) Rare Jewels - Jewels contain basic modifiers for Maximum Life, Attributes, Resistances, and perhaps the most influential - Added Cold Damage and Critical Strike mods. |
|
| Recommended affixes: Chaos Resistance Elemental Resistances Added Cold Damage to Spells Strength Dexterity Maximum Life Critical Strike modifiers |
|
 (Jewel) Militant Faith - Inner Conviction can be acquired by transforming Doomsday or Mind Over Matter Keystone via Dominus' variant of Militant Faith. (Jewel) Militant Faith - Inner Conviction can be acquired by transforming Doomsday or Mind Over Matter Keystone via Dominus' variant of Militant Faith. |
|
| Carved to glorify (2000-10000) new faithful converted by High Templar Dominus Passives in radius are Conquered by the Templars Historic <two random mods of devotion> |
|
 (Jewel) Impossible Escape - A specific version of this Jewel with Necromantic Aegis Keystone can be used for Potency of Will, Dreamer, and Ash, Frost, and Storm Notables. (Jewel) Impossible Escape - A specific version of this Jewel with Necromantic Aegis Keystone can be used for Potency of Will, Dreamer, and Ash, Frost, and Storm Notables. |
|
| Passive in Radius of Necromantic Aegis can be Allocated without being connected to your tree | |
 (Jewel) Watcher's Eye - You're using Hatred, Determination, and perhaps Zealotry. The best modifiers would grant you an extra base Critical Strike Chance - as Hatred does, or an extra Cold Damage Penetration, which is also one of Hatred's mods. (Jewel) Watcher's Eye - You're using Hatred, Determination, and perhaps Zealotry. The best modifiers would grant you an extra base Critical Strike Chance - as Hatred does, or an extra Cold Damage Penetration, which is also one of Hatred's mods. |
|
| (4-6)% increased maximum Energy Shield (4-6)% increased maximum Life (4-6)% increased maximum Mana <Two or Three random aura modifiers> |
|
 (Jewel) Large Cluster Jewel - The build is suited for one or two Large Cluster Jewels. Doryani's Lesson grants Life Leech which is extremely beneficial. Blanketed Snow and Force Multiplier are the best damage-wise mods. (Jewel) Large Cluster Jewel - The build is suited for one or two Large Cluster Jewels. Doryani's Lesson grants Life Leech which is extremely beneficial. Blanketed Snow and Force Multiplier are the best damage-wise mods. |
|
| Recommended affixes: 1 Added Passive Skill is Blanketed Snow 1 Added Passive Skill is Doryani's Lesson 1 Added Passive Skill is Prismatic Heart 1 Added Passive Skill is Battle-Hardened 1 Added Passive Skill is Force Multiplier 1 Added Passive Skill is Iron Breaker |
|
 (Jewel) Medium Cluster Jewel - Two Vast Power Notables can be used for much more Area of Effect and Area Damage. Magnifier and Towering Threat have similar effects but don't scale up with Power Charges. (Jewel) Medium Cluster Jewel - Two Vast Power Notables can be used for much more Area of Effect and Area Damage. Magnifier and Towering Threat have similar effects but don't scale up with Power Charges. |
|
| Recommended affixes: 1 Added Passive Skill is Magnifier 1 Added Passive Skill is Vast Power 1 Added Passive Skill is Towering Threat 1 Added Passive Skill is Blast-Freeze |
|
 (Jewel) Small Cluster Jewel - Uncompromising and Spiteful Presence can increase the Mana Reservation Efficiency of Determination or Hatred, which you might find useful. (Jewel) Small Cluster Jewel - Uncompromising and Spiteful Presence can increase the Mana Reservation Efficiency of Determination or Hatred, which you might find useful. |
|
| Recommended affixes: 1 Added Passive Skill is Uncompromising 1 Added Passive Skill is Spiteful Presence |
|
 (Flask) Bottled Faith - Bottled Faith is useful in a vast majority of Critical Strike Builds, this one is no exception. (Flask) Bottled Faith - Bottled Faith is useful in a vast majority of Critical Strike Builds, this one is no exception. |
|
| 40% increased Damage Creates Consecrated Ground on Use (30-15)% reduced Duration Consecrated Ground created by this Flask has Tripled Radius Consecrated Ground created during Effect applies (7-10)% increased Damage taken to Enemies (100-150)% increased Critical Strike Chance against Enemies on Consecrated Ground during Flask effect |
|
 (Flask) Taste of Hate - Taste of Hate reduces Cold Damage Taken, but most importantly, it's a lot of extra Cold Damage sourced from Physical Damage. (Flask) Taste of Hate - Taste of Hate reduces Cold Damage Taken, but most importantly, it's a lot of extra Cold Damage sourced from Physical Damage. |
|
| +50% to Cold Resistance 20% less Cold Damage taken (10-15)% of Physical Damage from Hits taken as Cold Damage during Flask effect Gain (10-15)% of Physical Damage as Extra Cold Damage during effect 30% chance to Avoid being Chilled during Flask effect 30% chance to Avoid being Frozen during Flask effect |
|
|
Other suggested Flasks:
|
|
   |
|
|
If you have any other build requests please leave that in the comments below. We are always open to suggestions and constructive feedback.
Pictures used in this article are the intellectual property of Grinding Gear Games.
