Blade Flurry Gladiator Duelist Build - Odealo's Crafty Guide
Extremely versatile Path of Exile melee fighter. Great defenses from high block chance and very high damage allow it to face any BossBlade Flurry
Gladiator/Duelist
Starter build
Updated for Patch 3.9
The Best Crafty Guides by Odealo
Estimated budget: low to medium

| Guide notes |
| December 21, 2019 -Updated for Patch 3.9 |
Blade Flurry Gladiator is one of the most versatile builds in the game. It’s very tanky due to high block chance while maintaining extremely high damage. It’s very efficient at farming maps, eternal Labyrinth and killing bosses. Blade Flurry scales well, because of damage being boosted for each stage reached while channeling, which combined with high physical damage allows you to clear all the endgame content, including both Shaper and Uber Atziri. Investing in unique items like the Belly of the Beast and The Surrender will help you reach this build’s maximum defensive potential.
The full list of our other Path of Exile Crafty Guides can be found here: Odealo's Crafty Guides - Full List
1. Gameplay
Blade Flurry is one of the most satisfying builds in the game. High block chance allows you to tank most hits while you shield charge between packs of monsters obliterating them with Blade Flurry. The most important part of the gameplay is to channel Blade Flurry until it reaches six stacks and then release it for an explosion.
|
This video was recorded pre 3.9 - we will try to get you an updated video soon |
|
|

2. Build's PROS & CONS
| PROS |
|
| CONS |
|
3. Leveling tips
Leveling with Blade Flurry is very easy, because of damage continually being boosted for each stage you reach while channeling. Thanks to this killing packs and bosses go very fast, and the build doesn’t require significant investments during the leveling phase. We recommend using Cleave early on, then replace it with Sunder as soon as you kill Merveil in act 1. After reaching level 28, you can switch to Blade Flurry. Preferably use a one-handed weapon with the highest physical damage you can find and shield in the off-hand slot.
Suggested leveling Gem setups:
| Cleave/Sunder setup | |
 |
Cleave - will be the first skill you should be using, and replace it with Sunder as soon as you kill Merveil in Act 1 |
 |
Sunder - grants better range and good AoE |
 |
Added Fire Damage Support - great buff to your DPS |
 |
Maim Support - this Gem will increase your damage and maim enemies on hit, which slows their movement speed and increases the damage they take |
| Blade Flurry setup | |
 |
Blade Flurry - you should start using Blade Flurry as soon as you hit level 28. Try to use(and level up) as many Support Gems you plan to use later on with this setup. This always makes the transition to your final build much easier |
 |
Melee Physical Damage Support - it's the most important Support Gem for this build. Buy it in act 2 as soon as you hit level 18 and use instead of Maim support |
|
Added Fire Damage Support - great buff to your DPS |
 |
Concentrated Area of Effect Support - increases all damage by a lot in exchange for reduced Blade Flurry AoE. Can be swapped for Increased Area of Effect Support for clearing wider areas, but it’s mandatory for killing bosses |
| Utility Gems | |
 |
Ancestral Warchief - this totem increases your melee damage and deals a lot of damage on its own. It benefits from the Physical/Melee Support Gems (e.g., Faster Attacks, Maim Support) |
 |
Punishment - definitely the best curse for this build, which grants you more melee damage and attack speed when you hit cursed enemies. You can start using it at level 24 |
 |
Herald of Ash - combined with Sunder’s seismic wave it will destroy packs of monsters in no time |
 |
Shield Charge - this movement skill, linked with Faster Attacks Support allows you to move through locations much faster |
Bandits:
It's recommended to kill all the Bandits for two additional Passives Points. If you are a high level you may also switch to Alira for extra Crit. Multiplier if you need some additional damage
Leveling Skill Trees:
30 Points Skill Tree
Priorities: 1) Art of the Gladiator 2) Defiance 3) Retaliation 4) Swift Skewering
62 Points Skill Tree
Priorities: 1) Blade of Cunning 2) Bloodless 3) Blade Master 4) Forceful Skewering 5) Constitution
Recommended leveling items:
 Blackheart - great physical DPS leveling Rings. Available as soon as level one will grant you amazing DPS bonuses Blackheart - great physical DPS leveling Rings. Available as soon as level one will grant you amazing DPS bonuses |
|
| Adds 1 to 4 Physical Damage to Attacks 5% increased Physical Damage Adds 1 to 3 Chaos Damage to Attacks +(20-30) to maximum Life (2-4) Life Regenerated per second 10% chance to Cause Monsters to Flee |
|
 Meginord's Girdle - powerful belt, giving a lot of flat physical damage attacks which scales extremely good with %increased damage from Blade Flurry channeling stages Meginord's Girdle - powerful belt, giving a lot of flat physical damage attacks which scales extremely good with %increased damage from Blade Flurry channeling stages |
|
| +(25-35) to Strength Adds 5 to 15 Physical Damage to Attacks +25 to Strength 10% increased maximum Life +(10-20)% to Cold Resistance 25% increased Flask Life Recovery rate |
|
 Crest of Perandus - this shield grants a lot of life, chance to block and life regeneration, big impact of the shield is noticeable especially in early stages, because you can use it since level 8 Crest of Perandus - this shield grants a lot of life, chance to block and life regeneration, big impact of the shield is noticeable especially in early stages, because you can use it since level 8 |
|
| Chance to Block: 31% Evasion: 51 +(60-80) to maximum Life (5-7.5) Life Regenerated per second +30% to Lightning Resistance 0.6% of Physical Attack Damage Leeched as Life +5% Chance to Block |
|
|
|
|
| Physical Damage: 10.2–27.2 Critical Strike Chance: 5.00% Attacks per Second: 1.59 40% increased Accuracy Rating 100% increased Damage when on Low Life 50% increased Physical Damage Adds 2 to 6 Physical Damage 10% increased Attack Speed +(20-30) to maximum Life +2 Life gained for each Enemy hit by Attacks |
|
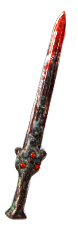 Redbeak –first sword we suggest to use, you can start using since level 1
|
|
|
| Physical Damage: (45 to 56)–(77.4 to 94) Critical Strike Chance: 5.00% Attacks per Second: (1.65 to 1.72) +190 to Accuracy Rating (60-80)% increased Physical Damage Adds (5-8) to (10-14) Physical Damage (10-15)% increased Attack Speed (40-30)% reduced Stun and Block Recovery 20% chance to Avoid being Stunned Socketed Gems are supported by Level 1 Multistrike |
|
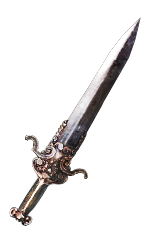 Lakishu’s Blade - great physical damage one-handed sword that you can start using at level 28, the same as Blade Flurry
|
|
|
| Physical Damage: (79.2 to 93.6)–(145.2 to 171.6) Critical Strike Chance: 5.00% Attacks per Second: (1.52 to 1.62) +330 to Accuracy Rating (100-140)% increased Physical Damage (17-25)% increased Attack Speed 0.2% of Chaos Damage Leeched as Life 25% of Physical Damage Converted to Chaos Damage Attacks with this Weapon Maim on Hit |
|
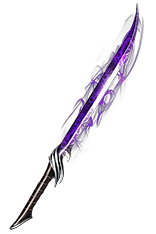 Innsbury Edge - another very high physical sword, that converts part of physical damage to chaos damage and slows enemies with Maim on hit affix
4. Final Skill Tree, Ascendancy Points, and Pantheon
Final Skill Tree:
116 Points Skill Tree
116 Points Path of Building(PoB) link
Ascendancy points:
Preferably in that order:
- Painforged
- Violent Retaliation
- Versatile Combatant
- Outmatch and Outlast
Pantheon:
Major God: there are two choices depending on if you are clearing Maps or want to challenge endgame Bosses. For clearing Maps:
Soul of Lunaris 1% additional Physical Damage Reduction for each nearby Enemy, up to 8%; 1% increased Movement Speed for each nearby Enemy, up to 8%
For single target bosses:
Soul of Solaris 6% Physical Damage Reduction if there is only one nearby Enemy; 20% chance to take 50% less Area Damage from Hits
Minor God: Soul of Gruthkul - 1% additional Physical Damage Reduction for each Hit you've taken Recently up to a maximum of 5%
5. Final Gems links
| [DPS] Blade Flurry setup | |
 |
Blade Flurry - your main DPS spell. It grants terrific AoE and perfect single target DPS |
 |
Melee Physical Damage Support - the most crucial Support Gem for this setup |
 |
Infused Channelling Support - newly added Support Gem from Patch 3.6. It greatly increases the damage you deal with supported skills while channeling |
 |
Fortify Support - grants high bonus damage and reduces your damage taken from all damage types making it a must-have in this build |
 |
Brutality Support - greatly increases your Physical Damage but makes Blade Flurry deal no Chaos and Elemental Damage |
 |
Concentrated Effect Support - increases all damage dealt at the cost of the reduced area of the radius of supported skills |
| [UTILITY] Blood Rage and Precision | |
 |
Precision - new Aura skill which gives us 100% Chance to Hit enemies and extra Crit. Chance |
 |
Blood Rage - increases your Attack Speed, Life Leech and grants Frenzy Charges on a kill. Deals a moderate amount of damage to self so don't use it when you aren't fighting |
| [UTILITY] Ancestral Warchief | |
 |
Ancestral Warchief - this Totem increases your melee damage and deals a lot of damage by itself, which might come in handy versus strong rares or bosses |
|
Melee Physical Damage Support - increases the damage of your Ancestral Warchief Totem |
 |
Culling Strike Support - increases the damage of your Totem and kills immediately all enemies that are below 10% of their maximum Life |
 |
Increased Area of Effect Support - increases the radius of your Totem’s attacks |
| [MOBILITY] Shield Charge | |
|
Shield Charge - great movement skill, helps to move between groups of monsters or escaping from danger |
 |
Faster Attacks Support –linked to Shield Charge increases its movement speed |
 |
Blood Magic Support- it will spend life instead of mana for casting Shield Charge |
| [AURA] Pride, Blood and Sand, Dread Banner | |
 |
Pride - grants very high increased Physical Damage taken by affected enemies |
 |
Blood and Sand - allows you to switch between stances for either extra AoE (Sand Stance) or DPS (Blood Stance) |
 |
Dread Banner - increases your chance to Impale on Hit |
 |
Enlighten - Enlighten on level 2 and above will reduce Mana Reservation cost of supported Gems |
| [UTILITY] Punishment and Ice Golem | |
|
Punishment - the recommended Curse for this build. Use this Gem at level 12 |
 |
Cast when Damage Taken Support - will auto-cast your Curse. Keep the Gem at level 9 |
 |
Summon Ice Golem - recommended Golem for this build. Keep this Minion Gem at level 11 |
| [UTILITY] Reckoning (The Surrenderer) |
|
 |
Power Charge on Critical Support - Critical Strikes with Reckoning will generate Power Charges for some extra DPS |
 |
Cast when Damage Taken Support - increases your chance to Critically Hit with Reckoning, increasing the rate at which you generate Power Charges |
|
|
5. Gear Setup
Blade Flurry is an extremely flexible build. It scales incredibly well with expensive gear and powerful, unique items we have listed. We suggest trying out the end-game version of this build because this is precisely where this build truly shines. Most of the items can be replaced with cheaper alternatives for the leveling/early mapping phase which is included in the following section.
If by any chance you are looking for cheap PoE Currency needed to get all recommended gear, you are at the right place. Simply head over to our Market section accessible via link on top of the page.
Our recommended items will:
- Cap your resistances
- Give you enough DPS/Life to start mapping successfully
- Save you at least a couple of hours on planning your build!
|
Stat priorities on items:
|
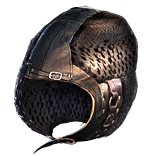 (Helmet) Rat's Nest - beginner and budget-friendly option for the Helmet slot. Grants a lot of extra DPS and Critical Strike Chance which is very important for this build (Helmet) Rat's Nest - beginner and budget-friendly option for the Helmet slot. Grants a lot of extra DPS and Critical Strike Chance which is very important for this build |
|
| 15% increased Attack Speed (60-75)% increased Global Critical Strike Chance 150% increased Evasion Rating (20-25)% increased Rarity of Items found 10% increased Movement Speed 10% reduced Character Size |
|
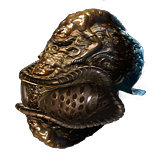 (Helmet) Abyssus - this helmet provides the highest bonus DPS. The only downside is increased Physical Damage taken, but it’s negligible with our very high block chance and high Armour Rating (Helmet) Abyssus - this helmet provides the highest bonus DPS. The only downside is increased Physical Damage taken, but it’s negligible with our very high block chance and high Armour Rating |
|
| Adds 40 to 60 Physical Damage to Attacks +(20-25) to all Attributes +(100-125)% to Melee Critical Strike Multiplier (100-120)% increased Armour (40-50)% increased Physical Damage taken |
|
| Helmet enchantment: 40% increased Blade Flurry Damage |
|
 (Weapon) Rare 380+ pDPS one-handed sword - this weapon is the best for damage output. Preferably it should be Jewelled Foil base type or Corsair Sword if you are lacking Accuracy (Weapon) Rare 380+ pDPS one-handed sword - this weapon is the best for damage output. Preferably it should be Jewelled Foil base type or Corsair Sword if you are lacking Accuracy |
|
| Min. requirements: 350 Physical DPS 1.75 Attack Speed Optional affixes: Increased Critical Strike Multiplier Increased Critical Strike Chance |
|
 (Body Armour) Rare Body Armour - an Elder piece with high Life and level # Maim Support will be the best in the slot (Body Armour) Rare Body Armour - an Elder piece with high Life and level # Maim Support will be the best in the slot |
|
| Min. requirements: 120 maximum Life 6% maximum Life Socketed Gems are supported by level 1 Maim |
|
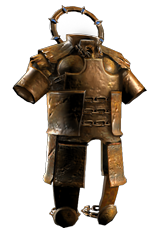
 (Body Armour) Belly of the Beast - best in the slot (defense-wise) Body Armour for this build, where you should link Blade Flurry with all its Support Gems. This chest gives an insane amount of Life for your build and extra Elemental Resistances which helps you cap them (Body Armour) Belly of the Beast - best in the slot (defense-wise) Body Armour for this build, where you should link Blade Flurry with all its Support Gems. This chest gives an insane amount of Life for your build and extra Elemental Resistances which helps you cap them |
|
| 3% reduced Movement Speed (Hidden) (150-200)% increased Armour (30-40)% increased maximum Life +(10-15)% to all Elemental Resistances 50% increased Flask Life Recovery rate Extra gore |
|
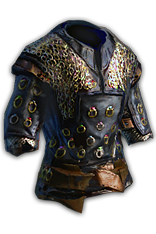 (Body Armour) Loreweave - very solid pick which grants all the important stats and increases your maximum Elemental Resistances (Body Armour) Loreweave - very solid pick which grants all the important stats and increases your maximum Elemental Resistances |
|
| Has 6 Sockets Adds (4-10) to (14-36) Physical Damage to Attacks +(8-24) to all Attributes (20-60)% increased Global Critical Strike Chance +(15-50) to maximum Energy Shield +(20-60) to maximum Life +(20-50) to maximum Mana (6-30)% increased Rarity of Items found (15-50)% increased Elemental Damage Your Maximum Resistances are (76-78)% |
|
 (Shield) The Surrenderer - the best in the slot. It grants a level 30 Reckoning Gem and very high defensive bonuses (Shield) The Surrenderer - the best in the slot. It grants a level 30 Reckoning Gem and very high defensive bonuses |
|
| +(30-40) to maximum Life Grants Level 30 Reckoning Skill (130-170)% increased Armour +(65-80) to maximum Life Recover 250 Life when you Block +6% Chance to Block +1500 Armour if you've Blocked Recently |
|
 (Boots) Rare Boots - get pair with the highest maximum Life bonus you can afford (Boots) Rare Boots - get pair with the highest maximum Life bonus you can afford |
|
| Min. requirements: 60 maximum Life 20% increased Movement Speed 25% Fire Resistance 25% Lightning Resistance 25% Cold Resistance |
|
| Boot enchantment: 16% increased Attack and Cast Speed if you've Killed Recently |
|
 (Belt) Rare Belt - again, we try to grab one with the highest maximum life and elemental resistances bonuses (Belt) Rare Belt - again, we try to grab one with the highest maximum life and elemental resistances bonuses |
|
| Min. requirements: 70 maximum Life 35% Fire Resistance 35% Lightning Resistance 35% Cold Resistance Optional affixes: increased Physical Damage |
|
 (Belt) Belt of the Deceiver - despite being very cheap, it’s extremely powerful. This belt provides good life bonus, resistances and on top of that increases the damage monsters receive by 10% (Belt) Belt of the Deceiver - despite being very cheap, it’s extremely powerful. This belt provides good life bonus, resistances and on top of that increases the damage monsters receive by 10% |
|
| (25-35) to Strength (15-25)% increased Physical Damage You take 30% reduced Extra Damage from Critical Strikes +(30-40) to maximum Life +(10-15)% to all Elemental Resistances Nearby Enemies are Intimidated |
|
 (Amulet) Rare Amulet (Amulet) Rare Amulet |
|
| Min. requirements: 60 maximum Life 15% All Elemental Resistances Adds min. 15 Physical Damage to Attacks Optional affixes: increased Global Critical Strike Multiplier increased Global Critical Strike Chance Accuracy Rating Attributes |
|
 (Ring) Rare Rings (Ring) Rare Rings |
|
| Min. requirements: 60 maximum Life 80% Total Elemental Resistances Adds min. 5 Physical Damage to Attacks Optional affixes: -# Total Mana Cost of Skills Accuracy Rating Attributes |
|
 (Gloves) Rare Gloves - extra Attack Speed may be a good addition in end-game versions of this build (Gloves) Rare Gloves - extra Attack Speed may be a good addition in end-game versions of this build |
|
| Min. requirements: 60 maximum Life 25% Fire resistance 25% Lightning resistance 25% Cold resistance Optional affixes: increased Attack Speed |
|
| Glove corruption: Attacks have +# to Critical Strike Chance |
|
 (Jewels) Tempered Flesh - if socketed between Juggernaut and Barbarism nodes, it will grant over 50% Critical Strike Multiplier greatly increasing your DPS (Jewels) Tempered Flesh - if socketed between Juggernaut and Barbarism nodes, it will grant over 50% Critical Strike Multiplier greatly increasing your DPS |
|
| -1 Strength per 1 Strength on Allocated Passives in Radius +5% to Critical Strike Multiplier per 10 Strength on Unallocated Passives in Radius |
|
 (Jewels) Rare Jewels - this should provide extra Life and damage bonuses (Jewels) Rare Jewels - this should provide extra Life and damage bonuses |
|
| Recommended affixes: increased maximum Life increased Generic/Physical/Melee/Area Damage increased Global Critical Strike Multiplier Optional affixes: increased Attack Speed |
|
 (Flask) Rumi’s Concoction - this is the recommended Granite Flask for this build. Lion's Roar will provide much higher DPS bonus, but the Knockback may collide with Blade Flurry's low radius (Flask) Rumi’s Concoction - this is the recommended Granite Flask for this build. Lion's Roar will provide much higher DPS bonus, but the Knockback may collide with Blade Flurry's low radius |
|
| +3000 to Armour (14-20)% Chance to Block during Flask effect (6-10)% Chance to Block Spells during Flask effect |
|
|
Other suggested Flasks:
|
|
    |
|
|
If you have any other build requests please leave that in the comments below.
Pictures used in this article are the intellectual property of Grinding Gear Games.
