
Blade Blast of Unloading Assassin
Insanely strong and fun setup for Assassin using Blade Blast on Unloading to deal amazing bursts of Damage in a quick manner.Blade Blast of Unloading
Assassin build
Updated for Patch 3.24
The Best Crafty Guides by Odealo
| Guide notes |
| March 29, 2024 -Build updated |
| Build overview | |||
| Tags: [CRIT] [ELEMENTAL] [LIFE] [CASTER] | |||
|
Budget: Defenses: |
|
Boss DPS: AoE: |
|
The new Blade Blast of Unloading is a refreshed variant of the previous Blade Blast. Out of all Blade Skills, it can interact only with the Blade Vortex by detonating them in a ring around you. If you have more than one stack of the Blade Vortex, the detonation will repeat, gaining massively increased Area for every consumed Vortex, and damaging your Enemies again.
Usually, gaining all 10 stacks of Blade Vortex takes quite a long time, but you can make use of smart game mechanics to quickly ramp up your stacks. You can use the Arcanist Brand to quickly accumulate Blade Vortex stacks without manually casting them. The Brands will add 1 stack of Blade Vortex with each activation, and you can additionally use the Brand Recall to cause all your Brands to activate once without any target. Moreover, by using the Perfect Crime Notable from the Saboteur Ascendency you will double all stacks you gain since Arcanist Brand counts as Trigger. With this setup gaining max stacks against a single target takes only a few seconds, and it's almost permanent if there are more Enemies.
The Blade Blast of Unloading deals Physical Damage. It is best to convert it fully to Cold Damage, which allows you to scale the Damage via Curses, Elemental Penetration, and Hatred Aura. You will also slow and freeze your Enemies. Currently, it is hard to find a reason to not use a Power Stacking setup, especially on the Assassin Ascendency. It scales all important aspects of the Build and can be assembled very cheaply, leaving a lot of space to build up your defenses.
The Saboteur provides underwhelming bonuses for the Build outside the Triggerbots, so it is best to use the Forbidden Flesh & Flame Jewels to borrow it. The Assassin Ascendency provides very strong bonuses to your Damage, especially when your Gear is still lacking. You can also opt for the Trickster, which is famous for its amazing defense capabilities.
You can also check our other Path of Exile builds right over here Odealo's Crafty Guides - Full List
1. Gameplay
You should maintain a maximum amount of Brands summoned at all times. Using the Brand Recall will cause them all to activate, which will instantly add 10 stacks of Blade Vortex, even without targeting any monster. Use the Blade Blast on Unloading to detonate them all in a large Area. You can use the Frostblink during the Blade Blast to further improve your Clear, as the Explosions expand from your location. Against tougher enemies make sure to activate your Hatred Aura and Curse them with Frostbite.
|
|
|
|

2. Build's PROS & CONS
| PROS |
|
| CONS |
|
3. Leveling tips
Use the regular Blade Vortex during the leveling, it has very good Damage on its own. You will need the Arcanist Brand with the Perfect Crime Notable to smoothly utilize your final setup. Fortunately, the Shadow has a very good starting area for Spellcasters. Since most of your scaling comes from Power Charges, you should slightly adjust the Passive Tree during the leveling for a better experience. The Hrimsorrow Gloves are part of your End-game setup and can be worn at level 9.
Suggested leveling Gem setups:
| Blade Vortex setup | |
 |
Blade Vortex - summons up to 10 spinning Blades that deal Damage to all Enemies in close Range. |
 |
Added Fire Damage Support - add a portion of your Physical Damage as extra Fire Damage. |
 |
Elemental Focus Support - disables your Elemental Ailments, but greatly improves your Damage. |
 |
Faster Casting Support - allows you to accumulate your charges faster. Replace it with the Unleash Support later on. |
 |
Increased Critical Strikes Support - greatly improves your Critical Strike Chance with the Blade Vortex. |
 |
Increased Critical Damage Support - significantly boosts the Damage of your Critical Strikes. |
| Aura setup | |
 |
Herald of Purity - a Herald Skill that considerably improves your Physical Damage. |
 |
Vitality - a very useful Aura that grants you a ton of Life Regeneration. |
 |
Clarity - similar to the previous Aura, it helps with your Mana sustain during the Campaign. |
| Utility setup | |
 |
Assassin's Mark - increase your Critical Strike Chance and Damage against Marked Enemies. |
 |
Frostblink - an instant Movement Skill. You can link it with the Bonechill Support to increase the Cold Damage taken by affected enemies. |
 |
Steelskin - creates a barrier that absorbs part of the incoming Damage. |
Bandits:
Killing all Bandits for 2 bonus Skill Points is the best option. You can help Alira for better early-game bonuses, and chance it later.
Leveling Skill Trees:
32 Points Skill Tree
Pick nearby Damage and sustain notables to improve your leveling speed greatly.
62 Points Skill Tree
Take Notables that boost your Damage, Crit Chance, or maximum Life and Mana.
4. Final Skill Tree, Ascendancy Points, and Pantheon
Final Skill Tree:
113 Points Final Skill Tree (doesn't include Unique or Cluster Jewels)
120 Points Path of Building(PoB) link
Ascendancy points:
Preferably in the order:
- Opportunistic
- Ambush and Assassinate
- Unstable Infusion
- Deadly Infusion / Mistwalker
Pantheon:
Major God: Soul of Arakaali 10% reduced Damage taken from Damage Over Time; +40% Chaos Resistance against Damage Over Time
Minor God: Soul of Shakari 50% less Duration of Poisons on You; 5% reduced Chaos Damage taken
5. Final Gems links
| [DPS] Blade Blast of Unloading setup | |
 |
Blade Blast of Unloading - detonates your active Blade Vortex stacks in an expanding circle around you, dealing Damage and increasing the Area for each Vortex consumed. |
 |
Power Charge on Critical Support - improves your Damage for each Power Charge you have. The Empower Support might be better if you don't have that many Power Charges yet. |
|
Increased Critical Damage Support - significantly improves your Critical Strike Multiplier. |
 |
Cold Penetration Support - greatly increases your Damage by ignoring part of the Cold Resistance of your Enemies. The Awakened Version can also inflict Cold Exposure on Hit. |
 |
Hypothermia Support - increases the Damage you deal against Chilled Enemies. |
 |
Increased Area of Effect Support - this Gem increases the Area coverage of your Blade Blast. You can swap it for the Concentrated Effect Support during particularly tough encounters. |
| [DPS] Blade Vortex setup | |
|
Blade Vortex - a Vortex of Blades, you can have up to 10 of them active. It doesn't deal much Damage in this Setup. |
 |
Arcanist Brand - a Brand that Triggers linked Spells while it is attached to Enemies, and once after being Recalled. It is the fastest way to quickly accumulate all your blade Vortex stacks. |
|
Faster Casting Support - increases the Trigger Rate of your Arcanist Brand. It also makes it smoother to summon. |
 |
Increased Duration Support - increases the Duration of your Arcanist Brand, so you have to resummon them less often. The Duration of the Blade Vortex is irrelevant since you will constantly detonate them anyway. |
| [UTILITY] Auras setup | |
 |
Petrified Blood - delays part of the incoming Damage, keeps you at a low Life status without penalty, and allows you to freely Reserve half of your maximum Life. |
 |
Purity of Elements - grants a lot of Elemental Resistances and makes you immune to all Elemental Ailments. |
 |
Summon Skitterbots - summons helpful immortal Minions that apply Shock and Chill to nearby Enemies. |
| Bonechill Support - your Chilling Skitterbot will cause affected Enemies to take increased Cold Damage. | |
| [UTILITY] Arrogance setup | |
|
Herald of Purity - this Herald significantly improves your Physical Damage. You can also use Herald of Ash or Herald of Ice for their on-kill effects, and slightly lower Damage bonuses. |
 |
Precision - improves your Critical Strike Chance. You can keep it on a low level. |
 |
Arrogance Support - improves the effect of your Auras and causes them to Reserve Life instead of Mana. |
| [UTILITY] Divine Blessing setup | |
 |
Hatred - a very powerful Aura, it adds a portion of your Physical Damage as extra Cold Damage and boosts all Cold Damage you deal. |
 |
Divine Blessing Support - turns a Pernament Aura into a temporary Buff which you can cast using the Energy Shield. It also significantly improves the effectiveness of this Aura. |
 |
Inspiration Support - lowers the Mana Cost of the Blessing, making it easier to manage. If you have no troubles with sustain, you can use the Increased Duration Support instead. |
| [UTILITY] Various Utility Skills | |
|
Frostblink - an instant Blink Spell that allows you to cover a small distance. You can use it during the Blade Blast expansion, which will travel with you. |
 |
Frostbite - a Curse Spell that lowers the Cold Resistance of affected Enemies. You can also use the Assassin's Mark if your Crit Chance is still low. |
 |
Brand Recall - summons all Brands to you, and forces them to activate once. Use it to move your Brands around the Map and instantly generate maximum amounts of Blades. |
|
Steelskin - a Guard Skill that reduces the incoming Damage and disables Bleed effects on you. |
|
|
5. Gear Setup
The Gearing process is very straightforward. You shall use almost exclusively Unique Items. Most of them are cheap, so you should try to get useful Corruptions on them. The Power-stacking combo is currently the best way to scale most Spell Casters, it is strong and very affordable. The Utula's Hunger is particularly great here, as most of the other Uniques provide no Life modifiers anyway. You will easily reach 11 Power Charges with the most basic Gear, but with greater investments, you can reach 14 of them. The Damage is great anyway, so it is better to focus on defense. On the Rare Gear pieces, you should look for lacking Attributes and Resistances, Energy Shield, Spell Suppression, Cast Speed, and Critical Strike Multiplier.
|
Stat priorities on items:
|
 (Helmet) Rare Helmet - it should grant you Spell Suppression, Resistance, Attributes, and Physical Damage mitigation. It should grant you a lot of Energy Shield, which you use to cast your Spells. (Helmet) Rare Helmet - it should grant you Spell Suppression, Resistance, Attributes, and Physical Damage mitigation. It should grant you a lot of Energy Shield, which you use to cast your Spells. |
|
| Min. requirements: 40% Total Elemental Resistances 12% chance to Suppress Spell Damage 12% of Physical Damage from Hits taken as Elemental Damage Optional affixes: #% increased Mana Reservation Efficiency of Skills Chaos Resistance Attribute |
|
 (Weapon) Void Battery - grants you additional Power Charge, decent Cast Speed, Critical Strike Chance for your Spells, and improves your Spell Damage for each Power Charge you have. You can Corrupt it to get more AoE instead of the minor Spell Damage bonus. (Weapon) Void Battery - grants you additional Power Charge, decent Cast Speed, Critical Strike Chance for your Spells, and improves your Spell Damage for each Power Charge you have. You can Corrupt it to get more AoE instead of the minor Spell Damage bonus. |
|
| (36-40)% increased Spell Damage 80% reduced Spell Damage (10-20)% increased Cast Speed (50-65)% increased Global Critical Strike Chance +(40-50) to maximum Mana +1 to Maximum Power Charges 25% increased Spell Damage per Power Charge |
|
 (Weapon) Malachai's Loop - improves your Spell Damage and grants 2 additional Power Charges. The downside of this item is being nullified by your Belt. Try to get a Corrupted Implicit that converts part of the incoming Physical Damage to be taken as Elemental. (Weapon) Malachai's Loop - improves your Spell Damage and grants 2 additional Power Charges. The downside of this item is being nullified by your Belt. Try to get a Corrupted Implicit that converts part of the incoming Physical Damage to be taken as Elemental. |
|
| (210-250)% increased Energy Shield +2 to Maximum Power Charges 20% chance to gain a Power Charge on Hit (12-16)% increased Spell Damage per Power Charge Lose all Power Charges on reaching Maximum Power Charges Shocks you when you reach Maximum Power Charges |
|
 (Boots) Ralakesh's Impatience - with those Boots you will always have maximum benefits of all your Charges. They also offer solid Movement Speed and Resistance bonuses. (Boots) Ralakesh's Impatience - with those Boots you will always have maximum benefits of all your Charges. They also offer solid Movement Speed and Resistance bonuses. |
|
| +(15-25)% to Cold Resistance +(15-25)% to Chaos Resistance 30% increased Movement Speed Count as having maximum number of Endurance Charges Count as having maximum number of Frenzy Charges Count as having maximum number of Power Charges |
|
 (Amulet) Badge of the Brotherhood - it applies all your maximum Power Charge bonuses to the Frenzy Charges as well, which grants you a ton of Cast Speed and Damage. It also lowers the Cooldown on your Frostblink Skill. (Amulet) Badge of the Brotherhood - it applies all your maximum Power Charge bonuses to the Frenzy Charges as well, which grants you a ton of Cast Speed and Damage. It also lowers the Cooldown on your Frostblink Skill. |
|
| +(16-24) to Dexterity and Intelligence (7-10)% increased Cooldown Recovery Rate of Travel Skills per Frenzy Charge (7-10)% increased Effect of Elusive on you per Power Charge (20-25)% chance to lose a Frenzy Charge when you use a Travel Skill (20-25)% chance to lose a Power Charge when you gain Elusive Your Maximum Frenzy Charges is equal to your Maximum Power Charges |
|
 (Belt) Graven's Secret - increases your maximum Power Charges, but disables their generation. You will instead gain Absorption Charges, which bypass the Shock from your Shield. Thanks to your Boots you will have all the benefits of the Power Charges anyway. (Belt) Graven's Secret - increases your maximum Power Charges, but disables their generation. You will instead gain Absorption Charges, which bypass the Shock from your Shield. Thanks to your Boots you will have all the benefits of the Power Charges anyway. |
|
| +(60-70) to maximum Energy Shield (16-20)% increased maximum Mana +(40-60)% to Lightning Resistance +1 to Maximum Power Charges Modifiers to Minimum Power Charges instead apply to Minimum Absorption Charges Maximum Absorption Charges is equal to Maximum Power Charges Gain Absorption Charges instead of Power Charges |
|
 (Body Armour) Utula's Hunger - this Armour can nearly double your maximum Life, but you can't have any Life modifiers on your other pieces. You will need a Corrupted version that has 6 White Sockets, or color it with the Tainted Chromatics as they ignore Attribute Requirements. (Body Armour) Utula's Hunger - this Armour can nearly double your maximum Life, but you can't have any Life modifiers on your other pieces. You will need a Corrupted version that has 6 White Sockets, or color it with the Tainted Chromatics as they ignore Attribute Requirements. |
|
| (60-100)% increased Armour Recover (1-3)% of Life on Kill (30-40)% increased Stun and Block Recovery +(700-1000) to maximum Life if there are no Life Modifiers on other Equipped Items |
|
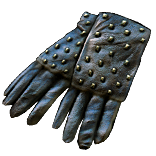 (Gloves) Hrimsorrow - it is an easy way to gain full Cold Damage Conversion. Try to get a Corruption that boosts the base Critical Strike Chance of your Spells. (Gloves) Hrimsorrow - it is an easy way to gain full Cold Damage Conversion. Try to get a Corruption that boosts the base Critical Strike Chance of your Spells. |
|
| +(20-30) to Strength +(40-50) to Evasion Rating +(20-30)% to Cold Resistance 100% of Physical Damage Converted to Cold Damage Reflects 100 Cold Damage to Melee Attackers |
|
 (Gloves) Rare Gloves - you can also get Cold Conversion via veiled modifier and Eldrtich Implicit on Rare Gloves. It will be very expensive, but can potentially give a bit more Damage or Spell Suppression. (Gloves) Rare Gloves - you can also get Cold Conversion via veiled modifier and Eldrtich Implicit on Rare Gloves. It will be very expensive, but can potentially give a bit more Damage or Spell Suppression. |
|
| Min. requirements: 60% of Physical Damage Converted to Cold Damage 10% chance to Suppress Spell Damage Optional affixes: Chaos Resistance Cold Damage leeched as Life increased Damage against Chilled Enemies |
|
 (Ring) Rare Ring - on your Ring you should fix your remaining Resistances or Attribute requirements. It should also grant you some Cast Speed and Chaos Resistance. Remember to not use Life modifiers, such as maximum Life, Regen, or Life Recoup. (Ring) Rare Ring - on your Ring you should fix your remaining Resistances or Attribute requirements. It should also grant you some Cast Speed and Chaos Resistance. Remember to not use Life modifiers, such as maximum Life, Regen, or Life Recoup. |
|
| Min. requirements: 40% Total Elemental Resistances 20% Chaos Resistance +50 to Strength or Dexterity Optional affixes: Non-Channelling Skills have -(7-6) to Total Mana Cost Cast Speed Critical Strike Multiplier |
|
 (Jewel) Large Cluster Jewel - the Cluster Jewel can be used to obtain the Life Leech from the Elemental Damage via the Doryani Lesson Notable. Other Notables are more flexible. If you have Life Leech from another source you could use a Physical Damage Cluster which is usually cheaper. (Jewel) Large Cluster Jewel - the Cluster Jewel can be used to obtain the Life Leech from the Elemental Damage via the Doryani Lesson Notable. Other Notables are more flexible. If you have Life Leech from another source you could use a Physical Damage Cluster which is usually cheaper. |
|
| Recommended affixes: 1 Added Passive Skill is Blast-Freeze 1 Added Passive Skill is Doryani's Lesson 1 Added Passive Skill is Prismatic Heart 1 Added Passive Skill is Blanketed Snow 1 Added Passive Skill is Cold to the Core |
|
 (Jewel) Watcher's Eye - there are a lot of powerful modifiers you could use with this Jewel. The most potent are tied to the Hatred Aura. The Purity of Elements also offers very useful defensive modifiers, such as extra Chaos Resistances or Physical Damage mitigation. You can also use it to gain a bit of Cold Conversion, but it would cost a fortune to mix it with other useful modifiers. (Jewel) Watcher's Eye - there are a lot of powerful modifiers you could use with this Jewel. The most potent are tied to the Hatred Aura. The Purity of Elements also offers very useful defensive modifiers, such as extra Chaos Resistances or Physical Damage mitigation. You can also use it to gain a bit of Cold Conversion, but it would cost a fortune to mix it with other useful modifiers. |
|
| (4-6)% increased maximum Energy Shield (4-6)% increased maximum Life (4-6)% increased maximum Mana <Two or Three random aura modifiers> Recommended modifiers: +(30-50)% to Chaos Resistance while affected by Purity of Elements (8-12)% of Physical Damage from Hits taken as Cold Damage while affected by Purity of Elements Damage Penetrates (10-15)% Cold Resistance while affected by Hatred |
|
 (Jewel) Militant Faith - it can grant you the Inner Conviction Keystone which grants you more Damage for each Power Charge you have, but disables Frenzy Charge generation. Again, your boots bypass this downside, making it a very powerful Keystone for this Build. (Jewel) Militant Faith - it can grant you the Inner Conviction Keystone which grants you more Damage for each Power Charge you have, but disables Frenzy Charge generation. Again, your boots bypass this downside, making it a very powerful Keystone for this Build. |
|
| Carved to glorify (2000-10000) new faithful converted by High Templar Dominus Passives in radius are Conquered by the Templars Historic |
|
  (Jewel) Forbidden Flame & Flesh - you will need this set of Jewels to get the Perfect Crime Notable from the Saboteur's Ascendency. It will double your Blade Vortex stacks gained from the Arcanist Brand, and the less Damage penalty doesn't apply to the Blade Blast. The Build can be played without them, but it is not as fast or enjoyable. (Jewel) Forbidden Flame & Flesh - you will need this set of Jewels to get the Perfect Crime Notable from the Saboteur's Ascendency. It will double your Blade Vortex stacks gained from the Arcanist Brand, and the less Damage penalty doesn't apply to the Blade Blast. The Build can be played without them, but it is not as fast or enjoyable. |
|
| Allocates Perfect Crime if you have the matching modifiers on Forbidden Flame Allocates Perfect Crime if you have the matching modifiers on Forbidden Flesh |
|
 (Jewel) Bloodnotch - this Jewel provides an excellent Life Recovery, it can completely nullify the Hit Damage from incoming Stunning Hits when combined with the Petrified Blood. It won't protect you from lethal one-shot. (Jewel) Bloodnotch - this Jewel provides an excellent Life Recovery, it can completely nullify the Hit Damage from incoming Stunning Hits when combined with the Petrified Blood. It won't protect you from lethal one-shot. |
|
| (40-60)% of Damage taken from Stunning Hits is Recovered as Life | |
 (Jewel) Immutable Force - with this Jewel incoming Stuns are barely noticeable. With the Energy Shield Mastery, you will be Stunned by every Hit. (Jewel) Immutable Force - with this Jewel incoming Stuns are barely noticeable. With the Energy Shield Mastery, you will be Stunned by every Hit. |
|
| (500-1000)% increased Stun and Block Recovery | |
 (Flask) Taste of Hate - this Flask is worth using just for the powerful defensive modifiers it grants against Physical and Cold Damage, but in this Build it also boosts your Damage. (Flask) Taste of Hate - this Flask is worth using just for the powerful defensive modifiers it grants against Physical and Cold Damage, but in this Build it also boosts your Damage. |
|
| (10-15)% of Physical Damage from Hits taken as Cold Damage during Effect Gain (10-15)% of Physical Damage as Extra Cold Damage during effect 30% chance to Avoid being Chilled during Effect 30% chance to Avoid being Frozen during Effect |
|
|
Other suggested Flasks:
|
|
    |
|
|
If you have any other build requests please leave that in the comments below. We are always open to suggestions and constructive feedback.
Pictures used in this article are the intellectual property of Grinding Gear Games.
