Big Bad Zombies Vacuum Champion Build - Odealo's Crafty Guide
Our Big Bad Zombies Vacuum Champion build is the only one of its kind. Suck in enemies while Zombies do the jobBig Bad Zombies
Champion-Duelist build
Updated for Patch 3.5
The Best Crafty Guides by Odealo
Estimated budget: high

| Guide notes |
| December 21, 2018 -Updated for Patch 3.5 -Added Support for Impale mechanic |
Big Bad Zombies Vaccum Champion build is the only one of its' kind. This build is not your ordinary Minion build - it's quite expensive, but it allows clearing almost any Map tier and all the Map mods. It is one of the most durable Minion builds, but at the same time, it provides decent clear speed and amazing damage. High Strength bonuses from Duelist and Marauder's part of the Skill Tree make it easier to reach over 1000 Strenght to grant the Baron's buff and allow summoning additional Big Bad Zombies.
You can also check our other Path of Exile builds right here Odealo's Crafty Guides - Full List
1. Gameplay
Big Bad Zombies Vacuum Champion build is based on:
- Reversed-knockback mechanics provided by the Empire's Grasp gauntlets. Ground Slam with increased Area of Effect will be great at "sucking in" enemies. It will also Taunt enemies thanks to the Champion's Conqueror Ascendancy passive and Impale them on Hit. This mechanic is made for fun, to have this build a little bit more interesting, but using other skills is also viable
- High Life, Strength, and Armour stats provide fantastic sustainability and additional damage to your Minions (thanks to The Baron Helmet). Since you are supposed to "suck in" and Taunt all enemies, you need to be quite durable
- Extremely high frenzied Zombie's DPS gained by six-link setup, Mon'tregul's Grasp Unique Mace, and additional damage from Impale stacks
- Great Supporting role of Champion Ascendancy class and the additional damage from Impale mechanic introduced in Patch 3.5
|
Full gameplay video: 0:07 T13 Ghetto Map Video recorded pre 3.5. Please hang on a little, this build deserves an update on the video part, because of the immense gap in performance compared to back then |
|
|

2. Build's PROS & CONS
| PROS |
|
| CONS |
|
3. Leveling tips
Leveling as Duelist is rather straightforward. You should use high DPS two-handed weapons and the Sunder skill. You will be getting the Zombie/Minion nodes later, and it's not worth bothering about them until you can wear all the required gear. You will pick up mainly defensive Passive Nodes, so regarding equipment, you should look to maximize your Physical DPS.
Suggested leveling Gem setups:
| Sunder setup | |
 |
Sunder - great Melee/AoE leveling skill |
 |
Melee Physical Damage Support - great buff to Sunder's DPS |
 |
Added Fire Damage Support - grants additional fire damage to attacks |
 |
Increased Area of Effect Support - will increase the radius of Sunder skill, allowing faster leveling |
| Leap Slam setup | |
 |
Leap Slam - mobility skill that can be used while leveling |
 |
Faster Attacks Support - increases the movement speed of Leap Slam |
| Utility Gems | |
 |
Stone Golem - provides extra life regeneration |
 |
Punishment - a good curse that increased your physical damage |
 |
Hatred - offers extra DPS based on your Physical Damage |
 |
Clarity - increased Mana Regen. Might be helpful because of the lack of Mana/Int. nodes early on |
Bandits:
We recommend killing all the Bandits for two additional Passive Points
Leveling Skill Trees:
31 Points Skill Tree
Priorities: 1) Art of the Gladiator 2) Master of the Arena 3) Destroyer 4) Butchery 5) Constitution
62 Points Skill Tree
Priorities: 1) Retribution 2) Resolute Technique 3) Barbarism 4) Redemption 5) Devotion
Recommended leveling items:
 Blackheart - the best rings for the earlies levels. Get it as soon as you enter the town for the first time Blackheart - the best rings for the earlies levels. Get it as soon as you enter the town for the first time |
|
| Adds 1 to 4 Physical Damage to Attacks 5% increased Physical Damage Adds 1 to 3 Chaos Damage to Attacks +(20-30) to maximum Life (2-4) Life Regenerated per second 10% chance to Cause Monsters to Flee |
|
 Belt of the Deceiver - great leveling belt for melee classes Belt of the Deceiver - great leveling belt for melee classes |
|
| +(25-35) to Strength (15-25)% increased Physical Damage You take 30% reduced Extra Damage from Critical Strikes +(30-40) to maximum Life +(10-15)% to all Elemental Resistances Nearby Enemies are Intimidated |
|
 Deidbell - amazing DPS buff at early levels Deidbell - amazing DPS buff at early levels |
|
| Adds 10 to 20 Physical Damage to Attacks +(20-30) to Strength +(20-30) to Dexterity +(200-300) to Armour 20% increased Melee Damage Cannot Leech when on Low Life |
|
 Wideswing - potent weapon at early levels. Grant additional Support Gem for your Sunder setup so you can replace the Inc. Area of Effect Support with some other Gem of choice Wideswing - potent weapon at early levels. Grant additional Support Gem for your Sunder setup so you can replace the Inc. Area of Effect Support with some other Gem of choice |
|
| Socketed Gems are Supported by Level 20 Increased Area of Effect (120-160)% increased Physical Damage +10 to Strength +(50-80) to Accuracy Rating +10 Mana gained on Kill +2 to Weapon range |
|
|
|
|
| +1 to Level of Socketed Strength Gems (80-100)% increased Physical Damage Adds 5 to 10 Physical Damage Adds (30-40) to (70-80) Physical Damage +(15-30) to Strength Gain 70% of Physical Damage as Extra Fire Damage Culling Strike |
|
 The Cauteriser - grants extremely high damage. Since you do not get all the major melee/physical damage nodes, you should prioritize high damage weapons, and this is one of the best choices for the leveling phase
4. Final Skill tree, Ascendancy Points, and Pantheon
Final Skill Tree:
116 Points Final Skill Tree
116 Points Path of Building(PoB) link
Ascendancy points:
Preferably in that order:
- Master of Metal
- Conqueror
- Worthy Foe
- Inspirational
Pantheon:
Major God: Soul of Lunaris 1% additional Physical Damage Reduction for each nearby Enemy, up to 8%; 1% increased Movement Speed for each nearby Enemy, up to 8%
Minor God: Soul of Gruthkul 1% additional Physical Damage Reduction for each Hit you've taken Recently up to a maximum of 5%
5. Final Gems links
| [DPS] Raise Zombie setup (Body Armour) |
|
 |
Raise Zombie - your main DPS minion spell. With the recommended items you should be able to summon 5 Big Bad Zombies (or ten smaller ones) which deal insane damage |
 |
Minion Damage Support - increases your Zombie's damage |
 |
Melee Splash Support - great buff to clear speed and AoE DPS |
 |
Multistrike Support - a great addition to Zombie's DPS |
 |
Fortify Support - grants increased Melee Physical DPS and the Fortify buff for your Zombies |
|
Melee Physical Damage Support - your Zombies are 100% Melee/Physical Damage based, so this is an obvious choice |
| [UTILITY] Animate Guardian setup (Baron Helmet) |
|
 |
Animate Guardian - the Animated Guardian is a Minion, that will be carrying Unique Items listed below. Guardian "consumes" the items(by using the spell on unique items that are on the ground), and those items will perish if he dies, but you and your Zombies benefit from their powers while the Guardian is active. In this setup, Animated Guardian should be nearly immortal with over 25k Life and high Resistances.
|
 |
Minion Life Support - boost to Animated Guardian's Life |
 |
Minion and Totem Elemental Resistances Support |
 Leer Cast - grants extra damage to all Allies (you and your Zombies)
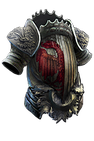 Ambu's Charge - grants Endurance Charges to himself and nearby allies
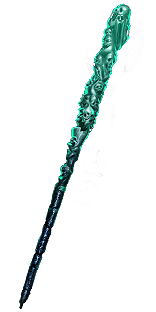 Dying Breath - grants increased damage to nearby Allies, and also increases the effect of Curses on enemies
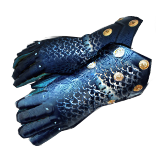 Southbound - provides a lot of bonus Life for your Animated Guardian
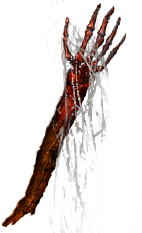
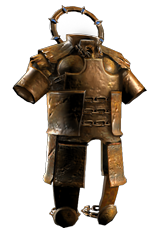
 Kaom's Roots - for the defensives bonuses for your Guardian
| [VACUUMING] Ground Slam (Empire's Grasp) |
|
 |
Ground Slam - this skill provides the highest AoE coverage among all Mace/Melee skills. Also, it has a high chance to Stun and grant Endurance Charges |
 |
Endurance Charge on Melee Stun Support - generates Endurance Charges |
|
Increased Area of Effect Support |
 |
Blood Magic Support - makes Ground Slam cost Life instead of Mana |
| [UTILITY] Herald of Purity | |
 |
Herald of Purity - adds Physical Damage to your Attacks and creates Sentinels on Purity for some extra DPS and utility |
 |
Maim Support - increases Physical Damage from Supported Skills and makes your Sentinels of Purity Maim enemies on Hit |
| [UTILITY] Dread Banner | |
 |
Dread Banner - a new Aura Skill which grants increases chance to Impale on Hit to your and your Allies. Plant it versus Bosses for even better results and increased effects of the Fortify buff |
| [UTILITY] Vaal Haste | |
 |
Vaal Haste - Aura which increases Attack, Movement, and Cast Speed of you and your allies. You should use the regular Aura all the time, and Vaal Haste against Bosses |
| [MOBILITY] Shield Charge | |
 |
Shield Charge - your main mobility skill |
|
Faster Attacks Support - provides a faster movement with SC |
|
Fortify Support - will grant defensive buffs on melee hits with SC |
| [UTILITY] various utility Gems | |
 |
Desecrate - creates several corpses that can be consumed by Flesh Offering |
 |
Flesh Offering - consumes corpses for greatly increased Movement and Attack Speed for your Minions |
|
Punishment - the recommended Curse for this build. It increases Physical Damage taken by affected enemies, and grants increased Attack Speed to Melee attackers |
 |
Faster Casting Support - makes auto-casting Supported Spells much easier as a Champion |
|
|
5. Gear Setup
Big Bad Zombies build is quite exceptional, which makes it fun, but also limits the possible gear options. The only diversity it offers is with the Jewels and Body Armour slots. This build is also not a budget one. It will cost a minimum of 20-25 Exalted Orbs to get all the required gear and allow you to do end-game content.
Our recommended items will:
- Cap your resistances
- Give you enough DPS/Life to start mapping successfully
- Save you at least a couple of hours, as it's already all planned out for you!
|
Stat priorities on items:
|
 (Helmet) The Baron - mandatory item for this build. It makes the Zombies extremely powerful with high Strength bonuses (Helmet) The Baron - mandatory item for this build. It makes the Zombies extremely powerful with high Strength bonuses |
|
| +(20-40) to Strength +2 to Level of Socketed Minion Gems Minions have 20% increased maximum Life Half of your Strength is added to your Minions +1 to maximum number of Zombies per 300 Strength With 1000 or more Strength, 2% of Damage dealt by your Zombies is Leeched to you as Life |
|
| Helmet enchantment: 40% Increases Raise Zombie Damage 15% Increased Raise Zombie Attack Speed |
|
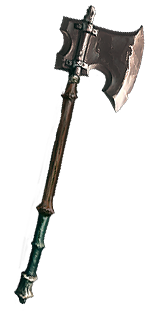
 (Weapon) Mon'tregul's Grasp - grants huge Life and damage bonus to your Zombies. It is required for high tier map farming and dealing with end-game Bosses (Weapon) Mon'tregul's Grasp - grants huge Life and damage bonus to your Zombies. It is required for high tier map farming and dealing with end-game Bosses |
|
| 40% increased Elemental Damage 50% reduced number of Zombies allowed +5000 to Zombie maximum Life (25-30)% increased Zombie Resistances 25% increased Zombie Size Enemies killed by Zombies explode dealing Fire Damage Zombies deal (80-100)% more Physical Damage |
|
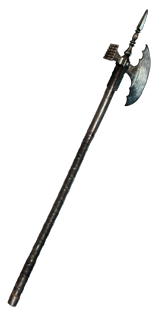
 (Weapon) Brightbeak - it is a great pick for low/mid tier mapping when you don't need that many defenses on your Zombies (Weapon) Brightbeak - it is a great pick for low/mid tier mapping when you don't need that many defenses on your Zombies |
|
| 10% reduced Enemy Stun Threshold (50-75)% increased Physical Damage 50% increased Attack Speed 25% increased Critical Strike Chance +(20-30)% to Fire Resistance +(20-30)% to Lightning Resistance |
|
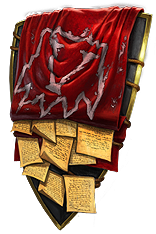 (Shield) Victario's Charity - the best in slot item for this build. Will provide Frenzy Charges for your Zombies which greatly buffs their DPS (Shield) Victario's Charity - the best in slot item for this build. Will provide Frenzy Charges for your Zombies which greatly buffs their DPS |
|
| 3% reduced Movement Speed (Hidden) +8% to all Elemental Resistances +(50-70) to maximum Life +(20-30)% to Lightning Resistance +11% to Chaos Resistance 20% increased Area of Effect of Aura Skills 10% chance to grant a Power Charge to nearby Allies on Kill 5% chance to grant a Frenzy Charge to nearby Allies on Hit |
|
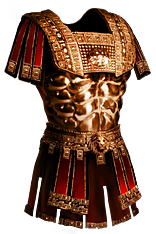 (Body Armour) Demigod's Dominance - a good choice for Body Armour slot, however, available only to Standard League players (Body Armour) Demigod's Dominance - a good choice for Body Armour slot, however, available only to Standard League players |
|
| +(15-25)% to all Elemental Resistances +1 to Level of Socketed Gems +(30-50) to all Attributes |
|
 (Body Armour) Rare Body Armour - the best in the slot. The higher the stats the better (Body Armour) Rare Body Armour - the best in the slot. The higher the stats the better |
|
| Min. requirements: 1400 Armour 70 maximum Life 40 Strength 35% Fire Resistance 35% Cold Resistance |
|
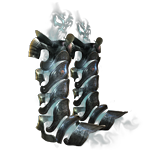 (Boots) Alberon's Warpath - mandatory Boots for this build. Provide the highest Strength bonuses among all your items (Boots) Alberon's Warpath - mandatory Boots for this build. Provide the highest Strength bonuses among all your items |
|
| Adds 1 to 80 Chaos Damage to Attacks +(180-220) to Armour +(9-12)% to Chaos Resistance 20% increased Movement Speed +1 to maximum number of Skeletons (15-18)% increased Strength |
|
| Boot enchantment: Regenerate 2% of Life and Mana per second if you were Hit Recently |
|
 (Gloves) Empire's Grasp - required for the reversed-knockback mechanics. If you don't want to use it, feel free to equip a Strength-based Rare pair. It will be much easier to cap Elemental Resistances and get the 1000 Strength for extra Leech (Gloves) Empire's Grasp - required for the reversed-knockback mechanics. If you don't want to use it, feel free to equip a Strength-based Rare pair. It will be much easier to cap Elemental Resistances and get the 1000 Strength for extra Leech |
|
| +(400-600) to Armour Knockback direction is reversed Socketed Gems are Supported by Level 10 Knockback |
|
 (Gloves) Rare Gloves (Gloves) Rare Gloves |
|
| Min. requirements: 70 maximum Life 40 Strength Optional affixes: Elemental Resistances High Armour Rating |
|
 (Belt) Rare Belt (Belt) Rare Belt |
|
| Min. requirements: 75 maximum Life 65 Strength 40% Fire Resistance 40% Cold Resistance |
|
 (Amulet) Astramentis - for the highest attribute bonuses in the game (Amulet) Astramentis - for the highest attribute bonuses in the game |
|
| +(10-16) to all Attributes +(80-100) to all Attributes -4 Physical Damage taken from Attacks |
|
 (Ring) Rare Rings - you need to cap Elemental Resistances with the Rings and get as much Life and Strength as possible (Ring) Rare Rings - you need to cap Elemental Resistances with the Rings and get as much Life and Strength as possible |
|
| Min. requirements: 60 maximum Life 35 Strength 35% Fire Resistance 35% Cold Resistance or 35% Lightning Resistance |
|
 (Jewel) Violent Dead - great DPS buff for your Zombies. Socket it in the slot on the top/left of your Skill Tree (above Devotion) (Jewel) Violent Dead - great DPS buff for your Zombies. Socket it in the slot on the top/left of your Skill Tree (above Devotion) |
|
| Minions deal (10-15)% increased Damage With at least 40 Intelligence in Radius, Raised Zombies' Slam Attack has 100% increased Cooldown Recovery Speed With at least 40 Intelligence in Radius, Raised Zombies' Slam Attack deals 30% increased Damage |
|
 (Jewel) Efficient Training - makes reaching 1,000 Strenght much easier with two of these (Jewel) Efficient Training - makes reaching 1,000 Strenght much easier with two of these |
|
| +(16-24) to Strength Intelligence from Passives in Radius is Transformed to Strength |
|
 (Jewel) Emperor's Mastery - the best in slot Jewels for this build. They are expensive, but greatly increases all the important stats in this build (Jewel) Emperor's Mastery - the best in slot Jewels for this build. They are expensive, but greatly increases all the important stats in this build |
|
| 4% increased maximum Life 3% increased Character Size 5% increased Global Defences (5-7)% increased Attributes |
|
 (Jewel) Rare Jewels - they should provide extra Life and Damage bonuses (Jewel) Rare Jewels - they should provide extra Life and Damage bonuses |
|
| Recommended affixes: increased maximum Life increased Minion Damage Strength Optional affixes: missing Elemental Resistances |
|
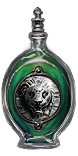
 (Flask) Lion's Roar - mandatory Flask for this build. Provides extra knockback chance and Armour Rating (Flask) Lion's Roar - mandatory Flask for this build. Provides extra knockback chance and Armour Rating |
|
| (-10-10)% increased Charges used (15-25)% increased Area of Effect during Flask Effect 2 additional Projectiles during Flask Effect |
|
Other suggested Flasks:
|
|
   |
|
|
If you have any other build requests, please leave that in the comments below.
