Ball Lightning Archmage Hierophant Build
One of the strongest Spell Caster builds in Path of Exile based on self-casting massively buffed Ball LightningBall Lightning
Archmage Hierophant Build
Updated for Patch 3.13
The Best Crafty Guides by Odealo
Estimated budget: medium

| Guide notes |
| September 20, 2020 -Updated for Patch 3.12 -Added alternative Starter version of this build Major changes: -Patch 3.12 didn't change much in this build, however, we have decided to add an alternative setup to make this viable as a League Starter build -Added support for Sigil of Power - a new utility Spell that adds a ton of extra damage for the more stationary type of playstyle January 25, 2021 -Updated for Patch 3.13 |
Archmage is a Support Gem that defines a number of Spell Caster builds. It's oriented on maximizing Mana pool, Lightning Spell Damage, and in most cases, Energy Shield (as it's easier to boost Energy Shield when you have high Maximum Mana). Archmage Support is the single-best Support Gem in terms of how much it can increase your Skill's DPS so if build correctly, it simply outperforms any other Gem in the game. For Archmage, you will usually want to go Hierophant as it's the class that offers the highest bonuses to Maximum Mana and Energy Shield, making it easy to build properly without excessive expenses on end-game equipment and Uniques. This build utilizes Ball Lightning as it's one of the top Lightning Spells, has high effectiveness of Added Damage (considering how it periodically zaps enemies with high frequency) and overall, allows you to take down Bosses on Tier 15 Maps with a single Spell Cast (quite a feast currently).
With the introduction of Patch 3.12, we have decided to add an alternative variation of this build which is a League Starter version based on Life and random Rare equipment only (with few recommended Uniques, but none of which are expensive or hard to get, and what's more important, they are completely optional). You will find both versions of Passive Trees and Equipment recommendations below.
You can also check our other Path of Exile builds: Odealo's Crafty Guides - Full List
1. Gameplay
This is a very straightforward build to play. You Dash around Maps and self-cast Ball Lightning which will trigger several times thanks to the use of Unleash Support Gem. You don't really need to spam it, as all enemies will go down from a single "ball". You should be looking to have your Arcane Cloak up at all times, or at least have it ready for Bosses, as it boosts your damage significantly, and grants you a protective shield that will absorb damage based on your Mana (similar to Molten Shell and Armour, but with no hard cap).
|
This video was recorded on a level 91 Hierophant with 12,7k Energy Shield and approximately 480k Ball Lightning DPS. However, we used a Legacy Fevered Mine and Mind of the Council (to replenish the Mana faster because of the higher Mana Cost of Spells). You can expect the build to have around 20% less DPS, 2k Energy Shield more, and more consistent Leech from Light Eater. We are going to add the League Starter version gameplay footage within the next few days - stay tuned |
|
|

2. Build's PROS & CONS
| PROS |
|
| CONS |
|
3. Leveling tips
For leveling, we recommend playing with Ball Lightning Totems. It's a much safer and easier route. You will be playing a standard Life/Spell character without having to obtain any specific Uniques while completing the campaign, and the damage from Totems is more than enough to get you through the lower levels. Obviously, if you prefer to self-cast, don't pick up Ancestral Bond Passive. They will also attract your enemies' attention, so you shouldn't die too often either (if not at all). Approximately at level 75 (shortly after you start Maps), you can try respeccing to full Energy Shield and self-casting, but that will most likely require you to have the equipment prepared beforehand. On the other hand, if you are playing the League Starter version, you can easily reach level 90+ with that version as well, and whether you want to respecc later or not is entirely up to you.
Suggested leveling Gem setups:
| Ball Lightning Totem setup | |
 |
Ball Lightning - primary Spell used in this build. During the campaign and leveling, you should have Totems casts it for you |
 |
Spell Totem Support - allows you to summon Totems which will cast Ball Lightning for you |
 |
Added Lightning Damage Support - adds a lot of Lightning Damage |
 |
Faster Casting Support - allows you to cast Arc much more frequently |
| Lightning Spire Trap setup | |
| Lightning Spire Trap - it's your single target skill that can deal solid damage against Bosses even when you are using Ancestral Bond Passive | |
|
Faster Casting Support - definitely the best gem for Trap. While it might not be noticeable in Path of Building or tooltip DPS, it is the highest Damage boost, because it increases Lightning Strikes cast frequency |
 |
Trap and Mine Damage Support - increases Trap Damage by a lot |
| Utility Gems | |
 |
Summon Lightning Golem - the recommended Golem for this build which increases your Critical Strike Chance |
 |
Conductivity - perfect Curse for our build because it lowers Lightning Resistance of cursed enemies |
 |
Herald of Thunder - perfect Herald Spell for leveling that will grant additional Lightning Damage |
| Flame Dash setup | |
 |
Flame Dash - recommended mobility Spell |
|
Faster Casting - increased casting and movement speed of Flame Dash |
Bandits:
We recommend helping Alira for increased Critical Strike Multiplier and Elemental Resistances. It's also reasonable to kill all the Bandits for two additional Passives
Leveling Skill Trees:
35 Points Skill Tree
Priorities: 1) Light of Divinity 2) Ancestral Bond 3) Quick Recovery 4) Shamanistic Fury
62 Points Skill Tree
Priorities: 1) Elemental Overload 2) Shaman's Dominion 3) Cruel Preparation 4) Heart and Soul 5) Lightning Walker 6) Purity of Flesh
Note: Following Skill Trees are only for ES/Ivory Tower version and display the transition from Life -> Energy Shield in this build. If you are playing pure Life/Starter just head to the final Tree to find out how to distribute the remaining Points up to level 90+.
Level 70+ Skill Tree
You should have level 75+ at the point where you switch to self-casting Ball Lightning and Energy Shield (or higher if you don't have all the gear ready). This Tree does not include Cluster Jewel(s) but assumes you have 10+ Points spent there as well
Level 70+ Skill Tree
This is what you should have after you refund your Passives and switch to Energy Shield. This Tree does not include Cluster Jewels and has 6 Points free to allocate all the Passives from Thread of Hope that's recommended for this build (Lightning Walker, Light Eater, Heart of Thunder, Utmost Intellect etc.)
Recommended leveling items:
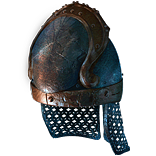
 Malachai's Simula - great leveling Helmet for Lightning Builds. If you wear it, then you should not use any Aura or Heralds for leveling Malachai's Simula - great leveling Helmet for Lightning Builds. If you wear it, then you should not use any Aura or Heralds for leveling |
|
| (15-30)% increased Spell Damage +20 to Strength (20-30)% increased Lightning Damage +10% to Lightning Resistance Blood Magic |
|
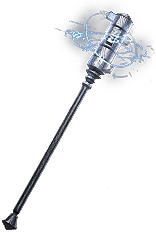 Axiom Perpetuum - one of the best leveling weapons for Spell Casters in PoE. It grants very high added damage to Spells and extra Crit Axiom Perpetuum - one of the best leveling weapons for Spell Casters in PoE. It grants very high added damage to Spells and extra Crit |
|
| 12% increased Elemental DamageAdds (2-3) to (5-6) Fire Damage to Spells Adds (2-3) to (5-6) Cold Damage to Spells Adds 1 to (10-12) Lightning Damage to Spells (4-6)% increased Cast Speed (100-140)% increased Critical Strike Chance for Spells |
|
 Stone of Lazhwar - grants a lot of Chance to Block Spell Damage and Cast Speed, which increases both Arc and Lightning Spire Trap Damage Stone of Lazhwar - grants a lot of Chance to Block Spell Damage and Cast Speed, which increases both Arc and Lightning Spire Trap Damage |
|
| (12-15)% Chance to Block Spell Damage (10-15)% increased Cast Speed +(30-50) to maximum Mana |
|
 Le Heup of All - perfect choice for the whole leveling process, it's recommended to use it on both ring slots Le Heup of All - perfect choice for the whole leveling process, it's recommended to use it on both ring slots |
|
| (10-30)% increased Damage +(10-30) to all Attributes (10-30)% increased Rarity of Items found +(10-30)% to all Elemental Resistances |
|
 Trolltimber Spire - grants high bonus Life and Life Leech. If you are using Malachai's Simula, it will help you replenish Life quickly that's spent to cast your Spells Trolltimber Spire - grants high bonus Life and Life Leech. If you are using Malachai's Simula, it will help you replenish Life quickly that's spent to cast your Spells |
|
| +(20-30) to maximum Life (130-150)% increased Armour +(40-60) to maximum Life You and your Totems Regenerate 0.5% of Life per second for each Summoned Totem 15% increased Area of Effect for Skills used by Totems 0.5% of Damage dealt by your Totems is Leeched to you as Life |
|
4. Final Skill Tree, Ascendancy Points, and Pantheon
Final Skill Tree (ES/Ivory Tower version):
113-116 Points Final Skill Tree
113-116 Points Path of Building(PoB) link
Final Skill Tree (Life/Starter version):
114-117 Points Final Skill Tree
114-117 Points Path of Building(PoB) link
(the exact number of Points allocated depends on the Cluster Jewels you managed to get)
Ascendancy points:
Preferably in that order:
- Pursuit of Faith
- Ritual of Awakening
(these two have to be refunded when you switch to Energy Shield, and you need to pick Divine Guidance and Sanctuary of Thought in their stead) - Illuminated Devotion
- Arcane Blessing
Pantheon:
Major God: Soul of Lunaris 1% additional Physical Damage Reduction for each nearby Enemy, up to 8%; 1% increased Movement Speed for each nearby Enemy, up to 8%
Minor God: Soul of Gruthkul 1% additional Physical Damage Reduction for each Hit you've taken Recently up to a maximum of 5%
5. Final Gems links
ENERGY SHIELD/IVORY TOWER VAR.
| [DPS] Ball Lightning setup | |
|
Ball Lightning - your main all-purpose Spell which deals massive damage to all enemies it passes through when it's fully buffed by Archmage Support and Arcane Cloak |
 |
Archmage Support - adds a lot of Lightning Damage based on the amount of Mana Spent to Cast Support Spells. It's the single-best DPS Support Gem in the game and the build-defining one |
 |
Arcane Surge Support - grants very high bonus Spells Damage, Mana Regeneration Rate, and Cast Speed. Since Ball Lightning's Mana Cost is very high, you will get Arcane Surge with each cast |
 |
Unleash Support - accumulates charges and when you finally cast your linked Spell, it will repeat several times for each charge accumulated allowing you to dish out insane burst damage against Bosses when fully loaded |
 |
Slower Projectiles Support - reduces Ball Lightning's travel speed, which lets it hit each enemy more times |
 |
Lightning Penetration Support - your enemies have lower Lightning Resistance |
| [UTILITY] Flame Dash/Arcane Cloak | |
|
Flame Dash - recommended Movement Spell for this build. It allows you to travel faster and avoid big attacks |
 |
Arcane Cloak - a must-have Guard Spell for this build which removes a portion of your current Mana to grant protective shield and extra added Lightning Damage based on the Mana removed that way |
 |
Increased Duration Support - increases the duration of Arcane Cloak buff |
 |
Second Wind Support - allows you to carry additional use of Brand Recall and reduces its' Cooldown Recovery Speed |
| [UTILITY] Curses setup | |
 |
Conductivity - main Curse, which reduces enemies' Lightning Resistance. Will be applied automatically by Storm Brand |
 |
Hextouch Support/Awakened Hextouch Support - makes Storm Brand apply linked Curse or Curses |
 |
Storm Brand - applies your linked Curse or Curses. It has very good AoE and cast frequency making it perfect for the job |
 |
Elemental Weakness - if you manage to get Awakened Curse on Hit, you can use a second Curse here, and that would be Elemental Weakness |
| [AURA] Wrath (Socketed in Prism Guardian) |
|
 |
Wrath - increases Lightning Damage. Like all the other Auras in this setup, it has to be socketed in Prism Guardian so that it reserves your Life instead of Mana |
 |
Discipline - increases your Maximum Energy Shield making it a must-have Aura |
 |
Zealotry - increases your Spell Damage and Spell Critical Strike Chance |
| [UTILITY] Clarity | |
 |
Clarity - use a level 1 Clarity if you have the recommended Watcher's Eye for it. It also slightly increases your Mana Regeneration Rate |
| [UTILITY] Lightning Golem | |
 |
Cast when Damage Taken Support - will auto-cast your Golem after you take a certain amount of damage |
|
Summon Lightning Golem - increases your Attack and Cast Speed while active |
| [UTILITY] Wave of Conviction, Tempest Shield (Socketed in Crafted Wand) |
|
 |
Wave of Conviction - applies Lightning Exposure to enemies, reducing their Lightning Resistance |
 |
Tempest Shield - increases your Chance to Block and zaps nearby enemies with moderate Lightning Damage |
|
Increased Duration Support |
LIFE/STARTER VAR.
| [DPS] Ball Lightning setup (Socketed in Pledge of Hands) |
|
|
Ball Lightning - for detailed Skill and Support Gems description check the previous setup. We will only add comments to Skills that aren't used in the primary version |
|
Archmage Support |
|
Arcane Surge Support |
 |
Spell Echo Support - adds an extra cast of Ball Lightning with a higher damage multiplier because of this Gem's interaction with Greater Spell Echo from Pledge of Hands Staff |
 |
Greater Multiple Projectiles Support - increases the number of Ball Lightning's projectiles which greatly increases your clear speed. You can replace it with Slower  Projectiles Support against Bosses Projectiles Support against Bosses |
|
Lightning Penetration Support |
| [DPS] Storm Brand (Socketed in Body Armour) |
|
|
Storm Brand - in most cases the Starter variation of this build will lack single-target DPS so you may use Storm Brand to assist you with it. You don't need to push a second 6-link here, 4 or 5 will be enough on Mid Tier Maps |
|
Archmage Support |
 |
Elemental Focus Support - greatly increases Elemental Damage you deal with Storm Brand |
 |
Controlled Destruction Support - greatly boosts Spell Damage at the cost of reduced Crit. Chance |
 |
Concentrated Effect Support - greatly increases AoE Damage but reduces the lined skill's radius |
|
Lightning Penetration Support |
| [UTILITY] Flame Dash/Sigil of Power | |
|
Flame Dash |
 |
Sigil of Power - new Utility Spell added in Patch 3.12. It creates a zone which builds up Stages as you spend Mana inside, reducing your damage taken and adding extra Lighting Damage to your Spells per stage |
 |
Brand Recall - recalls your active Brands to your current location, allowing it to attach to nearby enemies and refresh their duration |
|
Second Wind Support - increases the number of charges and increases cooldown recovery speed of all linked Spells |
| [UTILITY] Curses/Wave of Conviction setup | |
|
Conductivity |
|
Hextouch Support - makes Wave of Conviction apply linked Curse |
 |
Wave of Conviction - applies Lightning Exposure to enemies Hit and applies your linked Curse |
| [AURA] Wrath (Socketed in Essence Worm) |
|
|
Wrath - in this variation of the build you can only use one Aura and it has to be socketed in the Essence Worm so that it doesn't Reserve any Mana |
| [UTILITY] Arcane Cloak | |
 |
Arcane Cloak - consumes a large portion of your current Mana to grant a very strong protective shield and extra damage based on the amount of Mana spent |
| [UTILITY] Orb of Storms | |
|
Cast when Damage Taken Support - will auto-cast your Orb of Storms after you take a certain amount of damage. Keep this Gem at level 1 |
 |
Orb of Storms - this Spell is used to occasionally grant the Innervate buff and also kill enemies below 10% Life instantly |
 |
Culling Strike Support - makes linked Spell instantly kill enemies on low-life (even end-game Bosses) |
 |
Innervate Support - whenever you kill an enemy with Orb of Storms you will get the Innervate buff which adds a bit of extra Lightning Damage to your Skills |
| [UTILITY] Wrath (Socketed in Essence Worm) |
|
 |
Wrath - the best Aura for this build. It has to be socketed in Essence Worm so that it doesn't reserve any Mana |
|
|
5. Gear Setup
Below you will find the required and recommended equipment for this Ball Lightning Archmage Hierophant build. It includes only the end-game Items which you should have when you switch to Energy Shield/self-cast mode. Up until that point you simply have to focus on random equipment with high Life, Resistances, Lightning Spell Damage, and Spell Critical Strike Chance/Multiplier bonuses. You should do the switch before the game gets actually hard, so its' less relevant what you use before that.
We have also added an additional section below the primary one, with recommended Items for the Life/Starter variation of this build. We have not gotten into that much detail as most of the equipment will be random rares with similar Stat priorities.
You can also check out our Path of Exile Marketplace section where you can find cheap Currency on sale for real money. It should help you out complete this or any other build you want to play in PoE.
The recommended items from our list will:
- Help you cap your Elemental Resistances
- Give you enough DPS, Energy Shield, and Maximum Mana to start mapping successfully
ENERGY SHIELD/IVORY TOWER VAR.
|
Stat priorities on items:
|
 (Helmet) Rare Helmet - always a decent option if you are playing a INT/Mana stacking build (Helmet) Rare Helmet - always a decent option if you are playing a INT/Mana stacking build |
|
| Min. requirements: 200 Energy Shield 75 Maximum Mana Optional affixes: Intelligence Elemental Resistances |
|
 (Helmet) Mindspiral - the BiS Helmet for this build. It grants a very high bonus, Mana, as well as Energy Shield (Helmet) Mindspiral - the BiS Helmet for this build. It grants a very high bonus, Mana, as well as Energy Shield |
|
| (10-15)% increased Cold Damage (10-15)% increased Lightning Damage +(100-120) to maximum Mana Gain (5-10)% of Maximum Mana as Extra Maximum Energy Shield Enemies Cannot Leech Mana From you (5-10)% of Damage taken gained as Mana over 4 seconds when Hit Cannot Leech Mana |
|
| Helmet enchantments: Ball Lightning fires an additional Projectile Arcane Cloak Spends an additional 15% of current Mana |
|
 (Weapon) Rare Wand - it's best to buy a Spell Damage Wand with an open suffix to craft "Trigger Socketed Spell when you use a Skill" which will cast several important Spells for you automatically (Weapon) Rare Wand - it's best to buy a Spell Damage Wand with an open suffix to craft "Trigger Socketed Spell when you use a Skill" which will cast several important Spells for you automatically |
|
| Min. requirements: 90% increased Lightning/Spell Damage 140 maximum Mana Trigger Socketed Spell when you use a Skill Optional affixes: increased Cast Speed Added Lightning Damage to Spells |
|
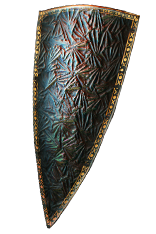 (Shield) Prism Guardian - a must-have Item for this build which will allow you to use all main Auras (Wrath, Zealotry, Discipline) by Reserving Life instead (Shield) Prism Guardian - a must-have Item for this build which will allow you to use all main Auras (Wrath, Zealotry, Discipline) by Reserving Life instead |
|
| +12% to all Elemental Resistances +2 to Level of Socketed Aura Gems Socketed Gems have Blood Magic Socketed Gems have 25% reduced Mana Reservation +(20-30) to Dexterity +25% to all Elemental Resistances |
|
 (Body Armour) The Ivory Tower - a must-have and build-defining Item. Similar to Shavronne's Wrappings, it allows you to play Low-Life because of how high your Mana Pool is. It also grants a lot of Mana, Energy Shield, and Intelligence (Body Armour) The Ivory Tower - a must-have and build-defining Item. Similar to Shavronne's Wrappings, it allows you to play Low-Life because of how high your Mana Pool is. It also grants a lot of Mana, Energy Shield, and Intelligence |
|
| +(40-70) to Intelligence +30 to maximum Energy Shield per 100 Reserved Life +(80-100) to maximum Mana Regenerate 2% of Energy Shield per second Chaos Damage is taken from Mana before Life |
|
 (Amulet) Rare Amulet - can get tons of Mana if you can invest a bit more Currency in it (Amulet) Rare Amulet - can get tons of Mana if you can invest a bit more Currency in it |
|
| Min. requirements: 15% Maximum Energy Shield 60 Maximum Mana Optional affixes: Maximum Mana% Attributes +1 to Level of All Lightning Gems +1 to Level of All Intelligence Gems |
|
 (Amulet) Atziri's Foible - one of the best Amulets you can pick for this build. It's also very cheap compared to the Rare one but grants higher bonus Mana and Mana Regeneration Rate (Amulet) Atziri's Foible - one of the best Amulets you can pick for this build. It's also very cheap compared to the Rare one but grants higher bonus Mana and Mana Regeneration Rate |
|
| (20-30)% increased Mana Regeneration Rate +100 to maximum Mana (16-24)% increased maximum Mana (80-100)% increased Mana Regeneration Rate Items and Gems have 25% reduced Attribute Requirements |
|
| Recommended Anointments: Dynamo |
|
 (Ring) Rare Rings - just aim for high Mana, Energy Shield, and Elemental Resistances. It's also a good spot to get some Attributes for Items' requirements (Ring) Rare Rings - just aim for high Mana, Energy Shield, and Elemental Resistances. It's also a good spot to get some Attributes for Items' requirements |
|
| Min. requirements: 40 Energy Shield 60 Maximum Mana Optional affixes: Elemental Resistances Attributes increased Lightning/Spell Damage |
|
 (Boots) Skyforth - the best pair of Boots you can use for this build. It grants very high bonus Mana and Stun Threshold (Boots) Skyforth - the best pair of Boots you can use for this build. It grants very high bonus Mana and Stun Threshold |
|
| +(60-120) to maximum Mana 30% increased Movement Speed 25% chance to gain a Power Charge on Critical Strike 6% reduced Mana Reserved You have no Life Regeneration Stun Threshold is based on 500% of your Mana instead of Life |
|
| Boot enchantment: 16% increased Attack and Cast Speed if you've Killed Recently Damage Penetrated 10% of Enemy Elemental Resistances if you haven't Killed Recently |
|
 (Belt) Rare Belt - preferable Crystal Belt as it offers the highest Energy Shield, but you as always want to prioritize Maximum Mana here (Belt) Rare Belt - preferable Crystal Belt as it offers the highest Energy Shield, but you as always want to prioritize Maximum Mana here |
|
| Min. requirements: 80 Energy Shield 60 Maximum Mana 80% Total Elemental Resistances |
|
| Min. requirements: 150 Energy Shield 50 maximum Mana 80% Total Elemental Resistances Optional affixes: Spell Damage Attributes |
|
 (Gloves) Voidbringer - a great pair of Gloves if you feel comfortable playing with less defensive bonuses. It will increase the Mana Cost of your Ball Lightning, greatly increasing your DPS (Gloves) Voidbringer - a great pair of Gloves if you feel comfortable playing with less defensive bonuses. It will increase the Mana Cost of your Ball Lightning, greatly increasing your DPS |
|
| +1 to Level of Socketed Elemental Gems (125-150)% increased Critical Strike Chance for Spells (180-250)% increased Energy Shield (80-40)% increased Mana Cost of Skills +(15-20) Energy Shield gained on Kill |
|
 (Jewel) Thread of Hope - getting this Jewel with a "Large Ring" on it is a must. It will allow you to pick as many as 7 important Passives for this build without connecting them to your Tree (in some cases even 3 or 4 Passives is good enough to use Thread of Hope and here you pretty much double that) (Jewel) Thread of Hope - getting this Jewel with a "Large Ring" on it is a must. It will allow you to pick as many as 7 important Passives for this build without connecting them to your Tree (in some cases even 3 or 4 Passives is good enough to use Thread of Hope and here you pretty much double that) |
|
| Only affects Passives in <size> Ring Passives in Radius can be Allocated without being connected to your tree -(20-10)% to all Elemental Resistances Allocated Passives: Light Eater Heart of Thunder Utmost Intellect Arcane Focus Practical Application Lightning Walker Snowforged (optionally if you need the extra Resistances) |
|
 (Jewel) Healthy Mind - socketed right below Melding will grant you very high bonus Mana (approximately 1,000) (Jewel) Healthy Mind - socketed right below Melding will grant you very high bonus Mana (approximately 1,000) |
|
| (15-20)% increased maximum Mana Increases and Reductions to Life in Radius are Transformed to apply to Mana at 200% of their value |
|
 (Jewel) Rare Jewels - simply get extra Mana and DPS bonuses (Jewel) Rare Jewels - simply get extra Mana and DPS bonuses |
|
| Recommended affixes: increased Maximum Mana increased Spell Damage/Lightning Damage Optional affixes: Maximum Energy Shield |
|
 (Jewel) Large Cluster Jewel - this build should be made with two Large Cluster Jewels. You should aim to get two Scintillating Idea Passives and one Supercharge - which greatly increases your non-crit. damage (Jewel) Large Cluster Jewel - this build should be made with two Large Cluster Jewels. You should aim to get two Scintillating Idea Passives and one Supercharge - which greatly increases your non-crit. damage |
|
| Recommended affixes: 1 Added Passive Skill is Scintillating Idea 1 Added Passive Skill is Supercharge 2 Added Passive Skills are Jewel Sockets Optional affixes: 1 Added Passive Skill is Widespread Destruction 1 Added Passive Skill is Storm Drinker |
|
 (Jewel) Small Cluster Jewel - you should aim to get 4 Small Cluster Jewels which increase your Maximum Mana with one of the two listed Passives (Jewel) Small Cluster Jewel - you should aim to get 4 Small Cluster Jewels which increase your Maximum Mana with one of the two listed Passives |
|
| Recommended Passives: Scintillating Ideas Will Shaper |
|
 (Jewel) Watcher's Eye - it's an excellent pick for this build, that can greatly increase your Mana Regeneration while you are affected by Clarity (level 1 is enough) (Jewel) Watcher's Eye - it's an excellent pick for this build, that can greatly increase your Mana Regeneration while you are affected by Clarity (level 1 is enough) |
|
| Recommended bonuses: Gain (12-18)% of Maximum Mana as Extra Maximum Energy Shield while affected by Clarity Damage Penetrates (10-15)% Lightning Resistance while affected by Wrath (40-60)% increased Lightning Damage while affected by Wrath |
|
|
|
|
| Recharges 1 Charge when you Consume an Ignited corpse Enemies Ignited by you during Flask Effect take 10% increased Damage Recover (1-3)% of Life when you Kill an Enemy during Flask Effect Recover (1-3)% of Mana when you Kill an Enemy during Flask Effect Recover (1-3)% of Energy Shield when you Kill an Enemy during Flask Effect <One Veiled Mod> |
|
 (Flask) Atziri's Promise - grants very high bonus damage, though if your Lightning Resistance is the highest (uncapped one) you could be better off with Wise Oak instead (Flask) Atziri's Promise - grants very high bonus damage, though if your Lightning Resistance is the highest (uncapped one) you could be better off with Wise Oak instead |
|
| +35% to Chaos Resistance 2% of Chaos Damage Leeched as Life during Flask effect Gain (15-20)% of Physical Damage as Extra Chaos Damage during effect Gain (10-15)% of Elemental Damage as Extra Chaos Damage during effect |
|
 (Flask) Dying Sun - increases the number of your Ball Lightning's projectiles, greatly increasing your damage and clear speed (Flask) Dying Sun - increases the number of your Ball Lightning's projectiles, greatly increasing your damage and clear speed |
|
| +50% to Fire Resistance 20% less Fire Damage taken (-10-10)% increased Charges used Skills fire 2 additional Projectiles during Flask Effect (15-25)% increased Area of Effect during Flask Effect |
|
Suggested Rare Flasks:
|
|
   |
LIFE/STARTER VAR.
| (Helmet) Mindspiral - a very cheap Helmet that grants a ton of Mana and Mana Recovery |
|
| (10-15)% increased Cold Damage (10-15)% increased Lightning Damage +(100-120) to maximum Mana Gain (5-10)% of Maximum Mana as Extra Maximum Energy Shield Enemies Cannot Leech Mana From you (5-10)% of Damage taken gained as Mana over 4 seconds when Hit Cannot Leech Mana |
|
 (Weapon) Pledge of Hands - amazing Staff that grants high Spell Damage, Maximum Mana, and the 7th link to your Ball Lightning setup - which actually lets you dish out some sick DPS even with a 5-linked weapon (Weapon) Pledge of Hands - amazing Staff that grants high Spell Damage, Maximum Mana, and the 7th link to your Ball Lightning setup - which actually lets you dish out some sick DPS even with a 5-linked weapon |
|
| +20% Chance to Block Spell Damage while wielding a Staff Socketed Gems are Supported by Level 30 Greater Spell Echo (120-160)% increased Spell Damage 100% increased maximum Mana |
|
| (Amulet) Atziri's Foible - one of the best Amulets even for the end-game version of this build |
|
| (20-30)% increased Mana Regeneration Rate +100 to maximum Mana (16-24)% increased maximum Mana (80-100)% increased Mana Regeneration Rate Items and Gems have 25% reduced Attribute Requirements |
|
| Recommended Anointments: Mana Drinker |
|
 (Ring) Essence Worm - lets you use Wrath Aura with increased effect without having to "pay" the Mana Reservation Cost (Ring) Essence Worm - lets you use Wrath Aura with increased effect without having to "pay" the Mana Reservation Cost |
|
| Has 1 Socket +2 to Level of Socketed Aura Gems Socketed Gems Reserve No Mana 40% increased Mana Reserved |
|
 (Body Armour) Cloak of Defiance - grants a ton of extra Mana, Mana Regeneration, and lets you pick up an additional Passive from refunding Mind over Matter from your Tree (Body Armour) Cloak of Defiance - grants a ton of extra Mana, Mana Regeneration, and lets you pick up an additional Passive from refunding Mind over Matter from your Tree |
|
| (300-400)% increased Evasion and Energy Shield +(100-150) to maximum Mana Regenerate 1% of Mana per second 10% of Damage is taken from Mana before Life Mind Over Matter |
|
 (Jewel) Clear Mind - since you reserve no Mana with Wrath socketed inside Essence Worm, this Jewel grants you amazing bonuses at a very low price (Jewel) Clear Mind - since you reserve no Mana with Wrath socketed inside Essence Worm, this Jewel grants you amazing bonuses at a very low price |
|
| (20-30)% increased Mana Regeneration Rate (40-60)% increased Spell Damage while no Mana is Reserved |
|
 (Jewel) Medium Cluster Jewel - it's recommended to get a Cluster Jewel with Cold Conduction and Inspired Oppression Passives, which will let you Freeze enemies with Lightning Damage and grant a 60% Mana Regeneration Rate. The base has to affect your "non-damaging Ailments" to have those two (Jewel) Medium Cluster Jewel - it's recommended to get a Cluster Jewel with Cold Conduction and Inspired Oppression Passives, which will let you Freeze enemies with Lightning Damage and grant a 60% Mana Regeneration Rate. The base has to affect your "non-damaging Ailments" to have those two |
|
| Recommended affixes: 1 Added Passive Skill is Cold Conduction 1 Added Passive Skill is Inspired Oppression |
|
| (Jewel) Small Cluster Jewel - if you are using a Medium Cluster Jewel, and you have spare Passives, make sure to get a Small one as well with Scintillating Ideas Passive |
|
| Recommended affixes: 1 Added Passive Skill is Scintillating Idea Optional affixes: 1 Added Passive Skill is Openness |
|
 (Jewel) Abyss Jewels - Abyssal Jewels with flat added Mana will be better than regular Jewels, though you can use also those if you don't have an alternative (Jewel) Abyss Jewels - Abyssal Jewels with flat added Mana will be better than regular Jewels, though you can use also those if you don't have an alternative |
|
| Recommended affixes: Maximum Life Maximum Mana Added Lightning Damage to Spells Optional affixes: Damage if you have killed recently |
|
 (Flask) Rumi's Concoction - this Flaks will help you reach very high Chance to Block Attacks and Spells, greatly boosting your defenses (Flask) Rumi's Concoction - this Flaks will help you reach very high Chance to Block Attacks and Spells, greatly boosting your defenses |
|
| +3000 to Armour +(14-20)% Chance to Block Attack Damage during Flask effect +(6-10)% Chance to Block Spell Damage during Flask effect |
|
 (Flask) The Wise Oak - assuming your Lightning Resistance is the highest, this Flask will greatly increase your DPS while being relatively cheap (Flask) The Wise Oak - assuming your Lightning Resistance is the highest, this Flask will greatly increase your DPS while being relatively cheap |
|
| +35% to all Elemental Resistances During Flask Effect, 10% reduced Damage taken of each Element for which your Uncapped Elemental Resistance is lowest During Flask Effect, Damage Penetrates (10-15)% Resistance of each Element for which your Uncapped Elemental Resistance is highest |
|
All of the remaining equipment should be random Rares with the following stat priority:
For the remaining Flasks you should also get:
|
|
|
If you have any other build requests please leave that in the comments below.
Pictures used in this article are the intellectual property of Grinding Gear Games.
