![[3.0]Righteous Fire Chieftain Uber Lab/Atziri - Odealo's Crafty Guide](https://static.odealo.com/upload/images/article/POErighteous-fire-chieftain_59b7fcacf40de_l.jpg)
[3.0]Righteous Fire Chieftain Uber Lab/Atziri - Odealo's Crafty Guide
Extremely powerful and tanky Righteous Fire Chieftain build. Try this Uber Lab and Uber Atziri farmer with enjoyable gameplay mechanicsRighteous Fire
Chieftain build
Updated for Patch 3.5
The Best Crafty Guides by Odealo
Estimated budget: moderately low

| Guide notes |
| December 19, 2018 -Updated for Patch 3.5 |
With the recent Patch 3.0 changes, Life Builds have become extremely popular. This time we are presenting a very tanky, and extremely powerful Righteous Fire Chieftain build. This build requires a lot of Life and Life Regeneration to keep the Righteous Fire up but it deals immense damage even in barely 4-links setup.
For the full list of our Path of Exile builds you can check Odealo's Crafty Guides - Full List
1. Gameplay
The main idea behind this build is to maintain Righteous Fire which causes extremely high damage over time to both monsters and the caster (which is "degeneration damage", and will not proc Cast when Damage Taken spells for example). The most important part of this build is very high Life and Life regeneration, this is why both Kaom's gear pieces will be used. With the Patch 3.2 changes, Chieftain provides even higher Life Regeneration bonuses than before, making it one of the best classes for the RF build.
|
|

2. Build's PROS & CONS
| PROS |
|
| CONS |
|
3. Leveling tips
As most of the points in skill tree are allocated in Life and Fire Damage, we recommend sticking to that during leveling too. The Searing Bond and Flame Totem combination should quickly take you to Act 10. You can also use Firestorm as a "supporting" AoE-damage spell.
Suggested leveling Gem setups:
| Searing Bond Totem setup | |
 |
Searing Bond - your primary damage dealing spell. It plants a totem that casts beams of fire at you and your other Totems damaging enemies. Deals very good damage if positioned well |
 |
Burning Damage Support - this Gem provides the highest DPS increase for Searing Bond |
 |
Controlled Destruction Support - another excellent DPS increase to the Searing Bond |
| Flame Totem setup | |
 |
Flame Totem - will plan a Totem that will be targeted by your Searing Bond totem, as well as deal additional projectile-based fire spell damage |
 |
Faster Casting Support - will increase the rate at which Flame Totem's spell is cast |
 |
Greater Multiple Projectiles Support - great DPS increase, multiplying the number of totem's projectiles |
 |
Fire Penetration Support - same as above. This two are entirely viable options. However, 4th and 5th Gems are not precisely that most essential thing during leveling, so you can use pretty much anything you can get your hands on |
| Firestorm setup | |
 |
Firestorm - decent AoE damage. Will help you clear big packs and also burn your mana in harder battles |
 |
Increased Area of Effect Support - increases the radius of supported spells |
 |
Spell Echo Support - same as above, will also grant extra damage |
Bandits:
We recommend killing all the Bandits for two additional Passive Skill Points
Leveling Skill Trees:
38 Points Skill Tree
Priorities: 1) Warrior's Blood 2) Arsonist 3) Holy Fire
70 Points Skill Tree
Simply fill all the Life Nodes and Jewel sockets in any order
Recommended leveling items:
 Lifesprig - this wands grats decent early-game spell damage as well as +1 level to socketed Spell Gems. We suggest using 2 of this and put two different totem setup in each Lifesprig - this wands grats decent early-game spell damage as well as +1 level to socketed Spell Gems. We suggest using 2 of this and put two different totem setup in each |
|
| (8-12)% increased Spell Damage +1 to Level of Socketed Spell Gems (20-28)% increased Spell Damage (5-8)% increased Cast Speed +(15-20) to maximum Life +(15-20) to maximum Mana Regenerate (6-8) Life over 1 second when you Cast a Spell |
|
 Praxis - great leveling ring for casters. If you plan to use Tabula Rasa and 6-link your totems you will need a good mana/mana regeneration ring like Praxis Praxis - great leveling ring for casters. If you plan to use Tabula Rasa and 6-link your totems you will need a good mana/mana regeneration ring like Praxis |
|
| +(20-25) to maximum Mana +(30-60) to maximum Mana (3-6) Mana Regenerated per second -(8-4) to Mana Cost of Skills 8% of Damage taken gained as Mana over 4 seconds when Hit |
|
 Goldrim - an amazing leveling helmet. Provides enough resistances to make it a viable option all the way to Act 10. Goldrim - an amazing leveling helmet. Provides enough resistances to make it a viable option all the way to Act 10. |
|
| +(30-50) to Evasion Rating 10% increased Rarity of Items found +(30-40)% to all Elemental Resistances Reflects 4 Physical Damage to Melee Attackers Level Requirement reduced by 100 (Hidden) |
|
 Emberwake - increases your fire damage. If you don't want to respec to many points later and stick to the recommended skill trees you might need some extra %Fire damage Emberwake - increases your fire damage. If you don't want to respec to many points later and stick to the recommended skill trees you might need some extra %Fire damage |
|
| +(20-30)% to Fire Resistance (30-40)% increased Fire Damage (5-10)% increased Cast Speed 10% chance to Ignite You can inflict an additional Ignite on an Enemy Ignited Enemies Burn 65% slower |
|
4. Final Skill Tree, Ascendancy Points, and Pantheon
Final Skill Tree:
116 Points Final Skill Tree
116 Points Path of Building(PoB) link
Building your RF Chieftain from at this point is very easy. You should have already picked up all the required DPS nodes so now all that is left is to pick the remaining Life/Life Regeneration Nodes and Jewel sockets.
Ascendancy points:
Preferably in that order:
- Tawhoa, Forest's Strength
- Ramako, Sun's Light
- Ngamahu, Flame's Advance
- Hinekora, Death's Fure
Pantheon:
Major God: Soul of Arakaali 5% reduced Damage taken from Damage Over Time; 10% chance to Avoid Lightning Damage when Hit
Minor God: Soul of Abberath 5% reduced Fire Damage took while moving; Unaffected by Burning Ground
Both of this Gods reduce the Damage over Time done to you by Righteous Fire
5. Final Gems links
| [DPS] Righteous Fire | |
 |
Righteous Fire - your main DPS spell. Simply keep your Life above 1 and try not to die when it's on, and Righteous Fire will deal with all the enemies in its' range |
|
Burning Damage Support - this is the main Support Gem for this setup. Grants the highest Burning Damage out of all Support Gems. It's best to be supplied by the Elder Rare Helmet |
 |
Elemental Focus Support - greatly increases Elemental Damage dealt by supported skills |
 |
Efficacy Support - increases Righteous Fire Spell Damage and Damage over Time |
 |
Increased Area of Effect Support - great Support Gem for leveling and Map farming |
| [MOBILITY & DEF] Shield Charge | |
 |
Shield Charge - your main movement skill |
 |
Faster Attack Support - increases Shield Charge's Attack Speed |
 |
Fortify Support - grants the Fortify buff on melee hits with Shield Charge |
 |
Summon Stone Golem - golem will grant you extra Life Regeneration |
| [AURAS] Vitality & Purity of Fire | |
 |
Purity of Fire - this Aura will grant additional Fire Resistance, as well as raise its' maximum value |
 |
Vitality - this Aura grants high Life Regeneration |
 |
Empower - your auras are very important in this build. That's why it's recommended to link them to the highest Empower Support Gem you can afford |
| [UTILITY] Flammability and Scorching Ray | |
 |
Flammability - our recommended curse, which reduces enemies fire resistance, link it to Blasphemy Support Gem and it will work like an aura, affecting all enemies in Righteous Fire range |
 |
Scorching Ray - used to apply a debuff on enemies which reduces their Fire Resistance |
 |
Faster Casting Support |
|
|
5. Gear Setup
Let's get down to the most exciting part. All the items required for this build shouldn't cost more than 6-10 Exalted Orbs. f that's for some reason above your available budget, you are more than welcome to visit our PoE Currency Marketplace and get the missing PoE Currency. Our recommended gear setup will:
- Provide at least 6,000 Life on a level 70 character
- Cap your Elemental Resistances
- Allow efficient Map farming
|
Stat priorities on items:
|
 (Helmet) Rare Helmet - preferably Elder with increased Elemental Damage and Burning Damage Support Gem granted. It will allow you to use Righteous Fire in the pseudo-5-link setup (Helmet) Rare Helmet - preferably Elder with increased Elemental Damage and Burning Damage Support Gem granted. It will allow you to use Righteous Fire in the pseudo-5-link setup |
|
| Min. requirements: 80 maximum Life 40% Fire Resistance 40% Cold Resistance Life Regenerated per second Optional affixes: Socketed Gems are supported by level 18 Burning Damage |
|
| Helmet enchantment: 40% increased Righteous Fire Damage |
|
 (Body Armour) Kaom's Heart - if you can afford it, buy corrupted one with +1% max resistances, and the highest value of the increased Fire Damage attribute. Buying Legacy Kaom's Heart (which is extremely expensive) will grant even higher maximum Life boost and is the best in slot item for this build (Body Armour) Kaom's Heart - if you can afford it, buy corrupted one with +1% max resistances, and the highest value of the increased Fire Damage attribute. Buying Legacy Kaom's Heart (which is extremely expensive) will grant even higher maximum Life boost and is the best in slot item for this build |
|
| Has no Sockets +500 to maximum Life (20-40)% increased Fire Damage |
|
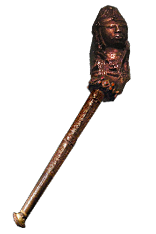 (Weapon Slot) Doryani's Catalyst - one of the best weapons for this build. With 3.4 Changes to Shield Charge's Attack Speed, using Brightbeak is no longer advised (Weapon Slot) Doryani's Catalyst - one of the best weapons for this build. With 3.4 Changes to Shield Charge's Attack Speed, using Brightbeak is no longer advised |
|
| 32% increased Elemental Damage Socketed Gems are Supported by Level 20 Elemental Proliferation Adds (65-85) to (100-160) Physical Damage (11-15)% increased Attack Speed (6-10)% increased Cast Speed (30-40)% increased Global Critical Strike Chance 0.2% of Elemental Damage Leeched as Life (80-100)% increased Elemental Damage |
|
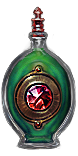
 (Shield) Rise of the Phoenix - extremely important part of the gear. It increased your maximum fire resistance (Shield) Rise of the Phoenix - extremely important part of the gear. It increased your maximum fire resistance |
|
| 3% reduced Movement Speed (Hidden) +8% to all Elemental Resistances (80-100)% increased Armour and Energy Shield 6 Life Regenerated per second +8% to maximum Fire Resistance +(20-25)% to Fire Resistance +25% to Fire Resistance while on Low Life 10% increased Movement Speed when on Low Life Cannot be Ignited while on Low Life |
|
 (Boots) Kaom's Roots - we pick another Kaom's piece for incredible Life bonus. (Boots) Kaom's Roots - we pick another Kaom's piece for incredible Life bonus. |
|
| Has no Sockets Cannot be Knocked Back +(150-200) to maximum Life You cannot be slowed to below the base speed Unwavering Stance |
|
| Boot enchantment: Regenerate 2% of Life and Mana per second if you were Hit Recently |
|
 (Belt) Rare Belt - aim for the highest Maximum Life bonus you can afford (Belt) Rare Belt - aim for the highest Maximum Life bonus you can afford |
|
| Min. requirements: 130 maximum Life 22% Fire Resistance 22% Cold Resistance 22% Lightning Resistance |
|
 (Amulet) Bisco's Collar - we have chosen Bisco's Collar for the slot as this build is more than viable with it equipped (res will be capped anyway with the other recommended gear) For players with lower budget or struggling in mid/high tier maps with it, you can also try the second option with increased Life/Life regen. and Fire damage bonus (Amulet) Bisco's Collar - we have chosen Bisco's Collar for the slot as this build is more than viable with it equipped (res will be capped anyway with the other recommended gear) For players with lower budget or struggling in mid/high tier maps with it, you can also try the second option with increased Life/Life regen. and Fire damage bonus |
|
| (12-20)% increased Rarity of Items found (100-150)% increased Rarity of Items Dropped by Slain Magic Enemies (50-100)% increased Quantity of Items Dropped by Slain Normal Enemies |
|
 (Amulet) Rare Amulet - this is the budget-friendly variant (Amulet) Rare Amulet - this is the budget-friendly variant |
|
| Min. requirements: 80 maximum Life 4 Life Regenerated per second 16% Burning Damage Optional affixes: Elemental Resistances Attributes |
|
 (Rings) Rare Rings - our goal is to get as much extra Resistances and maximum Life as possible (Rings) Rare Rings - our goal is to get as much extra Resistances and maximum Life as possible |
|
| Min. requirements: 90 maximum Life Life Regenerated per second 10% All Elemental Resistances Optional affixes: increased Fire Damage Attributes |
|
 (Gloves) Rare Gloves - we aim for the highest Life obviously. Attack speed is an extra addition to grant you better mobility (Gloves) Rare Gloves - we aim for the highest Life obviously. Attack speed is an extra addition to grant you better mobility |
|
| Min. requirements: 75 maximum Life 33% Cold Resistance 40% Lightning Resistance Optional affixes: Attributes Life Regeneration |
|
| Glove enchantment: Commandment of Frost |
|
 (Jewels) Rare Jewels - with bonus Life and any of the following Damage bonuses (Jewels) Rare Jewels - with bonus Life and any of the following Damage bonuses |
|
| Recommended affixes: increased maximum Life increased Generic/Fire/Area/Elemental/Damage over Time Optional affixes: Attributes |
|
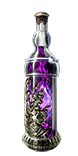 (Flask) Witchfire Brew - grants additional 25-40% damage while under Flask Effect. The extra defensive effects might also come in handy (Flask) Witchfire Brew - grants additional 25-40% damage while under Flask Effect. The extra defensive effects might also come in handy |
|
| Creates a Smoke Cloud on Use 50% increased Charges used (25-40)% increased Damage Over Time during Flask Effect Grants level 21 Despair Curse Aura during Flask Effect |
|
Other suggested Flasks:
|
|
   |
|
|
We will appreciate all suggestions regarding this build. Also if you have a request for a future guide, please leave it in the comments below.
Pictures used in this article are the intellectual property of Grinding Gear Games.
