![[3.0]Frostbolt Miner Saboteur Budget Build - Odealo's Crafty Guide](https://static.odealo.com/upload/images/article/POEfrostbolt-miner_59b524e98158b_l.jpg)
[3.0]Frostbolt Miner Saboteur Budget Build - Odealo's Crafty Guide
Try one of the most enjoyable builds in Path of Exile - The Frostbolt Miner SaboteurFrostbolt Miner Shadow Saboteur
100 Chaos Budget Build
Updated for Patch 3.3
The Best Crafty Guides by Odealo
Estimated budget: low (100 Chaos Orbs)

| Guide notes |
| March 9, 2018 -Updated Skill Trees to Patch 3.2 -Removed Elemental Equilibrium passive June 18, 2018 -Updated for Patch 3.3 |
We are presenting the second guide from the Crafty Guides series. This time we have decided to present a build which is suitable as League Starter, as well as will allow you to start mapping on barely a 100 Chaos Orbs budget.
Remote Miner builds have become very popular recently. They are extremely powerful while being fun at the same time. Our Frostbolt Miner is an excellent build for those who are just starting their Path of Exile adventure and want some viable solution for mapping, while on a low budget. This build, however, with a little bit more investments, is capable of clearing Tier 15 and Tier 16 Maps, as well as the Uber Labyrinth.
For the full list of our Path of Exile builds you can visit the following article: Odealo's Crafty Guides - Full List
1. Gameplay
The main idea of any Miner build is to place your mines and detonate them. With Remote Mine Support Gem, you will put a mine, and the skill will be replaced with Detonate Mines spell. When used, it will detonate your mines and cast the supported skills - in our case, the Frostbolt. The playstyle is different from the other most common builds, which makes it extremely interesting and fun to play. The best part about being a Miner is that you are not affected by Damage Reflect, and Curses do not affect your mines.
|
|

2. Build's PROS & CONS
| PROS |
|
| CONS |
|
3. Leveling tips
The leveling phase with a Miner is a smooth ride. You should prioritize the Increased Elemental Damage and Life passive nodes. We recommend using Frostblades and Fire Trap until level 12 when you can equip Fire Nova Mine. Adequately linked Fire Nova Mines will get you to your final build. You should get the recommended wands, which should give you enough damage, while periodically replacing other gear with higher life/res rares.
Suggested leveling Gem setups:
| Levels 1-12 recommended skills | |
 |
Frost Blades - the best starting skill you can use as the Shadow class. Will get you to level 12 in no time |
 |
Onslaught Support - a decent Support Gem, which will drop from a chest in the Twilight Strand right after you start the game |
 |
Fire Trap - extra damage, will come in handy in boss fights and as extra AoE |
| Fire Nova Mine 3L Setup | |
 |
Fire Nova Mine - a spell you should start using from level 12. You can use it until you swap to the Frostbolt mines. Will benefit from all the mine nodes you are grabbing when leveling. You will be more than fine to 3L them in the suggested unique wands, however, if you can afford Tabula Rasa or decent 4L items, feel free to go for it. |
 |
Minefield Support - great DPS boost to the FNM Gem. You can link it as soon as you get the FNM on level 12 |
 |
Added Lightning Damage Support - will add extra damage to the spell early on, and synergize quite well with Herald of Thunder you can get at level 16 |
 |
(optional)Faster Casting Support - Fire Nova Mine is the mine that relies most on player's casting speed. If you are planning to increase the number of links from your wands, this is a good Support Gem for the setup |
 |
(optional)Fire Penetration Support - another decent Support Gem. We recommend using it if you plan on getting a Tabula Rasa |
Bandits:
We recommend helping Alira for increased Mana regeneration rate and extra Elemental Resistances. You can also kill them all for two extra Passive Points
Leveling Skill Trees:
32 Points Skill Tree
Priorities: 1) Trickery 2) Blood Siphon 3) Coldhearted Calculation, and you can pick the 3 Mine/Trap nodes pretty much in any order
67 Points Skill Tree
We recommend picking up the increased Mine damage nodes first (Volatile Mines, Destructive Apparatus) and pick up the remaining crit/life nodes depending on current gear
Recommended leveling items:
 Lifesprig - grants decent Spell damage and remarkably valuable +1 level to socketed Gems. Can be dual wielded until you reach level Lifesprig - grants decent Spell damage and remarkably valuable +1 level to socketed Gems. Can be dual wielded until you reach level |
|
| (8-12)% increased Spell Damage +1 to Level of Socketed Spell Gems (20-28)% increased Spell Damage (5-8)% increased Cast Speed +(15-20) to maximum Life +(15-20) to maximum Mana Regenerate (6-8) Life over 1 second when you Cast a Spell |
|
 Praxis - excellent leveling ring for casters. Will allow spamming even the most mana consuming spells Praxis - excellent leveling ring for casters. Will allow spamming even the most mana consuming spells |
|
| +(20-25) to maximum Mana +(30-60) to maximum Mana (3-6) Mana Regenerated per second -(8-4) to Mana Cost of Skills 8% of Damage taken gained as Mana over 4 seconds when Hit |
|
 Amplification Rod - an excellent wand for leveling. You should get one at level 36 and link your FNM Gems in it. Usually, I get to level 68 with it and buy my final gear then; however, you can freely try to get some higher Spell damage wands along the way Amplification Rod - an excellent wand for leveling. You should get one at level 36 and link your FNM Gems in it. Usually, I get to level 68 with it and buy my final gear then; however, you can freely try to get some higher Spell damage wands along the way |
|
| (15-19)% increased Spell Damage +1 to Level of Socketed Gems Socketed Gems are Supported by level 1 Increased Area of Effect Socketed Gems are Supported by level 1 Spell Echo Socketed Gems are Supported by Level 1 Controlled Destruction +(10-30) to Intelligence |
|
 Tabula Rasa - it is always a great leveling item if you can afford one. If you plan to 6 links you FNM in it, you might need at least 1 Praxis ring equipped otherwise you will be unable to cast the spell frequently Tabula Rasa - it is always a great leveling item if you can afford one. If you plan to 6 links you FNM in it, you might need at least 1 Praxis ring equipped otherwise you will be unable to cast the spell frequently |
|
| Item has no level requirement and Energy Shield (Hidden) Item has 6 White Sockets and is fully linked (Hidden) |
|
4. Final Skill tree, Ascendancy Points, and Pantheon
Final Skill Tree:
115 Points Final Skill Tree
115 Points Path of Building link
Ascendancy points:
Preferably in that order:
- Bomb Specialist
- Demolitions Specialist
- Explosives Expert
- Pyromaniac
Pantheon:
Major God: Soul of Lunaris - 1% additional Physical Damage Reduction for each nearby Enemy, up to 8%, 1% increased Movement Speed for each nearby Enemy, up to 8%
Minor God: Soul of Gruthkul - 1% additional Physical Damage Reduction for each Hit you've taken Recently up to a maximum of 5%
5. Final Gems links
| [DPS] Remote Frostbolt Mines - 5-6L setup (in Body Armour) |
|
 |
Frostbolt - your main DPS spell. You will not be using it directly though; you are supposed to plant remote mines, that when detonated cast the Frostbolt spell |
 |
Remote Mine Support - a mandatory Support Gem, you won't be able to plant the Frostbolt |
 |
Mine and Trap Damage support - a Support Gem which increases your mine's damage, it's self-explanatory |
|
Minefield - increases the number of remote mines with each cast, as well as maximum numbers of mines that you can have planted |
 |
Increased Critical Strike Support - good DPS boost, since we are using Shadow/Crit. build combination |
 |
Greater Multiple Projectiles Support - increases the number of Frostbolt projectiles cast by each mine. Increases your clear speed and AoE DPS |
| [DEFENSE] CwDT + Immortal Call 4L setup | |
 |
Cast when Damage Taken Support - kept at level 1 will cast supported skills after every 528 damage taken (does it frequently) |
 |
Immortal Call - upgrade it only up to level 3 (to make its' level not higher than 38). Will grant brief Physical Damage immunity |
 |
Increased Duration Support - will increase the duration of both the Immortal Call and Vaal Clarity |
 |
Vaal Clarity - makes your spells cost 0 mana. It should be linked in the entire setup to benefit from the Increased Duration support. However, the spell itself has to be cast manually (it won't work with the CwDT Gem) |
| [UTILITY] Orb of Storms 4L setup | |
 |
Orb of Storms - you can have only one Orb of Storms active at a time, just cast it in middle of groups and near bosses so that I can apply the linked curse and Elemental Equilibrium(EE) effect. Linking it with Chain Support is not required, if you can afford only three sockets at that time, just go for the three blue combination |
 |
Frostbite - your offensive curse, it will reduce monsters cold resistance, while giving you a 10-14% chance to freeze them with your Frostbolts |
 |
Chain Support - helps Orb of Storms greatly with applying the curse and EE effect |
 |
Curse on Hit Support - makes the Orb of Storms apply the Frostbite curse |
| [UTILITY] Detonate Mines and Ice Golem 2L + 2L setup | |
|
Cast when Damage Taken Support - once again keep it at level 1. Link it to the Detonate Mines Gem, which makes a great and cheap combination that will save your life numerous times |
 |
Detonate Mines - link it to CwDT, will detonate your mines whenever you cumulatively get 528 damage, it's a life-saving combination |
 |
Ice Golem - golem grants some extra DPS. Can be linked with either Culling Strike Support (to finish off some troublesome enemies) or a defensive Gem of your choice |
 |
Culling Strike Support - as explained earlier, that's my pick for this socket. However, Golem will do just fine with anything else, you are using it mainly for the extra Crit./DPS |
| [UTILITY] Auras 2L+1L setup | |
 |
Temporal Chains - your main defensive curse, which will work as an aura linked with Blasphemy Support Gem. You won't be able to apply both your curses, but Temporal Chains should slow enemies that want to approach you, while enemies you are targeting from a distance should be affected by the Orb of Storms Frostbite curse. However, a build with Windscream boots would also be viable, and would only require altering elemental resistances values on the links provided in next section |
 |
Blasphemy Support - link it with Temporal chains for the effect described above |
 |
Discipline - amazing defensive aura, grants additional energy shield |
| [MOBILITY] Shield Charge 3L setup | |
 |
Shield Charge - fast and rather easy to use mobility skill. Will also grant extra defenses if linked with the Fortify Support Gem |
 |
Faster Attacks Support - makes your character cast Shield Charge faster - meaning you move faster |
 |
Fortify Support - grants extra damage reduction on melee hits by your shield charge spell, if you are here only for mobility you could skip this Gem. However, it shouldn't be hard to get a 3L on your wand |
|
|
5. Gear Setup
And now let's proceed with the most important and exciting section - gear selection. This time we have decided to make a start/low budget-friendly build, with an estimated cost of 100 Chaos Orbs.
We would also like to invite you to visit our PoE Currency Marketplace where you can buy cheap PoE Currency. You can also trade your items from previous Leagues with other Odealo users for real cash.
We can guarantee that the items listed by us will:
- Cap your resistances
- Give you enough DPS/Life/Energy Shield to start mapping successfully
- Save you at least a couple of hours since all the specific item stats are already listed!
|
Stat priorities on items:
|
 (Helmet) Rare ES helmet - we are aiming for moderately high ES, increased maximum life, Fire and Cold resistances. Triple-res and ES/Life helmets can get very expensive, so we will have to manage with just dual-res helmet (Helmet) Rare ES helmet - we are aiming for moderately high ES, increased maximum life, Fire and Cold resistances. Triple-res and ES/Life helmets can get very expensive, so we will have to manage with just dual-res helmet |
|
| Min. requirements: 120 Energy Shield 55 maximum Life 35% Fire Resistance 35% Cold Resistance Optional affixes: Attributes |
|
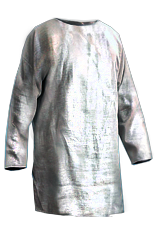
 (Body Armour) Rare ES armour - we go for the highest ES/Life combination. You can either try to get 5/6 links directly, or look for a cheaper option with no sockets/links. You will need to craft the sockets yourself. We are skipping elemental resistances on this piece, however usually they will have some resistances, so you can alter stats on other items later on (Body Armour) Rare ES armour - we go for the highest ES/Life combination. You can either try to get 5/6 links directly, or look for a cheaper option with no sockets/links. You will need to craft the sockets yourself. We are skipping elemental resistances on this piece, however usually they will have some resistances, so you can alter stats on other items later on |
|
| Min. requirements: 520 Energy Shield 70 maximum Life Optional affixes: Elemental Resistances Attributes |
|
|
|
|
| Min. requirements: 120 Energy Shield 65% increased Cold Spell Damage Added 40 Cold Damage to Spells Optional affixes: increased Cast Speed increased Critical Strike Multiplier increased Projectile Speed |
|
 (Shield) Rare ES/Life shield - your main priorities should be high es, high spell damage, and increased critical strike chance for spells. It's would be best if you can find one with open affix to craft additional maximum life (Shield) Rare ES/Life shield - your main priorities should be high es, high spell damage, and increased critical strike chance for spells. It's would be best if you can find one with open affix to craft additional maximum life |
|
| Min. requirements: 120 Energy Shield 60% increased Spell Damage 40% increased Critical Strike Chance for Spells Optional affixes: maximum Life Elemental Resistances Intelligence |
|
 (Boots) Brinerot Whalers - basically decent ES, good damage boost and a very cheap option overall (Boots) Brinerot Whalers - basically decent ES, good damage boost and a very cheap option overall |
|
| +(80-100) to maximum Energy Shield 20% increased Physical Damage 25% increased Movement Speed +(20-30)% to Lightning Resistance (20-40)% increased Projectile Damage Unaffected by Shocked Ground |
|
 (Belt) Rare chain belt - with decent ES, Life and elemental resistances (Belt) Rare chain belt - with decent ES, Life and elemental resistances |
|
| Min. requirements: 70 maximum Life 40 maximum Energy Shield 25% Fire Resistance 25% Cold Resistance 25% Lightning Resistance |
|
 (Amulet) Eye of Chayula - provides you with stun immunity. It is a very important stat for caster classes. This is not the best option, however it is very cheap and still viable for the build (Amulet) Eye of Chayula - provides you with stun immunity. It is a very important stat for caster classes. This is not the best option, however it is very cheap and still viable for the build |
|
| +(10-16) to all Attributes 20% reduced maximum Life 30% increased Rarity of Items found Cannot be Stunned |
|
 Buy Cheap PoE Unique Items Buy Cheap PoE Unique Items |
|
 (Rings) Rare rings with life and elemental resistances - our goal is to get as much elemental resistances and life as possible. Extra mana or mana regeneration shouldn't cost much more so you can try to include this stats in item filters (Rings) Rare rings with life and elemental resistances - our goal is to get as much elemental resistances and life as possible. Extra mana or mana regeneration shouldn't cost much more so you can try to include this stats in item filters |
|
| Min. requirements(1st Ring): 55 maximum Life 33% Fire Resistance 33% Cold Resistance Min. requirements(2nd Ring): 55 maximum Life 33% Fire Resistance 36% Lightning Resistance Optional affixes: maximum Mana increased Mana Regeneration Rate Attributes |
|
 (Gloves) Rare Life/res gloves - we have decided to pick Strength-based gloves so that you can easily craft three red sockets for the CwDT/Immortal Call setup. They will also provide extra maximum Life and resistances at a very good price (Gloves) Rare Life/res gloves - we have decided to pick Strength-based gloves so that you can easily craft three red sockets for the CwDT/Immortal Call setup. They will also provide extra maximum Life and resistances at a very good price |
|
| Min. requirements: 75 maximum Life 33% Cold Resistance 40% Lightning Resistance Optional affixes: maximum Mana Attributes |
|
 (Jewel) Frozen Trail - great DPS boost to your Frostbolt spell. We recommend using at least 2 of those in your setup (as long as you can afford it) (Jewel) Frozen Trail - great DPS boost to your Frostbolt spell. We recommend using at least 2 of those in your setup (as long as you can afford it) |
|
| (7-10)% increased Projectile Damage With at least 40 Intelligence in Radius, Frostbolt Projectiles gain 40% increased Projectile Speed per second With at least 40 Intelligence in Radius, Frostbolt fires 2 additional Projectiles |
|
 (Jewels) Rare jewels - basically Cold damage, Life, ES, cast speed or any other random stat will do (as long as you can afford the extras) (Jewels) Rare jewels - basically Cold damage, Life, ES, cast speed or any other random stat will do (as long as you can afford the extras) |
|
| Recommended affixes: % increased maximum Life % increased maximum Energy Shield % increased Generic/Elemental/Spell/Cold/Projectile Damage Optional affixes: % reduced Mana Cost of Skills % increased Global Critical Strike Chance |
|
 (Flask) Lavianga's Spirit - great utility flask, however it is expensive and can be replaced with random mana flask (Flask) Lavianga's Spirit - great utility flask, however it is expensive and can be replaced with random mana flask |
|
| (30-50)% increased Amount Recovered 100% increased Recovery Speed Your Skills have no Mana Cost during Flask effect |
|
| Buy PoE Currency on Odealo |
|
Other suggested Flasks:
|
|
    |
 (Weapon Slot) Rare spell damage wand - you can freely balance between spell damage/added cold damage to spells values. And you can treat global critical strike multiplier, cast speed or increased projectile speed as extra additional stats
|
|
We hope that you have enjoyed this kind of guide, and we are looking forward to your feedback. We would love to hear your suggestions about which build should we work on next. Let us know in comments if you are more interested in budget builds, or end-game viable ones?
Pictures used in this article are the intellectual property of Grinding Gear Games.
