Werewolf Invoker POE 2 Build
A very strong and dynamic Setup that unlocks the full potential of Werewolf Skills with the Invoker Monk Ascendency!Werewolf
Invoker Build
Updated for Path of Exile 2 Early Access
The Best Crafty Guides by Odealo
| Guide notes |
| December 19 2025 - Created for Early Access Patch 0.4.0 |
| Build Overview | |||
| Tags: [SHAPESHIFT] [CRIT] [ES] [ATTACK] | |||
|
Budget: Defenses: |
|
Boss DPS: AoE: |
|
The new Werewolf form available by using the Talisman Weapon offers very dynamic gameplay. You will have a very fast Attack rate, and most of your Skills have extra mobility, such as dash to closeby Enemies upon attacking with Shred, a slight jump back with Cross Slash, or a long-range jump with Pounce. Additionally, you will be extremely efficient at Freezing or Chilling Enemies, highlighting your mobility even more.
The Werewolf form requires you to use almost every Skill in its arsenal for smooth gameplay, which makes it very engaging, although it can be a bit overwhelming at first. You will start with Lunar Assault, which deals low Damage in a large area in front of you, but has an insane Freeze Buildup modifier, reaching almost 600% More bonus. Once you Freeze an Enemy, you should switch to Shred, which deals a good amount of Damage, but also creates Ice Fragments if you Hit a Frozen Enemy. To ensure all Fragments Hit your main target, pull and instantly detonate them with the Cross Slash. This Skill deals a large amount of Damage, but is limited by a short Cooldown. It will also activate any Mark Effect, which can be applied beforehand with the Pounce. Preferably, you should use Freezing Mark, which makes Enemies more prone to Freeze, and grants you plenty of Extra Cold Damage if you Freeze your Target. If you fight a powerful foe, use the Lunar Blessing and Savage Fury for a massive Damage amplification.
The Werewolf gameplay focuses a lot on Melee combat, so you will need solid defence to survive. Freezing Enemies undoubtedly makes it much easier, but it can't be your only defensive layer. The hybrid Energy Shield and Evasion is a tried and trusted way to improve your survivability. Thanks to the Chaos Inoculation, you will become immune to Chaos Damage and Bleeding. The Invoker Ascendency allows you to quickly Meditate, which quickly refills and overflows your Energy Shield. We also recommend using the Essentia Sanguis Gloves to Leech Energy Shield with your Attacks.
You can also check our other Path of Exile 2 builds right over here Odealo's Crafty Guides - Full List
1. Gameplay
Use Lunar Assault to Clear packs of monsters or Freeze Bosses. Follow up with Shred, and finish with Cross Slash. Try to Meditate and activate the Lunar Blessing just before the Boss encounter starts. Activate the Savage Fury once you apply Freeze to boost your burst even more.
|
|
|
|

2. Build's PROS & CONS
| PROS |
|
| CONS |
|
3. Leveling tips
The Werewolf Skills can be used right from the start. Most of your Damage comes from the Shred Skill, which will level and unlock new Sockets automatically as you progress through the campaign. Remember to update your Weapons, Rings, and Gloves every few levels, as they are very impactful on your overall performance.
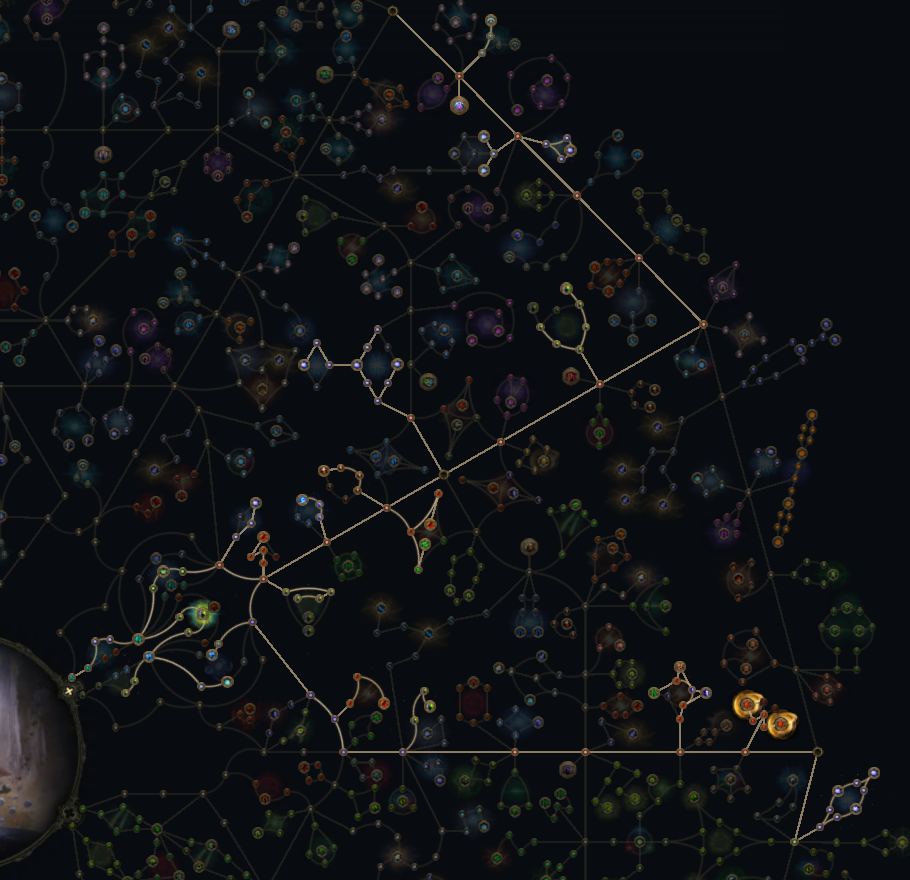
4. Final Skill Tree, Ascendancy Points, and Pantheon
Final Skill Tree:
 |
|
Click on the image to open the Passive Tree preview in a new window, or use the Path of Building (PoB) tool. |
Ascendancy points:
Preferably in this order:
- I am the Blizzard...
- Lead me through Grace
- Faith is a Choice /...and i Shall Rage
- Sunder my Enemies
5. Final Gems links
| [DPS] Shred setup | |
 |
Shred - a basic Werewolf Attack that dashes you to the nearby Enemy, performs a fast combo of attacks, and creates explosive Ice Fragments with each Hit against Frozen Enemy. |
 |
Rapid Attacks II |
 |
Crescendo II |
 |
Close Combat II |
 |
Overextend II |
 |
Elemental Armament II |
| [DPS] Lunar Assault setup | |
 |
Lunar Assault - a swift, arcing Attack that deals a small amount of Damage, but is extremely effective at Freezing Enemies. At first, you might need to use more Damage-related Support Gems, and replace them with Utility Gems later on. |
|
Rapid Attacks II |
 |
Magnified Effect II |
 |
Bhatair's Vengeance / Ice Bite II |
 |
Deep Freeze |
 |
Oisin's Oath / Efficiency II |
| [UTILITY] Lunar Blessing setup Weapon Set 2 |
|
 |
Lunar Blessing - a Warcry-style Buff that grants tons of Extra Cold Damage and Triggers very powerful Moonbeams with each Attack. Bind all your Werewolf Skills to Weapon Set II to avoid issues with Rigwald's Ferocity. |
|
Elemental Armament II |
 |
Concentrated Area |
 |
Prolonged Duration II |
 |
Cooldown Recovery II |
 |
Rigwald's Ferocity |
| [DPS] Cross Slash setup | |
 |
Cross Slash - a quick Attack that can Hit up to 3 times, pulls and explodes all Ice Fragments in one place, and activates secondary Mark effects. Use it to finish up your Shred combo, and to generate Power Charges. |
 |
Cold Exposure |
 |
Culmination II |
 |
Ailith's Chimes |
 |
Blindside |
|
Close Combat II |
| [DPS] Pounce setup | |
 |
Pounce - performs a quick jump towards the targeted area, dealing damage on impact and applying a Mark on the priority target. |
|
Freezing Mark - makes foes more likely to Freeze, and grants you Extra Cold Damage for a few seconds. |
|
Cooldown Recovery II |
 |
Fist of War II |
 |
Mark of Siphoning II |
 |
Mark for Death II |
| [DPS] Herald of Ice setup | |
 |
Herald of Ice - causes Cold explosions when you kill a Frozen Enemy. The explosion converts 100% of Physical Damage to Cold Damage. |
 |
Life Leech III - to make this Support work here, you will need sources of Extra Physical Damage, which won't be converted to Cold Damage. |
|
Magnified Effect II |
|
Elemental Armament II |
 |
Ambush |
 |
Longshot II |
| [UTILITY] Ghost Dance setup | |
 |
Ghost Dance - being Hit recovers a portion of your Energy Shield based on your Evasion Rating. |
 |
Compressed Duration II |
| [UTILITY] Savage Fury setup | |
 |
Savage Fury - gathers Fury by Attacking Enemies. Activate it to gain a massive Damage bonus and the Onslaught effect for a few seconds. |
|
Prolonged Duration II |
| [UTILITY] Other Spirit setups | |
 |
Charge Regulation - grants a massive bonus for your Critical Strike Chance if you can keep up generating Power Charges. |
 |
Eternal Rage - regenerates Rage over time. |
|
|
6. Gear Setup
You can use a few universal Unique Items, but most of them are completely optional and not important for basic functionality. As an Attack-based Build, the quality of your Items greatly affects your performance. You will need high amounts of added Damage, raise the Skill Gem levels, and make your Critical Hits more likely and powerful. Sustaining Mana can be problematic, so you have to invest in Mana Efficiency and Mana Leech. To improve defense, you should focus on high Energy Shield and Evasion Rating, which requires you to get extra Attributes, while also getting enough Elemental Resistances and bonus Item Rarity.
|
Stat priorities on items:
|
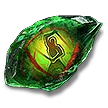
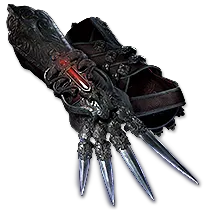
 (Weapon) Rare Talisman - the Physical Damage is preferred to enhance Leech, but you can use any Damage type as long as it achieves high DPS. You will also need a high base Critical Hit Chance and additional Gem Levels. Gained Extra Physical Damage allows you to Leech with fully Converted Skills. (Weapon) Rare Talisman - the Physical Damage is preferred to enhance Leech, but you can use any Damage type as long as it achieves high DPS. You will also need a high base Critical Hit Chance and additional Gem Levels. Gained Extra Physical Damage allows you to Leech with fully Converted Skills. |
|
| Min. requirements: 500+ DPS +5 to Level of all Melee Skills 10%+ Critical Hit Chance Optional affixes: Gain #% of Damage as Extra Physical Damage % increased Critical Damage Bonus Leeches #% of Physical Damage as Life/Mana |
|
 (Amulet) Rare Amulet - here you should get extra Gem Levels, and some bonuses for Critical Hits. It's also a great place to cap your Attributes thanks to Catalysts. You may also get additional Energy Shield here if survival is your main priority. (Amulet) Rare Amulet - here you should get extra Gem Levels, and some bonuses for Critical Hits. It's also a great place to cap your Attributes thanks to Catalysts. You may also get additional Energy Shield here if survival is your main priority. |
|
| Min. requirements: +2 to Level of all Melee Skills Optional affixes: % total Elemental Resistance % increased maximum Energy Shield +# to Attributes % increased Critical Hit Chance % increased Critical Damage Bonus % increased Rarity of Items found |
|
 (Ring) Rare Ring - the Rings are a very important source of additional Damage for your Attacks, but you will also need a bit of Leech and Resistances or Attributes. (Ring) Rare Ring - the Rings are a very important source of additional Damage for your Attacks, but you will also need a bit of Leech and Resistances or Attributes. |
|
| Min. requirements: Adds 50+ Lightning/Cold/Physical/Fire Damage to Attacks +40% total Elemental Resistance Optional affixes: % increased Rarity of Items found +# to Attributes Leeches #% of Physical Damage as Life/Mana |
|
 (Belt) Rare Belt - a rare Belt is a great piece to get tons of Elemental Resistances, allowing you to get better modifiers elsewhere. Try to get all 3 Charm Slots unlocked. (Belt) Rare Belt - a rare Belt is a great piece to get tons of Elemental Resistances, allowing you to get better modifiers elsewhere. Try to get all 3 Charm Slots unlocked. |
|
| Min. requirements: +80% total Elemental Resistance Optional affixes: +# Charm slots +# to Strength |
|
 (Belt) Ingenuity - if you have a pair of very good Rings, it might be a good idea to boost their effect with the Ingenuity Belt instead. Usually, it grants more Damage, but requires you to get more Resistances elsewhere. (Belt) Ingenuity - if you have a pair of very good Rings, it might be a good idea to boost their effect with the Ingenuity Belt instead. Usually, it grants more Damage, but requires you to get more Resistances elsewhere. |
|
| Has (1—3) Charm Slot 20% of Flask Recovery applied Instantly (-20—20)% reduced Charm Charges gained (-10—10)% reduced Charm Charges used (20—30)% increased bonuses gained from left Equipped Ring (20—30)% increased bonuses gained from right Equipped Ring |
|
 (Helmet) Rare Helmet - your Helmet should grant you tons of Energy Shield, but it raises the Intelligence requirements considerably. It can also grant you plenty of Critical Hit Chance and Elemental Resistances. (Helmet) Rare Helmet - your Helmet should grant you tons of Energy Shield, but it raises the Intelligence requirements considerably. It can also grant you plenty of Critical Hit Chance and Elemental Resistances. |
|
| Min. requirements: +300 to Energy Shield +30% increased Critical Hit Chance +40% total Elemental Resistance Optional affixes: % increased Rarity of Items found +# to Attributes |
|
 (Body Armour) Rare Armour - use a hybrid Energy Shield and Evasion Armour. It greatly boosts your defense, but also provides tons of Spirit thanks to the Invoker Ascendency. (Body Armour) Rare Armour - use a hybrid Energy Shield and Evasion Armour. It greatly boosts your defense, but also provides tons of Spirit thanks to the Invoker Ascendency. |
|
| Min. requirements: +400 to Energy Shield +1000 to Evasion Rating +40% total Elemental Resistance Optional affixes: +# to Attributes % faster start of Energy Shield Recharge |
|
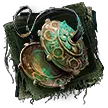
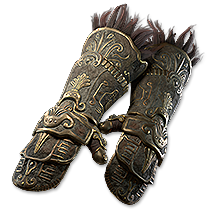
 (Gloves) Essentia Sanguis - with those Gloves, you are able to passively recover Energy Shield during combat, even if you get Hit often. The other bonuses on this Item are somewhat useful, but not great. (Gloves) Essentia Sanguis - with those Gloves, you are able to passively recover Energy Shield during combat, even if you get Hit often. The other bonuses on this Item are somewhat useful, but not great. |
|
| (50—70)% increased Evasion and Energy Shield Adds 1 to (30—50) Lightning damage to Attacks +(15—25) to Intelligence +(25—35)% to Lightning Resistance Life Leech is Converted to Energy Shield Leech |
|
|
|
|
| Optional affixes: Adds # Lightning/Cold/Physical/Fire Damage to Attacks +# increased Attack Speed +# to Level of all Melee Skills +#% increased Critical Damage Bonus #% of Leech is Instant % increased Rarity of Items found +# to Attributes |
|
 (Boots) Rare Boots - on the other hand, Boots serve a single purpose of improving your mobility. You should seek high Movement Speed, decent defenses, and Desecrate modifiers that reduce the Slow penalties on you. (Boots) Rare Boots - on the other hand, Boots serve a single purpose of improving your mobility. You should seek high Movement Speed, decent defenses, and Desecrate modifiers that reduce the Slow penalties on you. |
|
| Min. requirements: +100 to Energy Shield 35% increased Movement Speed +40% total Elemental Resistance Optional affixes: % increased Rarity of Items found % reduced Slowing Potency of Debuffs on You % reduced Movement Speed Penalty from using Skills while moving +# to Attributes |
|
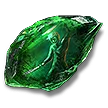
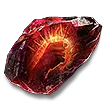
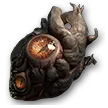 (Jewel) Heart of the Well - this Jewel can provide plenty of Damage, but most notably, it can make a portion of your Leech Instant. (Jewel) Heart of the Well - this Jewel can provide plenty of Damage, but most notably, it can make a portion of your Leech Instant. |
|
| Recommended modifiers: Gain (9–15)% of Damage as Extra Cold/Fire/Lightning Damage (6-12)% increased Critical Damage Bonus 10% of Leech is Instant |
|
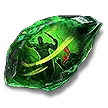
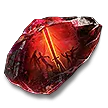
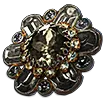 (Jewel) Against the Darkness - another universally powerful Jewel, this one can grant you tons of Extra Elemental Damage, ease the gearing process with additional Resistances, or tune down Ignites on you. (Jewel) Against the Darkness - another universally powerful Jewel, this one can grant you tons of Extra Elemental Damage, ease the gearing process with additional Resistances, or tune down Ignites on you. |
|
| Recommended modifiers: Notable Passive Skills in Radius also grant Gain (2—4)% of Damage as Extra Cold/Fire/Lightning Damage Small Passive Skills in Radius also grant (4—6)% reduced Ignite Duration on you Small Passive Skills in Radius also grant +(2—4)% to Elemental Resistance |
|
 (Jewel) Rare Jewel - a Rare Jewel can greatly improve your Mana sustain with a simple Mana on Kill modifier. It should also boost your Energy Shield and enhance your Critical Strikes. (Jewel) Rare Jewel - a Rare Jewel can greatly improve your Mana sustain with a simple Mana on Kill modifier. It should also boost your Energy Shield and enhance your Critical Strikes. |
|
| Min. requirements: Recover #% of maximum Mana on Kill Optional affixes: % increased Critical Hit Chance % increased Critical Damage Bonus % increased Area of Effect % increased maximum Energy Shield |
|
 (Charm) Nascent Hope - you will need a Thawing Charm anyway, so you might just as well use the Nascent Hope to start Recharging Energy Shield upon activation. (Charm) Nascent Hope - you will need a Thawing Charm anyway, so you might just as well use the Nascent Hope to start Recharging Energy Shield upon activation. |
|
| Grants Immunity to Freeze Used when you become Frozen (20—25)% Chance to gain a Charge when you kill an enemy Energy Shield Recharge starts on use |
|
 (Charm) Breath of the Mountains - this Charm passively generates Power Charges for you, which is useful for Charge Regulation Skill. (Charm) Breath of the Mountains - this Charm passively generates Power Charges for you, which is useful for Charge Regulation Skill. |
|
| +25% to Cold Resistance Used when you take Cold damage from a Hit (10—15)% reduced Charges per use Grants a Power Charge on use |
|
 (Flask) Lavianga's Spirits - a fully automatic Flask that provides constant Mana Regeneration. It is not as bursty as regular Flask, but saves you plenty of effort overall. (Flask) Lavianga's Spirits - a fully automatic Flask that provides constant Mana Regeneration. It is not as bursty as regular Flask, but saves you plenty of effort overall. |
|
| This Flask cannot be Used but applies its Effect constantly (70—80)% reduced Amount Recovered |
 (Gloves) Rare Gloves - the Rare Gloves offer a lot of opportunities to enhance your Damage through flat Damage for Attacks, Gem Levels, Crit Damage Bonus, and Attack Speed. They can also provide lacking Energy Shield, Resistances, or Leech. Obviously, pairing it all at once will be expensive, so pick according to your budget.
 |
|
If you have any other build requests please leave that in the comments below. We are always open to suggestions and constructive feedback.
Pictures used in this article are the intellectual property of Grinding Gear Games.