Werebear Form Max-Life Druid Build for Last Epoch
Complete Guide on Werebear Druid Build that takes advantage of the Bear FormWerebear
Druid/Primalist Build
Updated for Patch 0.8.5f
| Build notes: |
| August 6, 2022 -Build created |
Build Overview
One of Druid's Key abilities and its Mastry Skills is Warebear Form, it transmogrifies your character into a bear. As a bear, you will have an access to four new Skills, and thanks to the Warebear's and Druid's passives, you will also be much stronger while transformed. One of your bear skills, Maul, will be enhanced by Fury Leap - it will add the entire skill tree of this mobility skill onto Maul, allowing for some overpowered combinations. In a similar fashion, the Upheaval Skill will be connected as well. Your character should be low on Health at all times due to the Exsanguinous Body Armour and Last Steps of the Living Boots, it will enable some of the passives and Storm Crows. Storm Crow's entire purpose is to heal you. It's a very mobile build that's also incredibly tanky due to the many defensive layers present here.
You can also view the full build on the Last Epoch planner here: Werebear Druid Build
For the defenses, this build utilizes:
- Insane Ward Regeneration Rate from equipment
- Massive Healing via three Storm Cors at all times
- Werebear's form Health bonus
You can also check our other Last Epoch builds and character guides
 Pros Pros |
 Cons Cons |
| calm playstyle as you're primarily using only two Skills |
not very high DPS based on the investment needed |
| Low Health Berseker bonuses for more Health and Less Damage Taken |
it requires two Unique Items to properly function |
Gameplay video
coming soon
Passive Skill Trees
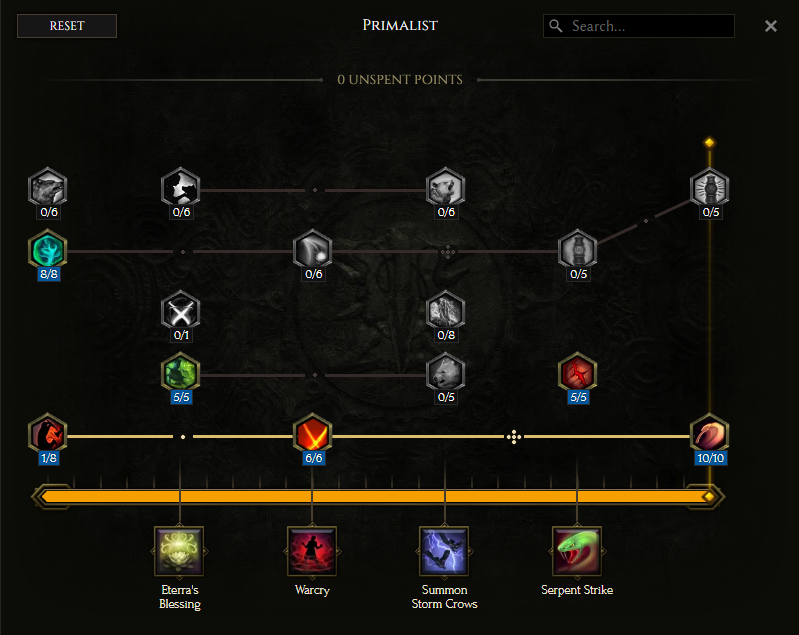 Primalist Skill Tree (35 Points) |
|
Notable Passives:
In this setup, we recommend seeking Melee Physical Damage and some defenses, not much room for any significant changes. There are a lot of passives influencing your Minions or Spells which you don't really should pay any attention to. |
|
|
|
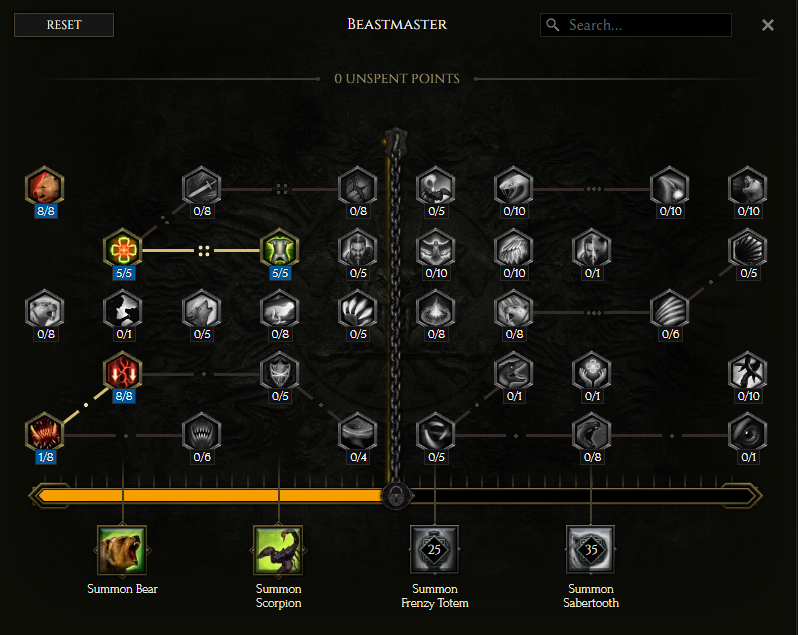
Notable Passives:
There are again a lot of useless or inefficient passives that you should avoid, seek the ones increasing your own performance. We've allocated a significant amount of points to defensives and reduced the received damage, especially the Aspect of the Boar. |
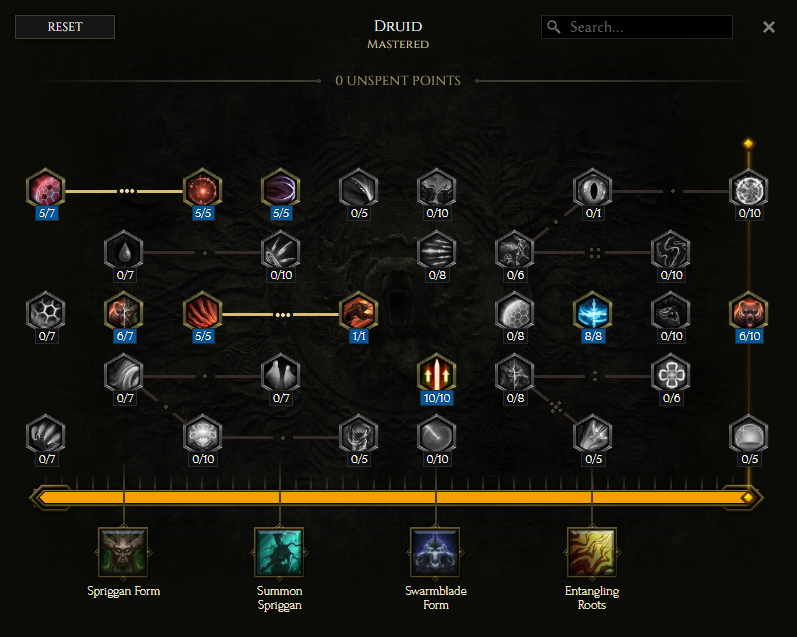 Druid Tree (51 Points) |
|
Notable Passives:
This Tree is where you will be able to find the most advantageous passives, look for ones increasing your performance while Transformed, such as Focused Wrath and Rancour. Endurance, Health, and Health Regeneration will be important, it increases your survivability, especially in this setup where you will be low on Health at all times. |
Skills
Note: Left-Clicking on any of the ability trees below will open the full-size version in a new window.
|
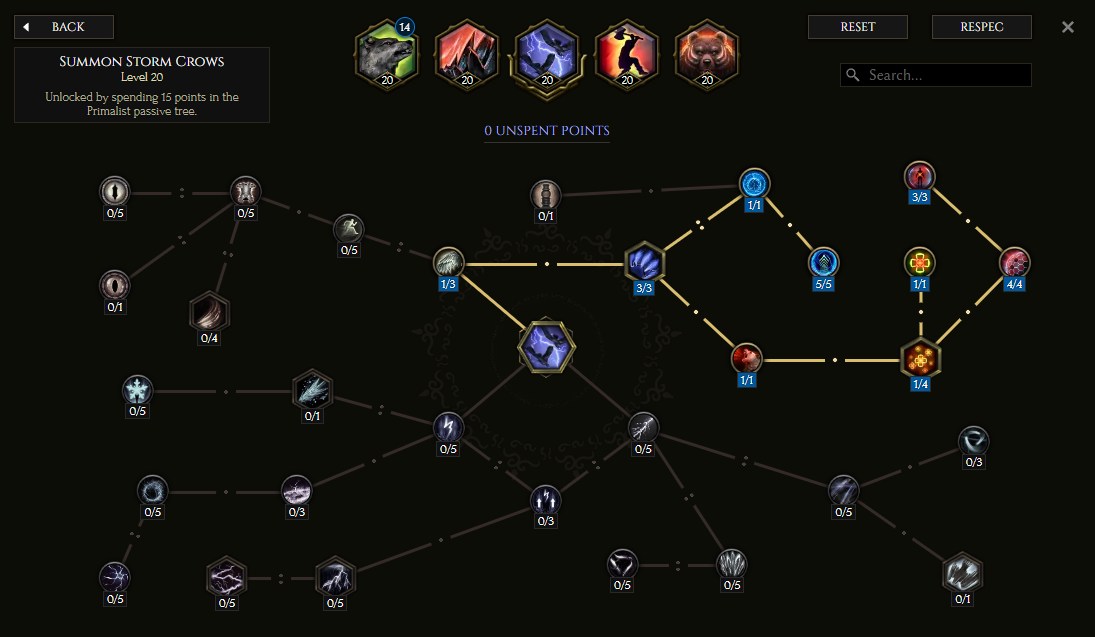
Summon Storm Crows - The upper right branch enables the utility and healing aspects of Storm Crows. Ornithology is very good, it will result in 30 bonus Intelligence. The most important passives are at the end of the branch - Goodberries with Winds of Restoration and Silverberries are the nodes granting you increased Health and Ward regeneration. It automates the Skill so you won't have to press anything, the Crows will Heal you and grant you Ward once every 10 seconds. |
 |
|
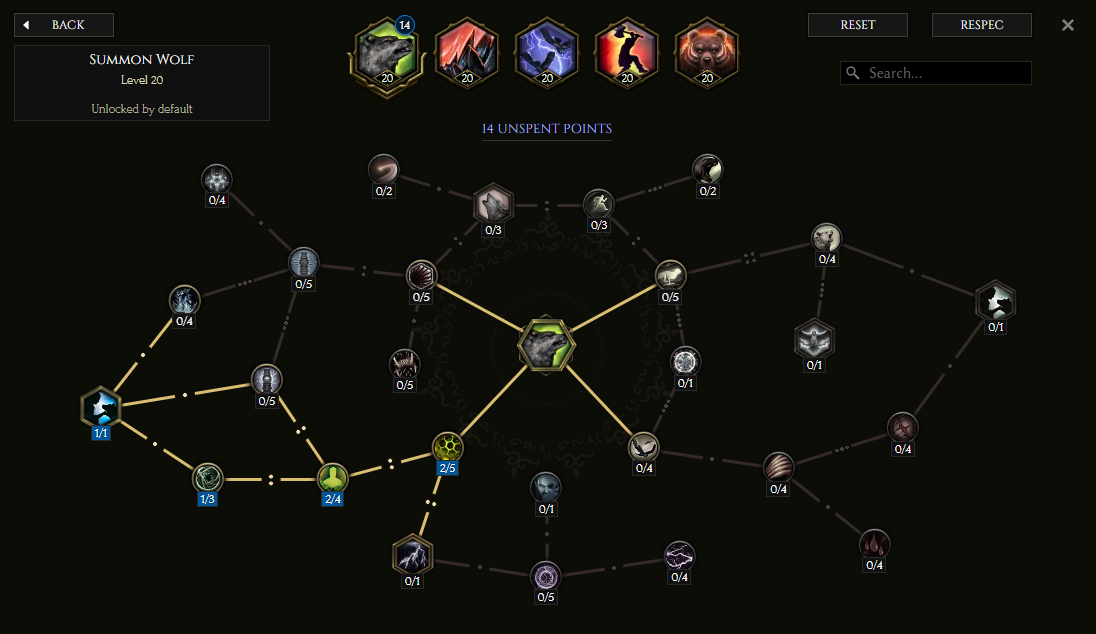
Summon Wolf - This skill has a singular goal, and it is to reach Pack Hunters passive. You won't use this skill, it's just there to increase the number of your Crows by one. |
 |
|
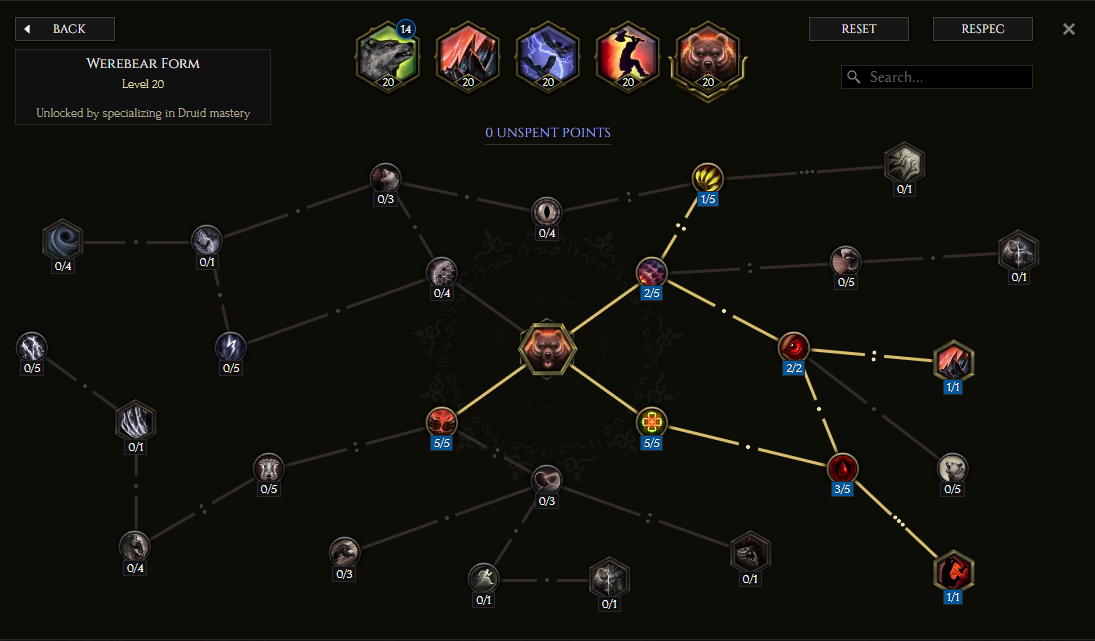
Werebear Form - This Skill transforms you into a bear granting you new abilities and Rage instead of Mana. You should use only Maul and Rampage, these two are the best Skills. Pick Rip and Tear to increase the damage of these two Skills. Invigoration helps with Health and Rage sustain, you will get 10 of both with each Hit. Territorial increases the Area of your Maul and Roar. The most important are Tremor Slam and Skull Crusher. These Skills will make you perform Upheaval after each Maul, and upgrade the Maul Skill by the passives from Fury Leap. The remaining points should be spent in Pummel and Bash for a better Rage sustain. |
 |
|
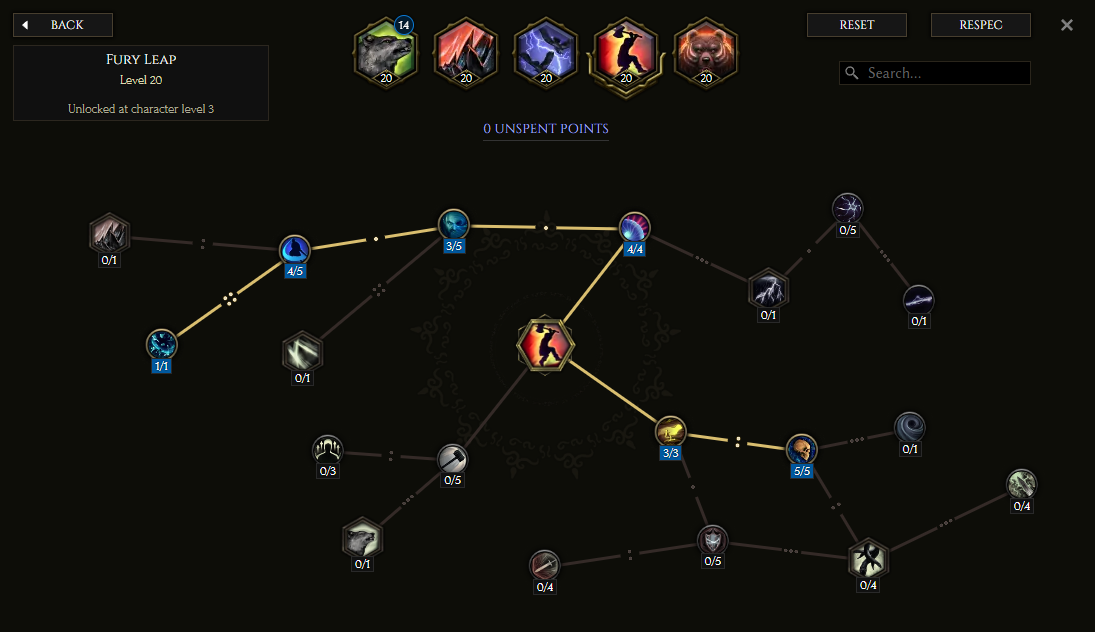
Fury Leap - It's another Skill that you won't ever have to use, it will be an extra source of damage for Maul. Because of that, pick only the damaging passives such as Crater for a bigger Area, Savage Impact for increased Damage, Brutal Impact for Critical Strike Multiplier, Unshacked to always Strike Critically, Panther Strike for more Damage, and Ambush Predator for increased damage against enemies on Full Life. |
 |
|
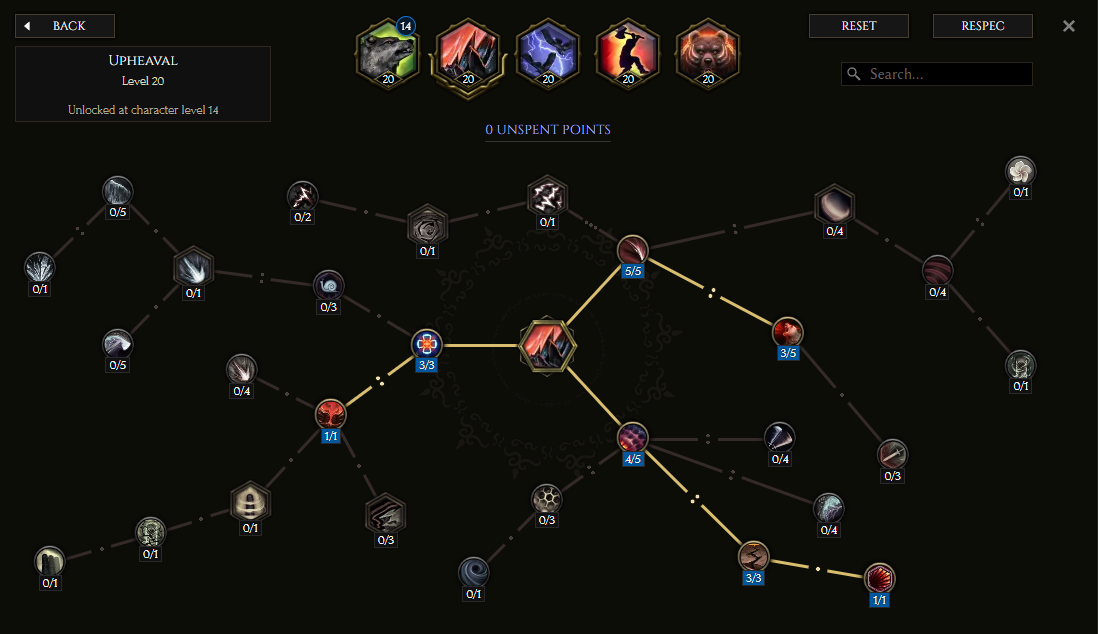
Upheaval - This Skill will be activated after every Maul, so the most important objective is to reduce its Mana Cost. Inexhaustible reduces Mana cost to 4 and grants Armour Shred Chance. Mantle Strike grants more Critical Strike Chance and disables enemies' chance to Dodge this Attack. The rest of the points should be spent to increase the Damage and Area even further. |
 |


Items
|
Stat priority: It's a defensive build that requires two Unique Items to work properly, these are Exsanguinous and Last Steps of the Living. With these items, your Health will be consistently drained keeping you at very low Health, but your Ward should be plentiful. Seek the default Health, Armor, and Resistance for increased survivability. Health will be by far the most important statistic. For Damage get Melee Physical Attack Damage with Critical Strike Multiplier, it will be easily achievable on a Two-Handed Axe. Remember to not let your Health go above third of its maximum value - an Affix for the Potions Health converted to Ward on a Belt is a good idea.
|
||||||
|
Recommended Unique Items:
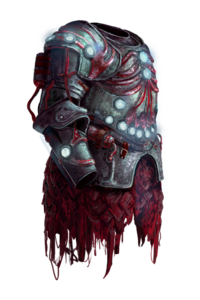
Exsanguinous - With this Body Armour you will sacrifice 20% of the current Health per second to gain 20% of your current missing Health as Ward. It makes you immune to Bleed and increases Attack and Movement Speed if you've used a Potion recently.
Last Steps of the Living - These Boots work similarly to the aforementioned Body Armour when it comes to draining Health to get Ward. The bonuses to Movement Speed and Ward Retention are great, but the downside is the Chill effect applied every 3 seconds.
Boulderfists - Boulderfists prevent you from Leeching Health, it would normally be a downside but in this build, you don't really want to regain too much Health, you need to stay at Low Life at all times. Health, Melee Stun Duration, and Melee Stun Chance are good too.
|
||||||
|
Idols: Health is what you're looking for, it can be found on all Idols no matter their size. Large Nobad Idols could get you a lot of Elemental Resistance While Transformed, the value of such affix is high since it's conditional, but you should be transformed at all times anyway. |
||||||
|
Recommended Blessings:
|


|
END NOTE This is the beta version of our Werebear Druid Build for Last Epoch. Obviously, as the game gets new content updates, we will be updating this guide regularly, though it may be impossible to be done after each Patch. |
Pictures used in this article are the intellectual property of Eleventh Hour Games