Twister Amazon POE 2 Build
Very fast and powerful Setup for the Amazon that combines Twisters and Whirling Slash for amazing resultsTwister
Amazon Build
Updated for Path of Exile 2 Early Access
The Best Crafty Guides by Odealo
| Guide notes |
| May 27 2026 - Updated the Build in preparation for Patch 0.5.0 |
| Build Overview | |||
| Tags: [ATTACK] [ELEMENTAL] [HYBRID] [SPEAR] | |||
|
Budget: Defenses: |
|
Boss DPS: AoE: |
|
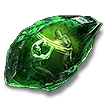
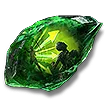
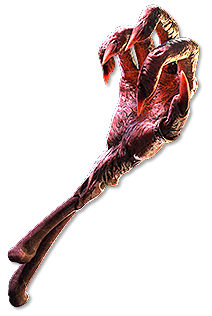
The Twister is a ranged Spear Attack that creates multiple tornadoes that rapidly move around in random directions. It is seemingly a very simple Skill, but it has many synergistic features that make it very powerful. Multiple Projectiles can damage the same target with short intervals, so increasing their Duration, Projectile Speed, and even Area of Effect, can massively boost your chances to Hit multiple times with a single attack, as well as improve your Clear Speed and AoE Coverage.
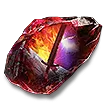
The Whirling Slash is a Melee Spear Attack that creates a stationary Whirlwind. By casting this Skill again, you will slightly move the Whirlwind in the specified direction and add a Stage. It also absorbs nearby Elemental Ground effects, even those created by your Companions with the Trail of Ice modifier. You can use Twister to consume the Whirlwind, gaining a lot of Damage, even more so if you absorbed an Element.
Lastly, you can use Barrage and Salvo Support to add additional Repeats, which will also be empowered by consumed Whirlwind. They both are limited by a short Cooldown, giving you enough time to build up the Whirlwinds between each use. The Barrage also consumes Frenzy Charges to cause more repeats. Unused Frenzy Charges will also passively improve your Attack Speed via Charge Regulation.
You will use two Weapon Sets. One focused on Attack Speed to build up Whirlwinds and quickly move around, while the second Set focuses on Damage and Critical Strikes. As Amazon, you will gain a lot of extra Critical Strike Chance via Accuracy Rating, which can also be used to improve your Attack Speed or add extra Physical Damage to your Weapon. Thanks to Essentia Sanguis Gloves, you can recover Energy Shield instead, which will be your main form of defense. The Twister gains lots of Extra Elemental Damage, but does not convert it, so you can easily rely on Leech to sustain your Mana.
You can also check our other Path of Exile 2 builds right over here Odealo's Crafty Guides - Full List
1. Gameplay
Use Whirling Slash to move around, create Whirlwind, and absorb Elemental Ground effects. Use Twister at close range to deal Damage once Whirlwind is ready. Against Bosses, use Barrage and wait for all Salvo charges. Use Sniper's Mark to generate Frenzy Charges in the meantime.
|
|
|
|

2. Build's PROS & CONS
| PROS |
|
| CONS |
|
3. Leveling tips
The Twister Combo is one of the very first Skills available for the Spear. You can effectively use it from the very beginning. To generate Elemental Ground, you should use Wake of Destruction Boots. On the Passive Tree, prioritise generic Attack Damage bonuses instead of Critical Strikes. Duration and Projectile Speed are still extremely important; do not skip them early.
4. Final Skill Tree, Ascendancy Points, and Pantheon
Final Skill Tree:
 |
|
Click on the image to open the Passive Tree preview in a new window, or use the Path of Building (PoB) tool. |
Ascendancy points:
Preferably in this order:
- Predatory Instinct
- Critical Strike
- Mystic Harvest
- Penetrate/Elemental Surge
5. Final Gems links
| [DPS] Twister setup Weapon Set 2 |
|
 |
Twister - creates damaging tornadoes. Consumes Whirlwind or Elemental Ground effects to gain more Damage. |
 |
Salvo |
 |
Projectile Acceleration III |
 |
Prolonged Duration II |
 |
Blindside |
 |
Overextend - you can also use Deliberation if your Critical Strike Chance is too low. |
| [UTILITY] Whirling Slash setup Weapon Set 1 |
|
 |
Whirling Slash - creates a Whirlwind while also propelling you in the targeted direction. Use it to move around and fuel up the Twisters. |
 |
Rapid Attacks III |
 |
Rage III |
 |
Rigwald's Ferocity |
 |
Heightened Accuracy II |
 |
Knockback |
| [UTILITY] Barrage setup | |
 |
Barrage - adds additional Repeats for your next attack. Consumes Frenzy Charges to grant more repeats, but it's effective even without them. |
 |
Heightened Charges |
 |
Cooldown Recovery II |
 |
Rapid Casting II |
 |
Perpetual Charge |
| [UTILITY] Sniper's Mark setup | |
 |
Sniper's Mark - generates Frenzy Charges against Bosses, and slightly increases your damage by Breaking Armour. |
 |
Charge Profusion II |
 |
Mark for Death |
|
Cooldown Recovery II |
| [UTILITY] Companion setup Weapon Set 1 |
|
 |
Companion - Tame a Beast that has one of the Trail modifiers, ideally Trail of Ice. You only need this Companion while creating Whirlwind. |
 |
Brutus' Brain |
 |
Blind II |
 |
Maim |
| [UTILITY] Charge Regulation setup Weapon Set 1 and 2 |
|
 |
Charge Regulation - grants you Attack Speed while you have Frenzy Charge, or Critical Chance when you have Power Charge. You will want both bonuses on each Set. |
 |
Uhtred's Exodus |
| [UTILITY] Combat Frenzy setup Weapon Set 2 |
|
 |
Combat Frenzy - Passively generates Frenzy Charges for you if you have enough Cold Damage to reliably Freeze enemies. |
|
Charge Profusion II |
| [UTILITY] Herald of Ice setup Weapon Set 2 |
|
 |
Herald of Ice - shattering an Enemy causes icy explosions that deal Attack Damage, improving your Clear Speed considerably. |
 |
Overreach |
 |
Elemental Armament II |
 |
Elemental Focus |
 |
Longshot II |
 |
Ambush |
| [UTILITY] Cast on Critical setup Weapon Set 2 |
|
 |
Cast on Critical - dealing Critical Strikes builds up Energy used to cast several utility Spells automatically. |
 |
Profane Ritual - consumes Corpses to grant you Power Charges. It won't work during most Boss fights. |
 |
Elemental Weakness - lowers the Enemy's Elemental Resistances. It requires Gem Level 18 to affect the hardest Bosses. |
 |
Frost Bomb - inflicts Elemental Exposure. Similarly, you will need 18 Gem Levels to work against Pinnacles. |
 |
Flame Wall - adds a bit of Fire Damage to all your Projectiles passing by it. Extra Gem Levels are not worth the Intelligence requirements. |
 |
Boundless Energy II |
|
|
6. Gear Setup
There are no mandatory Unique Items for functionality, but there are plenty of options you can use to gain a lot of Damage or Utility. The most impactful is Essentia Sanguis - with those Gloves, you will be able to Leech Energy Shield. For Damage you will want lots of Added Damage, Critical Strikes, and Gem Levels. You will get a bit of Attack Speed from Accuracy Rating, but it is not very impactful, and shouldn't be included on your Gear if you still have more important Affixes to get, such as Resistances or Rarity. For defense, you will want lots of Energy Shield and a bit of Evasion. A bit of maximum Life can also be useful, but it is not mandatory.
|
Stat priorities on items:
|
 (Weapon) Rare Weapon - aim for high Critical Hit Chance and DPS. Thanks to Amazon Ascendency, you can treat Accuracy Rating as Physical DPS, but its usefulness depends on the market. Gem Levels are also very good here. (Weapon) Rare Weapon - aim for high Critical Hit Chance and DPS. Thanks to Amazon Ascendency, you can treat Accuracy Rating as Physical DPS, but its usefulness depends on the market. Gem Levels are also very good here. |
|
| Min. requirements: 300+ DPS 10% Critical Hit Chance Optional affixes: +# to Level of all Projectile Skills % to Critical Damage Bonus +# to Accuracy Rating |
|
 (Weapon) Skysliver - a Unique Spear with low Damage, but very fast Attack Speed. You can speed it up even more with Corruption or Rune Sockets. (Weapon) Skysliver - a Unique Spear with low Damage, but very fast Attack Speed. You can speed it up even more with Corruption or Rune Sockets. |
|
| No Physical Damage Adds 1 to (80–120) Lightning Damage (15–30)% increased Attack Speed (50–100)% increased chance to Shock Rolls only the minimum or maximum Damage value for each Damage Type |
|
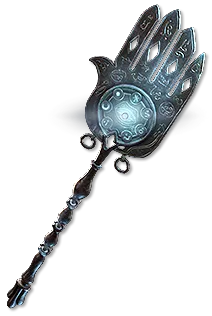
 (Offhand) Sacred Flame - grants a lot of Extra Fire Damage, and causes Enemies to Resist Damage with their Lowest Resistance, which can be useful against some Bosses. (Offhand) Sacred Flame - grants a lot of Extra Fire Damage, and causes Enemies to Resist Damage with their Lowest Resistance, which can be useful against some Bosses. |
|
| Grants Skill: Level # Purity of Fire Gain (40–60)% of Damage as Extra Fire Damage Allies in your Presence Gain (20–30)% of Damage as Extra Fire Damage Allies in your Presence Regenerate (2–3)% of their Maximum Life per second Enemies in your Presence Resist Elemental Damage based on their Lowest Resistance |
|
 (Offhand) Guiding Palm of the Eye - a much cheaper Sceptre that offers accordingly lower amount of Damage. Remember about the Purity Skill while capping your Resistances - you won't have this Buff while using Whirlwind Slash, which is most of the time. (Offhand) Guiding Palm of the Eye - a much cheaper Sceptre that offers accordingly lower amount of Damage. Remember about the Purity Skill while capping your Resistances - you won't have this Buff while using Whirlwind Slash, which is most of the time. |
|
| Grants Skill: Level # Purity of Ice Gain 25% of Damage as Extra Cold Damage Allies in your Presence deal (15–23) to (28–35) added Attack Cold Damage 50% of your Base Life Regeneration is granted to Allies in your Presence +(20–30) to Intelligence 25% increased Light Radius Grants effect of Guided Freezing Shrine |
|
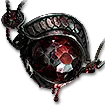 (Amulet) Yoke of Suffering - you will easily apply all Elemental Ailments, greatly increasing the Damage taken by Enemies. Anoint the Subterfuge Mask Notable for defense, or Stormcharged for offense. (Amulet) Yoke of Suffering - you will easily apply all Elemental Ailments, greatly increasing the Damage taken by Enemies. Anoint the Subterfuge Mask Notable for defense, or Stormcharged for offense. |
|
| +(30–40) to maximum Life +(10–15)% to all Elemental Resistances (15–30)% increased Elemental Damage Enemies take (15–20)% increased Damage for each Elemental Ailment type among your Ailments on them (30–40)% reduced Duration of Ignite, Shock and Chill on Enemies |
|
 (Ring) Rare Ring - your Rings can add tons of Elemental Damage to your Attacks, but you will also need a bit of Resistance and Leech modifiers for both Life and Mana. (Ring) Rare Ring - your Rings can add tons of Elemental Damage to your Attacks, but you will also need a bit of Resistance and Leech modifiers for both Life and Mana. |
|
| Min. requirements: Adds 30 Elemental Damage to Attacks Leech 5% of Physical Attack Damage as Mana Leech 5% of Physical Attack Damage as Life +40% total Resistance Optional affixes: +# to maximum Life Attributes Accuracy Rating |
|
 (Belt) Rare Belt - you will need a lot of Resistances or Attributes; it is a great piece to get lots of them. Life is also useful to have here. (Belt) Rare Belt - you will need a lot of Resistances or Attributes; it is a great piece to get lots of them. Life is also useful to have here. |
|
| Min. requirements: +80% total Elemental Resistance +30 to Strength Optional affixes: +# Charm slots +# to maximum Life |
|
 (Helmet) Rare Helmet - is a great source of Energy Shield. Thanks to the Subterfuge Mask Notable, it can also grant plenty of Evasion. It should also boost your Critical Hit Chance. (Helmet) Rare Helmet - is a great source of Energy Shield. Thanks to the Subterfuge Mask Notable, it can also grant plenty of Evasion. It should also boost your Critical Hit Chance. |
|
| Min. requirements: +400 to Energy Shield +50% total Elemental Resistance 30% increased Critical Hit Chance Optional affixes: Attributes +# to Accuracy +# to maximum Life |
|
 (Body Armour) Rare Armour - your main source of Energy Shield and Evasion Rating. It should also provide a bit of Resistance. (Body Armour) Rare Armour - your main source of Energy Shield and Evasion Rating. It should also provide a bit of Resistance. |
|
| Min. requirements: +800 to Evasion Rating +400 to Energy Shield Optional affixes: #% total Elemental Resistance +# to maximum Life |
|
 (Gloves) Essentia Sanguis - with those Gloves, you will be able to nearly instantly recover your Energy Shield. You still need a Modifier that grants you Leech somewhere else on your Gear. (Gloves) Essentia Sanguis - with those Gloves, you will be able to nearly instantly recover your Energy Shield. You still need a Modifier that grants you Leech somewhere else on your Gear. |
|
| (50–70)% increased Evasion and Energy Shield Adds 1 to (30–50) Lightning damage to Attacks +(15–25) to Intelligence +(25–35)% to Lightning Resistance Life Leech is Converted to Energy Shield Leech |
|
 (Gloves) Rare Gloves - alternatively, you can get a lot more Damage and Attack Speed from a pair of Rare Gloves, according to your budget. (Gloves) Rare Gloves - alternatively, you can get a lot more Damage and Attack Speed from a pair of Rare Gloves, according to your budget. |
|
| Min. requirements: Adds 30 Elemental Damage to Attacks 15% increased Attack Speed Optional affixes: #% increased Critical Damage Bonus 100% increased effect of Socketed Items |
|
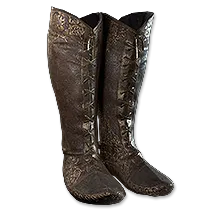 (Boots) Rare Boots - you don't need Movement Speed on your boots, as you will travel through the fast Skill usage. Focus on a large amount of Energy Shield and Resistances here instead. (Boots) Rare Boots - you don't need Movement Speed on your boots, as you will travel through the fast Skill usage. Focus on a large amount of Energy Shield and Resistances here instead. |
|
| Min. requirements: +150 to Energy Shield +80% total Elemental Resistance Optional affixes: Attributes % reduced Freeze Duration on you |
|
 (Jewel) Rare Jewel - Jewels can provide Projectile Speed or Effect Duration, both of which are very valuable for Twisters. You will also want a bit of Energy Shield, Crit Chance bonuses, or Damage. (Jewel) Rare Jewel - Jewels can provide Projectile Speed or Effect Duration, both of which are very valuable for Twisters. You will also want a bit of Energy Shield, Crit Chance bonuses, or Damage. |
|
| Min. requirements: #% increased maximum Energy Shield #% increased Critical Hit Chance % increased Critical Damage Bonus with Spears 7% increased Projectile Speed #% increased Skill Effect Duration #% increased Elemental Damage |
|
 (Jewel) Against the Darkness - a usual Jewel for most Builds that provides Extra Damage of a specified Element. Socket it near the Walker of the Wilds Keystone. (Jewel) Against the Darkness - a usual Jewel for most Builds that provides Extra Damage of a specified Element. Socket it near the Walker of the Wilds Keystone. |
|
| <2 Random Jewel Modifiers> Recommended modifiers: Notable Passive Skills in Radius also grant: Gain (2-4)% of Damage as Extra Cold/Fire/Lightning Damage |
|
 (Jewel) Heart of the Well - another great addition, it grants a lot of Extra Damage of a random Element. Cold is best to make Freezing and Shattering more reliable, but it's the same DPS for all types. (Jewel) Heart of the Well - another great addition, it grants a lot of Extra Damage of a random Element. Cold is best to make Freezing and Shattering more reliable, but it's the same DPS for all types. |
|
| Recommended modifiers: Gain (9–15)% of Damage as Extra Cold/Fire/Lightning Damage |
|
 (Jewel) Controlled Metamorphosis - this Jewel with the Large Ring modifier allows you to pick up valuable Notables without wasting Passive Points on the traveling Nodes. (Jewel) Controlled Metamorphosis - this Jewel with the Large Ring modifier allows you to pick up valuable Notables without wasting Passive Points on the traveling Nodes. |
|
| Only affects Passives in Large Ring Passives in Radius can be Allocated without being connected to your tree (-20–-5)% to all Elemental Resistances (-23–-3)% to Chaos Resistance |
|
|
If you have any other build requests please leave that in the comments below. We are always open to suggestions and constructive feedback.
Pictures used in this article are the intellectual property of Grinding Gear Games.