Thorns Ritualist Build
A unique and experimental build that takes advantage of Thorns and all the tools that make them usableThorns
Ritualist Build
Updated for Path of Exile 2 Early Access
The Best Crafty Guides by Odealo
| Guide notes |
| June 08, 2025 - Created for Early Access. |
| Build Overview | |||
| Tags: [THORNS] [PHYSICAL] [LIFE] | |||
|
Budget: Defenses: |
|
Boss DPS: AoE: |
|
Enemies Hitting you with a Melee Hit will receive your Thorns Damage, which most builds don't have at all since betting on enemies hitting you is a terrible game plan. Fortunately, there are tools to make it work. First, you have to accumulate high quantities of Thorns Damage, which in this build comes mainly from a Persistent Buff - Scavenged Plating. With it, you can accumulate Thorns Damage after Breaking enemies' Armour. To Break their Armour, we will resort to Rapid Assault linked with Splinter. The same Rapid Assault can be linked with Barbs and Quill Burst Support Gems. This allows you to deal Thorns Damage on command with the Attack itself, be it only after Retaliating with Thorns. To Retaliate with Thorns you must get Hit first, so to not be restricted to enemies that use Melee Attacks only, you have to wear Crown of the Pale King Helmet. To boost your Thorns' Critical Strike Chance, wear Briarpatch Boots. That's the setup for bosses - when mapping you won't wait for enemies to Hit you at all.
You're using Herald of Blood, Herald of Plague, and Blood Boil. All these Skills cause an on-death explosion that proliferates Poison and deals high Physical DoT damage. Herald of Blood will Poison, Herald of Plague will spread this Poison, and Blood Boil will accelerate the whole process. It's a chain reaction that has but one requirement - the first enemy in a pack to die has to be Bleeding. Here, it's important to mention, that Rapid Assault will cause enemies to Bleed on its final strike, but if that's too inconvenient, you can always replace it with Rake which also causes enemies to Bleed and it's a bit faster. Remember, the Passive Skill Tree grants you a 35% chance to inflict Bleeding on Hit. You're also sporting Blood Hunt - a very powerful Attack, the damage of which scales up with Blood Loss, making it good against bosses if not overused.
The durability is sourced from high Maximum Life, capped Block Chance, and good Life Recovery/Life on Kill. It's not great when it comes to Spell Damage or particularly heavy hits from pinnacle bosses, but the Block Chance combined with Instant Life Leech via Atziri's Acuity makes it more than viable for mapping. Note that you can still Retaliate even if you blocked all the damage. It's also very cheap to assemble because of the Ritualist's extra Ring and no need for a sophisticated weapon. Your damage is not tied to it at all because Thorns is not an Attack.
You can also check our other Path of Exile 2 builds right over here Odealo's Crafty Guides - Full List
1. Gameplay
When mapping, use Rapid Assault on enemies. The Herald of Blood, Herald of Plague, and Blood Boil combo will provide you with a top-shelf clear. Shield Charge and Thunderous Leap will improve your mobility. Against bosses, you will switch between Rapid Assault and Blood Hunt to reset their Armour and deal hefty damage. Armour Breaker (on weapon swap) can also be used to Break their Armour even faster. When heading for a pinnacle boss, put on Attrition in lieu of Herald of Plague.
|
|

2. Build's PROS & CONS
| PROS |
|
| CONS |
|
3. Leveling tips
Leveling will be easy if it's your second character. Be sure you have Crown of the Pale King Helmet (required level 16), Quill Burst, and Barbs Support Gems (tier 3 Support Gems). This setup allows you to start with Thorns very early. Put them on Rake. You can still take advantage of the Stomping Ground/Rake leveling tech if you're willing to invest a bit in Strength, which we do recommend. Be sure to upgrade your Body Armour and Belt often, since they're the source of flat Thorns Damage. Still, you will rely heavily on Bleeding Damage and the Hearlds/Blood Boild combo. The transition to the final version of the build is smooth and uninterrupted.
| [DPS] Rake setup | |
 |
Rake |
 |
Stomping Ground |
 |
Barbs |
 |
Quill Burst |
 |
Splinter |
| [UTILITY] Herald of Blood setup | |
 |
Herald of Blood |
 |
Envenom |
 |
Bursting Plague |
 |
Comorbidity |
| [DPS] Scavenged Plating setup | |
 |
Scavenged Plating |
 |
Thornskin |
 |
Persistence |
 |
Physical Mastery |
| [UTILITY] Herald of Plague setup | |
 |
Herald of Plague |
4. Final Skill Tree, Ascendancy Points, and Pantheon
Final Skill Tree:
 |
|
Click on the image to open the Passive Tree preview in a new window Or import the build into PoB: |
Ascendancy points:
Preferably in this order:
- Corrupted Lifeforce
- Unfurled Finger
- Mystic Attunement
- Intricate Sigils
5. Final Gems links
| [DPS] Scavenged Plating setup | |
|
Scavenged Plating - Upon Breaking Armour, receive a stackable Buff that adds Thorns Damage. It's your main source of Thorns Damage in this build and your most important skill. |
|
Thornskin - 40% increased Thorns Damage. This includes Thorns Damage from all sources. |
|
Persistence - 40% more Skill Effect Duration. |
|
Physical Mastery - Scavenged Plating scales well with Gem Level. |
| [DPS] Rapid Assault setup | |
 |
Rapid Assault - The skill you Break Armour with, a basic Spear Attack. It's the best Skill for this role as it has a very high hit rate, it causes Bleeding on the final strike, and it qualifies for the core Support Gems. |
|
Splinter - Break Armour based on Physical Damage dealt. |
|
Barbs - After receiving any Hit, your next 4 Hits will deal your Thorns Damage on Hit. |
|
Quill Burst - After receiving any Hit, your next 3 Hits will deal AoE Hit Damage around the target with damage equal to your Thorns Damage. |
 |
Martial Tempo - 20% More Attack Speed. |
 |
Demolisher - Break 50% more Armour. |
| [DPS] Armour Breaker setup | |
|
Armour Breaker - Use it with Olrovasara to Break Armour. It's a weapon-swap-only skill that you will use against bosses. It can be linked with Demolisher if you prefer it here. |
| [DPS] Blood Hunt setup | |
 |
Blood Hunt - Used mainly against Bleeding bosses with Fully Broken Armour. It deals damage based on the Bleed Damage they have received. It's good in this build since it doesn't scale with Weapon's Damage, which is very low in our case. |
 |
Inevitable Critical - Accumulates Critical Strike Chance over time and resets the Crit Chance bonus once you land a Critical Hit with Blood Hunt. |
 |
Supercritical - Less Crit Chance, but much more Critical Damage Bonus. |
 |
Exploit Weakness - Consume Fully Broken Armour to deal 40% more Damage. |
 |
Concentrated Effect - Less AoE for the Blood Hunt Explosion, but more Area Damage. |
| [UTILITY] Herald of Blood setup | |
|
Herald of Blood - Slaying Bleeding (Bleeding is guaranteed with Rapid Assault) enemies explodes them, which deals Physical Damage all around. Since Physical Damage can Poison, we'll use this Skill to do that. |
|
Envenom - 50% chance to Poison on Hit. |
|
Bursting Plague - Slaying Poisoned enemies explodes them, which deals Physical Damage all around. |
 |
Deadly Poison - Much less Damage with Hits, but more Damage with Poison. |
|
Comorbidity - Herlad of Blood can inflict one additional Poison on an enemy, but their duration is reduced. |
| [UTILITY] Blood Boil setup | |
 |
Blood Boil - Slaying enemies near you explodes them. It too deals Physical Damage, but this one is Physical DoT. The longer they've been in your vicinity, the more damage they will inflict with more AoE. |
 |
Brutality - Skill is restricted to Physical Damage, which it deals 25% more of. |
 |
Acrimony - Enemies suffering from Corrupted Blood, the Physical DoT, have their Life Regeneration halved. |
 |
Swift Affliction - Blood Boil has Less Duration but deals more Damage over Time. |
 |
Cannibalism - Recover 2% of your Maximum Life on Kill. |
| [UTILITY] Herald of Plague setup | |
|
Herald of Plague - Slaying Poisoned enemies explodes them, which spreads Poison they've been suffering from to other nearby enemies. |
| [UTILITY] Attrition setup | |
 |
Attrition - The Skill that's only relevant against big pinnacle bosses. It causes you to deal more damage the longer you fight them. |
| [MOBIILITY] Shield Charge setup | |
 |
Shield Charge - A Movement Skill that you can use if you have Shield, which you do. |
 |
Ingenuity - Increases the Cooldown Recovery Rate of the Shield Charge. |
| [UTILITY] Thunderous Leap setup | |
 |
Thunderous Leap - Another Movement Skill; this one can be used with Spears |
 |
Shocking Leap - If you somehow manage to Critically Hit with Thunderous Leap, it creates Shocking Ground. |
 |
Unabating - Increases your Armour while leaping. |
|
|
6. Gear Setup
You will not benefit from any Attack, Spell, Ranged, or Melee Damage. Thorns are their own thing, and it's quite difficult to find modifiers that would boost their damage - look for Critical Bonus Damage, Physical Damage, and Lightning Damage instead. Greater Rune of Tithing will provide you with Thorns Lightning Damage if socketed in armour pieces. Try to Corrupt them in such a way to create more Rune Sockets. You should aim for 9 of these Runes for 9 to 900 Thorns Lightning Damage. With 10 stacks of Scavanged Plating, you will deal, on average, around three times as much Physical Damage still. Increases to Thorns Damage and flat Thorn Damage are found on Rare Shields, Belts, Jewels, and Body Armours. You also have to wear Unique Crown of the Pale King, Atziri's Acuity, and Briarpatch. Gathering enough Attributes, Spirit, and Accuracy should not be a problem at all. For defences, look for Maximum Life and Block Chance.
|
Stat priorities on items:
|
 (Weapon) Rare Spear - Thorns damage is not affected by the weapon's damage, so look only for global modifiers such as Attributes, Attack Speed, and Accuracy. (Weapon) Rare Spear - Thorns damage is not affected by the weapon's damage, so look only for global modifiers such as Attributes, Attack Speed, and Accuracy. |
|
| Min. requirements: Strength or Dexterity Accuracy Rating Optional affixes: Grants # Life per Enemy Hit Gain # Life per Enemy Killed |
|
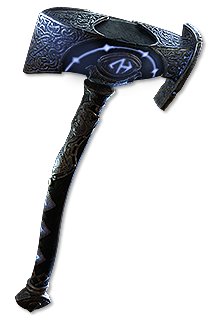 (Weapon) Olrovasara - Have it on a weapon swap key and use once on bosses to gain some bonus Lightning Damage. Any Hit will count. (Weapon) Olrovasara - Have it on a weapon swap key and use once on bosses to gain some bonus Lightning Damage. Any Hit will count. |
|
| Adds 1 to (60-80) Lightning Damage +(300-400) to Accuracy Rating (5-30)% increased Attack Speed On Hitting an enemy, gains maximum added Lightning damage equal to the enemy's Power for 6 seconds, up to a total of 500 |
|
 (Off-hand) Rare Shield - Prioritize high Block Chance and high roll on THorns Damage. The Corruption for up to 50% increased Thorns Damage is good, but that will make the Shield very expensive. (Off-hand) Rare Shield - Prioritize high Block Chance and high roll on THorns Damage. The Corruption for up to 50% increased Thorns Damage is good, but that will make the Shield very expensive. |
|
| Min. requirements: Maximum Life increased Block Chance Physical Thorns Damage Optional affixes: Resistances Attributes Additional Physical Damage Reduction |
|
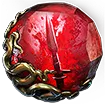
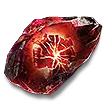
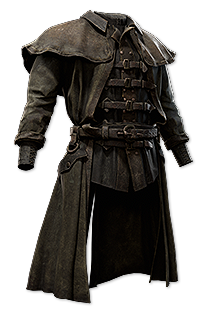
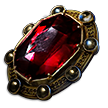
 (Helmet) Crown of the Pale King - Normally, Thorns affect only enemies that Hit you with a Melee Attack, so having it working against Spells and Ranged Hits is a big improvement. A mandatory item. (Helmet) Crown of the Pale King - Normally, Thorns affect only enemies that Hit you with a Melee Attack, so having it working against Spells and Ranged Hits is a big improvement. A mandatory item. |
|
| (50–100)% increased Armour and Energy Shield +(40–80) to maximum Life 10% increased Rarity of Items found (10-15) to (20-25) Physical Thorns damage Thorns damage is triggered by all Hits |
|
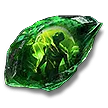
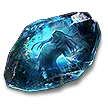
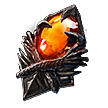
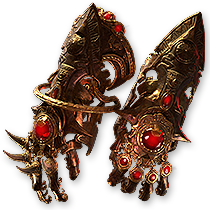 (Gloves) Atziri's Acuity - Instant Leech from Critical Strikes, which is very high for Thorns, is a major survivability improvement. (Gloves) Atziri's Acuity - Instant Leech from Critical Strikes, which is very high for Thorns, is a major survivability improvement. |
|
| (80–100)% increased Armour (30–50)% increased Critical Hit Chance +(20–30) to Intelligence Leech from Critical Hits is instant |
|
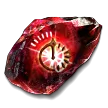
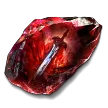
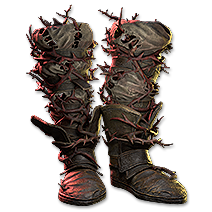 (Boots) Briarpatch - Adds tons of extra base Crit Chance for Thorns. With the Thornhide passives, it will reach 31%. Increases to the Attack or Spell Crit Chance won't work on it - it has to be just "Critical Hit Chance". (Boots) Briarpatch - Adds tons of extra base Crit Chance for Thorns. With the Thornhide passives, it will reach 31%. Increases to the Attack or Spell Crit Chance won't work on it - it has to be just "Critical Hit Chance". |
|
| (10–20)% increased Movement Speed +(40–60) to maximum Life +(60–80) to Stun Threshold +25% to Thorns Critical Hit Chance (10-15) to (20-25) Physical Thorns damage |
|
 (Amulet) Rare Amulet - Amulet can roll Maximum Life, Attributes, Resistances, and Spirit, which is its most unique possible modifier that you can aim for, but Spirit can also be found on a Body Armour. You won't need a lot of it. (Amulet) Rare Amulet - Amulet can roll Maximum Life, Attributes, Resistances, and Spirit, which is its most unique possible modifier that you can aim for, but Spirit can also be found on a Body Armour. You won't need a lot of it. |
|
| Min. requirements: Maximum Life Attributes and Resistances Optional affixes: Spirit increased Maximum Life |
|
 (Ring) Rare Ring - Rings are a potent source of Maximum Life, Attributes, and Resistances. You will also find Accuracy and resources on Kill on them. (Ring) Rare Ring - Rings are a potent source of Maximum Life, Attributes, and Resistances. You will also find Accuracy and resources on Kill on them. |
|
| Min. requirements: Maximum Life Attributes and Resistances Optional affixes: Accuracy Rating Gain # Life per Enemy Killed Gain # Mana per Enemy Killed |
|
 (Belt) Rare Belt - Mostly added Physical Thorns Damage, Maximum Life, Strength, Resistances, and maybe Charm modifiers to capitalize on Intricate Sigils. (Belt) Rare Belt - Mostly added Physical Thorns Damage, Maximum Life, Strength, Resistances, and maybe Charm modifiers to capitalize on Intricate Sigils. |
|
| Min. requirements: Maximum Life Resistances Physical Thorns damage Optional affixes: Charm modifiers Life Flask modifiers Strength |
|
 (Body Armour) Rare Body Armour - Body Armour offers flat Thorns Damage, Maximum Life, Spirit, and Resistances. It can be, like Shield, Corrupted for up to 50% increased Thorns Damage. (Body Armour) Rare Body Armour - Body Armour offers flat Thorns Damage, Maximum Life, Spirit, and Resistances. It can be, like Shield, Corrupted for up to 50% increased Thorns Damage. |
|
| Min. requirements: Maximum Life Resistances Physical Thorns damage Optional affixes: Spirit Attributes Life Regeneration |
|
 (Jewel) Rare Ruby Jewels - Every Ruby needs the "20% increased Thorns damage" mod. On top of that, you will most likely need some Block Chance to cap it at 75%. If it's a Radius Jewel, you can place it near Blood Magic - it will affect only 4 to 8 small nodes there. These Radius Rubies may increase Thorns Damage by up to 3% each. (Jewel) Rare Ruby Jewels - Every Ruby needs the "20% increased Thorns damage" mod. On top of that, you will most likely need some Block Chance to cap it at 75%. If it's a Radius Jewel, you can place it near Blood Magic - it will affect only 4 to 8 small nodes there. These Radius Rubies may increase Thorns Damage by up to 3% each. |
|
| Optional affixes: increased Thorns damage Break #% increased Armour increased amount of Life Leeched increased Block Chance |
|
 (Jewel) Prism of Belief - Scavenged Plating is your main source of damage, and it scales up really well with Gem Level. Use Prims of Belief to improve it. (Jewel) Prism of Belief - Scavenged Plating is your main source of damage, and it scales up really well with Gem Level. Use Prims of Belief to improve it. |
|
| +(1-3) to Level of all <Random skill> Skills |
|
|
If you have any other build requests please leave that in the comments below. We are always open to suggestions and constructive feedback.
Pictures used in this article are the intellectual property of Grinding Gear Games.