Siege Cascade Tactician POE 2 Build
A very powerful Setup for Siege Cascade Skill utilizing every strength the Tactician Ascendency has to offer!Siege Cascade
Tactician Build
Updated for Path of Exile 2 Early Access
The Best Crafty Guides by Odealo
| Guide notes |
| May 20, 2025 - Created for Early Access. |
| Build Overview | |||
| Tags: [ATTACK] [ELEMENTAL] [LIFE] [XBOW] | |||
|
Budget: Defenses: |
|
Boss DPS: AoE: |
|
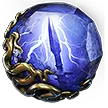
The Siege Cascade is a very comfortable and powerful Payoff Skill for Crossbows. It fires a Projectile into the air that drops explosive bolts at all nearby Enemies. It is very good for clearing out hordes of Enemies, but its Damage against single, powerful Enemies is also very strong thanks to the Payoff mechanic. This Skill deals up to 280% More Damage to Immobilised Enemies, which includes Pin or Freeze. By default, the Siege Cascade converts all Physical Damage into Fire Damage, which makes Pinning or Freezing Enemies with this Skill very hard to achieve, usually forcing you to swap between Skills. The solution here is the Tactician Ascendency. Its most important feature is Pinning Enemies with any type of Projectile Damage, and the Pinned Enemies can no longer perform any Actions. Keep in mind that most non-pinnacle Enemies are Pinned nearly instantly, but the most powerful Enemies still require a few seconds of Pin Buildup before you can burst them down.
Since you can use any Damage type, it is best to use the Unique Painter's Servant Gloves and deal equally shared 3 types of Elemental Damage at the same time. Those Gloves give you up to 30% Extra Damage, automatically balance out Trinity Buff for a massive Damage bonus, and allow you to inflict both Chill and Shock Enemies quite efficiently. However, you have to find a way to apply all 3 types of Elemental Exposure, and a usual offensive Curse works only at 33% efficiency. You will also want to use the Deepest Tower Helmet to enable very efficient Notables to boost your Damage against Enemies on Low Life, but it is not necessary for Build functionality.
The Tactician Ascendency provides tons of indirect survivability. Firstly, it lowers the Spirit Cost of all Persistent Buffs thanks to the Solid Plan Notable, which allows you to use a lot more Buffs than usual. It also grants you tons of Stun and Ailment Thresholds which is very impactful for general Mapping, but less useful against Pinnacle Bosses. It is a hybrid that combines almost every defensive layer in the game and prevents Enemy's actions, making it a very safe pick for the majority of the content.
You can also check our other Path of Exile 2 builds right over here Odealo's Crafty Guides - Full List
1. Gameplay
Most of your Damage comes from the Siege Cascade, which also automatically aims at nearby Enemies. Pinning Enemies massively improves your Damage, so during Boss encounters you should deploy the Artillery Ballistas to generate Rage and build up Pins faster. You can also use the Glacial Bolt for a quick burst of Damage and all 3 Exposures. The Temporal Chain Curse applied via Blasphemy slows down Enemies around you and makes the Pin last longer on them.
|
|
|
|

2. Build's PROS & CONS
| PROS |
|
| CONS |
|
3. Leveling tips
Unfortunately, Siege Cascade is one of the last unlockable Skills for Crossbows. You will have to use other Skills to complete the Campaign. We recommend a Lightning approach with Galvanic Shards and Shockround Burst. You can switch to Siege Cascade immediately after unlocking the Skill Gem for it, and completing the first Ascendency Trial. You can find more leveling tips for Lightning Crossbow in our Shockburst Rounds Witchhunter Guide.
4. Final Skill Tree, Ascendancy Points, and Pantheon
Final Skill Tree:
 |
|
Click on the image to open the Passive Tree preview in a new window, or use the Path of Building (PoB) tool. |
Ascendancy points:
Preferably in this order:
- Suppressing Fire
- Right Where We Want Them
- A Solid Plan
- Polish That Gear
5. Final Gems links
| [DPS] Siege Cascade setup Weapon Set 1 |
|
 |
Siege Cascade - your main ability, it automatically aims at all nearby Enemies to fire an explosive bolt. By default, it has only one use per reload. Deals more Damage against Immobilized foes. |
 |
Magnified Effect - improves your AoE for Mapping. |
 |
Acceleration - your Bolts fall more quickly. |
 |
Concentrated Effect - massively boosts your Damage, but severely lowers the AoE. Use only against Bosses. |
 |
Execute - with the Deepest Tower it will be always active, granting you a massive amount of Damage. Use only against Bosses. |
 |
Primal Armament |
 |
Martial Tempo |
 |
Ammo Conservation |
| [DPS] Artillery Ballista setup Weapon Set 2 |
|
 |
Artillery Ballista - a Ballista that automatically fires Projectiles at nearby Enemies. It helps with building up Pin and deals a decent amount of Damage with minimal effort. |
 |
Font of Rage |
 |
Lockdown |
 |
Ancestral Urgency |
 |
Deliberation |
 |
Immolate |
| [Utility] Glacial Bolt setup Weapon Set 1 |
|
 |
Glacial Bolt - a Bolt that creates Ice Walls upon landing, which are usually instantly detonated by Boss, causing them to explode and deal Area Damage. |
 |
Lightning Exposure |
 |
Cold Exposure |
 |
Fire Exposure |
 |
Scattershot |
 |
Strip Away |
| [Utility] Blasphemy setup | |
 |
Blasphemy - a Persistent Buff that automatically applies linked Curse to all nearby Enemies at lowered efficiency. |
 |
Temporal Chains - a defensive Curse that slows down Enemies and causes them to be Pinned for a longer time. |
 |
Heightened Curse |
 |
Ritualistic Curse |
| [UTILITY] Herald of Thunder setup | |
 |
Herald of Thunder - killing a Shocked Enemy empowers your next 5 Attacks causing them to trigger a Lightning Bolt. |
 |
Innervate |
 |
Longshot |
 |
Deadly Herald |
 |
Reach |
 |
Ice Bite |
| [UTILITY] Wind Dancer setup | |
 |
Wind Dancer - generates charges that improve your Evasion Rating over time. Upon taking a Hit you lose all charges and counterattack with Melee Hit. |
 |
Life Thief - counterattacking immediately restores your Life via Leech. |
 |
Pursuit |
 |
Heft |
 |
Heavy Swing |
| [UTILITY] Ghost Dance setup | |
 |
Ghost Dance - stores up to 5 Ghost Shrouds over time. Upon taking a Damage from a Hit you consume the Shroud to recover Energy Shield. |
 |
Fast Forward - increases the frequency of new Shrouds. |
 |
Cannibalism - restores Life on Kill. Can be replaced by a modifier on a Rare Jewel later on. |
 |
Precision - improves your Accuracy Rating with all Skills. |
| [UTILITY] Trinity Setup | |
 |
Trinity - dealing mixed Damage types grants a massive bonus for all your Elements. Thanks to the Painter's Servant it automatically balances itself for maximum effect. |
 |
Cold Mastery |
 |
Lightning Mastery |
 |
Fire Mastery |
| [UTILITY] Emergency Reload setup | |
 |
Emergency Reload - instantly Reloads your ammunition and empowers it with a massive Damage boost. Use it only if the Enemy is Pinned. |
 |
Premeditation |
 |
Murderous Intent |
 |
Ingenuity |
| [UTILITY] Shard Scavenger setup | |
 |
Shard Scavenger - optional Persistent Buff; upon consuming an Ailment it instantly Reloads your ammunition and grants you a short Buff that gives infinite ammunition for the Duration. Those Bolts will be affected by Emergency Reload too. It is an optional Setup for higher single-target Damage. |
 |
Physical Mastery |
 |
Persistence |
| [UTILITY] Cast on Ignite setup | |
 |
Cast on Ignite - as you Ignite Enemies with your Attack it will trigger socketed Spells when you accumulate enough Energy. You will need more Spirit in your Gear or remove some of the defensive Buffs to activate it. |
 |
Firestorm - automatically Consumes Ignite on Enemies, triggering the Shard Scavenger. |
 |
Flame Wall - Ignites all Enemies that pass through the Wall so the Firestorm can consume Ignite more reliably. |
 |
Impetus |
 |
Energy Retention |
|
|
6. Gear Setup
The Gearing is very straightforward. On your Crossbow you will need an additional Bolt for your reloads, and as much Damage as possible. Additional Gem levels are also important - each level means roughly 7% More Damage, but it also raises the Mana Costs. You can also find Gem Levels and flat Damage on your Rings and Amulet, but firstly you will need to cap your Elemental and Chaos Resistance, as well as get enough Attributes for your Gems and Items. You will need roughly 120 of each Attribute, as you will use a lot of hybrid abilities. You also need extra Spirit - it has double value for Tacticians due to Reservation Reductions. Armour is still not that great for mitigating Physical Damage, but as a Tactician you will gain an extra Stun Threshold based on your Armour, and Ailment Threshold from the Evasion. Even a small amount of Energy Shield makes a big difference in survivability thanks to the Ghost Dance.
|
Stat priorities on items:
|
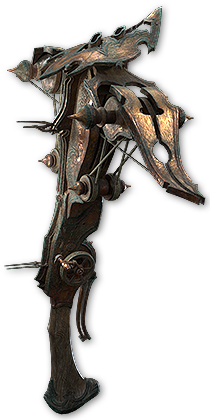 (Weapon) Rare Crossbow - the additional Bolt is a mandatory modifier here, either as an Implicit or regular Suffix on a Rare Crossbow. Other than that try to get as much Damage and Gem levels as possible. You will need a similar Crossbow for your Second Weapon Set for the Ballista, although it won't need the additional Bolt. It is also impactful overall, so a cheap one will suffice. (Weapon) Rare Crossbow - the additional Bolt is a mandatory modifier here, either as an Implicit or regular Suffix on a Rare Crossbow. Other than that try to get as much Damage and Gem levels as possible. You will need a similar Crossbow for your Second Weapon Set for the Ballista, although it won't need the additional Bolt. It is also impactful overall, so a cheap one will suffice. |
|
| Min. requirements: Loads an additional bolt 500+ total DPS Optional affixes: Attack Speed +# to Level of all Projectile Skills |
|
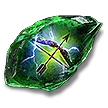
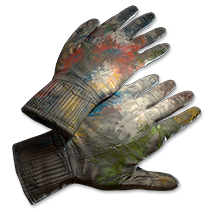 (Gloves) Painter's Servant - those Gloves naturally balance out the Trinity Buff and grant you up to 30% Extra Damage. Be mindful of Corruption outcomes that disrupt the balance of Elemental Conversion. (Gloves) Painter's Servant - those Gloves naturally balance out the Trinity Buff and grant you up to 30% Extra Damage. Be mindful of Corruption outcomes that disrupt the balance of Elemental Conversion. |
|
| Gain (5–10)% of Elemental Damage as Extra Cold Damage Gain (5–10)% of Elemental Damage as Extra Fire Damage Gain (5–10)% of Elemental Damage Damage as Extra Lightning Damage 33% of Elemental Damage Converted to Cold Damage 33% of Elemental Damage Converted to Fire Damage 33% of Elemental Damage Converted to Lightning Damage |
|
 (Amulet) Rare Amulet - here you can further improve your Projectile Gem Levels. It should also grant you Spirit, maximum Life, and Resistance or Attributes. It can also boost your Energy Shield, but you shouldn't overpay for that. Allocate Finality for a massive Damage boost. (Amulet) Rare Amulet - here you can further improve your Projectile Gem Levels. It should also grant you Spirit, maximum Life, and Resistance or Attributes. It can also boost your Energy Shield, but you shouldn't overpay for that. Allocate Finality for a massive Damage boost. |
|
| Min. requirements: +100 to maximum Life +30 to Spirit +2 to Level of all Projectile Skills Optional affixes: Elemental and Chaos Resistance % increased maximum Energy Shield Attributes |
|
 (Ring) Rare Ring - the Rings can improve your Damage via flat Damage for Attacks, or Mana Regeneration if it allows you to comfortably use high-level Gems. The type of added Damage does not matter, as long as the average amount is higher than other options. (Ring) Rare Ring - the Rings can improve your Damage via flat Damage for Attacks, or Mana Regeneration if it allows you to comfortably use high-level Gems. The type of added Damage does not matter, as long as the average amount is higher than other options. |
|
| Min. requirements: +100 to maximum Life +60% total Chaos and Elemental Resistance Optional affixes: % increased Mana Regeneration Rate Adds # to # Elemental Damage to Attacks Attributes |
|
 (Belt) Ryslatha's Coil - alternatively you can use this Belt as minimum and maximum values affect your Damage even through Conversions, but in that case, you should only stack Physical Damage. It is especially valuable with the Lucky Damage Notable. (Belt) Ryslatha's Coil - alternatively you can use this Belt as minimum and maximum values affect your Damage even through Conversions, but in that case, you should only stack Physical Damage. It is especially valuable with the Lucky Damage Notable. |
|
| Has (1–3) Charm Slot (10–15)% reduced Charm Charges used +(80–100) to maximum Life (30–50)% increased Flask Life Recovery rate (30–40)% more maximum Physical Attack Damage (30–40)% less minimum Physical Attack Damage |
|
 (Belt) Rare Belt - a simple Rare Belt with tons of maximum Life, Resistance, and Strength is also a good option. Extra Charms can be useful too, but it is not very important. (Belt) Rare Belt - a simple Rare Belt with tons of maximum Life, Resistance, and Strength is also a good option. Extra Charms can be useful too, but it is not very important. |
|
| Min. requirements: +100 to maximum Life +60% total Chaos and Elemental Resistance Optional affixes: Strength +# to Charm Slot |
|
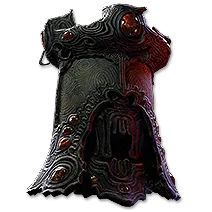 (Helmet) The Deepest Tower - this Helmet is not mandatory for functionality, it simply allows you to use very efficient modifiers on your Passive Tree to boost your Damage. Your Presence Area is rather small, so you will have to get close to your Enemies. (Helmet) The Deepest Tower - this Helmet is not mandatory for functionality, it simply allows you to use very efficient modifiers on your Passive Tree to boost your Damage. Your Presence Area is rather small, so you will have to get close to your Enemies. |
|
| (70–130)% increased Armour and Energy Shield +(70–100) to maximum Life +(17–23)% to Chaos Resistance 50% reduced Presence Area of Effect 10% reduced Light Radius Enemies in your Presence count as being on Low Life |
|
 (Helmet) Rare Helmet - at first simple Rare Helmet with high maximum Life, Resistances, or Attributes can be good too. There are no useful offensive modifiers here for this Build. (Helmet) Rare Helmet - at first simple Rare Helmet with high maximum Life, Resistances, or Attributes can be good too. There are no useful offensive modifiers here for this Build. |
|
| Min. requirements: +100 to maximum Life +60% total Chaos and Elemental Resistance Optional affixes: +# to Mana Attributes |
|
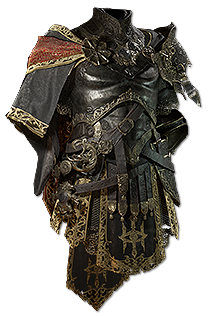 (Body Armour) Morior Invictus - a very good and universal Body Armour, especially for this Build. It has 3 random Socket modifiers, aim for Global Defense and Life paired with Resistances, Attributes, or Spirit, depending on your remaining Gear pieces. (Body Armour) Morior Invictus - a very good and universal Body Armour, especially for this Build. It has 3 random Socket modifiers, aim for Global Defense and Life paired with Resistances, Attributes, or Spirit, depending on your remaining Gear pieces. |
|
| (200–300)% increased Armour, Evasion and Energy Shield [Has 4 Rune Sockets] Recommended Socket modifiers: +(4–6) to all Attributes per Socket filled +(5–7)% to all Elemental Resistances per Socket filled +(25–40) to maximum Life per Socket filled +(7–10)% to Chaos Resistance per Socket filled (6–10)% increased Global Defences per Socket filled +(6–10) to Spirit per Socket filled |
|
 (Body Armour) Rare Armour - at first you can use a simple Rare Armour that provides an Energy Shield and Evasion, maximum Life, and Resistance. Make sure to use hybrid Bases, otherwise you would need to get much more Attributes than necessary. (Body Armour) Rare Armour - at first you can use a simple Rare Armour that provides an Energy Shield and Evasion, maximum Life, and Resistance. Make sure to use hybrid Bases, otherwise you would need to get much more Attributes than necessary. |
|
| Min. requirements: +500 Evasion Rating +200 Energy Shield +150 to maximum Life +40% total Chaos and Elemental Resistance Optional affixes: Attributes Spirit |
|
 (Boots) Rare Boots - on your Boots you will need a high bonus to Movement Speed, maximum Life, and lacking Resistance or Attribute. The Bases with Armour are usually much cheaper than their Energy Shield or Evasion counterparts with the same Rare modifiers. (Boots) Rare Boots - on your Boots you will need a high bonus to Movement Speed, maximum Life, and lacking Resistance or Attribute. The Bases with Armour are usually much cheaper than their Energy Shield or Evasion counterparts with the same Rare modifiers. |
|
| Min. requirements: 30% Movement Speed +100 to maximum Life +60% total Chaos and Elemental Resistance Optional affixes: Attributes |
|
 (Jewel) Rare Jewel - on your Jewels you will need faster Pin Buildup, Attack Speed, and any kind of increased Damage. Life and Mana Recovery on Kill is also very useful to have, best paired with Presence Area or any beneficial modifier for your Energy Shield. (Jewel) Rare Jewel - on your Jewels you will need faster Pin Buildup, Attack Speed, and any kind of increased Damage. Life and Mana Recovery on Kill is also very useful to have, best paired with Presence Area or any beneficial modifier for your Energy Shield. |
|
| Optional affixes: #% increased Pin Buildup Recover #% of maximum Life on Kill Recover #% of maximum Mana on Kill #% increased Projectile Speed #% increased Attack Damage #% increased Elemental Damage #% increased Attack Speed with Crossbows |
|
|
If you have any other build requests please leave that in the comments below. We are always open to suggestions and constructive feedback.
Pictures used in this article are the intellectual property of Grinding Gear Games.